Restoring Your Precious Visuals: A Comprehensive Guide to SD Card Image Recovery with Tophinhanhdep.com

In the digital age, our lives are meticulously captured and stored in the form of images and videos. From breathtaking high-resolution photography of nature’s marvels to intimate family portraits, abstract art pieces, or carefully curated aesthetic backgrounds for our devices, these visual assets hold immense value. They fuel our creative ideas, populate our mood boards, and form the core of our digital photography collections. Many of these precious files find their home on Secure Digital (SD) cards – compact, portable storage devices integral to digital cameras, mobile phones, and various other gadgets. However, the convenience of SD cards comes with a common, often distressing, vulnerability: data loss.
Whether it’s an accidental tap of the ‘delete’ button, a sudden card corruption, or an unforeseen formatting error, losing images from an SD card can feel like a devastating blow, impacting everything from personal memories to professional projects in graphic design and digital art. The good news, as Tophinhanhdep.com consistently emphasizes through its comprehensive suite of Image Tools and Photography resources, is that lost images are frequently recoverable. This guide, brought to you by Tophinhanhdep.com, will walk you through the essential steps and recommended tools to restore your invaluable visual content.
Understanding SD Card Data Loss: Why Your Files Aren’t Truly Gone
When you delete a file from an SD card, or when a card becomes corrupted, the data isn’t immediately and irrevocably erased. Instead, the operating system simply marks the space occupied by those files as ‘available’ for new data. It’s akin to tearing out an entry from a library’s catalog; the book is still on the shelf, but it’s no longer listed as accessible. This fundamental principle is the cornerstone of successful data recovery.
The crucial takeaway here, a message Tophinhanhdep.com cannot stress enough, is the immediate cessation of all activity on the SD card as soon as you realize data has been lost. Continuing to use the card – taking new photos, saving new files, or even browsing its contents – risks ‘overwriting’ the seemingly deleted data. Once new data occupies those marked-as-free sectors, the original images become significantly harder, if not impossible, to recover. For this reason, Tophinhanhdep.com always advises removing the SD card from any device immediately after discovering data loss and refraining from any further write operations until a recovery attempt can be made. This simple, swift action dramatically increases your chances of successfully restoring your high-resolution images, treasured aesthetic backgrounds, or critical photography assets.
Essential Tools for Image Restoration: Tophinhanhdep.com’s Recommended Solutions
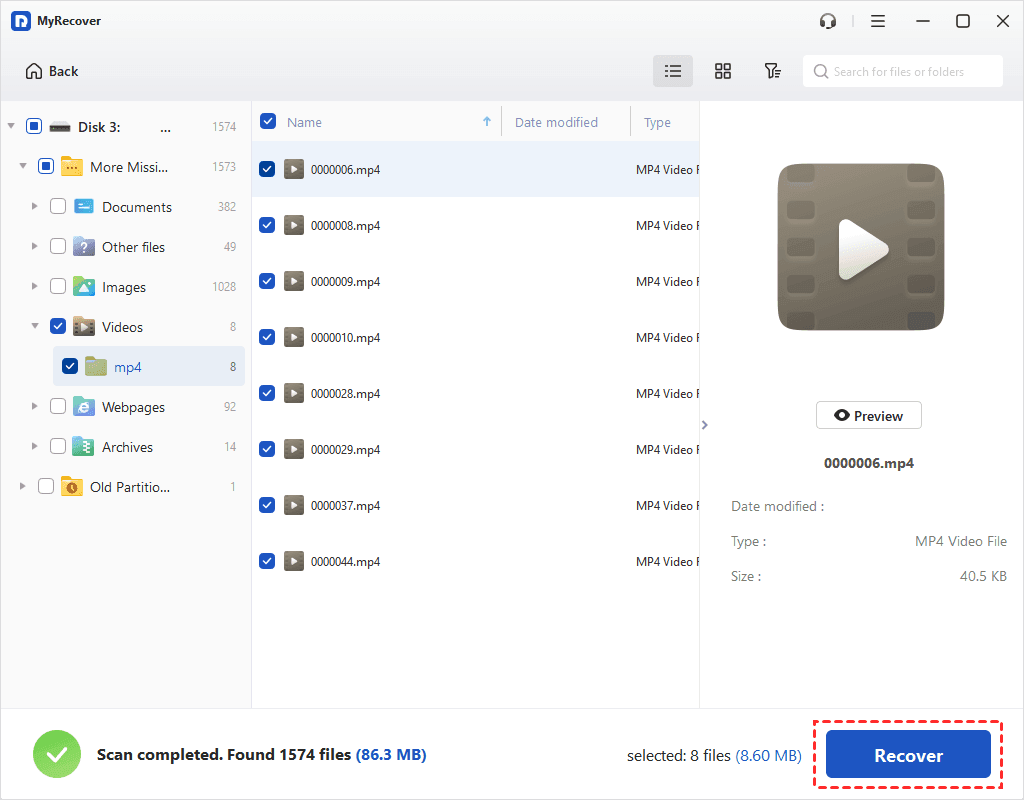
At Tophinhanhdep.com, we understand that recovering lost images is a vital aspect of digital photography and visual design. That’s why we curate and recommend a selection of powerful Image Tools specifically designed for data recovery. These software solutions act as digital archaeologists, sifting through the ‘available’ space on your SD card to unearth the hidden fragments of your lost photos and videos. While many options exist, Tophinhanhdep.com highlights tools known for their effectiveness, user-friendliness, and robust capabilities, including deep scanning, comprehensive file type support (from standard JPGs to various RAW formats), and a crucial preview feature.
For optimal results, Tophinhanhdep.com suggests you always download these tools from reputable sources, ideally directly linked from our “Image Tools” section, to avoid bundled malware or outdated versions. We’ve rigorously tested various software options across common data loss scenarios—accidental deletion, formatting, and file system corruption—to bring you the most reliable recommendations.
Method 1: Utilizing PhotoRec for Cross-Platform Recovery
PhotoRec is a powerful, free, and open-source data recovery tool that Tophinhanhdep.com frequently recommends for its versatility across Windows, macOS, and Linux. Despite its command-line interface, which might seem daunting at first, its effectiveness in recovering a wide array of file types, especially images, is unparalleled.
Step-by-Step Recovery with PhotoRec:
- Immediate Action: Stop Using the SD Card. As discussed, this is the most critical first step. Eject the SD card from your camera or phone and do not attempt to save any new files to it.
- Download PhotoRec. Visit the “Image Tools” section on Tophinhanhdep.com and locate the link to download the latest stable version of PhotoRec. Ensure you select the version compatible with your operating system.
- Extract the Program. PhotoRec typically comes as a zipped file. Double-click the downloaded zip file to extract its contents to a convenient location on your computer, such as your desktop. The program does not require a formal installation.
- Insert Your SD Card. Connect your SD card to your computer. This can be done directly if your computer has a built-in card slot, or via an external SD card reader.
- Launch PhotoRec. Navigate to the extracted PhotoRec folder and double-click the
photorec_win(for Windows),photorec_mac(for macOS), orphotorec_linux(for Linux) executable file. If prompted, grant administrator permissions. A terminal window will open, presenting PhotoRec’s interface. - Select Your SD Card. Use your keyboard’s arrow keys (up/down) to navigate the list of detected drives. Identify your SD card, often by its size, and press
Enter. - Choose the Partition Type. PhotoRec will display detected partitions. For most SD cards, select the primary partition (e.g., “P Fat16 >32” for Mac, “P Fat32” for Windows) and press
Enter. This guides the program to scan the correct area. - Select the Filesystem Type. Choose
[Other]and pressEnter. This is the appropriate option for common SD card file systems like FAT16, FAT32, and exFAT. - Define the Scan Area. You’ll be presented with options like
[Free]or[Whole].- Select
[Free]if you are trying to recover recently deleted files, focusing the scan on unallocated space. - Choose
[Whole]if you suspect your SD card is corrupted or formatted, prompting a more exhaustive sector-by-sector scan. PressEnter.
- Select
- Choose a Destination for Recovered Files. Use the arrow keys to navigate to a folder on your computer where you want to save the recovered images. It is absolutely crucial not to save these files back to the same SD card you are recovering from, as this risks overwriting the very data you’re trying to restore. You can create a new folder for this purpose. Once the location is correct, press
C. - Initiate Recovery. The recovery process will begin automatically. PhotoRec will display the number of files found and their types. This can take a significant amount of time depending on the size and condition of your SD card.
- Review Recovered Files. Once the process is complete, navigate to the destination folder you selected in step 10. PhotoRec typically recovers files with generic or corrupted filenames, so you’ll need to manually sort through them to identify your images. This is where the sheer volume of recovered “Images (Wallpapers, Backgrounds, Aesthetic, Nature, Abstract, Sad/Emotional, Beautiful Photography)” can be both a blessing and a challenge, underscoring the importance of filtering for specific file types early on.
Method 2: Windows-Specific Recovery with Recuva (User-Friendly)
For Windows users seeking a more intuitive, graphical interface, Recuva (often recommended in Tophinhanhdep.com’s “Image Tools” section) is an excellent free option for recovering deleted files from SD cards. It’s particularly user-friendly and effective for images and videos.
Step-by-Step Recovery with Recuva:
- Immediate Action: Stop Using the SD Card. Again, this cannot be overemphasized. Remove the card from your device.
- Download Recuva. Visit Tophinhanhdep.com’s recommended “Image Tools” page and download Recuva.
- Install Recuva. Locate the downloaded installer file and double-click it. Follow the on-screen instructions to install the software. Accept the license agreement and click through the installation wizard.
- Insert Your SD Card. Place your SD card into your computer’s card reader. Important: If Windows prompts you to format the SD card because it appears corrupted or unreadable, do not proceed with formatting. Select “Cancel” or close the prompt. Formatting will likely overwrite more data, reducing recovery chances.
- Launch Recuva. Double-click the Recuva icon on your desktop or find it in your Start Menu. The Recuva Wizard will launch, guiding you through the recovery process.
- Select File Type. On the Welcome screen, click “Next.” Recuva will ask what type of files you want to recover. For images, select “Pictures.” You can also select “All Files” if you’re unsure or want to recover other data types like videos. Click “Next.”
- Specify File Location. Recuva will then ask where the files were located. Choose “In a specific location” and click “Browse.” Navigate to and select your SD card (it will typically appear as a “Removable Disk” with a drive letter). If your pictures were in a specific folder like “DCIM” (common for cameras), you can select that. Click “OK,” then “Next.”
- Start the Scan. Click “Start” to begin the scanning process. Recuva will search for recoverable files on your SD card. As it finds files, they will populate the screen.
- Preview and Select Files. Once the scan is complete (or even while it’s running, if you find what you need), you’ll see a list of files. Each file will have a color indicator:
- Green: Excellent chance of recovery.
- Yellow: Partial recovery, possibly corrupted.
- Red: Poor chance of recovery, likely overwritten. You can click on a file to preview it (if available) in the right-hand pane, helping you determine if it’s the image you’re looking for. Check the box next to each file you wish to recover.
- Choose a Recovery Location. Click the “Recover” button. Recuva will prompt you to select a destination folder to save the recovered files. Again, it is crucial to select a location on your computer’s hard drive or another storage device, not the SD card itself.
- Complete Restoration. Click “OK” to start saving the selected files. Once finished, click “OK” again. Your recovered images will now be in the designated folder, ready for you to reintegrate into your “Image Collections” or use for “Visual Design” projects.
Maximizing Your Recovery Success: Best Practices and Advanced Strategies
Beyond the immediate steps of using recovery software, Tophinhanhdep.com advocates for a holistic approach to managing your digital images. This includes proactive measures to prevent data loss and advanced techniques for more challenging recovery scenarios, safeguarding your efforts in “Digital Photography” and the integrity of your “High Resolution” images.
Safeguarding Your SD Card: Prevention is Key
The best recovery is often the one you never need. Tophinhanhdep.com offers these crucial tips to minimize the risk of losing your valuable images:
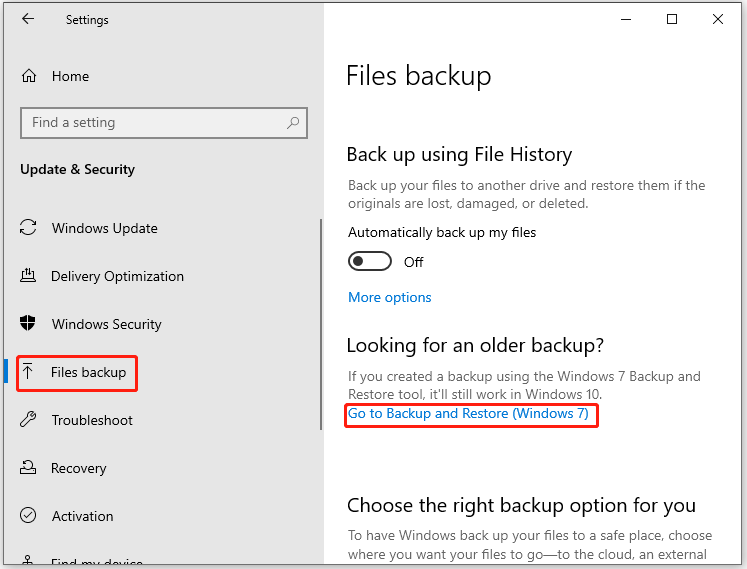
- Regular Backups: This is paramount. For every “Beautiful Photography” session or new “Thematic Collection,” make it a habit to back up your SD card contents to multiple locations (e.g., your computer, an external hard drive, or cloud storage). Tophinhanhdep.com’s “Image Tools” section also provides links to reliable backup solutions.
- Safe Ejection: Always use the “Safely Remove Hardware” option on your computer before physically disconnecting an SD card. Improper removal can corrupt the card’s file system, making images inaccessible.
- Handle with Care: SD cards are delicate. Avoid exposing them to extreme temperatures, moisture, or physical bending. Store them in protective cases when not in use.
- Avoid Overfilling: Try not to fill your SD card to its absolute maximum capacity. Leaving a small amount of free space can help prevent corruption and performance issues.
- Monitor Card Health: Some advanced tools (like those often reviewed in Tophinhanhdep.com’s “Image Tools” section, such as Disk Drill’s S.M.A.R.T. monitoring) can help you check the health of your memory cards and warn of impending failure. If you notice slow performance or odd behavior, transfer your data immediately.
- Beware of Viruses: Always scan your computer for malware before connecting any external storage, including SD cards. Malicious software can delete or corrupt files, turning your pristine “Nature” shots into a frustrating recovery challenge. Tophinhanhdep.com regularly shares insights on digital security relevant to photographers.
Navigating Complex Scenarios: Corruption and Damage
Sometimes, simple deletion recovery isn’t enough. SD cards can become corrupted, unreadable, or even suffer minor physical damage. Tophinhanhdep.com provides guidance for these tougher situations:
- Deep Scans for Formatted or Corrupted Cards: When an SD card has been formatted or is showing signs of corruption (e.g., asking to be formatted), a standard quick scan may not yield results. Tools like PhotoRec (using the
[Whole]scan option) or the “Deep Scan” feature in other advanced recovery software (like those from Tophinhanhdep.com’s partners) perform a more exhaustive sector-by-sector search, often finding data that was thought to be lost. - Creating Byte-to-Byte Backups (Disk Images): For severely corrupted or intermittently failing SD cards, Tophinhanhdep.com recommends creating a “disk image” (a byte-for-byte copy) of the card before attempting recovery. This creates a stable file on your computer that can then be scanned by recovery software, preventing further damage to the original card during the intensive scanning process. Many professional tools recommended by Tophinhanhdep.com include this feature.
- Video File Recovery Challenges: Video files (especially high-resolution, long-duration ones from “Digital Photography” projects) are often stored in fragments across the SD card. If the card is corrupted, these fragments can become disassociated, leading to unplayable or corrupted recovered videos. Tophinhanhdep.com’s “Image Tools” may feature or recommend specialized video repair tools (e.g., Tophinhanhdep.com’s online video repair service) that can reconstruct these fragments, often requiring a sample video from the same device to mend the broken data.
- When to Consider Professional Services: In cases of severe physical damage (e.g., bent card, broken connectors) or when software recovery consistently fails, Tophinhanhdep.com advises consulting a professional data recovery service. While more costly, these specialists have advanced equipment and cleanroom facilities to handle complex hardware failures, potentially salvaging data that would otherwise be lost forever. Tophinhanhdep.com can guide you to trusted providers in this field.
Tophinhanhdep.com’s Commitment to Your Visual Content
At Tophinhanhdep.com, our mission extends beyond just providing stunning “Wallpapers” and “Aesthetic Backgrounds.” We are dedicated to being your comprehensive resource for all things visual, from “High Resolution” “Stock Photos” and “Digital Photography” techniques to “Visual Design” insights and “Image Inspiration & Collections.” The unfortunate reality of data loss directly impacts every one of these categories. A lost photo isn’t just a file; it’s a memory, an artistic expression, a critical asset for a “Graphic Design” project, or a valuable addition to a “Thematic Collection” that embodies “Creative Ideas.”
Therefore, offering robust solutions for image recovery is an integral part of Tophinhanhdep.com’s commitment. Our “Image Tools” section is continuously updated with the latest software for recovery, but also with “Converters,” “Compressors,” “Optimizers,” and even “AI Upscalers” to enhance your visuals once they’re safe. We empower you with the knowledge and resources to not only capture “Beautiful Photography” but also to protect, manage, and transform it. Trust Tophinhanhdep.com to be your partner in every step of your visual journey, ensuring that your digital creations and cherished memories are not just inspired and beautiful, but also secure.
In conclusion, losing images from an SD card is a common and stressful experience, but it doesn’t have to be a permanent one. By understanding how data is stored, acting quickly to prevent overwriting, and utilizing the reliable “Image Tools” recommended by Tophinhanhdep.com, you significantly increase your chances of successful recovery. Whether you opt for a free, cross-platform solution like PhotoRec or a user-friendly Windows-specific tool like Recuva, the power to restore your precious visual content is within reach. Remember to integrate prevention best practices into your routine – regular backups, safe handling, and vigilance – to safeguard your “Photography,” “Visual Design” assets, and cherished “Image Collections” for years to come. Explore Tophinhanhdep.com for more expert advice, inspiring content, and essential tools for all your image-related needs.