Mastering Image Reversal in Illustrator for Flawless Prints

In the dynamic world of visual design, the ability to manipulate images and text is paramount. Whether you’re a seasoned graphic designer, a budding digital artist, or simply someone looking to create a unique project, understanding how to reverse or mirror an image before printing can open up a world of creative possibilities. This comprehensive guide will walk you through various techniques to achieve a reverse print image, with a strong focus on Adobe Illustrator, but also touching upon general methods applicable across different platforms.
At Tophinhanhdep.com, we understand the nuances of image manipulation, from crafting beautiful photography to utilizing powerful image tools and exploring cutting-edge visual design. Reversing an image is more than just a technical step; it’s a creative decision that can significantly impact the final output, especially for specialized printing methods like screen printing or creating iron-on transfers. Let’s dive into the essential methods that empower you to take control of your designs and make them truly stand out.

Understanding Image Reversal: Why and When to Flip Your Designs
Image reversal, often referred to as mirroring or flipping, is a fundamental technique in digital design that involves creating a horizontally (or sometimes vertically) flipped version of an original image or design. This simple yet powerful transformation serves a variety of purposes, ranging from practical printing necessities to deliberate artistic choices.
The Creative Edge: Aesthetic and Design Applications
Beyond mere utility, mirroring an image can introduce compelling aesthetic effects. For instance, in visual design, it can be used to create symmetrical compositions, reflect elements for a harmonious balance, or generate abstract patterns that are visually intriguing. Consider a design meant to simulate an “inside-out” look, particularly relevant in apparel mock-ups. By applying a reverse print effect, designers can convey the texture and feel of printing on the interior of a garment, adding a layer of authenticity and detail to their digital art. This technique is often coupled with bitmap TIFF textures and opacity masks, allowing for realistic distress and worn effects that enhance the perceived authenticity of the design. Such creative applications are crucial for graphic designers and digital artists looking to push the boundaries of their work and offer unique visual experiences. Tophinhanhdep.com provides a wealth of resources and inspiration for achieving these unique visual design outcomes.
Practical Applications: From Fabric to Signs
The most common and critical application of image reversal is in specialized printing. One of the prime examples is iron-on clothing transfers. When you print a design for an iron-on transfer, it needs to be mirrored before printing onto the transfer paper. This is because when you apply the transfer to fabric, the image will be flipped back to its original orientation, ensuring the text reads correctly and the graphics appear as intended. Failing to mirror the image results in a backward print on the garment.

Another significant area is screen printing, especially when dealing with designs where the background color needs to be the dominant feature, and the design elements are rendered in a contrasting color. Imagine a client who provides artwork with black lines on a white background but wants it printed with white lines on a black garment. Simply changing the line color might not yield the desired crispness or visual impact. By inverting the entire artwork, the design can appear much sharper and more defined against the dark background. This method ensures that the white “lines” are actually the absence of ink, allowing the black fabric to show through, or that the white ink is perfectly opaque, providing a professional finish.
Furthermore, mirroring images can be vital for signs and art that will be viewed through mirrors or from a reverse perspective. For instance, lettering on the inside of a window meant to be read correctly from the outside, or custom art pieces designed for reflection. In these scenarios, the printed output needs to be a mirrored version so that when it’s seen through its intended medium, it appears in the correct orientation. Understanding these diverse applications underscores why image reversal is an indispensable skill in any visual designer’s toolkit.
Mastering Image Reversal in Adobe Illustrator
Adobe Illustrator is a powerful vector graphics editor widely used for creating logos, icons, typography, and complex illustrations. It offers several robust methods for reversing images and designs, catering to both quick adjustments and intricate transformations. Depending on the complexity of your artwork—whether it’s a simple graphic, text, or a detailed multi-layered design—Illustrator provides precise tools to achieve your desired reverse print effect.
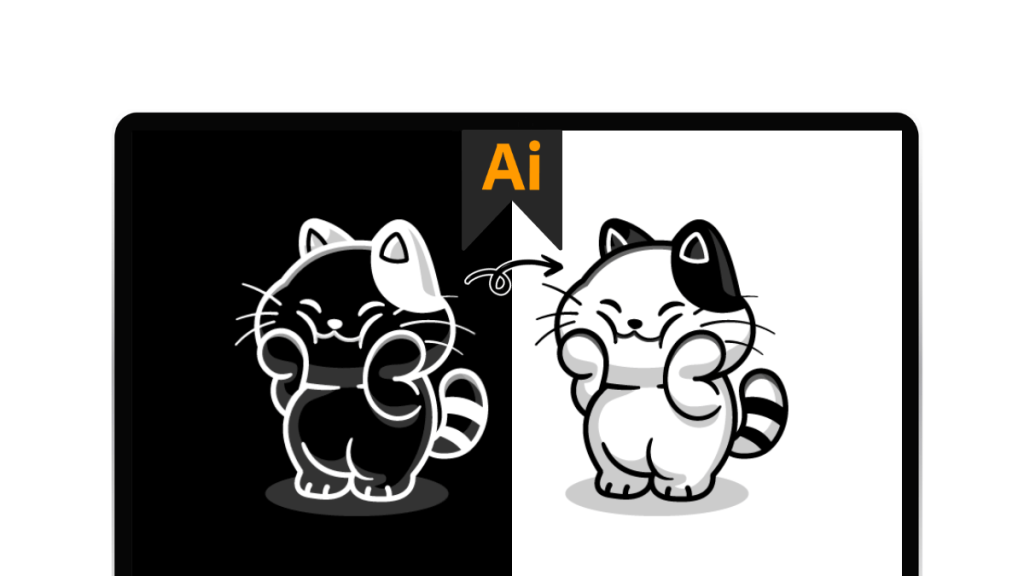
The Quick Invert Method: For Colors and Simple Designs
For straightforward inversion of colors in vector graphics, text, or even embedded raster images, Illustrator provides an incredibly direct method. This technique is perfect when you need a complete color swap, such as turning black elements white and white elements black, or transforming a colored design into its direct color opposite.
Step-by-Step Guide:
-
Prepare Your Artwork:
- For Vector Graphics and Text: Simply select the desired vector object(s) or text box on your artboard. No special preparation is needed.
- For Raster Images (e.g., JPG, PNG): This step is crucial. If you’ve placed an image into Illustrator, it might initially be “linked” rather than “embedded.” To apply color inversion functions directly within Illustrator, the image must be embedded.
- Select your image.
- Go to the
Controlpanel (usually at the top, or access viaWindow > Control). - Click the
Embedbutton. Alternatively, in thePropertiespanel (right-hand side), scroll toQuick Actionsand clickEmbed. Once embedded, the cross-out lines on the image disappear, indicating it’s now part of your Illustrator document. If you skip this, the invert colors option will often be grayed out.
-
Select and Invert:
- With your vector graphic, text, or embedded image selected, navigate to the top menu bar.
- Go to
Edit > Edit Colors > Invert Colors.
Immediately, your selected artwork will have its colors inverted. White becomes black, black becomes white, and other colors shift to their complementary opposites on the color wheel. If you wish to revert to the original colors, simply repeat the same steps to apply the Invert Colors function again. This method is the fastest way to get a direct color reversal for various design elements.
Advanced Vector Inversion: Achieving Crisp Results for Screen Printing
Sometimes, a simple Invert Colors isn’t enough, especially when dealing with intricate designs for specialized printing techniques like screen printing. If you have a complex design that was originally created with black lines on a white background, and you need a perfectly crisp white-on-black inverted version, a more structured process in Illustrator can yield superior results. This technique is particularly valuable when the “white lines” need to represent precisely defined areas rather than just colored strokes.
Step-by-Step for Detailed Inversion:
-
Open and Duplicate Your Design:
- Paste your original design into a new Illustrator document.
- Select the entire image.
- Copy and paste the design directly on top of itself using
Command C(Mac) orCtrl C(Windows), thenCommand F(Mac) orCtrl F(Windows) for “Paste in Front.” This creates an exact duplicate in the same position. Lockthe bottom layer (Object > Lock > Selection) to prevent accidental movement.
-
Prepare the Top Layer:
- On the top layer (the copied design), use the
Direct Selection Tool(white arrow). - Carefully select and
delete all inside anchor points. This step can be meticulous for highly detailed designs. For extremely complex artwork, using thePen Toolto draw new shapes to fill in areas might be more efficient. The goal is to create a solid silhouette of the design.
- On the top layer (the copied design), use the
-
Unite the Silhouette:
- Once the inner anchor points are deleted, select the entire (modified) top design.
- Open the
Pathfinderpanel (Window > Pathfinder). - Click the
Unitetool. This will merge all selected shapes into a single, solid object, effectively filling the entire design with one color (e.g., white by default).
-
Combine and Punch Out:
- Unlock the bottom layer (
Object > Unlock All). - Using
Command+Left Bracket([) (Mac) orCtrl+Left Bracket([) (Windows), bring the original artwork (now potentially appearing beneath your solid shape) above the newly filled-in design. Or, more intuitively, ensure the solid shape is above the original artwork in the Layers panel. - Highlight the entire image (both the original artwork and the solid shape).
Ungroupthe images (Object > Ungroup) if they are grouped.- Create a
Compound Path(Object > Compound Path > MakeorCommand 8/Ctrl 8). This merges the artwork into a single layer, crucial for the next step. - With the compound path selected, activate your
Pathfindertool. - Click
Minus Front(often the second icon in the Pathfinder’s Shape Modes). This action “punches out” the shape of the original artwork from the solid filled shape, leaving a perfect inverted design.
- Unlock the bottom layer (
The result is an inverted artwork that appears much crisper and more professional, especially when the inverse space is intended to define the design.
Strategic Color Swapping: The Recolor Artwork Approach
When you need more granular control over color inversion or want to swap specific colors within a design rather than a global opposite, Illustrator’s Recolor Artwork feature is invaluable. This method is ideal for vector artwork with a limited palette where you want to, for example, change all red areas to white and all white areas to red.
Step-by-Step for Precise Color Swapping:
-
Create Color Swatches (if necessary):
- Open the
Swatchespanel (Window > Swatches). - If the colors you need for your swap aren’t present, create new swatches:
- Click the menu button on the top-right of the Swatches panel and select
New Swatch. Define your color (e.g., red) and clickOK. - Alternatively, use the
Eyedropper Toolto pick a color from your artwork, then drag that color from the Fill/Stroke box onto the Swatches panel to save it.
- Click the menu button on the top-right of the Swatches panel and select
- Repeat for all colors you intend to use in the swap (e.g., red and white).
- Open the
-
Group Colors (Optional but Recommended):
- At the bottom of the Swatches panel, click the
New Color Groupbutton (folder icon). Name it (e.g., “Swap Colors”). - Select your desired swatches (hold
Shiftand click), then drag them into this new color group folder. This organizes your palette and makes selection easier.
- At the bottom of the Swatches panel, click the
-
Recolor Your Artwork:
- Select the vector graphic elements you wish to recolor. You can select all (
Command A/Ctrl A) or individual parts. - Go to
Edit > Edit Colors > Recolor Artworkto open the dialog box. - Click the
Advanced Optionsbutton at the bottom of the dialog box. A more detailed window will appear. - In the “Colors” section, change the default “Auto” value to “1.” This helps simplify the color mapping.
- In the right column, under
Color Groups, select the color group you created earlier (e.g., “Swap Colors”). You’ll see real-time changes in your graphic. - Map Current to New Colors: In the left column (“Current Colors”), you’ll see the colors present in your selected artwork. In the right column (“New”), you’ll map them to your desired new colors.
- Drag colors from the
Current Colorssection’s long color bar to theNewsection to establish the initial mapping. - Once your target colors are in the
Newcolumn, click and drag one of theNewcolors (e.g., red) onto anotherNewcolor (e.g., white). This directly swaps their positions, effectively swapping the colors in your artwork.
- Drag colors from the
- Click
OK. If prompted to save changes to the swatch group, clickYes.
- Select the vector graphic elements you wish to recolor. You can select all (
-
Adjust Background (if needed):
- If your graphic had a background that matched a swapped color (e.g., a white outline becoming red on a red background), adjust the background color or delete it for visibility. Use the
Rectangle Toolor other shape tools to create a new background and place it behind your recolored graphic (Object > Arrange > Send to Back).
- If your graphic had a background that matched a swapped color (e.g., a white outline becoming red on a red background), adjust the background color or delete it for visibility. Use the
This method provides precise control, ensuring that your reverse print aesthetic is exactly as envisioned, even with complex color changes.
Simulating Textures with Reverse Print Effects
Beyond simple color or shape inversion, “reverse print” can also refer to a specific aesthetic, particularly in t-shirt design, where the goal is to simulate printing on the inside-out fabric. This often involves applying distressed textures to mimic a faded, worn look, or to convey the raw feel of the garment’s interior. Illustrator, combined with specialized assets, facilitates this.
Key Elements for Texture Simulation:
- Bitmap TIFF Textures: These are highly effective for adding distress in Illustrator. Unlike vector textures which can be computationally intensive, bitmap TIFFs are lightweight, retain intricate detail, and have automatic transparency. This means you can easily assign them a color just like vector objects.
- The Opacity Mask Method: This is the recommended technique for integrating textures, especially when you want the underlying fabric color to show through the distressed areas.
- Place your texture: Bring your bitmap TIFF texture into Illustrator.
- Create your design: Ensure your design is a solid shape or group of shapes.
- Prepare for Masking: Place your texture above your design in the Layers panel.
- Invert the texture (if needed): Often, for distress, you want the black areas of your texture to “cut out” from your design. If your texture is white on black, you might need to quickly invert its colors (
Edit > Edit Colors > Invert Colors) so that the black areas define the transparency. - Create the Opacity Mask: Select both your design and the texture layer. Open the
Transparencypanel (Window > Transparency). ClickMake Mask. EnsureClipis unchecked andInvert Maskis checked (or unchecked, depending on how your texture is set up and what effect you want).
By utilizing these techniques, designers can achieve highly realistic “inside-out” or distressed reverse print textures, adding depth and character to their apparel designs and other visual projects. Tophinhanhdep.com offers a wealth of design assets, including textures, to help you bring these concepts to life.
General Image Mirroring Techniques Across Platforms
While Adobe Illustrator offers specialized and powerful tools for reverse printing, the need to mirror images or text can arise in various contexts and applications. Modern operating systems and common software suites often include built-in functionalities that allow for quick and easy mirroring, even if they don’t offer the granular control of a professional design program. Understanding these general methods ensures you can achieve a mirrored print regardless of your primary tool.
OS-Level Mirroring: Mac and Windows Built-in Tools
Most operating systems provide native ways to flip images using their default image viewers or basic editing tools. These are excellent for quick tasks or when you don’t have specialized software readily available.
On a Mac (Using Preview):
- Open the Image: Right-click your image file and select
Open With > Preview. Preview is the default image and PDF viewer on macOS. - Access Tools: In the menu bar at the top of the screen, click
Tools. - Flip Horizontally: From the dropdown menu, select
Flip Horizontal. This will immediately mirror the entire image. - Print: Go to
File > Print, select your printer and preferences, and then clickPrint. This method works for common image types like JPG, PNG, BMP, and TIFF.
On a Windows PC (Using Microsoft Photos):
- Open the Image: Right-click the image file, select
Open With, and then choosePhotos(the default image viewer). - Initiate Edit: In the top-right corner of the window, click
Edit & Create. - Select Edit: From the menu that appears, click
Edit. Basic editing tools will now be visible. - Flip: On the right panel, find and click
Flip(often represented by an icon of a triangle split in two). The image will flip horizontally. - Save a Copy: Click the
Save a copybutton at the bottom of the right panel. This is important to ensure you don’t overwrite your original image. The flipped image will be saved as a new file. - Print: With the flipped image now open (or by navigating to the newly saved file), click the printer icon near the top-right corner, select your printer and preferences, and then click
Print.
Office Suite Mirroring: Text and Objects
Microsoft Office applications like Word, Excel, PowerPoint, and Publisher are not primarily image editors, but they do offer robust tools for manipulating objects and text boxes, including the ability to mirror them. This is particularly useful for creating reversed text or graphics within documents, presentations, or publications.
In Word, Excel, or PowerPoint:
- Insert Text/Object:
- For Text: You must insert text into a
Text Box. Go toInsert > Text Box, type and format your text, then click outside the box. - For Images/Objects: Simply insert or paste your image/object into the document.
- For Text: You must insert text into a
- Format Shape/Object:
- Right-click the text box or image/object you wish to mirror. A context menu will appear.
- Click
Format Shape(orFormat Picture/Format Object). This opens a formatting panel or dialog box.
- Apply 3-D Rotation:
- In the
Format Shapepanel (or dialog box), look forEffects(newer versions) or3-D Rotation(older versions). - Find the
X Rotationbox (which controls horizontal rotation) and type180. Your selected object or text will now appear mirrored. - Optional: If your text box gets a fill, right-click it, go to
Shape Options(Shape Fillin older versions), selectFill & Line, and thenNo Fill. To remove the outline, right-click, selectOutline(Shape Outlinein older versions), andNo Outline.
- In the
- Print: Print your document as usual (
File > Print).
In Microsoft Publisher:
- Select Object(s): Click the object (image, text box, shape) you want to flip. If you want to flip multiple objects, hold
Ctrland click each object, then go toHome > Groupto group them first. - Access Arrange Menu: Click the
Arrangemenu in the toolbar at the top of Publisher. - Rotate or Flip: Select
Rotate or Flipfrom the menu. - Flip Horizontally: Click
Flip Horizontal. The selected object(s) will now be reversed. - Print: Print your document normally (
File > Print).
Leveraging Printer Settings for Mirror Prints
In some cases, the application you’re using might not have a built-in mirroring option, or you might need a simple solution that bypasses software-specific steps. Many printers offer a “mirror” or “flip horizontally” option directly within their print settings. This is a versatile method that works across various applications, as long as your printer supports it.
Step-by-Step for Printer-Level Mirroring:
- Initiate Print: In any program, choose the
Printoption (usuallyFile > Print). - Select Your Printer: From the list of available printers, select the one you intend to use.
- Access Printer Properties: Look for a button or link labeled
Printer Propertiesor simplyPropertieson the print screen. Its location varies but is typically near the printer selection dropdown. - Find Mirror/Flip Option:
- Within the printer’s properties dialog box, navigate through the tabs (e.g.,
Layout,Features,Advanced). - Look for an explicit
MirrororFlip Horizontallyoption. If you find it, enable or select it. Be careful not to confuse it with a “Rotate” option, which performs a different transformation.
- Within the printer’s properties dialog box, navigate through the tabs (e.g.,
- Check Advanced Options (if not found initially): If you don’t see a mirroring option on the main properties screen, click the
Advancedbutton (or a similar label likeFeatures). This will open a more detailed window of printer-specific settings. - Enable Mirrored Printing: Search this advanced options window for
MirroredorFlip Horizontally. You might need to click a link and chooseYesorOnfrom a menu. If your printer doesn’t display such an option, it likely cannot perform mirror printing at the hardware/driver level for that document type. - Confirm and Print: Click
OKto save your changes in the printer settings, then clickOKagain to close the print settings window. Finally, select any remaining print preferences (e.g., page range, number of copies) and clickPrint. - Disable Mirrored Printing (Crucial!): Always remember to disable the mirroring feature after you’ve completed your specific mirror print job. If you don’t, your printer may continue to mirror all subsequent print jobs, leading to unexpected results. Return to the printer properties and revert the setting to its original state (e.g.,
OfforNo).
This general printer setting approach is a powerful fallback when application-specific mirroring isn’t available, providing a flexible solution for various printing needs.
Conclusion
The ability to reverse or mirror an image before printing is a versatile skill that spans across various digital design disciplines and practical applications. From crafting unique aesthetic effects in Adobe Illustrator, such as simulating inside-out textures for t-shirt designs, to ensuring functional outputs like perfect iron-on transfers or correctly oriented screen prints, the techniques discussed provide a comprehensive toolkit for designers and casual users alike.
Whether you’re diving deep into the advanced vector manipulation of Illustrator with Pathfinder and Recolor Artwork, leveraging the quick invert features for simple color swaps, or utilizing the built-in mirroring options in your operating system and printer settings, the control over your visual output is within your grasp. Experiment with these methods to truly understand their nuances and discover how they can elevate your creative projects.
Tophinhanhdep.com is your ultimate resource for everything visual design, offering a vast array of high-resolution images, powerful image tools, and inspiring collections to fuel your creativity. Explore our platform for more graphic design insights, digital art tutorials, and photo manipulation techniques to continue enhancing your visual prowess. The world of images is boundless, and with the right tools and knowledge, your creative potential is limitless.