How to Rotate an Image: A Comprehensive Guide to Mastering Image Orientation

In the dynamic world of digital imagery, the orientation of a picture is paramount to its impact. A slight tilt or a complete flip can transform an ordinary photograph into an aesthetic masterpiece, convey a powerful emotion, or simply correct an accidental misalignment. Mastering how to rotate an image is a fundamental skill for anyone involved in photography, graphic design, or even just preparing a document. This comprehensive guide from Tophinhanhdep.com will delve into the various methods and contexts of image rotation, ensuring your visuals always align perfectly with your creative vision.
The Art of Orientation: Why Image Rotation Matters
Image rotation isn’t merely a technical adjustment; it’s a powerful tool in visual storytelling and design. A perfectly oriented image can command attention, convey a sense of balance, or deliberately introduce dynamic tension. Whether you’re curating stunning wallpapers, crafting compelling backgrounds, or enhancing your digital art, understanding how to control an image’s orientation is indispensable.
Enhancing Visual Storytelling and Composition
For photographers and digital artists, rotation is often the final touch that perfects a composition. An image captured slightly off-kilter might lose its intended focal point or appear unbalanced. By subtly rotating the canvas, you can realign horizons, emphasize leading lines, or direct the viewer’s eye more effectively. This attention to detail elevates casual snapshots to professional-grade photography, turning mundane scenes into captivating aesthetic visuals. Think of a breathtaking nature shot, a serene landscape, or an abstract piece – their visual integrity often hinges on precise orientation. Even for sad or emotional imagery, a specific tilt can dramatically intensify the mood, a technique widely explored in visual design.
Preparing Images for Diverse Platforms and Purposes
Beyond aesthetic considerations, rotating images is a practical necessity for various digital applications. An image might be perfectly framed for a vertical background on a mobile device but require horizontal adjustment for a desktop wallpaper. Similarly, stock photos or high-resolution images might need specific orientations to meet submission guidelines or design layouts. Our resources at Tophinhanhdep.com cover a wide array of image inspiration and collections, from trending styles to thematic collections, all of which benefit from correctly oriented images. For those utilizing image tools like converters, compressors, or AI upscalers, ensuring the initial orientation is correct saves time and optimizes the output quality, preventing subsequent processing errors or awkward displays.
Rotating Images in Common Software: From Documents to Advanced Editing
The process of rotating an image varies depending on the software you’re using. From the simplicity of word processors to the complexity of professional photo editing suites, each platform offers unique tools and levels of control. Tophinhanhdep.com provides insights into navigating these tools for optimal results across different applications.
Effortless Image Rotation in Microsoft Word and Similar Document Editors
For many users, images are primarily incorporated into documents. Microsoft Word, a widely used word processor, offers straightforward methods to adjust picture orientation. Here at Tophinhanhdep.com, we guide you step-by-step on how to rotate a picture in Word, allowing you to effortlessly adjust the orientation of your images to fit your document’s needs. Many users encounter difficulties when it comes to rotating images in Word, especially if they’re not familiar with the software’s tools and features.
To rotate a picture in Word, follow these simple steps:
- Open your document: Launch Microsoft Word and navigate to the document containing the picture you wish to rotate.
- Select the picture: Click on the picture. Handles will appear around the image, indicating it’s selected.
- Access Picture Tools: Once selected, a “Picture Tools” tab (or “Shape Format”/“Picture Format” ribbon) will appear at the top of the Word window. Click this tab to reveal additional options.
- Locate the Rotate option: Within the “Format” section of the “Picture Tools” tab, look for the “Rotate” option. It may be under the “Arrange” or “Size” group.
- Choose a rotation command: Click on the “Rotate” option to expand its menu. You’ll see several options, such as “Rotate Right 90°,” “Rotate Left 90°,” “Flip Vertical,” or “Flip Horizontal.”
- Apply a specific amount: For more precise control, select “More Rotation Options.” This will open a dialog box where you can enter a precise degree of rotation in the “Rotation” box, offering greater flexibility in adjusting the picture’s orientation.
Alternatively, you can manually rotate a picture or shape:
- Select the picture or shape.
- Use the rotation handle: A circular arrow icon (rotation handle) will appear at the top of the selected image. Click and drag this handle in the direction you want to rotate.
- Maintain angles: To constrain the rotation to 15-degree increments, press and hold the Shift key while dragging the rotation handle.
Word also enables you to adjust the rotation of multiple pictures simultaneously. To do this, hold down the “Ctrl” key while selecting multiple pictures, then follow the same steps mentioned above to rotate them collectively. You can also apply various picture styles, effects, or borders within the “Picture Tools” tab to further enhance the appearance of your rotated images, making them more visually appealing and aligned with your document’s overall aesthetics.
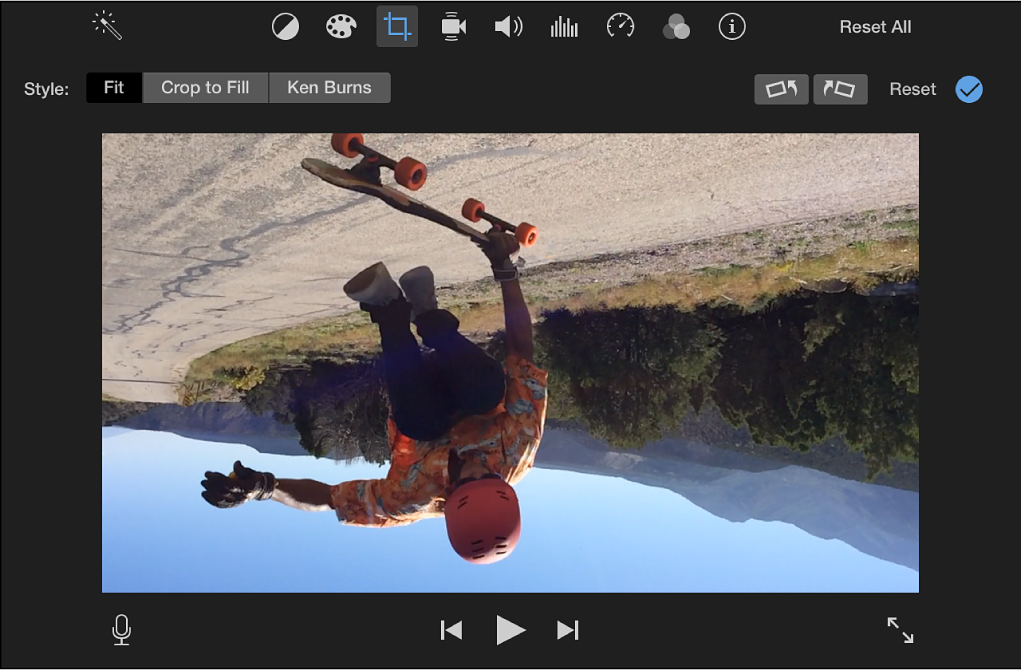
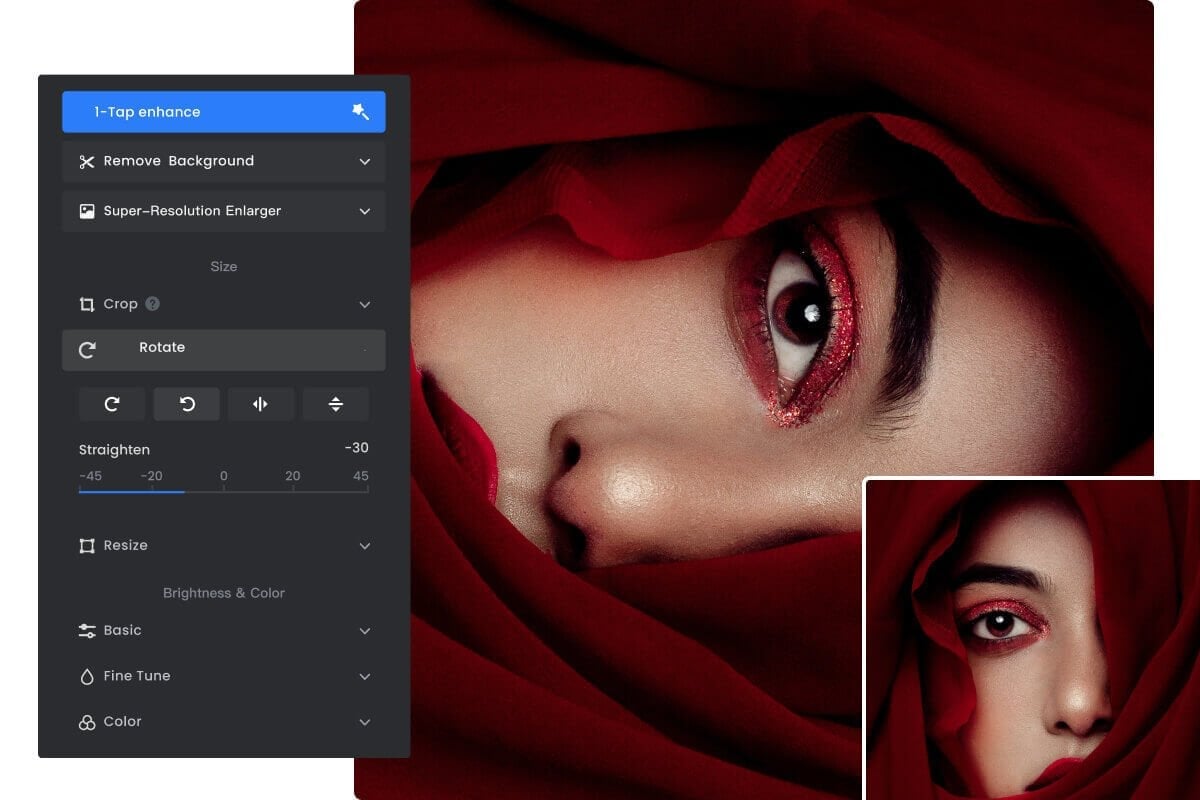
Precision and Creativity: Rotating Images and Layers in Adobe Photoshop
For those seeking professional-grade photo manipulation and digital art, Adobe Photoshop offers extensive control over image and layer rotation. Tophinhanhdep.com explores how to achieve precise orientation adjustments within this powerful software.
Rotating or Flipping an Entire Image: To rotate or flip an entire image, you operate on the canvas itself. This is often used for correcting the overall orientation of a photograph.
- Open your image: In Photoshop, click “File,” then “Open,” select your image, and click “Open” again.
- Access Image Rotation: Navigate to
Image > Image Rotationto view several options:- “180 degrees”: Rotates the image halfway around a complete circle.
- “90 degrees CW” (Clockwise): Rotates the image to the right by one-quarter of a circle.
- “90 degrees CCW” (Counter-Clockwise): Rotates the image to the left by one-quarter of a circle.
- “Arbitrary”: Allows you to specify a custom angle (in degrees) and direction (clockwise or counter-clockwise).
- “Flip Canvas Horizontal”: Mirrors the entire image horizontally.
- “Flip Canvas Vertical”: Flips the entire image upside-down.
- Undo changes: If you’re not happy, press
Ctrl+Z(Windows) or⌘ Command+Z(Mac) to undo. - Save the image: Open the
Filemenu and clickSave Asto save your newly rotated image.
Rotating or Flipping Individual Layers or Objects: When working on complex designs, you often need to rotate specific elements without affecting the entire image. This is where layer-based rotation comes into play, a core technique in graphic design and photo manipulation.
- Make Layers panel visible: Go to
Window > Layersif it’s not already open. This panel lists all layers and their thumbnails. - Select the desired layer(s): Click a layer once to select it. Hold
Ctrl(Win) or⌘ Command(Mac) to select multiple layers. If a layer is locked (padlock icon), click the icon to unlock it first. - Access Transform options: Go to
Edit > Transformto view various options:- “Rotate”: Allows you to enter an exact angle in degrees.
- “Rotate 180 degrees,” “Rotate 90 degrees CW,” “Rotate 90 degrees CCW”: Preset rotations.
- “Flip Horizontal,” “Flip Vertical”: Mirrors the layer(s).
Using the Free Transform Tool for Visual Control: For more interactive rotation, the Free Transform tool is invaluable.
- Activate Free Transform: Press
Ctrl+T(Win) or⌘ Command+T(Mac). A bounding box will appear around your selected layer(s). - Manually rotate: Hover your mouse cursor slightly outside any of the corner handles of the bounding box. The cursor will change into a curved, double-headed arrow. Click and drag to rotate the layer visually. Be careful not to drag inside the box unless you intend to resize or warp.
- Enter specific degrees: While in Free Transform mode, you can also enter a precise degree of rotation directly into the Options Bar at the top of the Photoshop window.
- Apply transformation: Press
Enter(Win) orReturn(Mac) to finalize the rotation.
Rotating a Selection: To rotate only a portion of a layer, you must first make a selection.
- Make a selection: Use any selection tool (Marquee, Lasso, Quick Selection, etc.) to define the area you want to rotate.
- Enter Free Transform: Press
Ctrl+T(Win) or⌘ Command+T(Mac). - Rotate: Drag the corner handles of the bounding box as described for layers. Hold
Shiftto constrain rotations to 15-degree increments. - Apply and Deselect: Press
Enter/Returnto apply, thenCtrl+D(Win) or⌘ Command+D(Mac) to deselect. Note that this method will cut the selection from its original spot and rotate it as a new floating selection.
Rotating the Canvas vs. Rotating Content:
Photoshop also offers a Rotate View Tool (R). This tool allows you to click-and-drag to rotate how you view the canvas without actually changing the image data. This is useful for working on an image at a comfortable angle without altering the artwork itself. If you export your project after using this tool, it will not export in the rotated view. To permanently rotate your whole project and canvas, you must select all active layers and rotate them, or use Image > Image Rotation.
Beyond the Basics: Advanced Rotation Techniques and AI-Powered Solutions
For professionals and enthusiasts diving deeper into visual design and digital photography, advanced rotation techniques offer unparalleled creative control. Moreover, emerging AI-powered solutions are revolutionizing how we approach image orientation and manipulation.
Mastering Layer Control and Pivot Points for Complex Designs
In advanced photo manipulation and graphic design, rotating objects around a specific pivot point is crucial for intricate compositions. By default, Photoshop’s Free Transform rotates around the center of the selection. However, you can click and drag the pivot point (the small crosshair in the center of the bounding box during Free Transform) to any desired location. This allows you to rotate elements around an external anchor, creating dynamic radial patterns or perfectly aligning components within a complex scene. This precision is vital for crafting unique digital art and creative ideas, a core focus of Tophinhanhdep.com’s visual design resources.
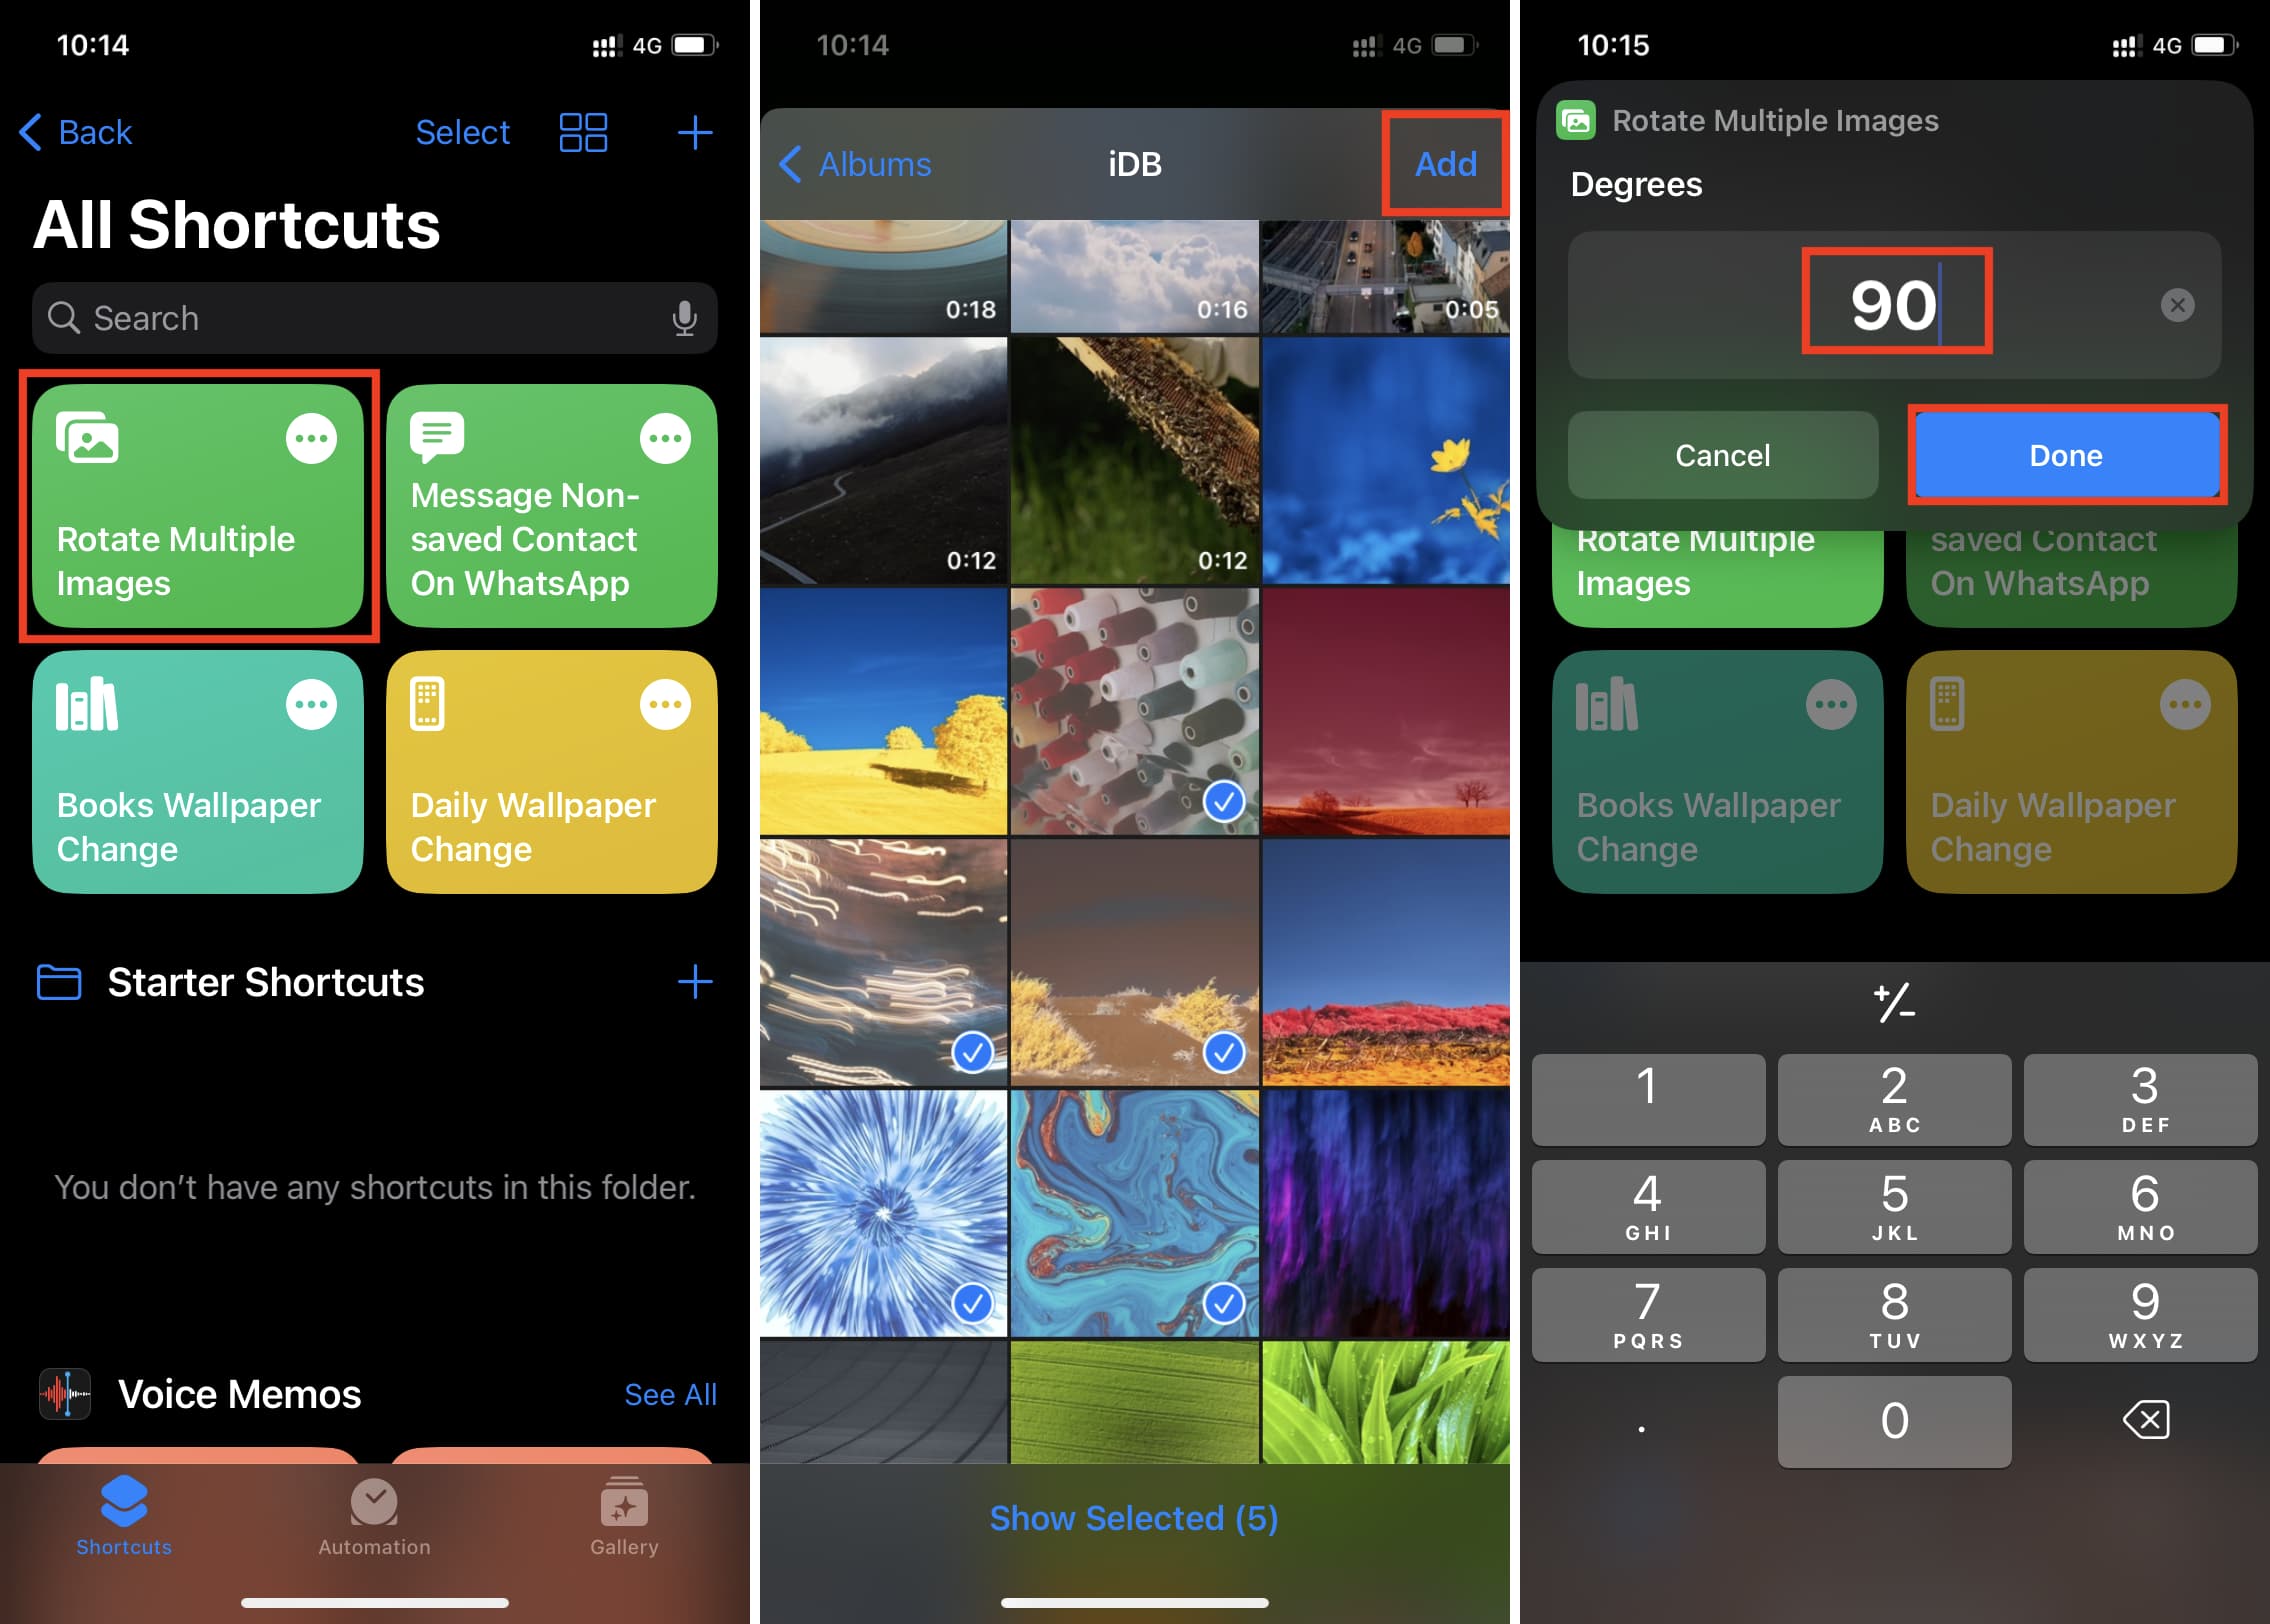
For designs with multiple elements, batch rotation can save considerable time. Photoshop’s “Actions” panel allows you to record a series of steps, including rotation, and then apply that action to an entire folder of images using File > Automate > Batch. This is particularly useful for preparing large collections of images, such as stock photos or thematic collections, for consistent orientation adjustments.
Smart Objects and Their Rotation Advantages: Smart Objects in Photoshop are layers that contain image data from raster or vector images, which preserve an image’s source content with all its original characteristics. When you rotate a Smart Object, you’re performing a non-destructive transformation. This means you can scale, rotate, or transform it multiple times without losing image quality, as the original data remains intact. This flexibility is a significant advantage for digital photography and editing styles, allowing for endless experimentation with creative ideas without committing to permanent pixel changes.
Leveraging AI for Intelligent Image Orientation and Enhancement
The advent of Artificial Intelligence has brought transformative capabilities to image editing, including rotation. AI-powered tools go beyond simple manual adjustments, offering intelligent orientation and enhancement features that significantly streamline workflows and elevate image quality.
Tophinhanhdep.com recommends leveraging advanced AI tools that offer automatic horizon alignment and perspective correction, streamlining the process far better than Photoshop’s multi-step approach. Platforms featured on Tophinhanhdep.com, such as Luminar Neo, exemplify this shift by incorporating AI-driven rotation functionalities. For instance, Luminar Neo’s Transform Tool allows users to easily turn, skew, and adjust perspective in a more streamlined way, providing faster control over object manipulation. The software automatically aligns objects or skies during rotations, ensuring perfect perspective without manual tweaking.
Compared to Photoshop’s often manual adjustments, these AI solutions can detect and correct subtle misalignments, adjust the orientation of skies with intelligent 3D rotation (a complex manual task in traditional software), and even suggest optimal rotations based on image content. This technology is particularly beneficial for high-resolution photography, where precise alignment is crucial, and for users who seek efficient image optimizers and upscalers without sacrificing artistic control. Explore the endless possibilities with AI-driven editors featured on Tophinhanhdep.com!
Practical Applications and Creative Inspiration for Rotated Images
Rotating images is not just about correcting errors; it’s a profound creative act that can dramatically alter the perception and emotional resonance of a visual. Integrating strategic rotation into your visual design workflow opens up a world of creative ideas.
Transforming Wallpapers and Backgrounds with Dynamic Angles
For images intended as wallpapers or backgrounds, a simple rotation can infuse dynamic energy or provide a fresh perspective. A serene landscape, typically displayed horizontally, might take on an abstract or dramatic quality when rotated vertically. Similarly, a close-up of nature photography, like a blooming flower or intricate textures, can be rotated to highlight unique patterns and lines, creating stunning aesthetic backgrounds. Tophinhanhdep.com’s extensive collection of images, from nature to abstract, often demonstrates how subtle rotational shifts can redefine the visual narrative, making an image more engaging and suitable for specific screen orientations or artistic layouts. Experimenting with different angles can uncover new visual dimensions, transforming ordinary images into compelling visual statements.
Crafting Unique Digital Art and Photo Manipulation Styles
In the realm of digital art and photo manipulation, rotation becomes a deliberate stylistic choice. Artists frequently rotate elements to create surreal compositions, introduce movement, or achieve specific abstract effects. Flipping an image can offer a completely different visual balance, revealing previously unnoticed compositional strengths or weaknesses. When combining multiple images or layers, rotating individual components allows for precise alignment and seamless integration, crucial for achieving cohesive and believable photo manipulations. For example, a high-resolution stock photo of an object can be rotated and layered onto a background to create a sense of depth or an unusual perspective, pushing the boundaries of creative ideas within visual design. Tophinhanhdep.com encourages artists to explore these techniques to develop distinctive editing styles and elevate their creative projects.
Optimizing Your Workflow: Tips for Efficient Image Rotation
Efficiency is key in any creative endeavor. Knowing the quickest and most effective ways to rotate images can save valuable time, especially when dealing with large volumes of digital photography or complex visual design projects.
Keyboard Shortcuts and Workflow Best Practices
Mastering keyboard shortcuts is one of the fastest ways to streamline your image rotation workflow. In Photoshop, Ctrl+T (Windows) or ⌘ Command+T (Mac) quickly invokes the Free Transform tool, allowing for immediate visual rotation. Holding Shift during manual rotation in most software locks the rotation to precise 15-degree increments, ensuring straight angles (0°, 90°, 180°, etc.) for accurate alignment. Regularly saving your work, especially after significant transformations, is also a crucial best practice to prevent data loss. For batch processing, as mentioned earlier, leveraging software “Actions” can automate repetitive rotation tasks, making light work of large image collections. These workflow efficiencies are vital for anyone managing extensive image collections, including wallpapers, backgrounds, and professional stock photos.
The Role of Image Tools in Post-Rotation Optimization
After rotating your images to perfection, further optimization can enhance their usability and quality. Tophinhanhdep.com emphasizes the importance of a comprehensive suite of image tools:
- Image Compressors: Rotated images, especially high-resolution ones, can still be large files. Compression tools can reduce file size without significant loss of quality, making them faster to upload, download, and store, ideal for web use or sharing.
- Image Optimizers: These tools further refine images for specific platforms, ensuring they load quickly and display correctly across various devices.
- AI Upscalers: If rotation is part of a larger manipulation that might slightly reduce perceived resolution (e.g., cropping after rotation), AI upscalers can intelligently enhance the image quality and resolution, perfect for ensuring your beautiful photography remains high-resolution.
- Converters: Sometimes, a rotated image might need to be in a different file format (e.g., from TIFF to JPEG). Converters ensure compatibility across platforms and devices.
By integrating these image tools into your post-rotation workflow, you can ensure that your images are not only perfectly oriented but also optimized for any purpose, from digital photography showcases to aesthetic social media posts.
In conclusion, knowing how to rotate an image is a foundational skill that impacts every aspect of digital image creation and management. Whether you’re making quick adjustments in a document or crafting intricate digital art in Photoshop, the ability to control orientation empowers you to create more compelling, aesthetically pleasing, and functionally appropriate visuals. Tophinhanhdep.com remains your comprehensive resource for mastering these techniques, ensuring your images always achieve their full potential.