How to Rotate an Image: A Comprehensive Guide to Perfecting Your Visuals

In the vast and dynamic world of digital content, images serve as the universal language. From stunning wallpapers and immersive backgrounds to captivating photography and intricate digital art, visuals are fundamental to how we communicate and express ourselves online. Whether you’re a professional graphic designer, a budding photographer, or simply someone looking to enhance a personal document, the ability to manipulate images effectively is a crucial skill. Among the most common and fundamental image adjustments is rotation – a seemingly simple task that can dramatically alter the impact, composition, and usability of a visual asset.
At Tophinhanhdep.com, we understand the power of precise image control. We offer a wealth of resources covering everything from high-resolution stock photos and aesthetic visuals to advanced image tools and creative design inspiration. This comprehensive guide will delve into the art and science of image rotation, exploring various methods across different platforms and tools. We’ll cover everything from quick manual tweaks in popular document editors like Microsoft Word to intricate transformations in professional software like Adobe Photoshop, and even the convenience of online utilities. Our aim is to equip you with the knowledge to effortlessly adjust the orientation of your images, ensuring they perfectly align with your vision and document needs, whether for a subtle aesthetic change or a significant compositional shift.
Understanding Image Rotation: The Fundamentals of Orientation
Before diving into the practical “how-to,” it’s essential to grasp the fundamental concepts behind image rotation. At its core, image rotation involves changing the angular position of an image around a central point. This seemingly straightforward action carries several implications for the image data itself, its dimensions, and its overall quality.
Imagine you have a beautiful piece of nature photography – perhaps a serene landscape or a striking portrait. If it was captured slightly off-kilter, or if you want to integrate it into a design with a specific visual flow, rotation becomes indispensable. Rotation can be performed in several ways:
- Clockwise or Counter-clockwise: The direction of rotation is typically measured in degrees. A positive degree value usually denotes clockwise rotation, while a negative value indicates counter-clockwise rotation.
- Specific Degree Values: You can rotate an image by precise angles, such as 90 degrees (a quarter turn), 180 degrees (a half turn, effectively flipping it upside down), or any arbitrary degree (e.g., 15 degrees, 43.7 degrees).
- Flipping/Mirroring: This is a special type of rotation where the image is mirrored either horizontally (along the Y-axis) or vertically (along the X-axis). While not a true angular rotation, it’s often grouped with rotation options due to its effect on orientation.
The Impact of Rotation on Image Data and Dimensions
The way an image rotation affects the actual image file can vary significantly depending on the angle of rotation and the software used.
- 90-Degree or 180-Degree Rotations: When you rotate an image by exactly 90 or 180 degrees, most software can perform this operation without any loss of pixel information or a change in the original image size (though width and height might swap for 90-degree turns). This is because pixels are simply rearranged within the existing grid. For high-resolution photography and stock photos, this is generally the safest option to preserve quality.
- Arbitrary Angle Rotations: Rotating an image by an arbitrary angle (anything other than multiples of 90 degrees) is more complex. To accommodate the rotated image, the canvas or image dimensions typically need to increase. This often results in “exposed” background areas, which are usually filled with white, black, or a transparent color, where the original image no longer covers the entire new boundary. This process can involve interpolation, where new pixel values are estimated, potentially leading to a slight reduction in sharpness, especially if the image is rotated multiple times. For digital photography and graphic design, understanding this is crucial to maintain visual fidelity.
- Paletted Images and Color Preservation: Some older or specialized image formats use a limited color palette. As observed in examples from image processing tools like WinTopo, rotating a paletted image by an arbitrary angle after converting it to a limited color palette can lead to undesirable visual artifacts, especially with text or fine details. If the original palette doesn’t contain the necessary intermediate shades (e.g., grays for anti-aliased black text), the rotated image might appear jagged or less legible. It’s often recommended to perform arbitrary rotations on full-color (24-bit or 32-bit) images first, and then convert them to a paletted format if necessary, to preserve color accuracy and visual quality. This is a critical consideration for those working with images for specific digital art or visual design projects where color integrity is paramount.
By understanding these fundamentals, you can approach image rotation not just as a mechanical task but as an informed decision that affects the aesthetic and technical quality of your visuals, from beautiful photography to abstract art.
Mastering Image Rotation in Microsoft Word
Microsoft Word, while primarily a word processor, offers surprisingly robust tools for image manipulation, including rotation. Many users initially struggle with these features, but once familiar, they can effortlessly adjust images to perfectly suit their document’s narrative and visual design. Whether you’re incorporating aesthetic backgrounds or simple graphics, rotating images in Word can be a game-changer for your visual documents.
Manual Rotation for Quick Adjustments
For immediate, intuitive adjustments, Word provides a manual rotation handle. This method is ideal when you need to quickly reorient an image without needing exact degree precision, perfect for refining the layout of your document or adding a touch of creative flair.

Step-by-Step Manual Rotation:
- Select the Image: Open your Microsoft Word document and click on the picture you wish to rotate. Once selected, handles (small squares or circles) will appear around the image’s edges, and a distinct circular arrow icon, known as the rotation handle, will appear either at the top or near one of the corners of the image.
- Drag the Rotation Handle: Click and hold the circular arrow icon. As you drag your mouse in any direction, the image will rotate to follow your cursor. This provides real-time visual feedback, allowing you to fine-tune the orientation until it looks just right.
- Precise Increments with Shift: For more controlled manual rotation, press and hold the
Shiftkey while dragging the rotation handle. This will constrain the rotation to 15-degree angles, helping you achieve more uniform and structured adjustments, which can be particularly useful for graphic design elements or thematic collections. - Release to Save: Once you’ve achieved the desired angle, release the mouse button. The image will snap into its new orientation. Remember to save your document to retain these changes.

This manual method is a quick and efficient way to handle everyday image orientation needs within your documents, making it easier to integrate visuals like wallpapers or backgrounds into your text.
Precise Rotations Using Format Options
When your visual design demands exactness, or when you need to perform specific flips, Microsoft Word’s “Picture Format” or “Shape Format” ribbon offers a more controlled approach to image rotation. This is where you can specify exact degrees of rotation or choose from a set of common predefined rotations, ensuring your beautiful photography or abstract images are perfectly aligned.
Step-by-Step Precise Rotation:
- Select the Image: Click on the image you want to rotate. This action will automatically activate the “Picture Tools” tab (or “Shape Format” depending on the object) at the top of the Word window.
- Access the Format Tab: Click on the “Picture Tools” or “Shape Format” tab. Within this ribbon, you’ll find a “Format” section dedicated to editing and formatting your picture.
- Locate the Rotate Option: Look for the “Rotate” option, which typically features an icon resembling a triangle with an arrow above it. It’s usually found within the “Arrange” or “Size” group.
- Choose a Preset Rotation: Clicking the “Rotate” option will expand a menu with several predefined choices:
- Rotate Right 90°: Rotates the image 90 degrees clockwise.
- Rotate Left 90°: Rotates the image 90 degrees counter-clockwise.
- Flip Vertical: Mirrors the image along its horizontal axis (top becomes bottom, bottom becomes top). This can be great for creating unique visual designs or symmetrical layouts.
- Flip Horizontal: Mirrors the image along its vertical axis (left becomes right, right becomes left). This is often used for stock photos or digital photography to create variations. Clicking any of these options will immediately apply the chosen rotation to your selected image.
- Input a Specific Degree with “More Rotation Options”: For unparalleled control, select “More Rotation Options…” from the “Rotate” menu. This will open a dialog box, typically under a “Size” or “Layout” tab, where you can find a “Rotation” box. Here, you can directly type in a precise numerical value (in degrees) for rotation.
- Positive numbers usually rotate the image clockwise.
- Negative numbers rotate the image counter-clockwise.
- You can also use the up/down arrows next to the input field for incremental adjustments. After entering your desired degree, click “OK” or “Close” to apply the precise rotation. This level of control is invaluable for graphic design and intricate photo manipulation.
Advanced Rotation Techniques in Word:
- Rotating Multiple Pictures Simultaneously: To maintain consistent orientation across several images (e.g., a thematic collection of nature photography), hold down the
Ctrlkey while clicking on each picture you want to select. Then, follow the precise rotation steps outlined above to apply the same rotation to all selected images at once. - 3-D Rotation for Creative Projects (Word 2007 & up): For more intricate visual effects, Word (since version 2007) allows for 3-D rotation. Right-click the image and select “Format Picture.” In the formatting panel that appears (often on the right side of your window), navigate to the “Effects” tab (represented by a pentagon icon). Under “3-D Rotation,” you can select from various presets or manually adjust X-Rotation (flips up/down), Y-Rotation (turns side to side), and Z-Rotation (rotates clockwise/counter-clockwise on the plane). This feature is excellent for digital art and advanced photo manipulation within a document.
By leveraging these precise rotation options, you can ensure your images – be they sad/emotional imagery or uplifting beautiful photography – are perfectly integrated into your Microsoft Word documents, enhancing their overall visual appeal and content coherence.
Advanced Image Manipulation: Rotating in Adobe Photoshop (and Similar Professional Tools)
For serious photographers, digital artists, and graphic designers, professional image editing software like Adobe Photoshop is the gold standard for intricate image manipulation. Photoshop offers a comprehensive suite of rotation tools that go far beyond basic adjustments, providing granular control necessary for high-resolution images, stock photos, and complex digital art projects.
Basic Rotation with the Move Tool and Options Bar
Photoshop makes simple rotations very accessible, even for beginners, through its primary manipulation tool.
Step-by-Step Basic Rotation:
- Open Your Project and Select Layer: Open your Photoshop project file and select the specific layer (image, shape, or object) you wish to rotate in the Layers panel.
- Activate the Move Tool: Ensure the Move Tool (shortcut
V) is active. - Free Transformation Bounding Box: With the layer selected and the Move Tool active, you’ll see a bounding box with corner handles around your object. If not, ensure “Show Transform Controls” is checked in the Options bar at the top, or press
Ctrl+T(Windows) /Cmd+T(Mac) to activate Free Transform. - Manual Drag Rotation: Hover your cursor just outside any of the four corner handles. The cursor will change into a curved double-arrow icon. Click and drag your mouse around to rotate the object visually. This real-time feedback is excellent for quick, aesthetic adjustments.
- Precise Rotation via Options Bar: For exact angular control, once the Free Transform bounding box is active (either through the Move Tool with “Show Transform Controls” or
Ctrl/Cmd+T), look at the Options Bar at the top of the Photoshop interface. You’ll see an input field labeled with an angle symbol (often a circle with a degree sign). Enter your desired degree of rotation directly into this box. Positive values rotate clockwise, negative values rotate counter-clockwise. Press Enter to apply the rotation.
This combination of visual dragging and precise numerical input offers flexibility for various editing styles and creative ideas, from subtle tilts to complete reorientations.
Specialized Rotation Techniques in Photoshop
Photoshop’s power lies in its multiple pathways to achieve a desired effect, and rotation is no exception. Beyond the basic Move Tool, there are specific commands for more targeted rotation scenarios, catering to different aspects of visual design and photo manipulation.
-
Tilting an Image via Transform Command: If you want to tilt an image (or any selected layer) as part of a broader transformation, the
Edit > Transformmenu is your go-to.- Select the layer containing the image you want to tilt.
- Go to
Editin the top menu, then hover overTransform. - Select
Rotate. A bounding box will appear around your image, allowing you to click and drag to tilt it. - This menu also offers preset rotations like
Rotate 180°,Rotate 90° Clockwise, andRotate 90° Counter Clockwise, along withFlip HorizontalandFlip Vertical. These are perfect for quick, standard adjustments of stock photos or digital photography.
-
Image-Specific Rotation for Permanent Changes: For rotating an entire image, rather than just a layer, Photoshop provides a dedicated command under the
Imagemenu. This method permanently reorients the entire canvas and all its contents (visible layers).- Go to
Imagein the top menu. - Hover over
Image Rotation. - You’ll see options like
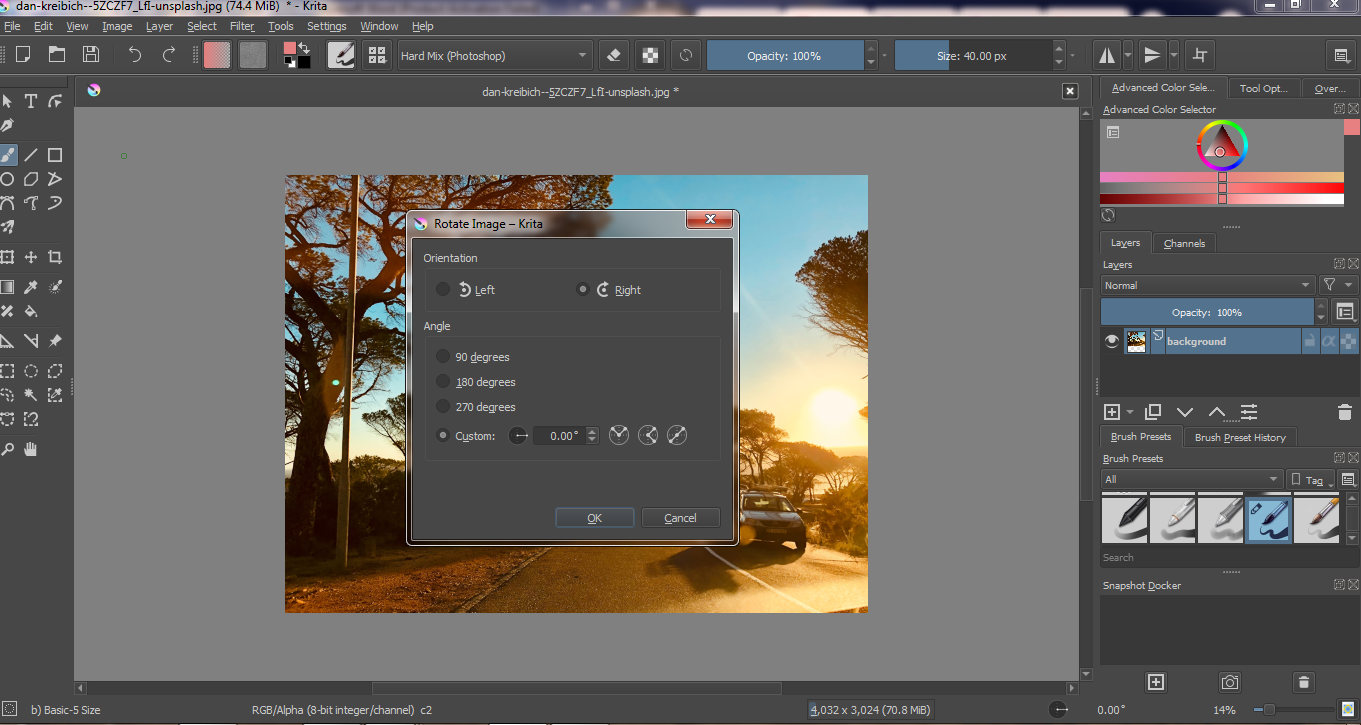
180°,90° Clockwise,90° Counter Clockwise,Arbitrary...,Flip Canvas Horizontal, andFlip Canvas Vertical. Arbitrary...allows you to input any precise degree of rotation for the entire canvas. Be aware that this will likely expand your canvas dimensions to accommodate the rotation, filling new areas with the background color.Flip Canvas HorizontalandFlip Canvas Verticalmirror the entire image. This is distinct from flipping individual layers and is often used for creating variations of backgrounds or complex digital art. This “Image Rotation” method is crucial when you want to change the fundamental orientation of your entire artwork for export or printing, especially for high-resolution images.
- Go to
-
Rotating the Canvas for Viewing vs. Permanent Change: Photoshop also offers a unique “Rotate View Tool” (shortcut
R).- Rotate View Tool (R): This tool allows you to temporarily rotate your canvas view without actually altering the image data. It’s incredibly useful for artists who prefer to work at different angles, much like rotating a physical canvas. Simply select the tool and click-and-drag your mouse to rotate the view. You can revert to the standard view at any time.
- Important Note: If you use the Rotate View Tool, remember that this only affects your perspective. If you export your project, it will export in its original, un-rotated form. To permanently rotate your entire project and canvas, you must select all active layers (or flatten the image) and then use the
Image > Image Rotationcommand or apply Free Transform to all layers simultaneously. This distinction is vital for digital photography and ensuring your final output matches your creative vision.
-
Rotating Selections and Shapes:
- Selections: To rotate a specific area of an image (a selection), first make your selection using any of Photoshop’s selection tools (e.g., Marquee, Lasso). Then, activate the Free Transform Tool (
Ctrl+T/Cmd+T). A bounding box will appear around your selection, allowing you to rotate it manually or with precise degrees in the Options bar. - Shapes: Rotating shapes (both pre-set and custom) follows the same principles as rotating any other object in Photoshop. Select the shape layer, then use the Free Transform Tool (
Ctrl+T/Cmd+T) for visual adjustments or enter a precise degree in the Options Bar. This flexibility is key for graphic design and creating intricate visual compositions.
- Selections: To rotate a specific area of an image (a selection), first make your selection using any of Photoshop’s selection tools (e.g., Marquee, Lasso). Then, activate the Free Transform Tool (
By mastering these varied rotation techniques in Photoshop, you can achieve any desired orientation for your aesthetic, nature, abstract, or beautiful photography, making Tophinhanhdep.com your ultimate resource for digital art and photo manipulation.
Beyond Desktop Software: Online Tools and Mobile Apps for Image Rotation
While professional desktop software offers unparalleled control, the modern digital landscape thrives on convenience and accessibility. For quick adjustments, sharing on social media, or basic editing on the go, online image tools and mobile applications have become indispensable. Tophinhanhdep.com acknowledges the need for versatile image solutions and provides insights into leveraging these accessible platforms for image rotation.
The Convenience of Online Image Tools
Dedicated online image tools have revolutionized how we interact with visuals. These web-based utilities often require no software installation, are accessible from any device with an internet connection, and frequently offer a streamlined, user-friendly interface for common tasks like image rotation.
- Ease of Use: Many online optimizers and converters offer a simple “upload, rotate, download” workflow. You simply drag and drop your image, click a “rotate” button (often with 90-degree increments, or sometimes an arbitrary degree slider), and then download the modified file. This is perfect for quick adjustments to wallpapers, backgrounds, or casual photography before sharing.
- Accessibility: Whether you’re on a library computer, a friend’s laptop, or your own device, online tools ensure you’re never without the ability to correct an image’s orientation. This makes them ideal for quickly fixing an incorrectly oriented sad/emotional image or a beautiful photo from a recent trip.
- Integrated Features: Many online rotation tools are part of larger suites that offer other “Image Tools” such as compressors, optimizers, and even AI upscalers. This allows for a multi-step editing process within a single web application, improving efficiency for tasks like preparing images for a website or a presentation.
- File Format Flexibility: Online converters often support a wide range of image formats, ensuring that you can rotate virtually any image file, regardless of its original extension, without needing specialized software.
When selecting an online tool from Tophinhanhdep.com’s recommended resources, look for those that balance ease of use with quality output, especially if you’re working with high-resolution images or stock photos that you don’t want to degrade.
Mobile Apps for On-the-Go Rotation
The ubiquitous nature of smartphones and tablets means that image editing capabilities are now literally at our fingertips. Mobile apps have evolved to offer powerful yet intuitive tools for photographers and casual users alike, making them perfect for rotating images captured directly on the device.
- Instant Correction: Many native camera apps and third-party photo editors on iOS and Android include rotation features. You can snap a picture of nature, a striking abstract, or an aesthetic moment, and instantly rotate it if it was taken sideways or upside down.
- Touch-Based Interface: Mobile apps often leverage touch gestures for rotation, allowing you to pinch, zoom, and rotate an image with natural finger movements. This tactile approach can be very intuitive for quick, visual adjustments.
- Basic and Advanced Options: While many apps offer simple 90-degree rotations and flips, more sophisticated mobile editors provide sliders for arbitrary degree rotation and even perspective correction, blurring the line between casual and professional editing. This versatility supports everything from casual “Photo Ideas” to more refined “Mood Boards.”
- Integration with Cloud and Social Media: Edited images can often be directly saved to cloud storage or shared instantly on social media platforms, streamlining the workflow from capture to distribution. This is particularly useful for quickly updating backgrounds or sharing trending styles.
Whether you’re using an online tool or a mobile app, the key is to choose one that fits your specific needs for speed, precision, and integration with your overall visual design workflow. Tophinhanhdep.com’s selection of “Image Tools” can guide you to the best options for efficient and effective image rotation.
The Art of Orientation: Creative Applications and Considerations for Image Rotation
Image rotation is not merely a corrective measure; it’s a powerful creative tool that can dramatically impact visual storytelling and overall aesthetic. Understanding when and how to apply rotation strategically can elevate your images, from simple wallpapers to complex photo manipulations.
Enhancing Visual Storytelling and Composition
Rotation plays a significant role in how an image is perceived, affecting its balance, dynamism, and emotional resonance.
- Correcting Horizon Lines: One of the most common applications is correcting a tilted horizon in a landscape photograph. Even a slight tilt can make an otherwise beautiful photo feel unsettling. A precise rotation can restore balance and professionalism. This is fundamental for “Beautiful Photography” and ensuring stock photos meet high standards.
- Creating Dynamic Compositions: Instead of a perfectly horizontal or vertical image, rotating an element by a few degrees can introduce a sense of motion, energy, or artistic tension. For “Digital Art” and “Graphic Design,” this can break the monotony of a grid-based layout, adding visual interest and guiding the viewer’s eye. Imagine an abstract image where elements are slightly skewed to create a more intriguing pattern.
- Emphasizing Emotion: A subtle tilt can sometimes contribute to the “Sad/Emotional” impact of an image, conveying disorientation or unease. Conversely, a well-aligned, stable image can project calm and order. The deliberate choice of orientation is a critical aspect of “Photo Manipulation” for expressive purposes.
- Generating Creative Ideas: Experimenting with rotation can lead to unexpected and compelling results. Flipping an image horizontally might reveal an entirely new perspective or composition you hadn’t noticed. Creating symmetrical reflections by rotating and combining duplicates can result in unique “Aesthetic” backgrounds or patterns for thematic collections. For example, a nature photography piece could be flipped to create a striking mirror effect, enhancing its visual depth.
- Improving Readability and Flow in Visual Design: In layouts where text interacts with images, rotating an image can help it fit better within available space or align with surrounding design elements, enhancing the overall “Visual Design” and user experience. This applies to everything from website backgrounds to detailed mood boards.
Practical Considerations and Best Practices
While the creative possibilities of rotation are vast, it’s essential to consider some practical implications, especially regarding image quality and file management. Tophinhanhdep.com emphasizes informed choices for optimal results.
- Maintaining Image Quality:
- Lossless vs. Lossy Rotation: As discussed earlier, rotating by exact 90 or 180 degrees is often lossless, meaning no pixel data is lost. Arbitrary rotations, however, typically involve resampling and interpolation, which can introduce slight blurriness or artifacts. For “High Resolution” and “Stock Photos,” it’s generally best to perform arbitrary rotations as early as possible in your editing workflow, using professional tools like Photoshop that employ advanced interpolation algorithms. Repeated rotations can compound quality degradation.
- File Format: Ensure you save your rotated images in appropriate file formats. JPEG is excellent for most photography but applies compression, which can become noticeable with repeated edits. PNG or TIFF are better choices for preserving quality, especially for “Digital Art” or when transparency is required, even if they result in larger file sizes.
- File Size Implications for Arbitrary Rotations: When an image is rotated by an arbitrary angle, the canvas often expands to contain the entire rotated image. The newly exposed areas are usually filled with a solid color or transparency. This expansion can lead to an increase in file dimensions and, consequently, file size. If file size is a critical concern (e.g., for website images or email attachments), you might need to use “Image Tools” like compressors or optimizers after rotation, or crop the image down to its essential content.
- Palette Considerations (Revisited): For specialized applications or legacy image formats, remember the lesson from tools like WinTopo: if you’re working with paletted images, perform complex rotations before converting to a limited palette. This preserves color integrity and avoids unsightly pixelation, especially for intricate graphic design elements or detailed abstract pieces.
- Choosing the Right Tool: The “best” way to rotate an image depends on your needs:
- For quick, non-critical adjustments in documents, Microsoft Word is sufficient.
- For professional-grade control over “High Resolution” images, “Digital Photography,” and “Photo Manipulation,” Adobe Photoshop or similar professional software is indispensable.
- For on-the-go edits or simple corrections, online “Image Tools” and mobile apps offer unmatched convenience.
- Backup and Version Control: Always keep a copy of your original image before performing significant rotations, especially arbitrary ones. This practice ensures you can always revert to the untouched version if you’re not satisfied with the result or need to try a different approach.
By thoughtfully applying rotation techniques and understanding their impact, you can transform your images to perfectly match your “Visual Design” goals, whether you’re creating a thematic collection of stunning “Wallpapers” or refining a crucial piece of “Beautiful Photography.” Tophinhanhdep.com is here to guide you through every step of your visual journey.
Conclusion: Perfecting Your Visuals with Precise Rotation
Image rotation, though a seemingly minor adjustment, is a foundational skill in the realm of digital imagery. From ensuring your high-resolution photos are perfectly level to crafting dynamic layouts in graphic design, the ability to accurately and creatively manipulate image orientation is paramount. As we’ve explored, whether you’re working within the confines of a Microsoft Word document, performing intricate photo manipulation in Adobe Photoshop, or making quick edits with online image tools and mobile apps, the principles and techniques for rotating images are diverse and powerful.
Tophinhanhdep.com is your go-to resource for all things visual. We offer a comprehensive library of images, ranging from breathtaking nature photography and serene backgrounds to captivating abstract art and emotionally resonant visuals. Our platform also provides invaluable insights into photography, covering high-resolution imaging and various editing styles. Crucially, we curate and recommend a suite of essential image tools – from converters and compressors to AI upscalers and optimizers – designed to empower your creative process.
By mastering image rotation, you’re not just correcting flaws; you’re unlocking new avenues for visual design, enhancing storytelling, and injecting creative ideas into every project. We encourage you to explore the myriad of resources available on Tophinhanhdep.com, delve into our thematic collections and trending styles, and continuously refine your skills. Remember that the perfect image often lies not just in its content, but in its presentation. With the knowledge and tools at your disposal, you can effortlessly adjust, transform, and perfect your visuals, ensuring every image you create or use resonates exactly as you intend. Dive in, experiment, and let Tophinhanhdep.com be your guide to achieving visual excellence.