Mastering Image Rotation in Canva: Unlock Creative Potential with Tophinhanhdep.com

In the dynamic world of visual content creation, the ability to manipulate images with precision and creativity is paramount. Whether you’re a seasoned graphic designer, a budding digital artist, or simply someone looking to enhance their personal photos, tools like Canva have revolutionized how we interact with visual elements. At the heart of many compelling visual stories lies a seemingly simple yet profoundly impactful action: image rotation. From subtly straightening a horizon in a breathtaking nature wallpaper to dramatically tilting an abstract background for a cutting-edge aesthetic, rotation can transform a static image into a vibrant component of your design.

For anyone aiming to produce high-resolution, professional-grade visuals or curate stunning thematic collections, understanding how to effectively rotate images in Canva is a fundamental skill. Tophinhanhdep.com, a leading resource for images, photography insights, and visual design tools, recognizes the importance of such foundational techniques. This comprehensive guide will walk you through every aspect of rotating images within Canva, ensuring your designs not only meet your vision but also align with the high standards of visual excellence championed by Tophinhanhdep.com.
The Foundational Role of Image Rotation in Visual Design
The simple act of rotating an image might seem minor, but its implications for visual design are vast. It’s a tool that allows for nuanced adjustments and radical transformations alike, playing a crucial role in creating impactful and engaging content.
Crafting Compelling Visual Narratives
Every image tells a story, and how that image is presented significantly influences the narrative. A slightly tilted photograph can convey motion or urgency, while a perfectly aligned shot might suggest stability and professionalism. For the vast array of images found on Tophinhanhdep.com – from tranquil wallpapers to dramatic abstract art – rotation allows creators to fine-tune the emotional resonance and message. Imagine a beautiful photography piece depicting a landscape; rotating it to perfectly align the horizon can bring a sense of calm and order, whereas a subtle off-kilter rotation might introduce a feeling of unease or dynamic energy. This control over perspective is a powerful storytelling device in digital photography and graphic design.
Rotation is not just about correcting imperfections; it’s about intentional design choices. When designing for specific moods, such as sad or emotional imagery, the angle of an element can amplify feelings of vulnerability or introspection. Conversely, for cheerful or aesthetic designs, playful rotations can infuse vitality and lightheartedness. This versatility makes rotation an indispensable skill for anyone looking to convey a specific emotional tone through their visuals, which is a core aspect of curating diverse image collections and mood boards.

Beyond Straightening: Infusing Dynamic Perspective
Beyond mere aesthetic adjustments, rotation is a cornerstone of creative photo manipulation. It enables designers to break free from conventional layouts, introducing dynamism and visual interest. A portrait rotated by 90 degrees transforms into a landscape, opening up new possibilities for cropping and composition. This is particularly useful when working with high-resolution stock photos or digital art, where versatility in application is key.
When you’re curating image inspiration or developing new photo ideas, experimenting with rotation can lead to unexpected and innovative compositions. For instance, an abstract image rotated upside down might reveal an entirely new pattern or visual hierarchy, sparking fresh creative ideas for a thematic collection. Similarly, incorporating rotated elements into graphic design projects can create a sense of depth, movement, and unconventional flair, making your visuals stand out in a crowded digital landscape. Tophinhanhdep.com’s emphasis on creative ideas and trending styles underscores the importance of such exploratory techniques.
Canva makes these creative explorations incredibly accessible. Its intuitive interface ensures that even complex rotations can be achieved with ease, allowing designers to focus on their artistic vision rather than getting bogged down by technical difficulties. This seamless integration of powerful tools empowers users to experiment freely and push the boundaries of their visual content.
Step-by-Step Rotation on Your Computer: Precision and Flexibility
Canva offers a robust and user-friendly experience for rotating images on desktop platforms, whether you’re using their online client or a dedicated application for Windows PC or Mac. The functionality remains largely consistent across versions, ensuring a smooth design workflow.
Launching Your Creative Space
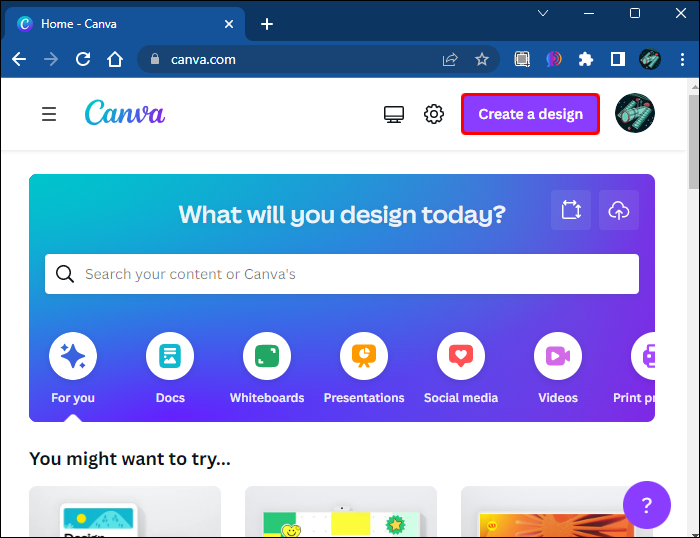
To begin, launch your preferred Canva version – either through your web browser or the installed desktop application. If you’re starting a fresh project, click on the prominent “Create a design” button, usually found in the top-right corner. Alternatively, you can pick up where you left off by opening one of your recent designs.
Once your design canvas is ready, you’ll need to bring in the image you wish to rotate. You can either select an existing image already on your canvas or upload a new one by clicking the “Upload files” button within the “Uploads” tab. Tophinhanhdep.com encourages the use of high-quality images, so ensure your uploaded files are of excellent resolution to maintain visual integrity post-manipulation.
Freehand Rotation for Artistic Flair
Canva provides an intuitive freehand rotation tool that offers immediate visual feedback, perfect for quick adjustments or artistic tilts.
- Select the Image: Click directly on the image you want to rotate on your canvas. This will activate the bounding box and editing controls around it.
- Locate the Rotate Handle: Below the selected image, you’ll notice a small circular icon with two arrows. This is your rotate handle.
- Rotate with a Drag: Long-press this handle and drag your cursor in the desired direction. As you rotate, a small bubble will appear, displaying the exact angle in degrees. This feature is incredibly useful for replicating specific angles across multiple images or for achieving a precise tilt without numerical input.
- Batch Rotation: For efficiency, you can select multiple images by holding down the Shift key and clicking on each image. Then, drag the rotate handle as usual to apply the same rotation to all selected elements simultaneously. This is a huge time-saver when working on large graphic design projects or thematic collections where consistency is key.
This freehand method is excellent for visual adjustments where exact numerical precision isn’t the primary concern, such as subtly correcting the perspective of a nature photo or giving a slight dynamic tilt to an abstract element in a mood board.
Achieving Pixel-Perfect Angles with Numerical Input
While freehand rotation offers fluidity, sometimes you need absolute precision – perhaps for symmetrical digital art or aligning elements to a very specific degree. Canva caters to this need with a numerical input option.
- Select Your Image: Click on the image you intend to rotate.
- Access Position Settings: Navigate to the top toolbar above the editor and click on the “Position” button (often located next to “Animate”).
- Locate the Rotate Text Bar: Within the “Arrange” tab of the Position panel, you will find a “Rotate” text bar.
- Enter Desired Angle: Type your desired rotation angle in degrees into this box. You can enter any value, from slight adjustments to full 360-degree rotations.
- Apply Changes: Press “Enter” or click outside the box to apply the rotation. Your image will instantly adjust to the specified angle.
This method is invaluable for tasks requiring exact alignment, ensuring your high-resolution photography or graphic design elements are perfectly positioned. It allows for a level of control that can elevate your designs, making them crisp and professional.
Flipping Elements for Mirrored Effects
Beyond simple rotation, Canva offers a “Flip” function that provides an alternative way to reorient your images, particularly useful for creating mirrored effects or quickly reversing an element.
- Select the Image: Click on the image you want to flip.
- Find the Flip Button: On the top toolbar, you’ll see a “Flip” button (often next to “Edit photo”).
- Choose Flip Direction: Click “Flip” and then select either “Flip vertical” (which rotates the image 180 degrees, effectively turning it upside down) or “Flip horizontal” (which mirrors the image sideways).
The “Flip vertical” option is a quick shortcut for a 180-degree rotation, while “Flip horizontal” offers a unique effect that cannot be achieved with the freehand rotate handle. This feature is fantastic for creating symmetrical designs, playing with reflections, or offering a fresh perspective on stock photos. For instance, a landscape photo of a lake could be duplicated, flipped vertically, and positioned below the original to simulate a perfect reflection.
Navigating Frames and Grids: Rotating Images within Constraints
Canva’s frames and grids are powerful tools for creating structured layouts and visual interest. However, rotating an image within these elements requires a slightly different approach if you want to keep the frame or grid itself stationary.
- Select Image within Frame/Grid: Click on the image that is placed inside a frame or grid.
- Access Edit Photo: Tap the “Edit photo” button on the top toolbar above the editor.
- Go to Crop Tab: Within the editing options, navigate to the “Crop” tab.
- Use the Rotate Slider: You will find a “Rotate” slider. Drag this slider left or right to adjust the angle of the image inside the frame or grid. The frame/grid itself will remain in its original orientation.
This nuanced control is crucial for maintaining the integrity of your design layout while still allowing creative freedom over the individual images, making it indispensable for complex graphic design and digital art compositions. It ensures that your curated photo ideas or thematic collections can be arranged beautifully without sacrificing individual image adjustments.
Once you are satisfied with all your rotations and design adjustments, saving your work is straightforward:
- Click the “Share” button in the top-right corner.
- Scroll down and select “Download.”
- Choose your preferred “File type” (e.g., JPG for web, PNG for transparency, SVG for vector graphics).
- Click “Download” to save your perfected design. Tophinhanhdep.com recommends choosing appropriate file types for your intended use to ensure optimal quality and performance.
Mastering Rotation on Mobile: Design on the Go
Canva’s mobile app provides incredible flexibility, allowing you to create and edit designs from anywhere. The process for rotating images on your smartphone or tablet, whether Android or iPhone, mirrors the desktop experience with touch-optimized controls.
Intuitive Touch Controls for Quick Adjustments
Mobile design prioritizes speed and ease of use, and Canva’s rotate handle on mobile is perfectly adapted for touchscreens.
- Create or Open Design: Tap the purple plus button at the bottom of your screen to start a new design, or select an existing one from your “Recent designs.”
- Select or Add Image: Find the image you want to rotate on your canvas. If it’s not there, add it using the “Use in a new design” button or by uploading from your device.
- Engage Rotate Handle: Tap and hold the circular rotate handle (the two arrows inside a circle) located below the image.
- Drag to Rotate: Drag the handle with your finger to your desired angle.
This method is ideal for quick, on-the-fly adjustments, perfect for busy creators working on social media graphics or quick photo edits.
Advanced Mobile Rotation for Specific Angles
Unlike the desktop version, the mobile app’s freehand rotation might not show the exact angle degree by default. However, you can still achieve precise, numerical rotations.
- Select the Image(s): Tap the image (or multiple images if desired) you want to rotate.
- Access Position Option: From the toolbar at the bottom of your screen, scroll left or right until you find the “Position” option.
- Navigate to Advanced Tab: Within the Position menu, scroll left to the “Advanced” tab.
- Enter Numerical Degree: Locate the “Rotate” text box in the bottom-right corner. Type in your exact desired degree of rotation.
- Apply Changes: Exit the “Position” menu to apply the changes to your image.
This powerful feature on mobile ensures that whether you’re working on high-resolution photography for Tophinhanhdep.com’s collections or intricate digital art pieces, you have full control over element orientation, even when designing on the go.
Mobile Flipping Techniques
Flipping images on mobile is just as straightforward as on desktop, offering the same versatility for mirroring and vertical inversion.
- Select Your Image: Tap the image you wish to flip.
- Locate Flip Icon: On the toolbar below the editor, find the “Flip” icon.
- Choose Flip Direction: Select “Flip vertical” to rotate the image 180 degrees (upside down) or “Flip horizontal” to mirror it sideways.
This quick flip functionality is excellent for creating symmetrical designs, generating creative effects for wallpapers or backgrounds, and providing a fresh perspective on any image or graphic, enhancing your overall visual design capabilities.
Once your mobile design is complete and all elements are perfectly rotated and positioned:
- Tap the “Export” button (an upward-pointing arrow in a partial box) in the upper-right corner.
- Select the “Download” option.
- Choose your preferred “File type.”
- Tap “Download” to save your design to your device.
Expanding Your Creative Horizon: Rotation Across Canva Elements
Canva’s versatility extends far beyond just images. The intuitive rotation tools apply to virtually any element you introduce into your design, offering a consistent and powerful creative experience.
Applying Rotation to Text, Graphics, and Videos
The handy rotate handle and numerical input options aren’t exclusive to photos. You can apply the exact same techniques to a wide array of other elements in Canva, which dramatically broadens your design possibilities.
- Text Boxes: A monotonous, straight text box can be given a dynamic tilt to add emphasis or an artistic touch. This is perfect for designing unique logos, engaging social media posts, or eye-catching headers on Tophinhanhdep.com’s various visual design templates. You can even create vertical text by adjusting the text box width and then rotating it. While the article content mentions “How to make text vertical in Canva by adjusting text box width,” a clever rotation can also achieve this by simply rotating a standard text box by 90 or 270 degrees.
- Graphics and Illustrations: Icons, shapes, and other graphic elements can be rotated to create patterns, indicate direction, or break the monotony of a symmetrical layout. This is essential for digital art, where every element contributes to the overall composition.
- Videos: Even videos can be rotated! If you have a poorly shot video clip that’s sideways, a quick rotation can fix it, making it usable within your Canva design. This functionality transforms Canva into a basic video editing tool, allowing for more cohesive visual storytelling.
The ability to rotate all these elements consistently empowers designers to integrate diverse media seamlessly, creating unified and visually appealing compositions.
Integrating Rotation with Tophinhanhdep.com’s Visual Design Principles
Tophinhanhdep.com emphasizes strong visual design principles, encompassing graphic design, digital art, and creative photo manipulation. Image rotation is a critical tool within this framework:
- Composition and Balance: Rotation can drastically alter the balance of a design. Tilting an element can shift visual weight, creating asymmetry that is sometimes more dynamic and engaging than perfect symmetry. This is crucial for creating visually striking wallpapers or backgrounds.
- Emphasis and Flow: Strategic rotation can guide the viewer’s eye through a design, creating a sense of flow or drawing attention to a particular element. An arrow graphic rotated to point toward key information is a simple yet effective example.
- Mood and Theme: As discussed, rotation contributes significantly to the overall mood. An aggressive angle might suit an “abstract” or “sad/emotional” theme, while a gentle tilt could enhance “beautiful photography” or “aesthetic” collections. For thematic collections on Tophinhanhdep.com, consistent rotation styles can unify disparate images.
- Creative Ideas and Trending Styles: Many trending graphic design styles incorporate rotated and skewed elements to create modern, edgy looks. By mastering rotation, you can easily adapt your designs to these contemporary aesthetics, keeping your content fresh and relevant for Tophinhanhdep.com’s audience.
Enhancing Tophinhanhdep.com’s Image Collections with Dynamic Angles
For creators contributing to or utilizing Tophinhanhdep.com’s extensive image collections, effective rotation can significantly enhance the value and appeal of visuals:
- Wallpapers and Backgrounds: A landscape wallpaper can be rotated to offer a portrait orientation for mobile devices, maximizing its utility. Abstract backgrounds can be rotated to create endless variations from a single source image, providing more options for users.
- Aesthetic and Nature Images: The subtle rotation of a flower or a branch in a nature shot can improve its aesthetic appeal, making it feel more organic and less “posed.”
- High-Resolution and Stock Photos: When working with high-resolution stock photos, rotation allows you to crop and reframe elements without losing quality, transforming a single stock image into multiple unique compositions. This versatility is key for digital photography and image editing styles that demand flexible source material.
- Mood Boards and Photo Ideas: Creating a mood board often involves arranging diverse images and elements. Rotation helps to interlink these elements, creating visual pathways and a cohesive narrative, which is essential for developing new photo ideas and inspirations.
By applying intelligent rotation, you can ensure that every visual asset, from simple images to complex graphic designs, contributes meaningfully to the overall message and aesthetic, truly embodying the spirit of Tophinhanhdep.com’s diverse content offerings.
Finalizing Your Design: Saving and Optimizing with Tophinhanhdep.com’s Ecosystem
After meticulously rotating, flipping, and arranging all your elements in Canva, the final steps involve saving your masterpiece and potentially leveraging Tophinhanhdep.com’s broader suite of tools for ultimate optimization.
Exporting Your Masterpiece from Canva
Once you’re completely satisfied with every angle and placement in your Canva design, the process of exporting it for use or sharing is straightforward and consistent across desktop and mobile platforms.
- Initiate Download/Export:
- On Desktop: Click the “Share” button in the top-right corner, then scroll down to the “Download” option.
- On Mobile: Tap the “Export” button (the upward-pointing arrow in a partial box) in the upper-right corner, then select “Download.”
- Choose Your File Type: Canva offers various file formats, each suitable for different purposes:
- JPG: Ideal for photos and designs with gradients, offering smaller file sizes for web use. Perfect for wallpapers and aesthetic images where file size is a consideration for fast loading.
- PNG: Best for designs requiring transparency (e.g., logos, elements with transparent backgrounds) or designs with sharp lines and text. Excellent for high-resolution graphics and digital art where quality and transparency are critical.
- SVG: A vector graphic format, meaning it’s scalable to any size without loss of quality. This is premium feature, generally suitable for intricate graphic design elements that might be used across various platforms and sizes.
- Other options like PDF (Standard/Print) or MP4 Video might also be available depending on your design’s content (e.g., if you incorporated video elements or animations). Tophinhanhdep.com strongly recommends selecting the file type that best suits your intended output, whether it’s for digital display, print, or further editing.
- Final Download: Hit the “Download” button to save your finished design to your device.
Leveraging Tophinhanhdep.com’s Image Tools for Post-Production Perfection
While Canva excels at design and manipulation, Tophinhanhdep.com offers a comprehensive array of dedicated image tools that can take your perfectly rotated Canva designs to the next level of optimization and utility. These tools complement Canva’s capabilities, ensuring your visuals are not just beautiful but also performant and versatile.
- Image Optimizers and Compressors: After creating your design, especially if it includes high-resolution photography or detailed digital art, it might have a large file size. Tophinhanhdep.com’s image compressors and optimizers can reduce file size without significantly compromising visual quality. This is crucial for web performance, ensuring your beautiful backgrounds and aesthetic images load quickly on any platform.
- AI Upscalers: If you started with an image of lower resolution and magnified it in Canva, or if you simply need to prepare your final design for a much larger display (e.g., a print billboard from a web-optimized design), Tophinhanhdep.com’s AI upscalers can intelligently enhance the resolution, adding detail and sharpness. This is a game-changer for digital photography and stock photos that need to adapt to various output requirements.
- Image Converters: Perhaps you downloaded your design as a PNG from Canva but now need it in a different format for a specific application. Tophinhanhdep.com’s converters can effortlessly change your file type, offering flexibility for all your visual content needs.
- Image-to-Text Tools: For designers working with images containing text (e.g., a creative graphic with a rotated text element), Tophinhanhdep.com’s image-to-text functionality can extract that text, making your content more accessible and searchable. This can be useful for cataloging your thematic collections or extracting quotes from beautiful photography.
By integrating the powerful design capabilities of Canva with the specialized optimization tools available on Tophinhanhdep.com, you create an end-to-end workflow that ensures your images, photography, and visual designs are not only creatively compelling but also technically perfect. This holistic approach empowers you to bring your creative ideas to life with unparalleled quality and efficiency.
In conclusion, mastering the art of image rotation in Canva is more than just learning a feature; it’s about unlocking a fundamental design principle that elevates your visual storytelling. Whether you’re crafting vibrant wallpapers, designing compelling graphic art, or curating inspiring photo collections, the ability to precisely control the orientation of your elements is invaluable. With the detailed guidance provided here and the complementary resources found on Tophinhanhdep.com, you are now equipped to infuse a stylish twist into every design, transforming your creative vision into a tangible reality.