Mastering Image Rotation in Photoshop: A Comprehensive Guide for Tophinhanhdep.com Users

At Tophinhanhdep.com, we understand that a truly captivating image, whether it’s a breathtaking nature shot, an aesthetic wallpaper, or a stunning piece of abstract digital art, often hinges on the smallest details. One such fundamental detail, yet incredibly powerful in its application, is image rotation. From correcting a slightly skewed horizon in your high-resolution photography to dynamically arranging elements for a complex graphic design, knowing how to efficiently rotate images and layers in Adobe Photoshop is an indispensable skill.
This guide is crafted for the Tophinhanhdep.com community – photographers, designers, and enthusiasts alike – to demystify the various methods of image rotation within Photoshop. We’ll delve into the nuances of rotating entire canvases, precisely manipulating individual layers, and exploring advanced techniques that streamline your workflow. By mastering these tools, you’ll elevate your visual content, ensuring that every image you create or enhance meets the high standards of quality and aesthetic appeal that Tophinhanhdep.com embodies. Whether you’re preparing stock photos, optimizing images for web, or simply bringing a creative idea to life, proper rotation is your first step towards visual perfection.

Rotating the Entire Image Canvas: Essential for Correcting and Composing
Sometimes, the simplest fix makes the biggest impact. An image captured slightly off-kilter, a scanned document needing reorientation, or a wallpaper that just doesn’t quite fit the aspect ratio you envisioned – these are all scenarios where rotating the entire image canvas comes into play. This global adjustment reorients your entire composition, which is often the most direct route to correcting foundational issues or achieving a desired aesthetic.
Step-by-Step: Global Image Orientation
To rotate your entire image in Photoshop, the process is straightforward and accessible through the main menu. This method ensures that every pixel of your image, across all layers, is uniformly rotated or flipped, preserving the overall composition.
-
Open Your Image in Photoshop: Begin by launching Adobe Photoshop and opening the image you wish to rotate. You can do this by navigating to
File > Openand selecting your desired image file. This is your initial canvas, ready for transformation. -
Access the Image Rotation Menu: Once your image is open, look towards the top menu bar. Click on
Image, then hover your cursor overImage Rotation. A submenu will appear, presenting you with a range of rotation and flipping options. This is your command center for global image adjustments.

- Choose Your Rotation Option: The
Image Rotationsubmenu offers several predefined choices, catering to common rotational needs:- 180 degrees: This option rotates your entire image halfway around a complete circle, essentially turning it upside down. It’s useful for correcting images that were scanned or captured inverted.
- 90 degrees CW (Clockwise): Rotates the image a quarter of a circle to the right. Ideal for changing a portrait-oriented landscape photo to a standard landscape view, or vice versa, to match the aesthetic you’re aiming for.
- 90 degrees CCW (Counter-Clockwise): Rotates the image a quarter of a circle to the left. This is the inverse of 90 degrees CW, serving similar reorientation purposes.
- Arbitrary: This powerful option allows you to define a custom angle of rotation. A dialog box will appear, prompting you to enter a specific degree value and select a direction (CW or CCW). This is perfect for fine-tuning a slightly crooked horizon line in your beautiful nature photography or achieving a precise angle for an abstract composition.
- Flip Canvas Horizontal: This mirrors the entire image across a vertical axis, as if looking at it in a mirror. It can be used for artistic effects or to correct orientations, particularly with text or signs.
- Flip Canvas Vertical: This mirrors the entire image across a horizontal axis, essentially flipping it upside down.
Standard Rotations: 90, 180 Degrees, and Arbitrary Angles
For photographers focusing on high-resolution nature scenes or digital artists crafting intricate abstract backgrounds, precision is key. The standard 90 and 180-degree rotations are quick fixes for common orientation errors. Imagine you’ve captured a stunning waterfall, but your camera was slightly tilted. The “Arbitrary” rotation becomes your best friend here. By entering a small degree, like 1.5 degrees CCW, you can subtly correct the tilt, transforming a good photo into a perfect one ready for Tophinhanhdep.com’s aesthetic collections. This level of control is crucial for maintaining the integrity and visual impact of your images.
Flipping the Canvas: Horizontal and Vertical Mirrors
Beyond simple rotation, Photoshop also allows you to flip the entire canvas. This creates a mirror image of your entire artwork. “Flip Canvas Horizontal” reflects the image from left to right, while “Flip Canvas Vertical” flips it top to bottom. These functions are not just for correcting inverted scans; they are powerful creative tools. For instance, a graphic designer might use “Flip Canvas Horizontal” to create symmetry in a background design, or an artist might experiment with “Flip Canvas Vertical” to explore new perspectives for an emotional or abstract piece. This quick manipulation can unlock unexpected creative ideas and photo opportunities, adding unique flair to your visual designs.
Remember, any changes made via Image > Image Rotation are permanent to the entire canvas once saved, affecting all layers equally. If you are not satisfied with a rotation, you can always use the undo function (Ctrl+Z on Windows or Cmd+Z on Mac) to revert your last action. Once you’re happy with the orientation, remember to save your work by going to File > Save As to preserve your adjustments without overwriting the original.
Precision Control: Mastering Layer Rotation for Detailed Elements
While global canvas rotation is essential for overall orientation, the true magic of Photoshop for visual designers and digital artists lies in its ability to manipulate individual elements within an image. This is where layer rotation comes into its own, offering unparalleled flexibility for photo manipulation, graphic design, and crafting intricate aesthetic compositions. At Tophinhanhdep.com, we celebrate the artistry that comes from precise control, and mastering layer rotation is a cornerstone of that artistic journey.
Identifying and Selecting Layers for Transformation
Before you can rotate anything, Photoshop needs to know what you want to rotate. This involves interacting with the Layers panel, a critical component of any complex Photoshop project.
-
Make the Layers Panel Visible: If your Layers panel isn’t already open, navigate to
Window > Layers. It typically appears as a floating panel or docked on the right side of your workspace. This panel lists every individual component of your image, from text boxes to background elements. -
Select the Desired Layer(s): In the Layers panel, each layer is represented by a thumbnail and a name. To select a single layer, simply click on its entry in the panel. The selected layer will be highlighted.
- Multiple Layers: If you want to rotate several layers simultaneously, hold down
Ctrl(Windows) orCommand(Mac) and click on each layer you wish to include in the selection. - Locked Layers: Be aware of a padlock icon next to a layer’s name. This indicates a locked layer, which cannot be modified. Simply click the padlock icon to unlock it before proceeding.
- Visibility: You can temporarily hide other layers by clicking the eye icon next to their thumbnails. This helps you focus solely on the layer you are currently rotating, especially useful for complex photo manipulation or digital art projects.
- Multiple Layers: If you want to rotate several layers simultaneously, hold down
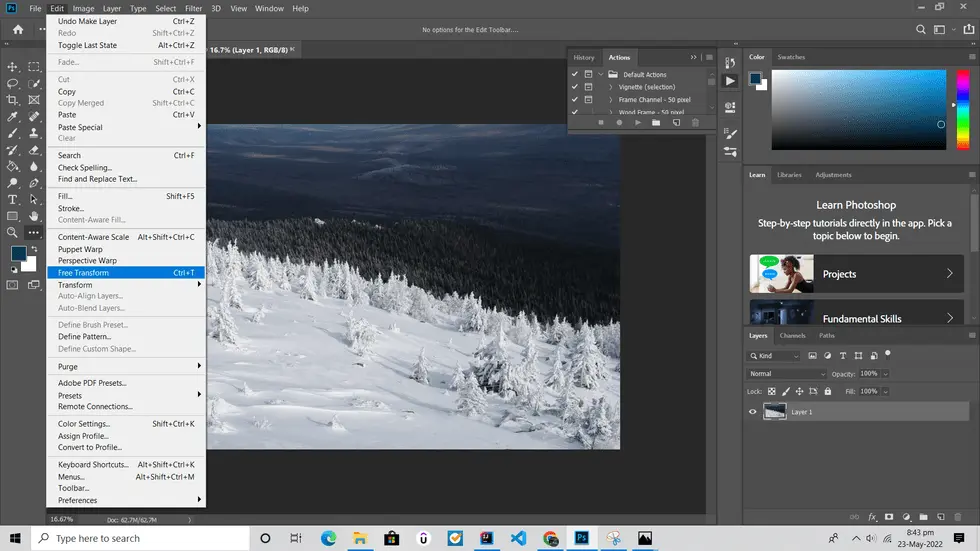
Free Transform: Intuitive Rotation with Bounding Boxes
The Free Transform tool is arguably the most versatile and intuitive method for rotating individual layers. It provides visual control, allowing you to drag and adjust elements with immediate feedback. This is particularly beneficial for creative ideas where exact angles aren’t initially known, such as placing abstract shapes or styling unique text layouts.
-
Activate Free Transform: With your layer(s) selected, press
Ctrl+T(Windows) orCommand+T(Mac). A bounding box will appear around your selected content. This box defines the editable area of your layer. -
Rotate Visually: Hover your mouse cursor just outside any of the corner handles of the bounding box. The cursor will change into a curved, double-headed arrow – the universal symbol for rotation. Click and drag your mouse around the bounding box. As you drag, your layer will rotate in real-time.
- Precision Snapping: To rotate in precise 15-degree increments (e.g., 90, 180, 270 degrees), hold down the
Shiftkey while dragging. This is invaluable for aligning elements for clean graphic design or preparing images for a high-resolution stock photography collection where exact alignment is paramount. - Pivot Point: By default, the rotation occurs around the center of the bounding box (the pivot point). You can click and drag this pivot point to a different location if you want the layer to rotate around another axis, which is incredibly useful for dynamic compositions or intricate digital art pieces.
- Precision Snapping: To rotate in precise 15-degree increments (e.g., 90, 180, 270 degrees), hold down the
-
Enter Specific Angles (Optional): While in Free Transform mode, you can also use the Options Bar at the top of the Photoshop window. Look for the rotation icon (a circular arrow) and an associated input field. Here, you can type in a precise numerical degree for rotation. This offers the best of both worlds: visual dragging for initial placement, and numerical entry for fine-tuning.
-
Finalize the Transformation: Once you are satisfied with the rotation, press
Enter(orReturnon Mac) to commit the changes. To cancel, pressEsc.
Specific Rotations for Text and Shapes
Text and shapes are fundamental elements in visual design, and their rotation requires the same precision as photographic elements. Fortunately, the principles of layer rotation apply seamlessly here. Whether you’re creating an eye-catching banner for Tophinhanhdep.com or designing a complex infographic, rotating text and shapes correctly is crucial.
-
Rotating Text Layers: Once you’ve typed out your text, it resides on its own layer. Select this text layer in the Layers panel, then use the Free Transform tool (
Ctrl+TorCmd+T). You can then visually drag to rotate the text, or input a specific angle in the Options Bar. This allows you to create dynamic headlines, tilted captions, or text elements that follow the flow of your digital art. -
Rotating Shapes: Whether you’re working with Photoshop’s predefined shapes (rectangles, circles, custom shapes) or vectors, they too exist on their own layers. The same Free Transform method applies: select the shape layer, activate Free Transform, and rotate as needed. This is essential for building abstract backgrounds, creating symmetrical patterns, or designing unique graphical elements. For instance, rotating a simple rectangle by 45 degrees can instantly transform a static layout into a more dynamic and engaging visual design.
By mastering these layer-specific rotation techniques, you gain immense control over your compositions. This granular control is what distinguishes professional digital art and high-quality photography, enabling you to bring your most creative ideas to life and create truly unique visual experiences for Tophinhanhdep.com’s diverse collections.
Advanced Techniques and Workflow Enhancements for Tophinhanhdep.com Creators
For seasoned photographers, graphic designers, and digital artists within the Tophinhanhdep.com community, efficiency and nondestructive editing are paramount. Photoshop offers advanced techniques that not only accelerate your workflow but also protect the quality of your high-resolution images. Integrating these methods for rotation ensures that your creative process is as smooth and robust as the stunning visuals you produce.
Leveraging Transform Shortcuts for Speed
In the fast-paced world of digital creation, every second saved contributes to a more fluid and productive workflow. Photoshop’s array of keyboard shortcuts for transformation actions can dramatically speed up your rotation tasks, especially when dealing with multiple layers or frequent adjustments.
The cornerstone is the Free Transform shortcut: Ctrl+T (Windows) or Command+T (Mac). This instantly brings up the bounding box, allowing for immediate visual rotation, scaling, skewing, and warping.
Beyond this, several modifier keys enhance Free Transform’s capabilities:
- Hold
Shiftwhile rotating to constrain rotations to 15-degree increments, perfect for achieving precise 90-degree turns or architectural alignments in your photography. - Hold
Alt(Windows) orOption(Mac) while rotating to rotate around the center point of the bounding box, even if you’ve manually moved the pivot point. - Combine
Shift + Alt(Windows) orShift + Option(Mac) to rotate in 15-degree increments around the center. - After initiating a rotation, you can
Right-Click(Windows) orControl-Click(Mac) inside the bounding box to access a contextual menu with other transform options, including predefined rotations (180, 90 CW, 90 CCW) and flips (horizontal, vertical). This keeps all your transformation options literally at your fingertips.
These shortcuts become muscle memory with practice, allowing you to fluidly adjust elements without breaking your creative flow. This is crucial when you’re deeply immersed in creating an intricate photo manipulation or a detailed aesthetic background for Tophinhanhdep.com.
Nondestructive Editing with Smart Objects
One of Photoshop’s most powerful features for preserving image quality, especially important for high-resolution photography and digital art destined for Tophinhanhdep.com, is the Smart Object. When you convert a layer to a Smart Object, Photoshop embeds the original image data (or a reference to it). Any transformations, including rotations, are applied to a virtual wrapper around this data, rather than directly to the pixels.
How Smart Objects enhance rotation:
- Quality Preservation: You can rotate a Smart Object multiple times, scale it up and down, and transform it in various ways without any loss of image quality. If you were to repeatedly rotate a regular pixel layer, each transformation would resample the pixels, leading to degradation and blurriness over time. For high-resolution stock photos or detailed digital artwork, this is a game-changer.
- Flexibility: You can always revert a Smart Object to its original, untransformed state, or change a rotation even after saving and reopening the file. This offers incredible freedom for experimentation in your visual design and creative ideas.
- Linked Instances: If you duplicate a Smart Object, all duplicates remain linked to the original source. Rotate one instance, and you can easily apply the same rotation to all others, or rotate them independently. This is ideal for mood boards or thematic collections on Tophinhanhdep.com where consistency across multiple elements is desired.
To convert a layer to a Smart Object, Right-Click (Windows) or Control-Click (Mac) on the layer in the Layers panel and select Convert to Smart Object. Once converted, proceed with your rotations as you would with any other layer. This practice is highly recommended for all elements you plan to transform repeatedly or for final high-resolution output.
Batch Processing for High-Volume Rotations
For users managing large collections of images—such as photographers processing high-resolution event photos, or administrators curating extensive galleries of nature or abstract backgrounds for Tophinhanhdep.com—individual rotation can be incredibly time-consuming. Photoshop’s Batch Processing feature, powered by Actions, automates repetitive tasks like rotation across numerous files.
-
Record an Action: First, you need to record the rotation steps as an “Action.” Open a sample image (
File > Open). Open the Actions panel (Window > Actions). Click the “Create new action” icon (a square with a plus sign). Give your action a name (e.g., “Rotate 90 CW”) and click “Record.” Now, perform the rotation (Image > Image Rotation > 90 degrees CWorEdit > Transform > Rotate 90 CWfor a layer-based approach if you have a consistent layer structure). Once the rotation is complete, click the “Stop playing/recording” icon (a square) in the Actions panel. -
Prepare Your Images: Place all the images you want to apply the rotation to in a single folder. You can also specify a destination folder for the processed images.
-
Run Batch Process: Go to
File > Automate > Batch. In the dialog box:- Set: Choose the set where you saved your recorded action.
- Action: Select the specific rotation action you just created.
- Source: Choose
Folderand clickChooseto select the folder containing your images. - Destination: Select
Folderand clickChooseto select a folder where Photoshop will save the rotated copies. Ensure this is a different folder than your source to avoid overwriting originals. - File Naming: Define how your new files will be named.
- Click
OK. Photoshop will now open each image, apply your recorded rotation, and save the result in the destination folder automatically.
Batch processing is an invaluable tool for efficiency, especially when dealing with hundreds or thousands of high-resolution images. It’s perfect for preparing large sets of stock photos, organizing image collections, or standardizing wallpapers for Tophinhanhdep.com, significantly reducing manual effort and ensuring consistent results across your entire library.
Visual Design and Image Inspiration: The Creative Impact of Rotation
Beyond mere correction, image rotation is a powerful tool in visual design, capable of transforming ordinary images into compelling works of art. At Tophinhanhdep.com, where aesthetic, nature, abstract, and emotional photography find their home, understanding the creative implications of rotation opens up a new realm of possibilities.
Rotation in Graphic Design and Digital Art
For graphic designers and digital artists, rotation is not just about fixing orientation; it’s about crafting dynamic compositions, expressing movement, and creating focal points.
- Dynamic Layouts: Slightly tilting text layers or graphic elements can break the monotony of a static layout, injecting energy and visual interest. Imagine an abstract background design on Tophinhanhdep.com where geometric shapes are rotated at varying, unconventional angles to create a sense of depth and complexity.
- Sense of Movement: A subtle rotation can imply motion. A stock photo of a bird in flight, if slightly rotated along its axis, can enhance the feeling of its aerodynamic movement.
- Emphasis and Hierarchy: Rotating an element slightly out of alignment with others can draw the viewer’s eye, creating visual hierarchy. This is particularly effective in photo manipulation, where a single, rotated object can stand out from a carefully composed scene.
Experimenting with different rotation angles, even seemingly minor ones, can dramatically alter the mood and message of your visual designs.
Leveraging Image Inspiration and Collections
The inspiration for how to rotate an image often comes from observing effective visual designs. Tophinhanhdep.com’s extensive collections of wallpapers, backgrounds, and aesthetic photography offer a rich source of such inspiration.
- Mood Boards: As you browse through Tophinhanhdep.com’s thematic collections and photo ideas, pay attention to how artists use rotation. Notice how a slight tilt in a portrait photograph can convey vulnerability, or how aggressively rotated abstract patterns evoke chaos or dynamism. Create mood boards based on these observations to guide your own projects.
- Trending Styles: The world of visual design is constantly evolving. Trending styles often feature innovative uses of rotation, from skewed grids in website designs to diagonally placed typography in digital art posters. Keep an eye on Tophinhanhdep.com for trending styles and consider how rotation contributes to their aesthetic appeal.
- Creative Ideas: Use rotation to generate creative ideas for your own work. What if that tranquil nature scene was slightly tilted to give it a more dramatic perspective? How would flipping a background image horizontally affect the overall balance of your digital art? These explorations can lead to genuinely unique and impactful visuals.
Rotation, therefore, transcends a simple technical adjustment; it becomes an integral part of your creative toolkit, allowing you to tell richer stories and evoke stronger emotions through your images.
Beyond Rotation: Integrating with Tophinhanhdep.com’s Image Tools
Mastering image rotation in Photoshop is a foundational step towards creating truly professional-grade visual content. For the Tophinhanhdep.com user, this skill seamlessly integrates with our suite of Image Tools and commitment to high-quality photography. A perfectly rotated image is often the prerequisite for optimal performance with other essential image manipulation tasks.
Preparing Images for Converters, Compressors, and Optimizers
Before you compress, convert, or optimize an image for web use or storage, ensuring its correct orientation and composition is paramount. An image that is tilted or incorrectly flipped, even subtly, will not look its best, regardless of how well it is compressed or optimized.
- Pre-Optimization: Always perform your rotation and compositional adjustments before using image compressors or optimizers. This ensures that the optimization process is applied to the final, intended visual, maximizing clarity and minimizing artifacts. Cropping out unnecessary rotated white space, for example, will lead to smaller, more efficient file sizes.
- High-Resolution Integrity: When working with high-resolution photography, preserving every pixel’s integrity is crucial. Nondestructive rotation with Smart Objects (as discussed in Advanced Techniques) ensures that your initial compositional tweaks don’t degrade the image quality before it’s even converted or upscaled.
- Image Converters: If you’re converting image formats (e.g., from RAW to JPEG for web, or PNG to WEBP for faster loading), having the image perfectly rotated beforehand means the converted file will immediately be ready for display on Tophinhanhdep.com or other platforms, without needing further edits that could reduce quality.
Enhancing Visuals with AI Upscalers and Image-to-Text Tools
Once your images are perfectly oriented and composed, Tophinhanhdep.com’s AI Upscalers can take them to the next level, and Image-to-Text tools can derive accurate information.
- AI Upscaling: An AI Upscaler works best on a clean, well-composed image. Rotating an image to its ideal angle before upscaling ensures that the AI can accurately enhance details and resolution without trying to correct an awkward orientation. This results in sharper, more impressive high-resolution images, perfect for stunning wallpapers or large-format prints.
- Image-to-Text: For images containing text, precise rotation is critical for our Image-to-Text tools. A straight, correctly oriented text block will yield far more accurate and reliable extraction results than one that is tilted or warped. This is vital for tasks like digitizing documents, extracting quotes from digital art, or categorizing stock photos based on embedded labels.
By integrating your Photoshop rotation skills with Tophinhanhdep.com’s advanced image tools, you create a powerful workflow that produces visually stunning, highly optimized, and intelligently processed imagery. This synergistic approach is at the heart of our mission: to empower users to create and manage exceptional visual content.
In conclusion, mastering image rotation in Photoshop is far more than a technicality; it’s a creative imperative. It’s about empowering you to correct, compose, and convey your artistic vision with precision and impact. From the simplest global flips to intricate layer manipulations and automated batch processes, Photoshop provides the tools, and Tophinhanhdep.com provides the platform and inspiration, for you to transform your digital imagery into something truly remarkable. So, dive in, experiment, and let your creativity rotate into new dimensions!