How to Save an Image from a Google Doc

In today’s visually-driven world, images are more than just decorative elements; they are powerful tools for communication, artistic expression, and memory. Whether embedded in a personal journal, a collaborative project, or a professional report on Google Docs, these images often hold significant value. From stunning nature photography captured by a friend to abstract art used for design inspiration, or even just a compelling background image for your next digital art piece, the need to extract and preserve these visuals in their best possible quality is paramount. While Google Docs excels in automatic saving and collaborative features, its direct image saving functionality isn’t always as intuitive as one might hope. Unlike simply right-clicking and downloading an image from a standard webpage, extracting visuals from a Google Doc often requires a few clever workarounds.
At Tophinhanhdep.com, we understand the importance of high-resolution images, vibrant wallpapers, and creative visual assets for everything from personal aesthetic collections to professional graphic design projects. Our platform is dedicated to providing an extensive array of images – be it tranquil nature scenes, thought-provoking abstract designs, or poignant sad/emotional photography – and equipping you with the tools and knowledge to manage them effectively. This comprehensive guide will walk you through various methods to save images from Google Docs on both desktop and mobile devices, ensuring you can seamlessly integrate these visuals into your own photography, digital art, or image inspiration collections. We’ll delve into techniques that help maintain image quality, discuss practical applications for your saved visuals, and even touch upon how Tophinhanhdep.com’s suite of image tools, like AI upscalers and converters, can further enhance your extracted assets. Get ready to unlock the full potential of the images hidden within your Google Docs.

Strategies for Extracting Images from Google Docs on Desktop
Saving images from Google Docs on a desktop computer offers a range of methods, each with its own advantages, depending on whether you need a single image or a batch, and your preferred level of convenience. From integrating with other Google services to leveraging external applications, these techniques ensure that your valuable visual content—be it a striking piece of beautiful photography or an aesthetic background for your next project—can be retrieved with minimal hassle and maximum fidelity.
Leveraging Google Keep for Quick Image Saves
One of the most straightforward and integrated ways to save a single image from Google Docs on your desktop is by using Google Keep. This method is particularly handy for individual images that you want to quickly grab without exporting the entire document. It’s a testament to Google’s ecosystem, allowing seamless interaction between its various services.
How it Works:
- Open your Google Docs document: Navigate to the document containing the image you wish to save.
- Right-click the desired image: A context menu will appear.
- Select “Save to Keep”: Look for this option in the dropdown menu, usually accompanied by a lightbulb icon. This action will open Google Keep in the right sidebar of your Google Docs interface, saving the selected image as a new note. This instantaneous transfer is excellent for quick captures of images you might later use as a wallpaper or a reference for a creative idea.
- Right-click the image within the Google Keep sidebar: Another context menu will appear, but this time it’s specific to the image within Keep.
- Choose “Save image as…”: This will prompt your browser’s download window, allowing you to name the image file and select its destination on your computer.
This method is ideal for those times when you encounter a compelling visual—perhaps a high-resolution stock photo or a unique abstract design—within a document and want to immediately add it to your personal collection or mood board. Tophinhanhdep.com users, in particular, will appreciate this for curating specific “Photo Ideas” or “Thematic Collections” as they browse documents. The image typically retains its original quality, making it suitable for subsequent digital photography projects or even as a background. After saving, you can simply delete the note from Google Keep if it was a temporary capture, keeping your Keep organized. This quick save option is a cornerstone for efficient visual content management for anyone passionate about images and visual design.
The Microsoft Word Export Method
For users who are accustomed to Microsoft Word or need to handle images within a familiar desktop application, exporting your Google Docs file to a .docx format offers a robust pathway for image extraction. This method is particularly useful when you prefer to work with traditional document software and desire precise control over each image, making it a valuable technique for digital photography enthusiasts and graphic designers alike.
Step-by-Step Process:
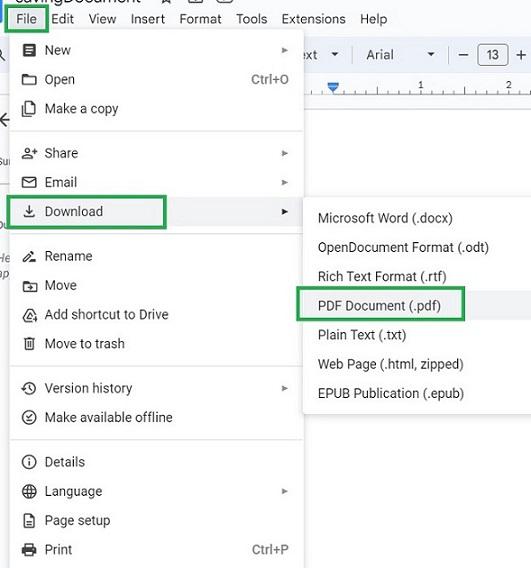
- Open your Google Docs document: Access the document from which you intend to extract images.
- Go to File > Download > Microsoft Word (.docx): This action will download a copy of your Google Docs file to your computer, converted into a Word document format. This conversion is generally quite accurate, preserving much of the original layout and image quality.
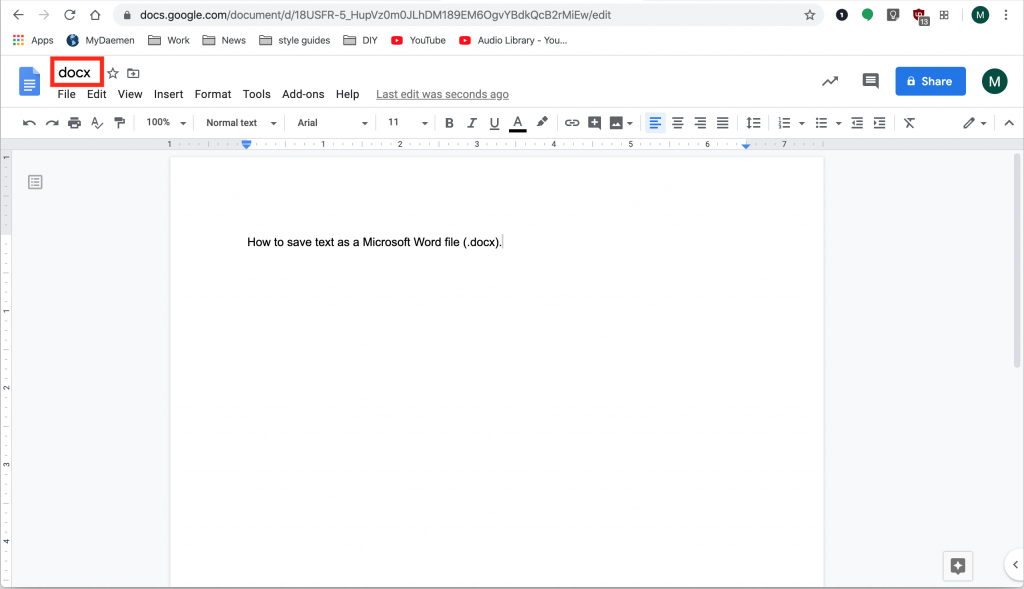
- Open the downloaded .docx file in Microsoft Word: Double-click the file from your downloads folder or open it directly through Word.
- Right-click on any image within the Word document: A context menu will appear.
- Select “Save as Picture…”: This option is specifically designed for image extraction.
- Choose your desired file format and location: Word typically offers options like PNG, JPEG, GIF, or BMP. For high-resolution images, PNG or JPEG are usually preferred as they balance quality and file size effectively. You can also rename the image before saving.
This method is excellent for ensuring high-resolution image quality is maintained. Since you’re dealing with the image directly within Word, you can verify its properties and ensure it meets the standards required for professional photography or graphic design work. For Tophinhanhdep.com users focused on creating aesthetic wallpapers or using stock photos in their projects, this precision is invaluable. It also allows for individual inspection of each image, ensuring that any specific editing styles or visual design elements embedded within the image are preserved before it becomes part of a broader collection. The Microsoft Word method serves as a reliable bridge between cloud-based productivity and desktop-level image management.
Batch Image Extraction via Web Page Download
When your Google Docs document contains numerous images, manually saving each one can be a tedious and time-consuming process. The “Download as Web Page” method offers a highly efficient solution for extracting all images in a document simultaneously, packaging them into a convenient ZIP archive. This approach is a godsend for anyone working with extensive thematic collections, mood boards, or large-scale digital photography projects where mass image retrieval is necessary.
Detailed Instructions:
- Open the Google Docs document: Access the document from which you wish to extract all images.
- Go to File > Download > Web page (.html, zipped): This option instructs Google Docs to convert your document into a web page and compress all associated files (including images) into a single ZIP file.
- Save the ZIP file to your computer: Your browser will prompt you to choose a save location. Once downloaded, navigate to this location.
- Extract the contents of the ZIP file: Right-click the ZIP file and select “Extract All” (on Windows) or simply double-click it (on macOS) to decompress its contents. This will create a new folder with the same name as your document.
- Locate the “images” folder: Inside the newly extracted folder, you will find an “images” subfolder. Open this folder, and voilà! All the images from your Google Docs document will be present, typically named with a generic sequence (e.g., “image1.png”, “image2.jpg”).
This method is invaluable for building comprehensive “Image Inspiration & Collections” from a single document. While the generic naming convention might require some post-extraction organization, the efficiency of obtaining all visuals at once far outweighs this minor inconvenience. For users of Tophinhanhdep.com, this means quickly populating a folder with diverse assets—from nature photography to various aesthetic backgrounds—which can then be categorized, compressed using image tools, or even subjected to AI upscalers for quality enhancement. It’s a powerful technique for anyone involved in visual design or digital art, providing a robust starting point for creative ideas without the tediousness of individual saves.
Utilizing “Publish to the Web” for Direct Image Access
The “Publish to the Web” feature in Google Docs offers a unique and surprisingly direct way to save images, especially when you need specific visuals from a document that you might not want to export in other formats. This method essentially turns your Google Doc into a basic webpage, from which you can then download images just as you would from any other website. It’s particularly effective for preserving the original context of the image and its high resolution, which is critical for photography and visual design purposes.
Step-by-Step Guide:
- Open your Google Docs document: Ensure you are working with the document containing the images you want to save.
- Go to File > Share > Publish to the web: This will open a new dialog box with options for publishing.
- Click the “Publish” button: You’ll be asked to confirm, select “OK.” Google Docs will then generate a public URL for your document.
- Copy the generated URL: The dialog box will display a link under the “Link” tab. Copy this URL.
- Paste the URL into a new browser tab and open it: Your Google Doc will now appear as a simple webpage in your browser.
- Right-click on the image you want to save: Just like on any other webpage, a context menu will appear.
- Select “Save image as…” (or “Save Image”): This will open your browser’s download prompt, allowing you to choose the save location and rename the file.
A notable advantage of this method is that the images often retain their original filenames if they had them, which can be a significant time-saver compared to the “Web Page Download” method that assigns generic names. This is especially useful for high-resolution images or stock photos that you want to integrate into your digital photography portfolio or visual design projects, maintaining clear attribution or organization. Furthermore, the ability to directly access images from a web context aligns well with the principles of Tophinhanhdep.com, where image inspiration and collections are paramount. It ensures that the aesthetic appeal and quality of your desired images, whether for wallpapers or creative ideas, are preserved and readily accessible.
Saving Images from Google Docs on Mobile Devices
Mobile devices have become indispensable tools for productivity and creativity, and Google Docs is no exception. However, saving images from Google Docs on a smartphone or tablet can sometimes feel less intuitive than on a desktop. Different operating systems and app functionalities necessitate distinct approaches. Whether you’re capturing beautiful photography for an aesthetic collection or need a compelling background for a quick design idea, knowing the right mobile method is key. Here, we’ll explore the specific steps for iOS and Android, ensuring your images, regardless of their nature—be it abstract, nature, or even emotional—are always within reach.
iOS Specific: Copying to Notes for Image Preservation
For iPhone and iPad users, a reliable method for saving individual images from Google Docs involves leveraging the native Notes app. This approach capitalizes on the deep integration within the iOS ecosystem, providing a smooth workflow for image preservation that respects the high-resolution standards of modern digital photography.
Step-by-Step for iOS:
- Open the Google Docs app: Launch the official Google Docs application on your iPhone or iPad.
- Access the desired document: Navigate to the document containing the image you wish to save.
- Long-press the image: Tap and hold your finger on the image until a context menu appears.
- Select “Copy”: This action places the image onto your device’s clipboard.
- Open the Notes app: Create a new note or open an existing one where you want to paste the image.
- Long-press in the note and select “Paste”: The copied image will now appear in your note.
- Tap the pasted image: This will open the image in a full-screen preview.
- Tap the Share icon: This icon, typically a square with an upward arrow, is usually located in the bottom-left corner of the screen.
- Select “Save Image”: This will save the image directly to your device’s Photos app.
This method is particularly advantageous for iOS users seeking to quickly add images to their aesthetic collections or curate specific photo ideas. The images generally retain their original quality, making them suitable for use as wallpapers, backgrounds, or as assets in visual design projects. For those dedicated to digital photography, this quick save ensures that compelling visuals from documents—perhaps a stunning nature photograph or an emotional piece of artwork—can be seamlessly transferred to their camera roll for further editing or integration into mood boards. Tophinhanhdep.com users will find this a valuable technique for enriching their thematic collections with high-resolution images, ready for any creative endeavor.
Android Specific: Web Page Download via Google Drive
Unlike iOS, Android devices currently don’t offer a direct “Copy & Paste to Photos” method for individual images from the Google Docs app. Instead, the most effective native solution for saving images—especially for extracting multiple images—involves leveraging Google Drive and the “Web Page” export option. This method ensures that all visual content, from high-resolution stock photos to intricate digital art, is accessible, though it requires a few more steps.
Detailed Process for Android:
- Open the Google Docs app: Launch the application on your Android smartphone or tablet.
- Tap the three-dot menu icon (⋮) next to the document: This menu, usually found on the document preview in the main Docs list, opens a pop-up with various options.
- Select “Share & export”: This opens a submenu related to sharing and exporting the document.
- Choose “Save as”: From the options, select “Web Page (.html, zipped)”. Tap “OK” to confirm. This action initiates the creation of a ZIP archive of your document as a web page, which is then saved directly to your Google Drive.
- Open the Google Drive app: Navigate to your Google Drive, where you’ll find the newly created ZIP archive, named after your Google Docs document.
- Tap the three-dot menu icon (⋮) next to the ZIP archive in Google Drive: This opens a context menu for the file.
- Select “Download”: This will download the ZIP file to your Android device’s internal storage, typically in the “Downloads” folder.
- Locate and extract the ZIP archive: Use your device’s file manager (e.g., “Files by Google” or a third-party app) to find the downloaded ZIP file. Tap on it to open, then select “Extract” or “Unzip”. This will create a new folder.
- Open the “images” folder: Inside the extracted folder, you’ll find a subfolder named “images” containing all the visuals from your Google Docs document.
This method, while requiring more steps, is highly effective for retrieving all images from a document, making it perfect for compiling “Image Inspiration & Collections” or for obtaining assets for a new visual design project. The extracted images, including wallpapers, backgrounds, and various photography styles, will be saved in their original quality. For Tophinhanhdep.com users, this means a straightforward path to obtaining high-resolution images that can then be optimized, converted, or even enhanced with AI upscalers available on the platform, ensuring every detail of that aesthetic or nature-inspired shot is preserved.
Cross-Platform Mobile Image Saving via Link Sharing
A versatile method for saving images from Google Docs on both iOS and Android devices, especially when dealing with multiple images or when direct app-to-app transfer isn’t ideal, is through “Link Sharing.” This approach mirrors the “Publish to the Web” method on desktop but is adapted for mobile browsing, offering a consistent experience across different platforms. It leverages the web-based nature of Google Docs, allowing you to interact with the document as if it were a standard webpage in your mobile browser.
Universal Mobile Steps (iOS & Android):
- Open the Google Docs app: Launch the app on your mobile device.
- Tap the three-dot menu (⋮) at the top of the document: This opens the document-specific menu.
- Select “Share & export”: Navigate to the sharing options.
- Tap “Manage access” or “Change access”: This is crucial to ensure the document is publicly accessible for viewing.
- Change the link access to “Anyone with the link can view”: Confirm this setting. This makes the document accessible as a webpage to anyone with the URL, allowing you to open it in a browser.
- Copy the link: Once access is set, copy the document’s shareable link.
- Open your mobile browser (e.g., Chrome, Safari): Paste the copied link into the address bar and navigate to the page. Your Google Doc will load as a view-only webpage.
- Long-press on the image you want to save: Tap and hold your finger on any image on the loaded webpage.
- Select “Download image” or “Save Image” from the context menu: This will prompt your mobile browser to download the image directly to your device’s photo gallery or downloads folder. Repeat this for all desired images.
This cross-platform strategy is excellent for quickly grabbing high-resolution images, whether they are stock photos, digital photography examples, or aesthetic visuals for your mood boards. It sidesteps some of the limitations of individual app integrations and offers a universal approach to image acquisition. For Tophinhanhdep.com users, this means effortlessly building “Thematic Collections” or gathering “Photo Ideas” from documents, knowing that the quality and visual integrity of the images are maintained. After saving, these images can be further refined using image tools, becoming perfect wallpapers or backgrounds, or serving as foundational elements for more complex visual design or digital art projects.
Advanced Techniques and Considerations for Image Extraction
Beyond the standard methods of downloading and copying, there are a few more advanced or situational techniques to consider when saving images from Google Docs. These methods often come with their own set of pros and cons, from quick-and-dirty solutions to cautionary tales about third-party tools. Understanding these nuances is crucial for users who prioritize image quality, efficiency, or security in their digital photography and visual design workflows.
The Screenshot Method: A Universal but Quality-Limited Option
The screenshot method is arguably the most universal way to capture any visual content, including images, from a Google Docs document on any device—desktop or mobile. It requires no specific export settings or app integrations, making it a quick and accessible solution. However, its primary drawback lies in image quality, which is often a critical concern for Tophinhanhdep.com users who value high-resolution images for wallpapers, backgrounds, or professional photography.
How to Take a Screenshot (General Steps):
- On Desktop (Windows): Use the “Print Screen” key (PrtSc), then paste into an image editor (like Paint) and save. For more precision, use the Snipping Tool (Windows Key + Shift + S) to select a specific area.
- On Desktop (macOS): Use Command + Shift + 4 to select a specific area, or Command + Shift + 3 for the entire screen. The screenshot is saved as a file on your desktop.
- On Mobile (iOS/Android): The exact button combination varies by device but typically involves pressing the power button and volume down button simultaneously. The screenshot is saved to your photo gallery.
Considerations for Quality and Use: While incredibly convenient for capturing an immediate visual, screenshots are inherently limited by your screen’s resolution. This means:
- Reduced Quality: The captured image will not be a high-resolution image in its original form but rather a pixel-for-pixel capture of what was displayed on your screen. This can be detrimental for digital photography, graphic design, or when aiming for crisp aesthetic wallpapers.
- Cropping Required: Often, screenshots will include parts of the Google Docs interface or other desktop elements, requiring post-capture editing to crop the desired image.
- Loss of Detail: Fine details in nature photography, abstract art, or beautiful photography might be lost or appear pixelated when viewed at larger sizes or printed.
For these reasons, the screenshot method is best reserved for quick reference, rough drafts for mood boards, or when image quality is not a primary concern. If you absolutely must use a screenshot and then require higher quality, Tophinhanhdep.com’s image tools, specifically AI Upscalers, can come to the rescue. These tools can intelligently increase the resolution of low-quality images, attempting to restore detail and sharpness, making them more suitable for various visual design applications or for enriching your image inspiration collections. However, it’s always preferable to use methods that retain original image quality whenever possible.
Exploring Third-Party Add-ons (with Caution)
For Google Docs users seeking streamlined image extraction, third-party add-ons can appear to be an attractive solution. These tools often promise to simplify the process, offering functionalities like batch downloads or direct saving to specific cloud services. One popular example mentioned in the references is “Image Extractor & Remover.” While the convenience is undeniable, especially for managing large thematic collections or digital art assets, it’s crucial to approach these add-ons with a high degree of caution due to potential privacy and security implications.
Functionality and Appeal:
- Batch Processing: Many add-ons are designed to extract all images from a document at once, a feature highly beneficial for users compiling extensive “Image Inspiration & Collections” or for graphic designers needing multiple assets from a single source.
- Simplicity: The interfaces are often straightforward, allowing users to initiate downloads with a few clicks, contrasting with the multi-step native methods.
- Integrated Workflow: Some add-ons might integrate directly with other cloud storage services or offer additional image tools like basic compressors or converters.
The Critical Caution: Permissions and Security: The main concern with third-party add-ons lies in the permissions they request. As highlighted in the reference material for “Image Extractor & Remover,” such add-ons often require extensive access to your Google account, including:
- Viewing, editing, and deleting your Google Drive files: This is a significant level of access that could potentially compromise your data if the add-on is malicious or poorly secured.
- Accessing personal information: Add-ons might request access to your profile information, email address, or other sensitive data.
Recommendations for Use:
- Evaluate Necessity: Before installing, consider if the benefits outweigh the risks. Can a native method (like “Download as Web Page”) achieve a similar outcome with greater security?
- Scrutinize Permissions: Always read the requested permissions carefully. Understand what data the add-on will access and what actions it can perform on your behalf. If the permissions seem excessive for the advertised functionality, proceed with extreme caution or avoid it entirely.
- Check Reviews and Reputation: Look for add-ons with a strong track record, positive reviews, and active support from reputable developers.
- Consider Alternatives: Given the robust native methods available for image saving, a third-party add-on might be an unnecessary risk, especially for sensitive documents containing high-resolution photography, aesthetic backgrounds, or confidential visual design elements.
While Tophinhanhdep.com provides a range of secure image tools like compressors, optimizers, and AI upscalers to enhance your saved images, it’s essential to ensure the source of your initial image acquisition is secure. For the discerning digital photography enthusiast or visual designer, prioritizing security when choosing image extraction methods from platforms like Google Docs is paramount to protecting your creative assets and personal data.
The Significance of Image Quality and Further Enhancement with Tophinhanhdep.com
Regardless of the method you choose to save an image from Google Docs, a recurring theme is the preservation and enhancement of image quality. For any enthusiast or professional engaged in digital photography, graphic design, or simply curating aesthetic collections, the resolution, clarity, and fidelity of an image are paramount. A blurry wallpaper, a pixelated background, or a low-resolution abstract art piece simply doesn’t meet the standards of visual excellence.
Why Image Quality Matters:
- Visual Impact: High-resolution images create a stronger visual impact, whether for a personal mood board or a professional presentation. This is especially true for beautiful photography, where every detail counts.
- Versatility: Quality images are versatile. They can be resized, cropped, and integrated into various visual design projects without significant degradation.
- Professionalism: For stock photos and elements in creative ideas, maintaining high quality reflects professionalism and attention to detail.
- Aesthetic Appeal: The aesthetic value of an image, whether it’s a serene nature scene or a poignant sad/emotional photograph, is directly tied to its visual quality.
While Google Docs generally aims to retain the original quality of images when downloaded through methods like “Save to Keep,” “Microsoft Word Export,” “Web Page Download,” or “Publish to the Web,” sometimes an image might have been uploaded in a lower resolution initially, or small edits within the document could subtly impact its fidelity upon extraction. This is where Tophinhanhdep.com steps in as an invaluable resource, offering a suite of image tools designed to not only manage but also significantly improve your visual assets.
Enhancing Your Images with Tophinhanhdep.com’s Image Tools:
- AI Upscalers: If you’ve had to resort to a screenshot or if an image in your Google Doc was inherently low-resolution, Tophinhanhdep.com’s AI Upscalers can be a game-changer. These intelligent tools use artificial intelligence to enlarge images without pixelation, adding detail and sharpness, effectively transforming a low-quality capture into a high-resolution image suitable for wallpapers, backgrounds, or even print. This is vital for transforming a small aesthetic image into a stunning feature.
- Converters: Often, images extracted from documents might be in a format that isn’t ideal for your next project (e.g., a PNG when you need a JPG for smaller file size, or vice-versa). Tophinhanhdep.com provides robust image Converters, allowing you to seamlessly switch between formats while preserving quality, ensuring compatibility with your digital art or graphic design software.
- Compressors and Optimizers: While you want high quality, large file sizes can be impractical for web use, email, or even storage. Our Image Compressors and Optimizers allow you to reduce file size without a noticeable loss in visual quality. This is crucial for efficiently managing your extensive collections of beautiful photography, ensuring your website loads quickly or your mood boards are easy to share.
- Image-to-Text (OCR): Beyond mere visuals, if your extracted images contain text (e.g., an infographic, a scanned document snippet, or a digital art piece incorporating typography), Tophinhanhdep.com’s Image-to-Text (OCR) tools can extract this text, converting it into editable digital content. This adds another layer of utility to your saved visual assets, merging “Images” with “Digital Photography” and even “Visual Design” by extracting actionable data.
By understanding the various methods for saving images from Google Docs and then leveraging the powerful image tools available at Tophinhanhdep.com, you can ensure that your visual content is not only preserved but also optimized and enhanced for any purpose. From building inspiring mood boards and thematic collections to creating professional graphic design pieces or simply finding the perfect high-resolution wallpaper, Tophinhanhdep.com empowers you to make the most of every image you discover.
Conclusion: Unlocking Your Visual Assets from Google Docs with Tophinhanhdep.com
Extracting images from Google Docs, while not always a one-click affair, is a perfectly achievable task with a variety of methods tailored for both desktop and mobile environments. Whether you’re looking to grab a single, eye-catching piece of aesthetic photography, batch export an entire collection of nature backgrounds, or simply save a crucial high-resolution image for your next digital art project, the strategies outlined in this guide provide you with the necessary roadmap. From the integrated convenience of Google Keep and the traditional reliability of Microsoft Word exports on desktop, to the clever use of native Notes apps on iOS and Google Drive pathways on Android, each method serves a specific need, ensuring your visual assets are liberated from their document confines.
We’ve also explored more universal, albeit sometimes quality-limited, options like the screenshot method, and cautioned against the use of third-party add-ons due to privacy concerns. The overarching goal, however, remains consistent: to maintain the highest possible image quality for your extracted visuals. This commitment to quality is fundamental for anyone passionate about photography, visual design, and curating inspiring image collections.
At Tophinhanhdep.com, we champion the power of images. We understand that every saved visual, be it an abstract masterpiece, a sad/emotional portrait, or a stunning piece of beautiful photography, can spark a creative idea, define a mood board, or serve as the perfect wallpaper. That’s why beyond the extraction process, Tophinhanhdep.com offers a comprehensive suite of image tools—including powerful AI upscalers to breathe new life into lower-resolution captures, versatile converters for format flexibility, and efficient compressors/optimizers for web-ready assets. By equipping you with both the knowledge to retrieve and the tools to refine, Tophinhanhdep.com ensures that every image you uncover in your Google Docs can be transformed into a valuable asset for your personal and professional visual endeavors. So go ahead, unlock those hidden visuals, and let your creativity flourish with the endless possibilities offered by Tophinhanhdep.com.