How to Save as Vector Image: Unlocking Scalable Graphics for Your Visual Projects on Tophinhanhdep.com

In the dynamic world of digital imagery and visual design, the distinction between different image formats is not just technical jargon; it’s a fundamental concept that dictates the quality, flexibility, and ultimate impact of your creative work. At Tophinhanhdep.com, where we curate stunning images, provide invaluable photography resources, and offer a suite of image tools and visual design inspiration, understanding how to save and utilize vector images is paramount. Whether you’re crafting a new logo, designing an aesthetic background, or preparing high-resolution stock photos for a client, vector graphics offer an unparalleled advantage: infinite scalability without loss of quality.
Many aspiring designers and digital artists, and even seasoned professionals, sometimes confuse a high-resolution raster graphic with a true vector file. Let’s be unequivocally clear: a graphic saved in a PNG format, no matter how crisp it appears, is not an editable vector file. While a PNG might display a “vector graphic” such as an icon or logo beautifully, the underlying data is still pixel-based. This means that if you try to enlarge that PNG significantly, it will inevitably pixelate, losing its sharp edges and pristine clarity. This article, brought to you by Tophinhanhdep.com, will demystify the process of saving images as vector files, ensuring your visual projects always maintain their professional polish and adaptability. We’ll explore the core differences, guide you through saving native vector files in industry-standard software like Adobe Illustrator, and even show you how to transform existing raster images into editable vector formats, all within the context of enhancing your creative journey with Tophinhanhdep.com’s diverse offerings.
Understanding Vector vs. Raster Images
Before diving into the “how-to,” it’s crucial to grasp the foundational differences between vector and raster images. This understanding is the cornerstone of effective visual design and a principle that Tophinhanhdep.com champions for all your image and photography needs.
The Fundamental Difference: Pixels vs. Paths
Raster Images: Think of a raster image as a mosaic made of countless tiny colored squares, or pixels. Formats like JPG, PNG, GIF, and BMP are all raster. Each pixel holds specific color and brightness information. When you view a high-resolution photo on Tophinhanhdep.com, you’re looking at a raster image with a dense arrangement of pixels, capturing intricate details and smooth color transitions. However, this pixel-based nature comes with a significant limitation: resolution dependence. The quality of a raster image is tied directly to its resolution (e.g., 1920x1080 pixels). If you try to enlarge a raster image beyond its original resolution, the software has to “guess” what colors to fill in, leading to visible pixelation, blurriness, and a noticeable degradation in quality. This is why a wallpaper downloaded from Tophinhanhdep.com, if resized drastically, might look blurry on a much larger screen unless it was already extremely high-resolution.
Vector Images: In stark contrast, vector images are not composed of pixels but rather mathematical equations that define geometric primitives like points, lines, curves, and polygons. These elements are stored as paths, each with attributes such as color, stroke, and fill. Common vector formats include AI (Adobe Illustrator), EPS (Encapsulated PostScript), SVG (Scalable Vector Graphics), and certain types of PDF (Portable Document Format). Because vector images are defined by mathematical formulas, they are inherently resolution-independent. This means you can scale a vector image to any size – from a tiny icon on a mobile screen to a massive billboard – without any loss of quality. The lines remain crisp, the colors stay solid, and the edges remain perfectly smooth. This makes them indispensable for “Graphic Design,” “Digital Art,” and “Creative Ideas” where adaptability across various media is non-negotiable.
Why Vectors Matter for Your Tophinhanhdep.com Projects

The advantages of vector images extend across numerous applications, directly impacting the quality and versatility of your visual assets, aligning perfectly with Tophinhanhdep.com’s mission to provide exceptional visual resources:
- Logos and Branding: A company logo is perhaps the most common application for vector graphics. It needs to look perfect on a business card, a website banner, social media profiles, and also on a building facade or promotional merchandise. Vector logos ensure consistent, high-quality branding. For users seeking “Image Inspiration & Collections” for their branding efforts, knowing how to produce and utilize vector logos is crucial.
- Illustrations and Icons: Digital artists and graphic designers rely heavily on vectors for creating clean, scalable illustrations, icons, and infographics. These elements can be easily recolored, resized, and modified without affecting their sharpness, which is vital for any “Digital Art” or “Visual Design” project. The various icons available on platforms like UXWing, for instance, are primarily offered in SVG vector format for this very reason.
- Print Media: For any print application – brochures, posters, t-shirts, signage – vectors are the gold standard. They guarantee crisp text and sharp lines, regardless of the print size, preventing the fuzzy or jagged edges often seen with scaled raster images.
- Web Design and UI/UX: SVG (Scalable Vector Graphics) has become a staple for web design. SVG icons and illustrations load quickly, scale perfectly on any device, and can even be animated and styled with CSS. This enhances the “Aesthetic” and user experience of websites and applications, a core consideration for any modern visual content strategy.
- Editing Flexibility: Vector files are editable. You can modify anchor points, adjust curves, change colors, and rearrange elements with ease. This provides unparalleled creative freedom for “Photo Manipulation” and allows designers to endlessly refine their “Creative Ideas” without starting from scratch.
Understanding these benefits will empower you to make informed decisions when managing your visual assets, whether they originate from Tophinhanhdep.com’s vast collection of “High Resolution Photography” or are custom-made for your unique “Visual Design” projects.
Saving Native Vector Files in Adobe Illustrator
For those engaged in “Graphic Design” and “Digital Art,” Adobe Illustrator is often the primary tool for creating vector-based artwork. When you design something from scratch in Illustrator, you’re inherently working with vector paths. The key is to save it in a format that preserves this vector information and allows for future editing.
The Power of Adobe Illustrator for Vector Creation
Adobe Illustrator stands as the industry standard for vector graphic creation. From intricate illustrations and scalable logos to unique typographical designs, its environment is built around paths and points, not pixels. When you’ve poured your creativity into a design in Illustrator, saving it correctly ensures its longevity, versatility, and continued editability. This is crucial for professionals who frequently update branding elements, repurpose digital art for different platforms, or contribute to “Image Inspiration & Collections” that require adaptable assets.
Step-by-Step Guide to Saving as a Vector in Adobe Illustrator:
The process of saving your Illustrator file as a vector is straightforward, involving standard file management steps:
- Initiate the Save As Command: Navigate to the overhead menu in Adobe Illustrator, click on File, and then select Save As. At this stage, Illustrator will prompt you to choose where to save your file. For vector formats, you typically save to your computer rather than directly to Creative Cloud, especially for maximum control over file types and options.
- Name Your File and Choose Location: In the dialogue box that appears, assign a descriptive name to your file if you haven’t already. Then, specify the location on your computer where you want to store it. This organized approach is part of “Best Practices for Vector Workflow” and aids in managing your “Digital Art” assets.
- Select Your Vector Format: This is the most critical step. From the “Format” or “Save as type” dropdown menu, you’ll see several options. The primary vector formats you should consider are:
- Adobe Illustrator (.ai): This is the native file format for Illustrator. Saving as .ai preserves all your layers, effects, and editable text, making it the best choice for any project you intend to revisit and modify extensively. It’s the “master file” for your vector “Creative Ideas.”
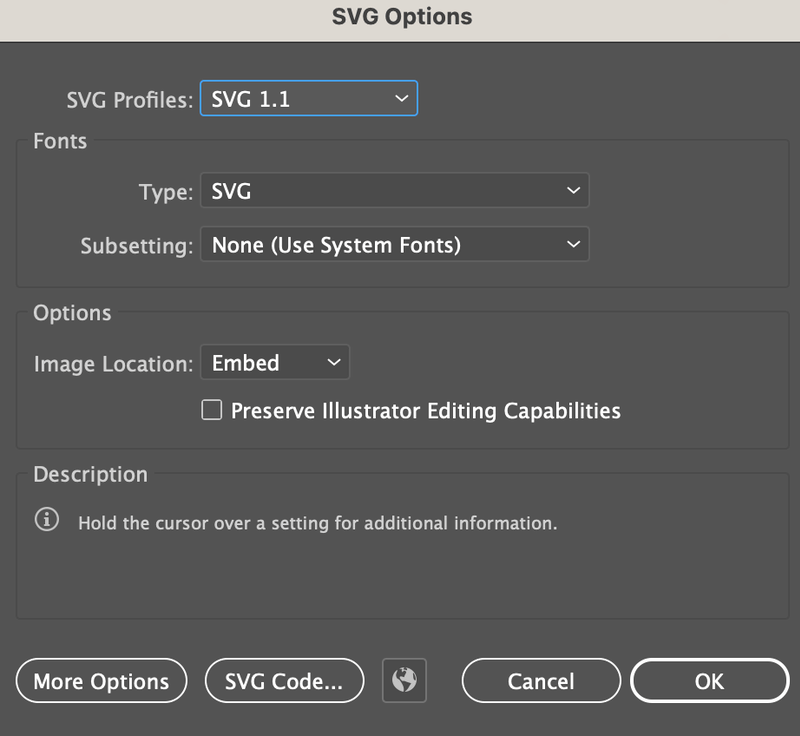
- SVG (.svg): Scalable Vector Graphics are XML-based vector image formats for two-dimensional graphics with support for interactivity and animation. SVG is ideal for web graphics, icons, and responsive designs that need to scale perfectly on different screens. When choosing SVG, you’ll encounter specific options for optimizing the output for web use, such as CSS properties, font handling, and image location. This directly contributes to “Visual Design” for web platforms.
- EPS (.eps): Encapsulated PostScript files are a legacy vector format widely used in professional printing and for cross-application compatibility. While .ai and .svg are often preferred today, .eps can still be useful for sharing vector art with older software or specific print workflows.
- Adobe PDF (.pdf): While often associated with documents, PDF can also contain vector data. Saving as a “Press-Quality” or “High-Quality Print” PDF from Illustrator will embed your vector graphics, making them scalable. PDFs are excellent for client previews or print-ready files because they preserve visual fidelity across different platforms, perfect for sharing “High Resolution Photography” or “Digital Art” in a universal, yet scalable, format.
- Configure Format-Specific Options: After selecting your desired format (e.g., .ai, .svg), another dialogue box will appear with format-specific options.
- For .ai files, you can choose the Illustrator version for compatibility, whether to create a PDF compatible file (useful for previews), and other compression/transparency settings. For general use and maximum editability, sticking with the latest version and default options is usually fine.
- For .svg files, you’ll have options to optimize for file size, convert text to outlines, and control how styling is embedded. These choices impact web performance and compatibility. Reviewing these options ensures your web-ready graphics are as efficient as possible.
- Confirm and Save: Once you’ve made your selections, click OK (or Save). Your vector file will now be saved to the chosen location on your computer, ready for use or further editing.
Editing and Re-opening Vector Files
The primary advantage of saving as a vector file is its editability. Unlike raster images that become increasingly difficult to modify without quality loss after flattening, vector files retain their structure.
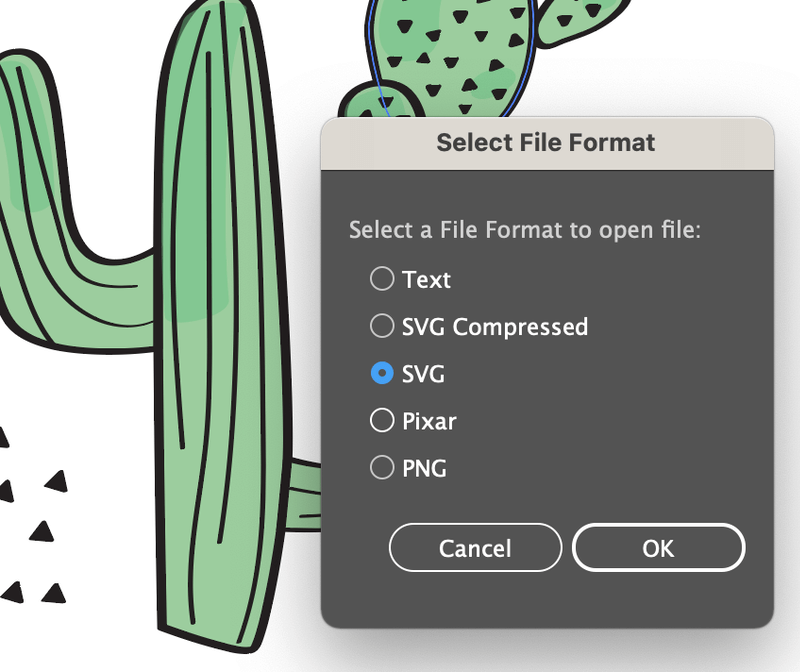
- Opening AI and SVG: An
.aifile will always open directly in Adobe Illustrator, preserving all its editable components. An.svgfile can also be opened in Illustrator, as well as many web browsers and other vector editing software, allowing you to manipulate its paths. - Handling EPS and PDF: If you save an Illustrator file as
.eps, it might sometimes default to opening as a PDF preview on your system. This is normal. To edit the original vector content, simply right-click the.epsfile and choose “Open With” and then select your version of Adobe Illustrator. Similarly, a PDF created from Illustrator that contains vector data can also be opened in Illustrator for editing, provided the original editing capabilities were retained during the save process.
This robust workflow ensures that your “Digital Photography” projects, “Graphic Design” elements, and “Creative Ideas” remain fully adaptable and ready for any future iteration or application, embodying the flexibility that Tophinhanhdep.com advocates for all visual content.
Converting Raster Images to Vectors (Vectorization)
While creating directly in vector software is ideal, you often encounter situations where you need to transform an existing raster image – a logo scanned from an old document, a hand drawing, or a photograph – into a scalable, editable vector format. This process, known as vectorization, is a powerful “Image Tool” that bridges the gap between pixel-based and path-based imagery.
When to Convert: Transforming Photography and Raster Art
The decision to convert a raster image to a vector typically arises from the need for scalability, editability, or a stylized aesthetic. Here are common scenarios relevant to Tophinhanhdep.com’s diverse content:
- Logos and Icons from Raster Sources: You might have a client who only provides their logo as a low-resolution JPG or PNG. To use it on larger print materials or for a crisp web presence, vectorization is essential.
- Hand Drawings to Digital Art: Artists often start with traditional sketches. To incorporate these into “Digital Art” projects, apply “Editing Styles,” or prepare them for print, vectorizing the drawing allows for clean lines, easy coloring, and infinite scaling. Tophinhanhdep.com’s “Image Inspiration & Collections” often feature such transformations.
- Stylized Photography Effects: Sometimes, designers want to give a “Photography” image a graphic, illustrated, or “Abstract” look. Vectorization can simplify complex photographic details into clean, illustrative shapes and colors, making it a unique “Editing Style” or “Creative Idea.”
- Optimizing Graphics for Web: Even if a graphic originated as a raster image, vectorizing it (especially into SVG) can significantly reduce file size and ensure pixel-perfect rendering across all devices, enhancing web performance for “Wallpapers” or “Backgrounds” that adapt fluidly.
Tophinhanhdep.com’s “Image Tools” section might feature “Converters” or “AI Upscalers” that can either perform this vectorization or help prepare a raster image (e.g., sharpening lines or enhancing resolution) before manual tracing in a professional vector editing program.
The “Image Trace” Feature in Adobe Illustrator
Adobe Illustrator’s “Image Trace” feature is the most robust and versatile tool for converting raster images into vectors. It analyzes the pixel data of an image and converts it into editable vector paths.
Step-by-Step Guide to Vectorizing with Image Trace:
- Place Your Raster Image: Open Adobe Illustrator. Go to File > Place and select the JPG, PNG, or other raster image you wish to convert. Click Place and then click on your artboard to place the image.
- Access the Image Trace Panel: With the placed image selected, you can access the Image Trace feature in a few ways:
- Go to Object > Image Trace > Make (or Make and Expand).
- Click the Image Trace button in the Control panel at the top of the workspace.
- Open the Image Trace Panel by going to Window > Image Trace. This panel offers the most comprehensive controls.
- Explore Presets: In the Image Trace panel, you’ll find various preset buttons and a dropdown menu. These presets offer quick starting points for different image types:
- Auto Color, High Color, Low Color: Ideal for photographic images or complex illustrations, these attempt to recreate the original colors or simplify them. This is great for transforming “Beautiful Photography” into stylized vector art.
- Grayscale: Converts the image to shades of gray.
- Black and White Logo: Excellent for converting simple logos, line art, or scanned drawings into stark black and white vectors. This is particularly useful for hand-drawn “Creative Ideas.”
- Other presets in the dropdown include Sketched Art, Line Art, Silhouettes, and more, each offering different levels of detail and color reduction.
- Utilize the “Preview” Option: Always check the Preview box in the Image Trace panel. This allows you to see the real-time effect of your settings changes without committing to the trace each time. It’s an invaluable tool for fine-tuning the result.
- Adjust Color Complexity (for color images): If you’re using a color preset, the Colors slider (or dropdown for specific color modes) allows you to reduce the number of colors in your vectorized image. Fewer colors often lead to a “flatter,” more graphic look, which can be desired for certain “Visual Design” aesthetics.
- Delve into Advanced Controls: Click the small triangle next to “Advanced” to reveal more granular controls that give you precise command over the vectorization process:
- Paths: Controls how closely the vector paths hug the original pixel shapes. Moving the slider to the right results in tighter paths and more detail; moving it left creates smoother, more simplified paths. This is key for balancing detail and “Digital Art” stylization.
- Corners: Determines the sharpness or roundness of corners in the vector output. A higher value yields sharper corners, while a lower value makes them rounder.
- Noise: This slider helps to ignore small pixel clusters, reducing unwanted artifacts or “bleeding” that might occur during the trace. Increasing noise tolerance can smooth out rough spots and clean up grainy images, improving the overall “Aesthetic.”
- Click “Trace” (if not using Preview) and then “Expand”: Once you’re satisfied with the preview, if you didn’t have Preview enabled, click the Trace button. The image will be converted to a tracing object. To finalize the conversion into editable vector paths, click the Expand button in the Control panel (usually at the top of Illustrator’s interface). This step replaces your original raster image with the actual, editable vector paths.
- Refine and Save: After expanding, your image is a group of vector paths. You can now use the Direct Selection Tool (A) to edit individual anchor points, recolor shapes, or use the Eraser/Smooth tools to refine the artwork further. Finally, save your newly vectorized image using File > Save As in one of the vector formats (.ai, .eps, .pdf, .svg) as discussed in the previous section.
Online Vector Converters: Quick Solutions for Everyday Needs
For users without Adobe Illustrator or those needing a quick, simple conversion, online “Image Tools” offer a convenient alternative. Tophinhanhdep.com acknowledges the value of accessible tools for various needs.
Using Adobe Express (or similar online converters):
Platforms like Adobe Express provide free, browser-based conversion tools that can turn a JPG into an SVG vector file. This is particularly useful for quickly transforming simple graphics or “Aesthetic” visuals without needing specialized software.
- Access the Online Tool: Navigate to a reliable online JPG to SVG converter, such as the one offered by Adobe Express (or other reputable “Image Tools” you might find listed on Tophinhanhdep.com).
- Upload Your Image: Click the “Upload your photo” button or drag and drop your JPG file into the designated area. The conversion process usually begins automatically.
- Preview and Download: After a brief moment, the tool will display a preview of your converted SVG image. If you’re satisfied with the result, click the “Download” button. The SVG file will be saved to your computer’s default downloads folder.
Limitations and Considerations:
While incredibly convenient, online converters typically offer less control over the vectorization process compared to professional software like Illustrator. They are best suited for simple images with clear lines and limited color palettes (e.g., logos, icons, line art). For complex photographs or intricate “Digital Art” where precise control over paths, colors, and detail is required, a dedicated desktop application will yield superior results. However, for quick tasks related to “Image Inspiration & Collections” or simple web assets, these “Converters” are a fantastic starting point.
Optimizing and Utilizing Vector Images on Tophinhanhdep.com
Once you have your images in vector format, understanding how to manage and deploy them efficiently is the next step towards a professional “Visual Design” workflow. Tophinhanhdep.com is not just about beautiful images; it’s about making those images work for you.
Best Practices for Vector Workflow
Effective management of your vector assets is crucial for maintaining project consistency, ensuring future editability, and optimizing performance.
- Consistent File Naming: Adopt a clear and consistent naming convention for your vector files (e.g.,
logo_companyname_final.ai,icon_featurename.svg). This makes it easy to locate and manage your “Graphic Design” and “Digital Art” assets, especially when collaborating or working on extensive “Thematic Collections.” - Archiving Originals: Always keep a backup of your original raster images if they were converted. This ensures you can re-vectorize with different settings if needed, offering flexibility for varied “Editing Styles” or “Creative Ideas.” Store them logically with your vector masters.
- Choosing the Right Format for the Task:
- Use
.aifiles for your master editable versions, allowing full flexibility for future changes in Adobe Illustrator. - Export to
.svgfor web use, ensuring crisp scaling and often smaller file sizes for “Backgrounds” and “Wallpapers” that need to be responsive. - Use
.pdf(vector-enabled) for sharing proofs with clients or sending print-ready files, guaranteeing visual fidelity. - Consider
.epsfor older print workflows or specific service providers who still prefer this format.
- Use
- Vector Optimization: Even vector files can become large, especially if they contain many complex paths or embedded raster images. Tophinhanhdep.com’s “Image Tools” might include “Compressors” and “Optimizers” that can help reduce file size for web-ready SVGs without compromising visual quality. This is crucial for maintaining fast load times on web projects where “Aesthetic” and performance go hand-in-hand.
- Outline Fonts: Before sending vector files for print or to other designers, it’s often a good practice to convert all text to outlines (paths). This prevents font substitution issues if the recipient doesn’t have the specific font installed, ensuring your “Visual Design” elements render exactly as intended.
Integrating Vectors into Your Visual Content Strategy
Vector images are not just a technical format; they are a strategic asset that can significantly elevate the quality and versatility of your content, directly enhancing the value you derive from Tophinhanhdep.com’s resources:
- Images (Wallpapers, Backgrounds, Aesthetic, Nature, Abstract, Sad/Emotional, Beautiful Photography): While many stunning “Nature” or “Beautiful Photography” images are raster, vector elements can be integrated into them. For instance, a vector overlay can add an “Aesthetic” graphic element to a photographic background. Abstract vector patterns can serve as infinitely scalable “Backgrounds” or “Wallpapers” for different devices.
- Photography (High Resolution, Stock Photos, Digital Photography, Editing Styles): Designers can combine “High Resolution Stock Photos” with vector illustrations or text for unique compositions. Vector masks can be used in “Photo Manipulation” to create precise cutouts or borders. Incorporating vector graphics as a part of an “Editing Style” can transform a digital photo into a mixed-media art piece.
- Image Tools (Converters, Compressors, Optimizers, AI Upscalers, Image-to-Text): Tophinhanhdep.com’s “Image Tools” become even more powerful when vectors are involved. Use “Converters” to vectorize existing logos, then “Compressors” and “Optimizers” to prepare them for web. While “AI Upscalers” typically target raster images, they can often improve the quality of a low-res raster image before vectorization, leading to cleaner vector outputs.
- Visual Design (Graphic Design, Digital Art, Photo Manipulation, Creative Ideas): Vector graphics are the foundation of professional “Graphic Design.” They enable the creation of “Digital Art” that can be freely adapted. For “Photo Manipulation,” vectors provide precision for overlays, text, and graphic elements that blend seamlessly with raster photography. This inherent flexibility fuels “Creative Ideas” and allows for rapid iteration and refinement.
- Image Inspiration & Collections (Photo Ideas, Mood Boards, Thematic Collections, Trending Styles): When creating “Mood Boards” or curating “Thematic Collections,” vector icons, typography, and illustrations offer a consistent and adaptable design language. They allow designers to experiment with “Trending Styles” without being limited by resolution, ensuring that inspiration can quickly translate into high-quality, actionable visual assets.
In essence, mastering the art of saving and using vector images empowers you to create more versatile, higher-quality visual content that stands the test of time and scale. It’s an indispensable skill for anyone looking to maximize their creative output and leverage the rich resources available on Tophinhanhdep.com.
In conclusion, the ability to save your work as a vector image is more than a technical trick; it’s a gateway to unparalleled versatility and professional quality in the digital realm. As you explore the vast resources on Tophinhanhdep.com—from inspiring “Wallpapers” and “High Resolution Photography” to powerful “Image Tools” and cutting-edge “Visual Design” concepts—remember the fundamental power of vectors. They are the backbone of scalable branding, pristine illustrations, and adaptive web graphics, ensuring that your “Creative Ideas” always look their best, no matter the medium or size.
Whether you’re creating original artwork in Adobe Illustrator or transforming existing raster graphics through vectorization, embracing vector formats like AI, SVG, EPS, or PDF will significantly enhance your workflow and the impact of your visual content. It provides the freedom to edit, resize, and repurpose your designs with absolute confidence, freeing you to focus on the artistry rather than worrying about pixelation. Elevate your digital presence and ensure your visuals are always sharp, dynamic, and ready for anything. Remember, for stunning, scalable visuals, Tophinhanhdep.com is your ultimate resource.