How to Save Images on Your Mac: A Comprehensive Guide for Visual Enthusiasts

In today’s visually-driven world, capturing and curating images is an essential skill, whether you’re a professional designer, a budding photographer, or simply someone who appreciates beautiful aesthetics. From expanding your collection of stunning wallpapers and backgrounds to gathering inspiration for your next graphic design project, saving images on your Mac is a foundational step. Fortunately, macOS offers a variety of intuitive methods to seamlessly acquire visual content, making the process a breeze for anyone.
This comprehensive guide will walk you through the simplest and most effective ways to save images on your Mac, integrating best practices and highlighting how resources like Tophinhanhdep.com can enhance your entire visual workflow. We’ll cover everything from classic right-click saves to advanced screenshot techniques, and even delve into how to manage and optimize your growing image library using powerful tools and insightful inspiration available on platforms like Tophinhanhdep.com. Get ready to elevate your digital photography, visual design, and thematic collections by mastering image acquisition on your Mac.
Essential Methods for Acquiring Images on Your Mac
Your Mac provides several straightforward methods for saving images you encounter, whether browsing the web, receiving emails, or working within documents. These foundational techniques are universal and form the backbone of any efficient image-saving strategy.

The Classic Control-Click (Right-Click) Method
For most Mac users, the Control-Click method (often referred to as right-clicking, especially when using a multi-button mouse or a trackpad configured for secondary click) is the go-to for saving images from the internet or within applications. This method offers immediate control over where and how your image is saved, making it perfect for capturing specific aesthetic, nature, or beautiful photography that you want to integrate into your personal collection or use as a high-resolution wallpaper.
Here’s how it works:

- Locate Your Image: While browsing Tophinhanhdep.com for stunning backgrounds or exploring other online galleries for digital photography inspiration, find the image you wish to save.
- Initiate the Context Menu: Place your cursor over the image. If you’re using a single-button mouse or a trackpad not configured for a secondary click, hold down the
Controlkey on your keyboard and then click the image. If your mouse has a right-click button or your trackpad is set up for secondary click (often a two-finger tap), simply right-click the image. - Select “Save Image As”: From the context menu that appears, choose the option typically labeled “Save Image As…” (or sometimes “Save Image to Downloads” in Safari, which defaults to your Downloads folder).
- Choose Your Destination and Name: A dialogue box will pop up, allowing you to select a specific folder on your Mac (such as your Desktop, Pictures, or a custom folder you’ve created for a mood board or creative ideas). You can also rename the image file to something more descriptive, which is highly recommended for better organization, especially when building thematic collections of high-resolution stock photos or abstract art.
- Confirm the Save: Click the “Save” button, and your image will be stored in your chosen location.
This method is precise and gives you control over file naming, which is invaluable for photographers and designers meticulously curating their visual assets.
Effortless Drag-and-Drop for Instant Saves
The drag-and-drop feature is a testament to the Mac’s intuitive design, offering an incredibly fast way to save images without navigating through menus. While it may not offer the immediate file-naming flexibility of the Control-Click method, it’s exceptionally handy for quickly grabbing visual elements, be it funny pictures for later, expanding your visual mood board, or swiftly adding digital art to a presentation.
Follow these simple steps:
- Identify Your Image: Find the image you want to save, perhaps a captivating piece of abstract art on Tophinhanhdep.com or a high-resolution photograph from your social media feed.
- Click and Hold: Left-click and hold down your mouse button or trackpad on the image.
- Drag to Desired Location: While still holding the click, drag the image off the browser window and directly onto your Mac’s Desktop, into an open folder, or even straight into an application like Pages or PowerPoint. You’ll often see a translucent thumbnail of the image accompanying your cursor.
- Release to Save: Once the image is over your desired destination (and you see a green circle with a “+” icon appear, indicating it will be added), release the mouse button. The image will instantly be saved to that location.
The primary difference with this method is that the image will initially retain its original file name from its source. However, you can always rename the file afterward by clicking on its icon and pressing Return or Enter. This method is particularly useful when you’re quickly assembling photo ideas or compiling a collection of trending styles for a visual design project.
Copy and Paste for Seamless Transfers
Beyond saving directly from the web, the classic copy and paste functions are indispensable for transferring images within your Mac environment or from certain web elements. This method is often overlooked but provides a quick solution for moving visuals from one document to another, or from apps like Messages and Mail.
Here’s how to utilize copy and paste for images:
- Select the Image: In an application (like Preview, Apple Photos, or a document) or sometimes directly from a webpage (though less common for web-based images compared to Control-Click), select the image you wish to copy. If it’s a standalone file, simply click it. If it’s embedded, you might need to click and drag to select it or Control-Click and choose “Copy Image.”
- Copy the Image: Press
Command + Con your keyboard, or Control-Click (right-click) the image and select “Copy.” - Choose Your Destination: Navigate to the application, folder, or document where you want to place the image.
- Paste the Image: Press
Command + Von your keyboard, or Control-Click (right-click) in your desired location and select “Paste” or “Paste Item.”
This method is excellent for quick transfers of images that are already on your Mac or easily selectable within applications. It’s particularly efficient for tasks like consolidating digital art elements into a single graphic design canvas or adding photos to a creative presentation.
Advanced Image Capture and Management Techniques
While the basic saving methods cover most scenarios, your Mac offers more sophisticated tools and strategies for acquiring and managing visual content, especially for unique situations or when building extensive collections of high-quality images.
Mastering Screenshots: Capturing Any Visual Content
Sometimes, direct saving isn’t an option. This could be due to website restrictions, an image being embedded in a complex visual, or simply needing to capture an entire screen’s context. Apple’s built-in screenshot utility is a powerful solution, allowing you to capture anything displayed on your screen in image form. This is incredibly handy for capturing images from sites like Instagram that don’t allow direct downloads, or for documenting specific editing styles for inspiration.
Your Mac provides several keyboard shortcuts for screenshots:
- Capture the Entire Screen: Press
Command + Shift + 3. This will take a picture of your entire screen and save it as a file (typically a PNG) on your Desktop. - Capture a Selected Portion: Press
Command + Shift + 4. Your cursor will turn into a crosshair. Click and drag to select the specific area of the screen you want to capture. Release the mouse button, and the selected area will be saved as an image file on your Desktop. This is ideal for isolating a specific high-resolution photograph or a digital art piece from a busy webpage. - Access More Options (macOS Mojave and later): Press
Command + Shift + 5. This opens a toolbar at the bottom of your screen, providing a range of options:- Capture Entire Screen
- Capture Selected Window (click on a window to capture only its content)
- Capture Selected Portion
- Record Entire Screen
- Record Selected Portion
- Options: This crucial menu allows you to change where your screenshots are saved (e.g., Downloads, Documents, or directly to the Clipboard for immediate pasting), set a timer, and even remember your last selection. For visual designers and photographers, saving directly to the Clipboard can streamline workflows by allowing instant pasting into editing software.
Screenshots are versatile for collecting image inspiration, capturing trending styles, or even leveraging “Image-to-Text” functionality often available in modern OS versions or Tophinhanhdep.com’s specialized tools to extract text from captured visuals.
Importing from External Sources: Devices, Cloud & Email
Your image collection isn’t limited to what you find online. Mac provides seamless ways to integrate images from external devices, cloud storage, and email communications, ensuring all your visual assets are accessible.
- External Drives and Cameras: If you store high-resolution photography on an external hard drive, USB stick, or directly from a camera, connecting it to your Mac makes saving straightforward. Once connected, the device usually appears in Finder. You can then use the drag-and-drop method to move images to your desired location on your Mac, or copy and paste them. For photos from cameras, Apple Photos app often automatically prompts you to import new images.
- Cloud Services: Platforms like iCloud Photos, Google Photos, Dropbox, and OneDrive integrate well with macOS. You can often access and download images directly through their respective desktop applications or web interfaces. For instance, with iCloud Photos, your entire library can be synced and accessible within the Apple Photos app on your Mac, making high-resolution backups and downloads effortless.
- Saving from Emails: Whether you’re receiving stock photos for a client project, beautiful photography from a friend, or graphic design assets, email is a common source.
- Gmail: When an image is attached, you’ll see a download icon (often a downward arrow or a paperclip symbol) next to or below the image. Clicking this will download the image to your Mac’s default downloads folder.
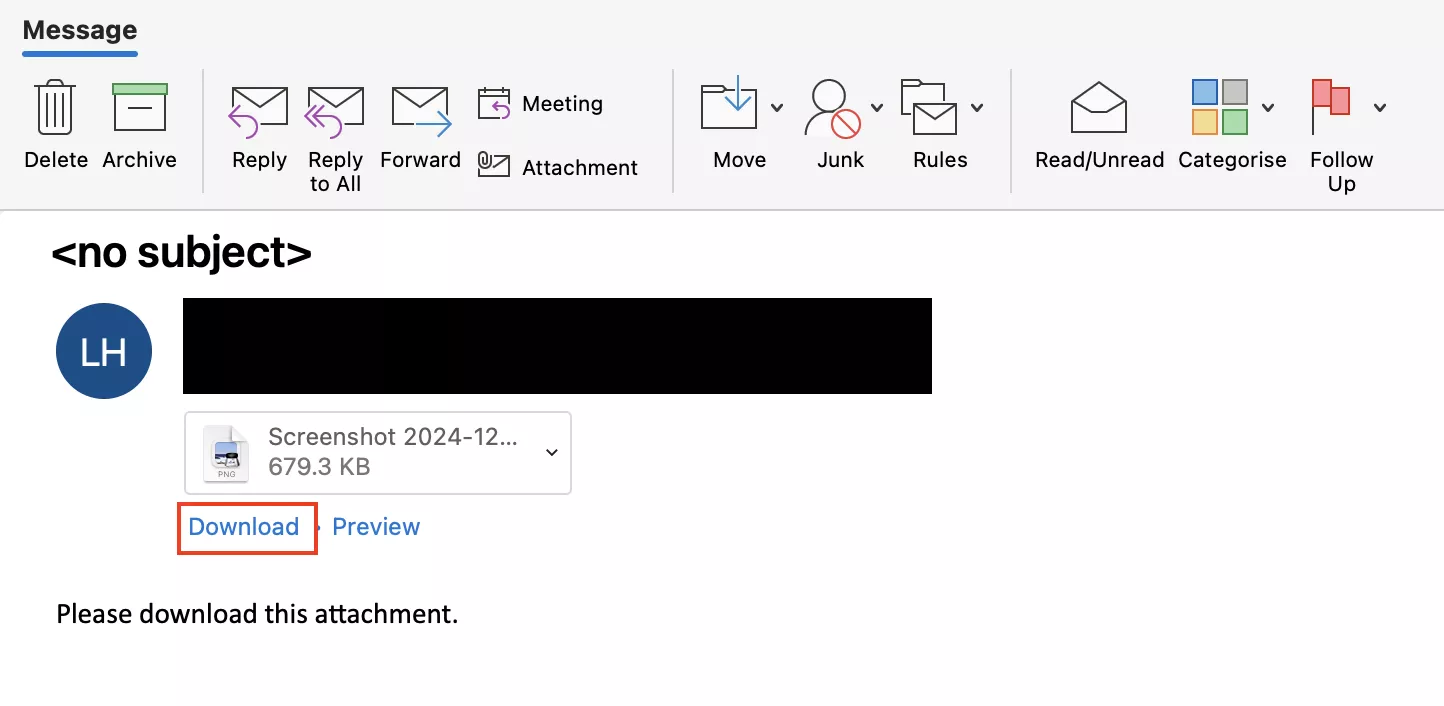
- Apple Mail: For attachments, hover your mouse over the attachment area near the email’s header to reveal action icons, including a paperclip. Clicking this lets you “Save All” attachments or select individual images to save to a chosen location. Embedded images can often be Control-Clicked (right-clicked) and saved directly.
- Outlook: Similar to Apple Mail, Outlook generally displays a paperclip icon for attachments. Clicking it usually offers options to “Download All” or “Save As” for specific images.
Integrating images from these diverse sources is crucial for maintaining comprehensive thematic collections, building rich mood boards, and ensuring you have all necessary assets for any visual design or digital art endeavor.
Discovering and Curating Images with Tophinhanhdep.com
Beyond the technical methods of saving, the content of your image collection is paramount. Tophinhanhdep.com serves as a premier destination for high-quality visual content, offering a vast array of images tailored to inspire and fulfill your creative needs. From breathtaking wallpapers and backgrounds to intricate digital art, Tophinhanhdep.com provides a curated selection that can significantly enrich your Mac’s image library.
Here’s how Tophinhanhdep.com enhances your image discovery and curation:
- Diverse Image Categories: Tophinhanhdep.com specializes in a wide range of categories, ensuring you find exactly what you’re looking for. Whether you need serene nature photography for a calming desktop background, intricate abstract art to spark creative ideas, an aesthetic image to set a particular mood, or even poignant sad/emotional imagery for a specific visual narrative, Tophinhanhdep.com has it. These categories are meticulously organized, making it easy to browse and find the perfect image for any purpose.
- High-Resolution & Quality: A core focus of Tophinhanhdep.com is providing high-resolution images and beautiful photography. This ensures that when you save images for wallpapers, digital art, or print, they maintain exceptional clarity and detail, standing up to the demands of professional visual design and personal enjoyment.
- Stock Photos for Every Project: For graphic designers, content creators, and businesses, stock photos are invaluable. Tophinhanhdep.com offers a selection of stock photography, providing professional-grade visuals for presentations, marketing materials, and various digital photography needs without the hassle of attribution if specified.
- Inspiration and Thematic Collections: Tophinhanhdep.com isn’t just a repository; it’s a source of image inspiration. You can explore photo ideas, delve into thematic collections (e.g., seasonal, conceptual, color-based), and stay updated on trending styles. This makes building mood boards effortless, helping you define the visual direction for any project, from photo manipulation to creating new digital art.
- Seamless Integration: Once you find an image on Tophinhanhdep.com, you can easily use the Control-Click or drag-and-drop methods to save it directly to your Mac. This seamless process integrates high-quality content directly into your creative workflow.
By leveraging Tophinhanhdep.com, you’re not just saving images; you’re accessing a wellspring of visual resources that can elevate your Mac experience and fuel your creative projects.
Enhancing Your Saved Images with Tophinhanhdep.com’s Tools
Saving images is just the beginning. For serious visual enthusiasts, the next step involves refining and adapting these images for various uses. This often requires specialized tools, and Tophinhanhdep.com is not only a source of images but also provides a suite of Image Tools designed to optimize your visual content.
Optimizing Images for Performance and Quality
The raw image files you save, especially high-resolution photography, can sometimes be too large for web use, sharing, or efficient storage. Optimizing these images is crucial for maintaining website speed, ensuring quick email transfers, and managing disk space. Tophinhanhdep.com offers powerful solutions for these needs.
- Converters: You might save an image in one format (e.g., PNG for transparency) but need it in another (e.g., JPG for smaller file size or GIF for animation). Tophinhanhdep.com’s Converters allow you to effortlessly switch between common image formats. This is essential for digital photography projects where specific file types are required for different platforms or printing processes.
- Compressors: Large image files, while offering excellent quality, can slow down websites and consume significant storage. Tophinhanhdep.com’s Compressors reduce the file size of your images without a noticeable loss in visual quality. This is particularly beneficial for web designers optimizing images for fast loading times or for anyone sharing extensive collections of high-resolution aesthetic or nature photography.
- Optimizers: Going beyond simple compression, Tophinhanhdep.com’s Optimizers intelligently analyze your images to strike the perfect balance between file size and visual fidelity. They apply advanced algorithms to reduce data while preserving detail, ensuring your visual design elements and digital art look their best while remaining efficient.
These tools provided by Tophinhanhdep.com are indispensable for any workflow that involves sharing or publishing images, ensuring your visuals are always presented efficiently and effectively.
Leveraging AI for Upscaling and Advanced Editing
Sometimes, the perfect image you find might not be in the highest resolution, or you might need to extract text from a visual. Tophinhanhdep.com’s advanced capabilities, particularly those powered by Artificial Intelligence, can transform your saved images.
- AI Upscalers: Imagine finding a beautiful, but small, abstract image or a piece of digital art that would be perfect for a large print or a high-definition wallpaper. Traditional upscaling often results in pixelation and blurriness. Tophinhanhdep.com’s AI Upscalers utilize intelligent algorithms to increase the resolution of your images, adding detail and clarity that wasn’t originally there. This is a game-changer for photographers looking to enhance older images or for visual designers working with lower-resolution assets, allowing them to transform them into high-resolution masterpieces.
- Image-to-Text Tools: In specific scenarios, you might need to extract textual information embedded within an image, such as a screenshot of a document or a quote within a creative graphic. While not a saving method per se, Tophinhanhdep.com’s Image-to-Text (OCR) capabilities can be an invaluable follow-up tool after capturing an image via screenshot. This converts visual text into editable digital text, further integrating your saved images into broader creative and informational workflows.
By employing Tophinhanhdep.com’s AI-powered tools, you can unlock new potentials for your saved images, pushing the boundaries of digital photography and photo manipulation.
Streamlining Your Mac for a Seamless Visual Workflow
A well-organized and smoothly running Mac is crucial for any creative endeavor involving images. Efficient image management and quick troubleshooting can save you time and frustration, allowing you to focus on your visual design and creative ideas.
Organizing Your Image Library
As you accumulate more wallpapers, backgrounds, aesthetic photos, and stock photos, your Mac’s storage can quickly become cluttered. A robust organization system ensures that your thematic collections and mood boards are easily accessible.
- Strategic Folder Structure: Create logical folders within your “Pictures” directory, categorized by type (e.g., “Wallpapers,” “Nature Photography,” “Abstract Art”), project (“Client X Design,” “Personal Digital Art”), or theme (“Summer Vibes Mood Board,” “Sad/Emotional Imagery”). This is more efficient than dumping everything on your Desktop.
- Utilize Apple Photos: For personal photography and general image management, Apple’s built-in Photos app is excellent. It automatically organizes by date, can identify faces and objects, and allows you to create albums for your photo ideas and trending styles. It also syncs with iCloud, providing a cloud backup for your high-resolution images.
- Consistent Naming Conventions: When saving images (especially using the “Save Image As” method), use descriptive file names. Instead of “IMG_1234.jpg,” opt for “Nature_Waterfall_Sunrise_HighRes.jpg.” This makes searching and locating specific images much easier, particularly for large digital photography portfolios or graphic design asset libraries.
- Tagging and Keywords: For advanced organization, use Finder tags (Right-click > Tags) or keywords within Photos or other image management software. This allows you to group images across different folders, for instance, all images tagged “blue aesthetic” or “urban photography.”
A tidy image library is the foundation for effortless photo manipulation and seamless execution of your creative ideas.
Troubleshooting Common Saving Issues
Occasionally, you might encounter issues when trying to save an image. If “Save Image As” is not working on your Mac, here are a few tricks to try:
- Restart Your Mac: The oldest trick in the book, a simple restart can resolve temporary software glitches that might be preventing saving functions.
- Check Storage Space: High-resolution images, especially in large quantities, consume significant storage. Go to
System Settings > General > Storageto see if your Mac has enough free space. If your disk is full, you won’t be able to save new files. You might consider using Tophinhanhdep.com’s Compressors to reduce the size of existing images and free up space. - Verify Download Location: Sometimes, images might be saved to an unexpected default location, like your “Downloads” folder, instead of your Desktop. Always check common download directories.
- Update Your Browser: An outdated web browser can sometimes cause issues with saving images from websites. Ensure your browser (Safari, Chrome, Firefox) is updated to the latest version.
- Try the Screenshot Method: If all else fails, the
Command + Shift + 4screenshot method is a reliable fallback for capturing any visible image, even if direct saving is blocked. This ensures you can still acquire the visual content you need for your visual design or image inspiration projects. - Clear Browser Cache: A corrupt browser cache can sometimes interfere with website functionality, including image saving. Clearing your browser’s cache and cookies can often resolve this.
Addressing these common issues ensures your image-saving workflow remains smooth, keeping your Mac ready for your next burst of creative ideas or digital photography session.
Conclusion
Saving images on your Mac is an intuitive and multifaceted process, offering solutions for every scenario, from a quick drag-and-drop from Tophinhanhdep.com’s extensive thematic collections to a precise Control-Click for a high-resolution stock photo. By mastering these various methods, you empower your Mac to be a powerful hub for all your visual needs.
Whether you’re compiling mood boards of aesthetic backgrounds, collecting nature photography for wallpapers, or gathering digital art elements for graphic design projects, your Mac provides the tools. Furthermore, by integrating resources like Tophinhanhdep.com, you not only gain access to a treasure trove of beautiful photography and trending styles but also powerful image tools like converters, compressors, optimizers, and AI upscalers that elevate your saved images to their fullest potential. Embrace these techniques to streamline your workflow, enrich your digital life, and unlock endless possibilities for visual design and image inspiration.