How to Save Images on Chromebook: A Comprehensive Guide for Visual Enthusiasts

Chromebooks have become incredibly popular due to their simplicity, security, and cloud-first approach. For anyone passionate about visuals—whether it’s curating stunning wallpapers, collecting inspiration for graphic design, or simply saving beautiful photography found online—knowing how to effectively save images on your Chromebook is a fundamental skill. This guide will walk you through various methods of acquiring and storing images, while also highlighting how Tophinhanhdep.com can be your ultimate companion for managing, enhancing, and drawing inspiration from your visual assets.
In today’s digital age, images are everywhere. From high-resolution stock photos perfect for digital photography projects to aesthetic backgrounds that redefine your workspace, and even abstract art that sparks creative ideas, the web is a treasure trove. Your Chromebook, combined with the powerful tools and diverse collections available on Tophinhanhdep.com, can transform into a formidable hub for all your image needs. Let’s delve into the practical steps for saving images, ensuring you never miss an opportunity to capture that perfect visual.

Direct Methods for Saving Images from the Web
The internet is arguably the most common source for images, offering everything from trending styles for your mood board to sad/emotional photography that resonates with a specific project. Saving these images to your Chromebook is a straightforward process, whether you prefer a permanent download or a quick copy to the clipboard.
Using “Save image as…” for Direct Downloads
This is the most common and robust method for saving images directly from any webpage. It allows you to download a copy of the image to your local storage, Google Drive, or an external device, making it readily accessible for future use, editing, or as a source of visual design inspiration.
Step-by-Step Guide:
- Navigate to the Image: Open your Chrome browser and go to the webpage containing the image you wish to save. This could be a gallery of nature photography, a collection of aesthetic backgrounds, or a page showcasing digital art that you find inspiring.
- Initiate the Save Command:
- For Trackpad Users: Place your cursor directly over the image. Then, perform a two-finger tap on your Chromebook’s trackpad. This action is equivalent to a right-click on a traditional mouse.
- For Touchscreen Users: If your Chromebook features a touchscreen, simply tap and hold your finger on the image until a contextual menu appears.
- Select “Save image as…”: From the menu that pops up, select the option labeled “Save image as…”. This will open a “Save file as” window, giving you control over the download.
- Choose Your Destination and Rename:
- Default Location: By default, ChromeOS will suggest saving the image to your “Downloads” folder. This is a convenient local storage option for quick access.
- Google Drive Integration: For seamless cloud access and synchronization across all your devices, you can easily select “Google Drive” from the left-hand column in the “Save file as” window. This is particularly useful if you’re building a thematic collection or a shared mood board. You can navigate into existing sub-folders or create a new one to keep your photography and visual design assets organized.
- External Storage: If you have a USB drive or an SD card connected to your Chromebook, you can also select these as destination folders, perfect for transferring high-resolution images or backing up your beautiful photography.
- Rename the File: Before saving, you have the opportunity to rename the image. This is a good practice for organization, especially when dealing with large collections of stock photos or images for creative ideas. A descriptive name will help you find the image later, whether it’s “abstract_sunset_wallpaper” or “nature_macro_flower.”
- Confirm the Save: Once you’ve selected your desired folder and renamed the image, click the “Save” button or press Enter on your keyboard.
- Verify the Download: A “Download complete” notification will briefly appear in the bottom-right corner of your screen. You can click “Show in folder” to immediately open the Files app and locate your newly saved image.

Important Considerations: Image Formats and Tophinhanhdep.com’s Image Tools
You might notice that some images, especially from modern websites, save as a WEBP file rather than the more common JPG or PNG formats. WEBP is optimized for web use, offering smaller file sizes and faster loading times, which is great for the internet but can sometimes be problematic for certain editing software or applications.
This is where Tophinhanhdep.com’s Image Tools become invaluable. If you find yourself with WEBP images that need to be converted for compatibility, or if you simply prefer your collection in a specific format like JPEG, TIFF, or GIF, you can utilize our Converters. Beyond format conversion, Tophinhanhdep.com also offers Compressors to reduce file sizes for storage or sharing, and Optimizers to ensure your images are perfectly suited for web use or specific visual design projects. For those moments when a downloaded image isn’t quite high-resolution enough for your wallpaper or digital art project, our AI Upscalers can magically enhance its quality, transforming a good image into a stunning one.
Copying Images to the Clipboard for Quick Use
Sometimes, you don’t need a permanent download; you just need to grab an image quickly to paste into a document, a chat, or a lightweight photo editor. The clipboard method is perfect for this.
Step-by-Step Guide:
- Locate the Image: Find the image on the webpage you wish to copy.
- Access the Context Menu: Similar to saving an image, right-click (two-finger tap) or tap and hold on the image.
- Select “Copy image”: From the menu, choose “Copy image.” The image is now stored temporarily in your Chromebook’s clipboard.
- Paste into Your Application:
- Standard Paste: Go to the application or document (e.g., Google Docs, Google Slides, a note-taking app, or an online version of photo manipulation software) where you want to use the image. Right-click at the desired insertion point and select “Paste.”
- Using the Clipboard History: ChromeOS has a handy clipboard history. Press Search + V (the Search key is usually where Caps Lock is on traditional keyboards) to open the clipboard. You’ll see a list of recently copied items, including your image. Select the image from this list to paste it. This is excellent for visual designers who might copy several elements before deciding which one to use.
While convenient for quick insertions, remember that images copied to the clipboard are temporary. For building a lasting collection of Wallpapers, Backgrounds, or specific Photo Ideas, the “Save image as…” method is preferred.
Capturing and Storing Visuals with Chromebook Screenshots
Screenshots are an incredibly versatile way to save images, especially when direct downloading isn’t an option, or when you need to capture a specific section of your screen for graphic design, digital art references, or to document creative ideas. Chromebooks offer robust built-in screenshot capabilities that cater to various needs.
Master Your Chromebook’s Screenshot Tools
The ChromeOS screen capture tool is intuitive and powerful, allowing you to capture full screens, specific windows, or custom regions.
Step-by-Step Guide for Screenshots:
- Activate the Screen Capture Tool:
- Keyboard Shortcut: The most common method is to press Ctrl + Shift + Show Window key simultaneously. The Show Window key is typically located above the number 6 on your keyboard, resembling a rectangle with two lines.
- System Tray Access: Alternatively, click on the time/date in the bottom-right corner of your screen to open the system tray. Here, you’ll find a “Screen capture” icon (often a camera or scissor icon). Click on it to activate the tool.
- Choose Your Capture Type:
- Full Screen Capture: To capture everything visible on your screen, select the “Take full screenshot” icon (usually a solid rectangle). This is great for saving an entire aesthetic layout or a complex digital art piece.
- Partial Screenshot (Region Selection): For capturing only a specific image or section, select the “Take partial screenshot” icon (often a dotted rectangle). Your cursor will turn into a crosshair. Click and drag to draw a box around the exact image or area you want to save. This is invaluable for isolating elements for photo manipulation or extracting specific components for visual design.
- Window Capture: To capture an entire open window, select the “Take window screenshot” icon.
- Confirm the Capture: After selecting your region or type, click “Capture.” The screenshot will be taken.
- Tablet Mode Specifics: If you’re using your Chromebook in tablet mode (e.g., a 2-in-1 device flipped over), you can take a full-screen screenshot by pressing the Power button and Volume Down button together. Note that this method only captures the entire screen, not partial regions.
- Access and Manage Your Screenshots:
- Default Save Location: All screenshots are automatically saved as PNG files to your “Downloads” folder.
- Change Default Folder: If you prefer a different default location (perhaps a specific folder in Google Drive for “Image Collections” or “Visual Design” assets), you can change this. When the screen capture tool is active, click the gear icon (settings). Select “Select folder” and choose your preferred destination.
- Quick Access: Like direct downloads, a notification will appear in the bottom-right corner after capture. Click “Show in folder” to immediately view your screenshot.
Screenshots are excellent for documenting steps, capturing fleeting visuals, or taking snapshots of digital art in progress. Once you have these PNG files, you can further refine them using Tophinhanhdep.com’s Image Tools. Our Compressors can reduce the file size of multiple screenshots for easier sharing, and if you captured a particularly inspiring visual that needs a slight boost in quality, an AI Upscaler can work wonders.
Importing and Managing Images from Cloud Services
Chromebooks are inherently linked to the cloud, with Google Drive and Google Photos being central to managing files and visual media. This seamless integration makes it incredibly easy to access and download your pre-existing image collections or beautiful photography stored online.
Seamlessly Downloading from Google Photos
Google Photos is a popular service for backing up and organizing personal photos. If you’ve uploaded your digital photography or created thematic collections there, downloading them to your Chromebook is a breeze.
Step-by-Step Guide:
- Open the Google Photos App: On your Chromebook, launch the Google Photos application.
- Select Your Image: Browse through your albums or search for the specific image you want to download. This could be a high-resolution photo from a recent trip or a particular aesthetic background you want to use.
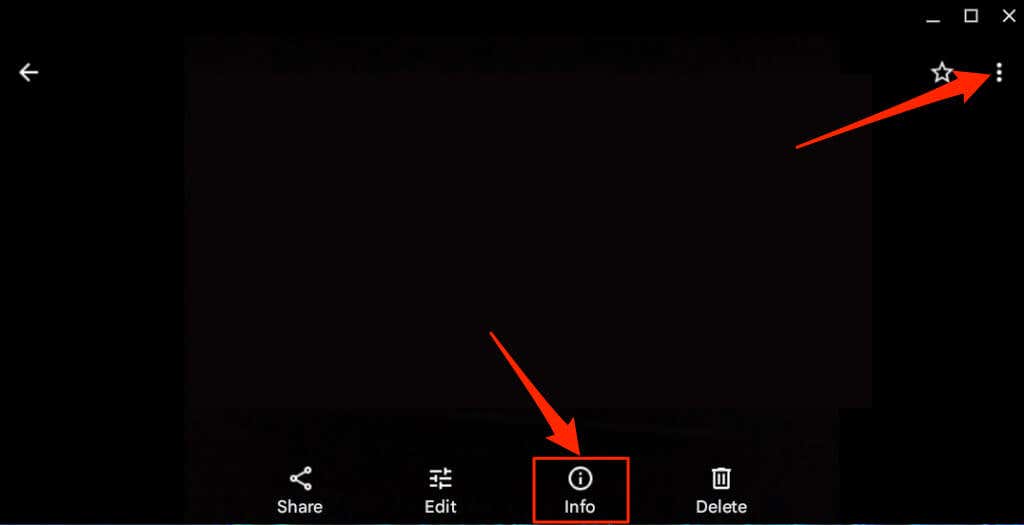
- Access Download Options:
- Three-dot Menu: Click on the three-dot menu icon, usually located in the top-right corner of the image viewer.
- Info Icon (sometimes): On some versions or interfaces, an “Info” icon might also provide access to download options.
- Select “Download”: From the dropdown menu, choose the “Download” option.
- Locate the Downloaded Image: The selected picture will be saved to your Chromebook’s “Downloads” folder, just like images saved directly from webpages. From there, you can move it to any other folder, your Google Drive, or an external device, consolidating your image inspiration.
This method ensures that your personal collection of beautiful photography, whether it’s nature scenes, abstract compositions, or family memories, is easily transferable to your Chromebook for editing, sharing, or simply enjoying as new wallpapers. If you download a batch of photos and find some are lower resolution than desired, remember Tophinhanhdep.com’s AI Upscalers can help bring them up to standard, ready for high-resolution display or digital art projects.
Enhancing Your Saved Images with Tophinhanhdep.com’s Tools and Inspiration
Saving images to your Chromebook is just the beginning. The true power lies in what you do with them. Tophinhanhdep.com is designed to complement your image-saving habits by offering a suite of tools and a vast library of inspiration that elevates your visual journey.
Image Tools for Every Need
Once you’ve amassed a collection of images—be it wallpapers, stock photos, or elements for graphic design—you’ll likely need tools to manage and optimize them.
- Converters: As mentioned earlier, dealing with diverse file formats like WEBP, JPG, PNG, and TIFF is common. Tophinhanhdep.com’s Converters allow you to effortlessly transform images from one format to another, ensuring compatibility with your preferred editing software or platforms. This is crucial for professionals working on photo manipulation or digital art projects.
- Compressors & Optimizers: High-resolution images, while stunning, can consume significant storage space and slow down website loading times. Our Compressors help you reduce file size without sacrificing noticeable quality, perfect for optimizing images for web use or freeing up space on your Chromebook. The Optimizers go a step further, fine-tuning image parameters for peak performance, ensuring your aesthetic backgrounds load quickly on your blog or your project visuals are perfectly prepared for online portfolios.
- AI Upscalers: Discovering a visually stunning image that’s unfortunately low-resolution can be frustrating. Tophinhanhdep.com’s AI Upscalers use advanced artificial intelligence to intelligently increase the resolution of your images, adding detail and clarity. This means a small image you saved for inspiration can be transformed into a high-resolution masterpiece suitable for a wallpaper, a large print, or a core element in a digital art composition.
- Image-to-Text: For specific applications, such as extracting text from a document screenshot or gleaning information from an image containing text, our Image-to-Text tool can be incredibly useful. This can aid in research, data entry, or simply in cataloging details about your saved image collections.
Building Your Visual Library: Inspiration and Collections
Beyond tools, Tophinhanhdep.com serves as a wellspring of inspiration for all visual enthusiasts. The images you save on your Chromebook are often the building blocks for larger creative endeavors.
- Wallpapers & Backgrounds: Your Chromebook is your personal canvas. Saving diverse images from our Wallpapers and Backgrounds collections allows you to personalize your device with everything from serene nature scenes to striking abstract designs, or perhaps a beautiful photography shot that resonates with your mood.
- Photo Ideas & Mood Boards: Many users save images to gather Photo Ideas for future shoots or to construct Mood Boards for design projects. A collection of sad/emotional images might inspire a particular narrative, while vibrant aesthetic photos could inform a new color palette for graphic design. Tophinhanhdep.com provides a rich source for building these visual narratives.
- Thematic Collections & Trending Styles: Organize your saved images into Thematic Collections—be it a folder dedicated to “Autumn Nature Photography,” “Minimalist Aesthetic,” or “Dynamic Abstract Art.” Regularly checking Tophinhanhdep.com for Trending Styles can keep your collections fresh and relevant, fueling your creative ideas and ensuring your visual design projects are always current.
- Digital Photography & Visual Design: For aspiring photographers, saving High Resolution images and Stock Photos from Tophinhanhdep.com can serve as excellent learning material for understanding different Editing Styles and composition techniques. For visual designers, these saved images are raw materials for Graphic Design projects, Digital Art creations, and complex Photo Manipulation work.
Conclusion
Saving images on your Chromebook is a simple yet powerful capability that opens up a world of creative possibilities. Whether you’re directly downloading beautiful photography from the web, quickly copying an aesthetic background, or meticulously capturing a section of your screen for a visual design project, your Chromebook makes the process seamless.
However, the journey doesn’t end with a saved file. Tophinhanhdep.com enhances every step of this visual process, from providing a vast library of High Resolution Images, Wallpapers, and Stock Photos for your inspiration, to offering essential Image Tools like Converters, Compressors, Optimizers, and AI Upscalers. These resources empower you to not only save images but also to manage, refine, and utilize them to their fullest potential in your Photography, Visual Design, and Digital Art endeavors.
Embrace your Chromebook’s ease of use and let Tophinhanhdep.com be your go-to partner for turning every saved image into a springboard for creativity and visual excellence. Start building your ultimate image collection today!