How to Scale Image in Photoshop: A Comprehensive Guide for Digital Creators

In the dynamic world of digital imagery, where visuals dominate everything from social media feeds to professional portfolios, mastering the art of image manipulation is essential. At the heart of this skill set lies the ability to efficiently scale, transform, and resize images within powerful editing software like Adobe Photoshop. Whether you’re a seasoned photographer aiming for pixel-perfect high-resolution prints, a graphic designer creating stunning digital art, or simply looking to adjust a background for your desktop, understanding how to effectively manage image dimensions is paramount.
This guide, curated for the diverse needs of Tophinhanhdep.com’s community—from those seeking beautiful photography for wallpapers to professionals engaged in intricate photo manipulation—will demystify the process of scaling images in Photoshop. We’ll explore various techniques, from basic proportional resizing to advanced non-destructive transformations, ensuring your visual creations always meet the highest quality standards.

Understanding the Core Resizing Methods
Photoshop offers multiple pathways to resize images and objects, catering to different needs and levels of precision. The most fundamental approaches involve adjusting the overall canvas or precisely manipulating individual layers using the Transform functions.
Resizing an Entire Document (Image Size)
When your goal is to change the overall dimensions of your entire image or document, including all its layers, the “Image Size” dialog box is your primary tool. This is particularly useful when preparing images for specific outputs, such as fitting a nature wallpaper to a screen or ensuring a stock photo meets client specifications.
To resize your entire image proportionally:

- Open Your Image: Begin by opening your desired image in Adobe Photoshop.
- Access Image Size: Navigate to the Image menu in the top bar and select Image Size (or use the shortcut
Alt + Ctrl + Ion Windows,Option + Command + Ion Mac). This will open the Image Size dialog box, which provides comprehensive controls over your image’s dimensions and resolution. - Maintain Aspect Ratio: This is a crucial step for preventing distortion. Look for the chain link icon located between the “Width” and “Height” input fields. Ensure this icon is activated (it will appear linked). When active, changing either the width or height will automatically adjust the other dimension to maintain the original image’s proportions. This preserves visual harmony, vital for aesthetic images and professional photography.
- Adjust Dimensions: You can now enter your desired values for width or height. These can be in pixels (for digital displays), inches or centimeters (for print), or percentages. As you modify one value, the linked dimension will update accordingly.
- Understand Pixel Dimensions and Resolution: Within this dialog box, you’ll see options for “Pixel Dimensions” and “Resolution.”
- Pixel Dimensions refer to the total number of pixels along the width and height of your image. Adjusting these directly changes the scale of your image.
- Resolution (measured in pixels per inch or PPI) determines how many pixels are packed into each inch of the image. A higher resolution means more detail, crucial for high-quality prints, while lower resolutions are often sufficient for web content to reduce file size. We will delve deeper into resolution later.
- Apply Changes: Once you’ve set your desired dimensions and ensured the aspect ratio is locked, click OK to apply the changes.

This method provides a precise way to resize an image, ensuring clarity isn’t compromised. It’s a fundamental skill for anyone working with digital photography and preparing images for various uses on Tophinhanhdep.com.
Scaling Objects and Layers with Free Transform
While “Image Size” affects the entire document, the “Free Transform” tool is indispensable for resizing individual layers or objects within your composition. This is particularly useful for photo manipulation, graphic design, and arranging elements for creative ideas like mood boards or abstract designs.
Here’s how to resize a layer using Free Transform:
- Select the Layer: In your Layers panel (usually located in the bottom-right corner), select the specific layer you wish to resize. The selected layer will typically have a highlighted background.
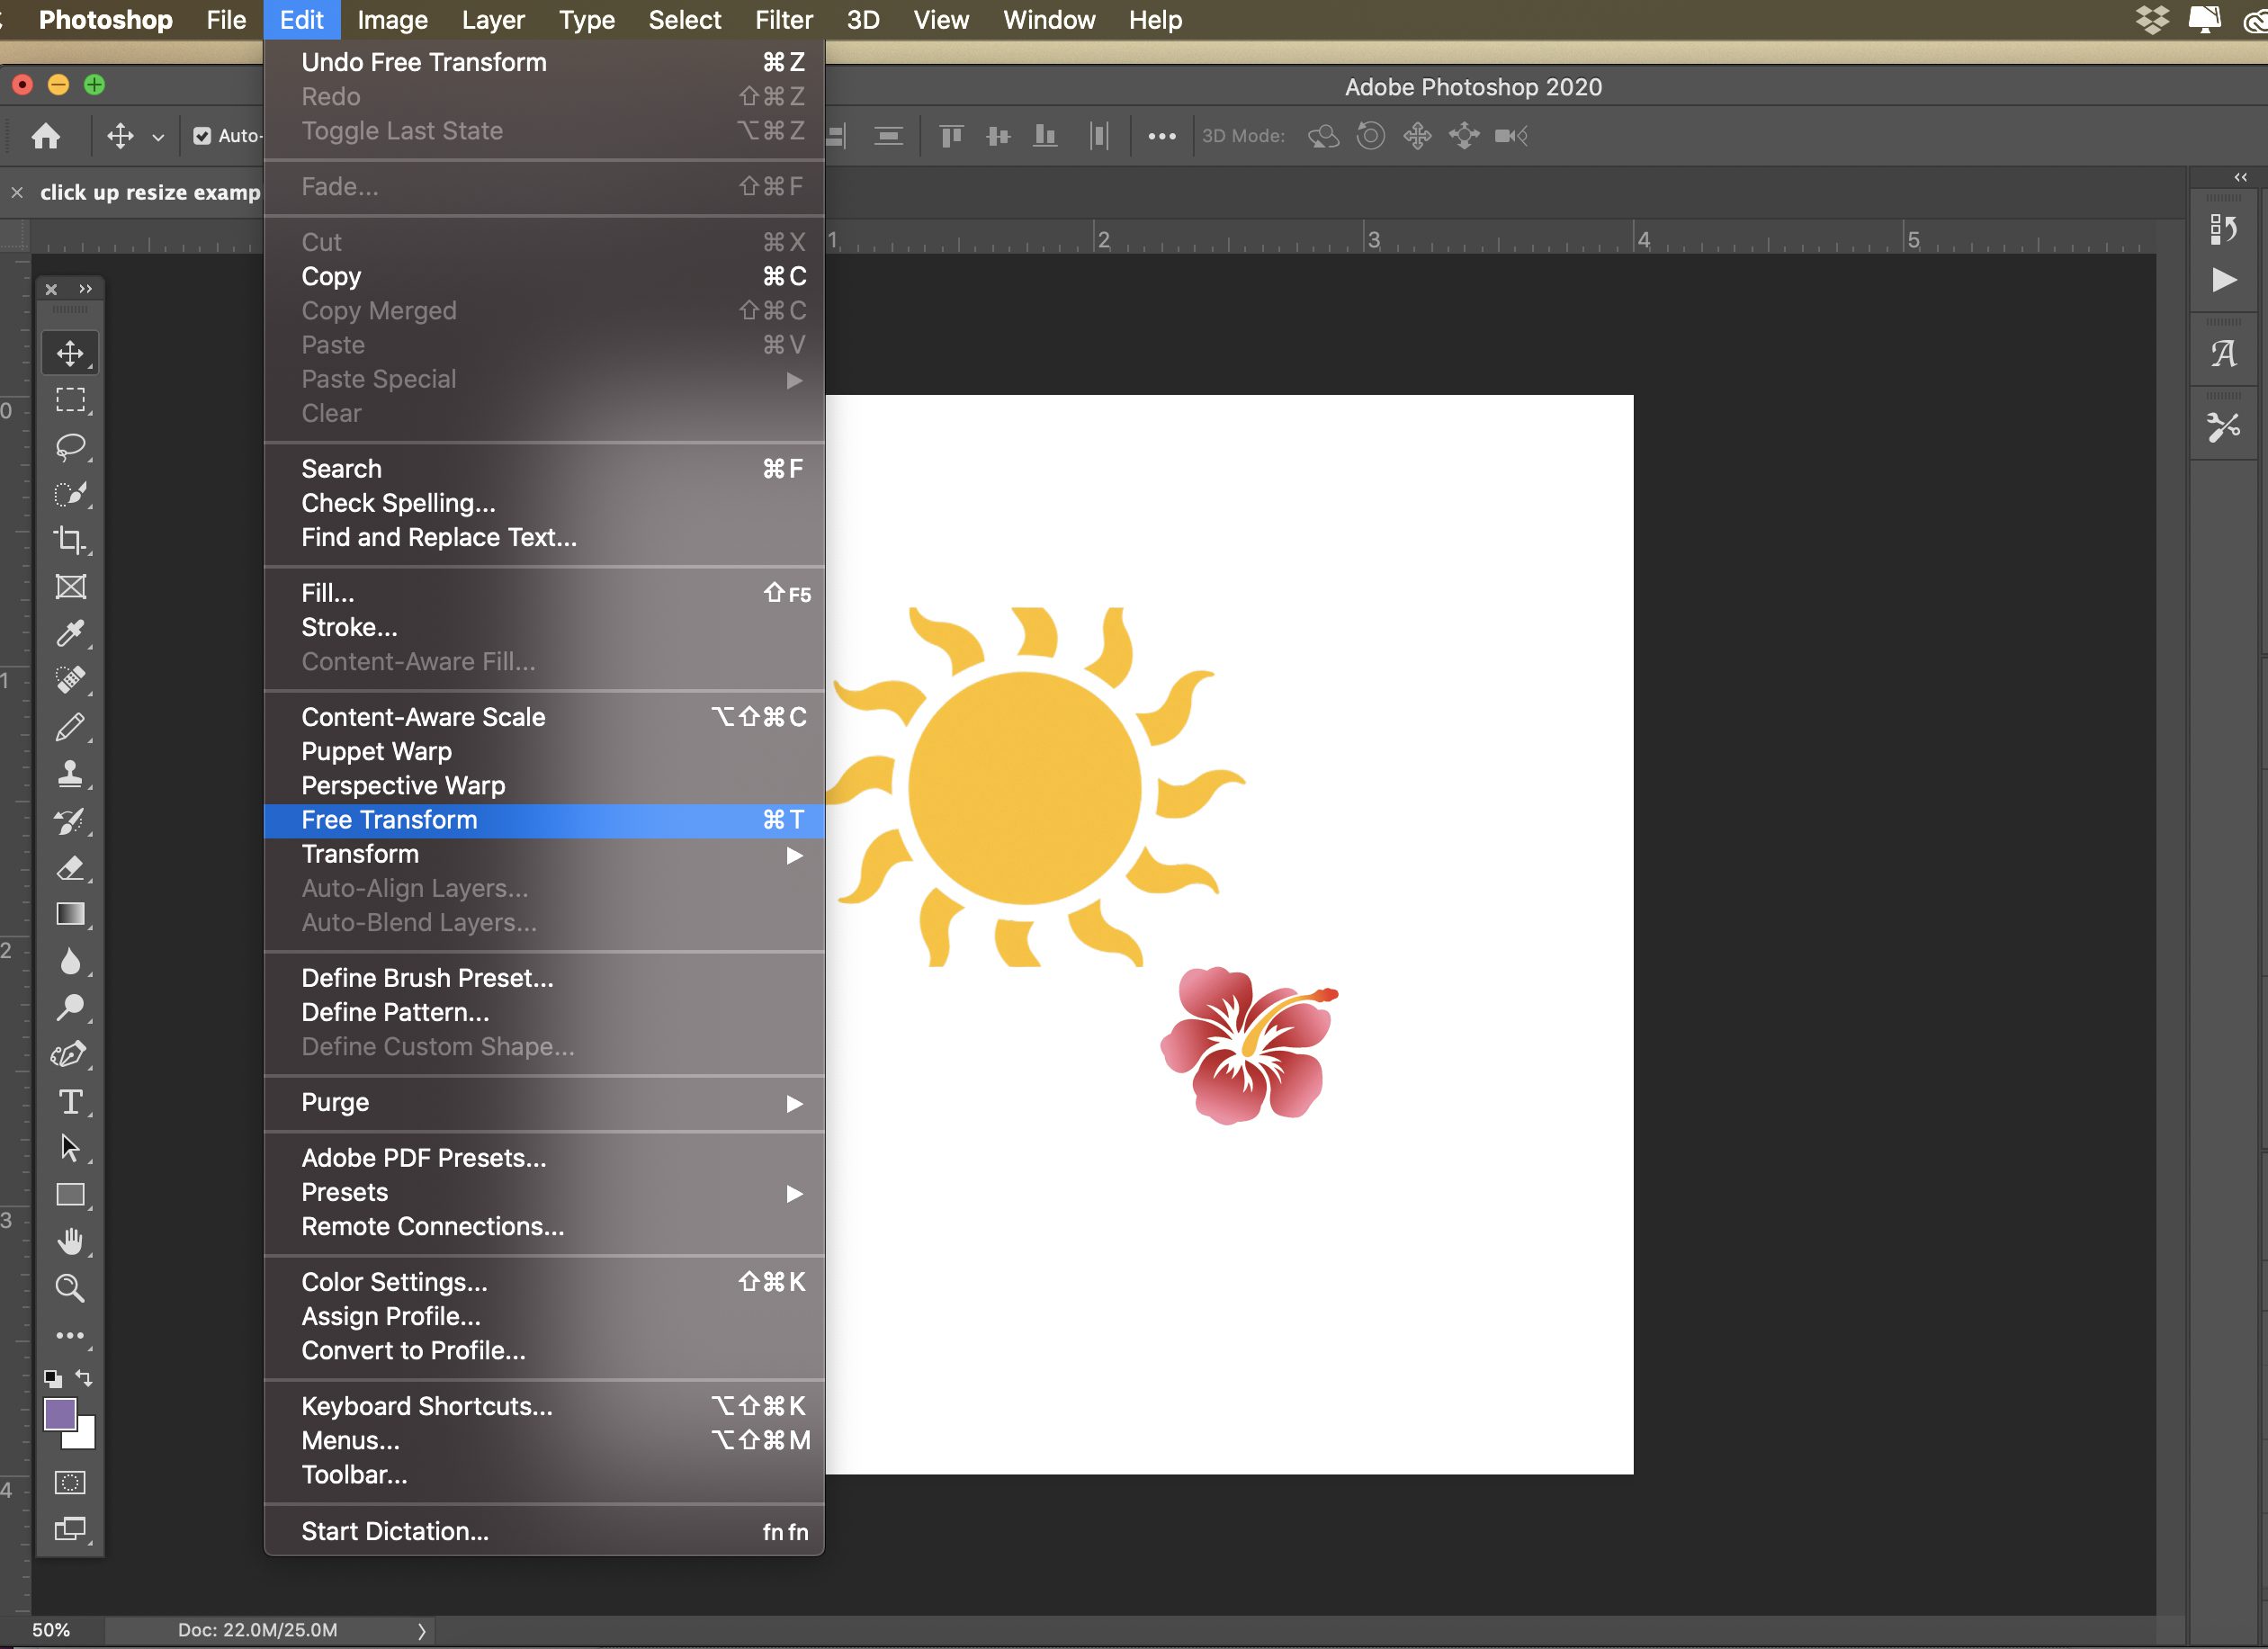
- Activate Free Transform: Go to the Edit menu and select Free Transform, or simply use the universal keyboard shortcut:
Ctrl + T(Windows) orCommand + T(Mac). A bounding box with corner and side handles will appear around your selected layer. - Resizing with Handles:
- Proportional Scaling (CC 2019 and newer): In recent versions of Photoshop (CC 2019 and later), dragging any corner handle will automatically scale the layer proportionally. You do not need to hold the Shift key. This streamlined behavior is often preferred for maintaining the integrity of objects, ensuring your aesthetic images or graphic design elements don’t appear stretched or squashed.
- Proportional Scaling (Pre-CC 2019): For older versions, you must hold down the Shift key while dragging a corner handle to constrain the proportions. Releasing Shift would allow non-proportional scaling.
- Non-Proportional Scaling (CC 2019 and newer): If you do want to intentionally distort or stretch an object in CC 2019+, you would hold down the Shift key while dragging a corner handle, or simply drag a side handle without holding any modifier key.
- Resizing from the Center: To scale an object from its center point rather than from the corner you’re dragging, hold down the Alt key (Windows) or Option key (Mac) while dragging a handle. Combining
Shift + Alt(Windows) orShift + Option(Mac) with a corner drag will resize proportionally from the center.
- Manual Percentage Input: For precise adjustments, you can also use the Options Bar at the top of the screen. After activating Free Transform, you’ll see “W” (Width) and “H” (Height) percentage fields. Ensure the Maintain Aspect Ratio button (chain link icon) is active next to these fields if you want to scale proportionally, then input your desired percentages.
- Confirm or Cancel: Once satisfied with the new size, press Enter (Windows) or Return (Mac) to apply the transformation. If you want to cancel the changes and revert to the original size, press the Escape (Esc) key.
Free Transform is a versatile tool that not only resizes but also allows you to move and rotate layers. To rotate, simply hover your mouse pointer just outside a corner handle until it changes into a curved, two-sided arrow, then click and drag. Holding Shift during rotation will constrain the rotation to 15-degree increments.
Mastering Transform Functions for Creative Control
Beyond basic scaling, Photoshop’s transform tools offer a suite of powerful options for comprehensive photo manipulation and visual design. These functions are crucial for artists and photographers who wish to infuse their images with creative ideas, from generating abstract patterns to crafting intricate composite scenes.
Beyond Simple Scaling: Rotate, Skew, Distort, Perspective, and Warp
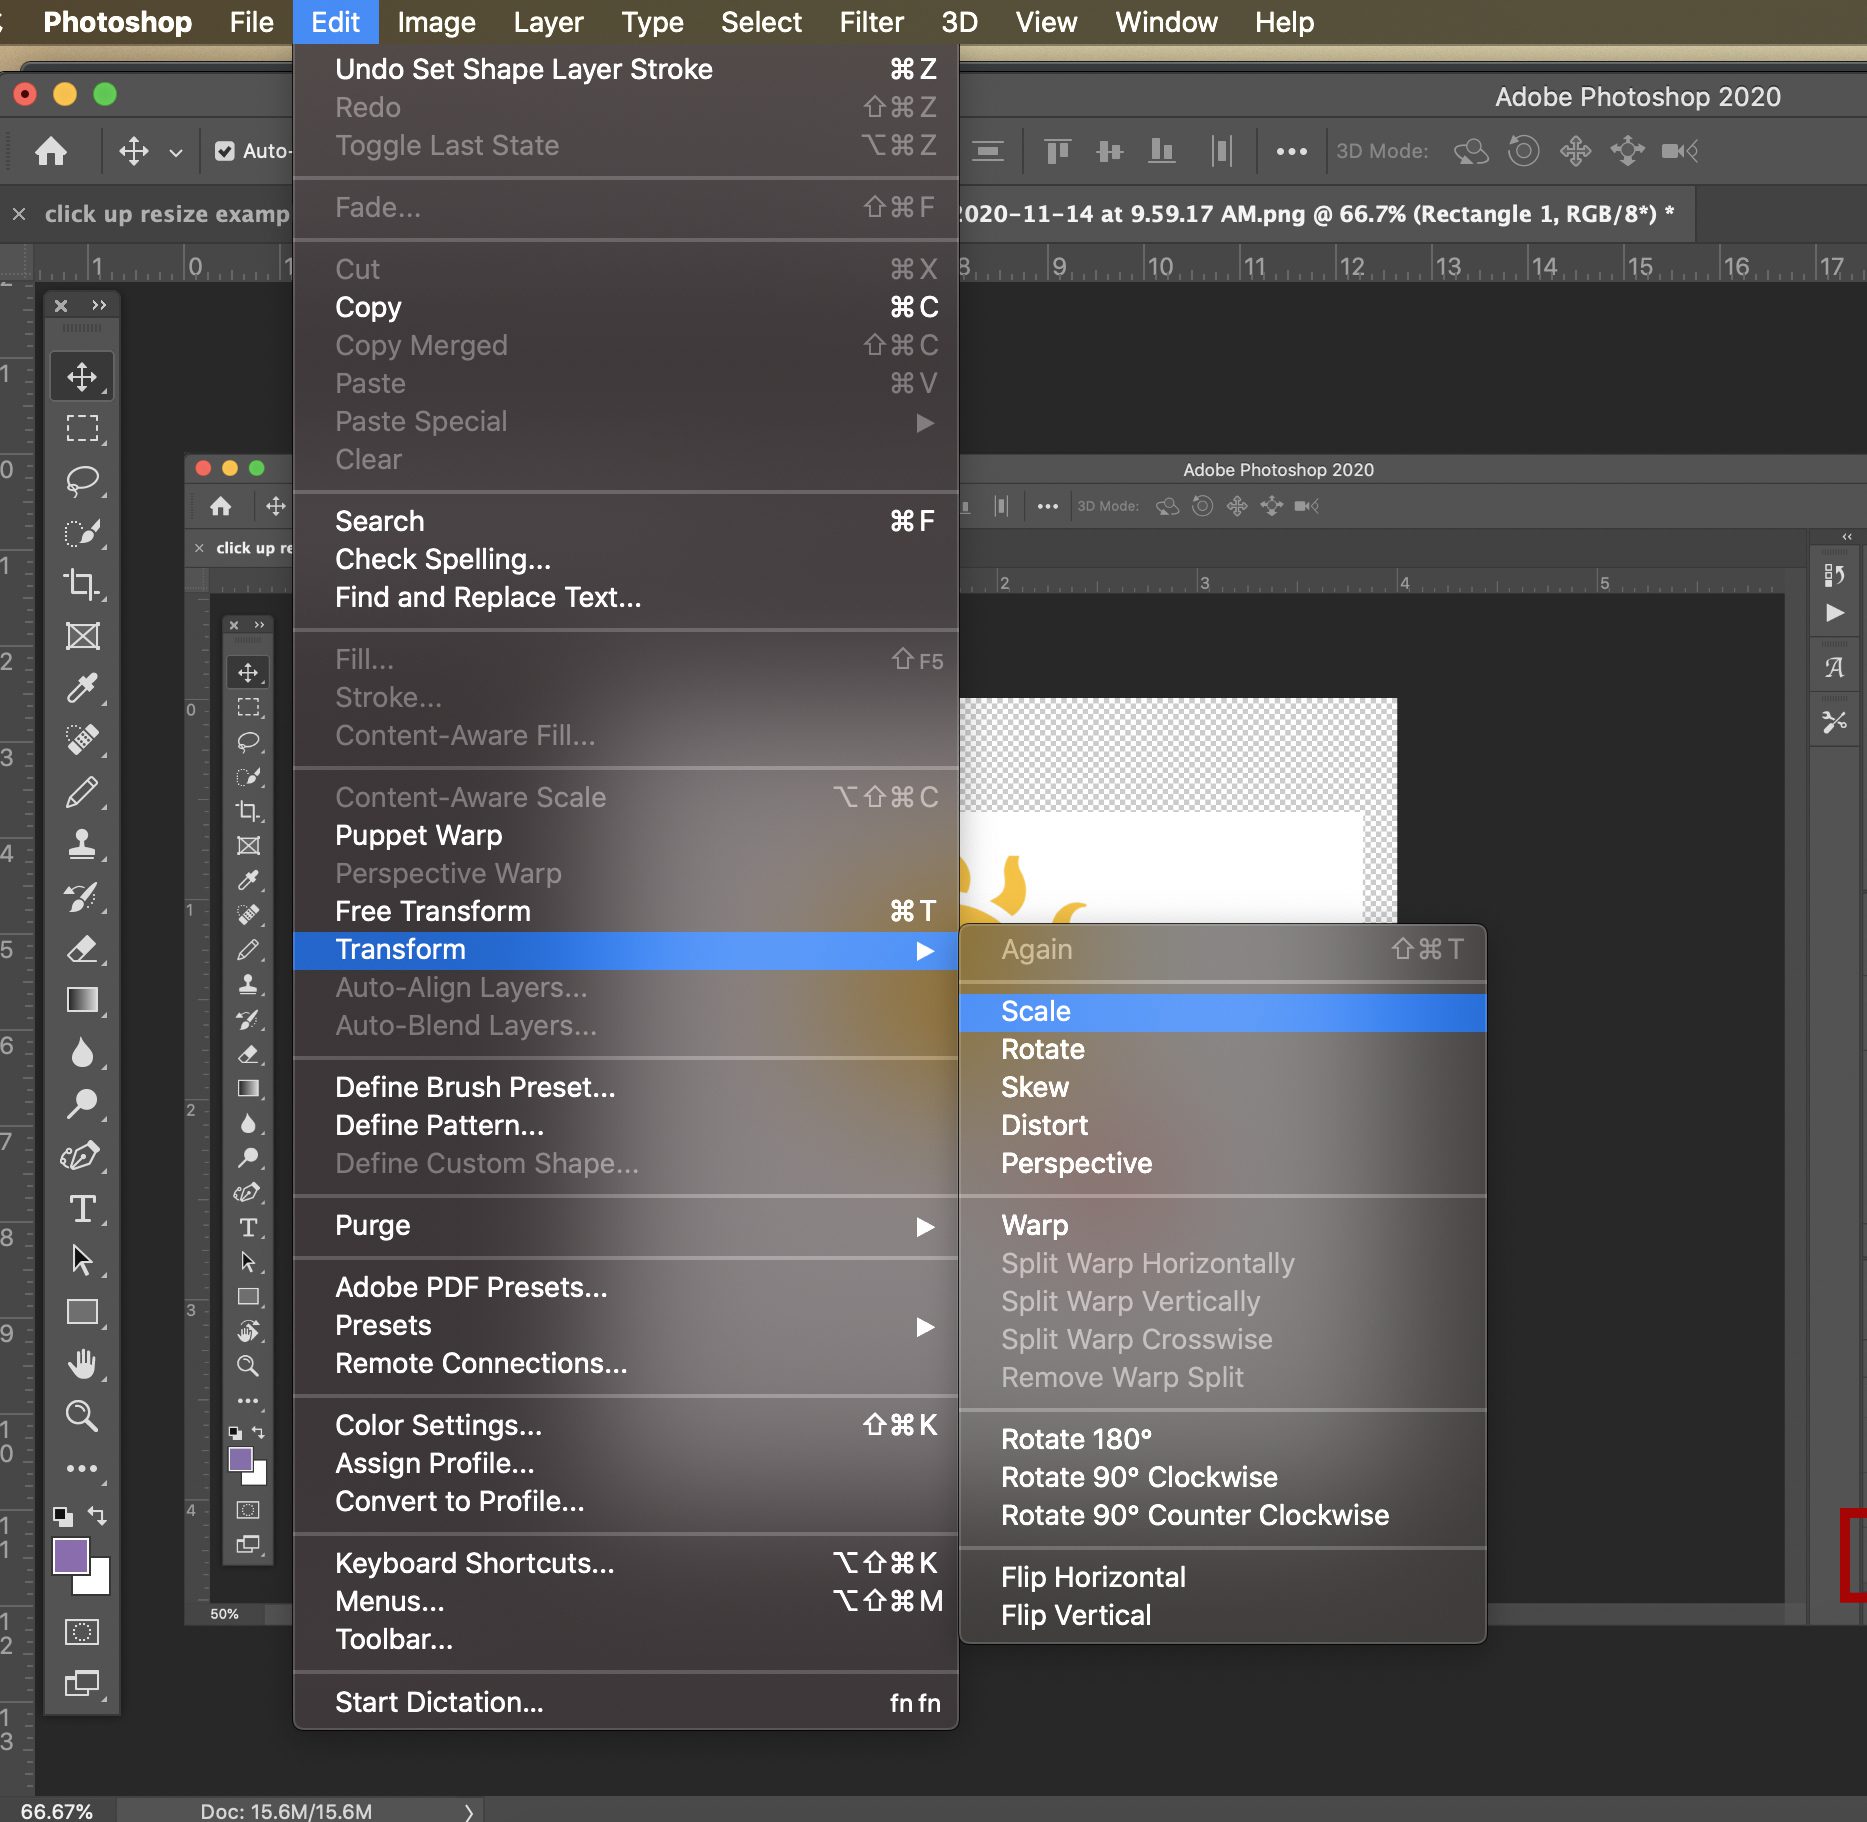
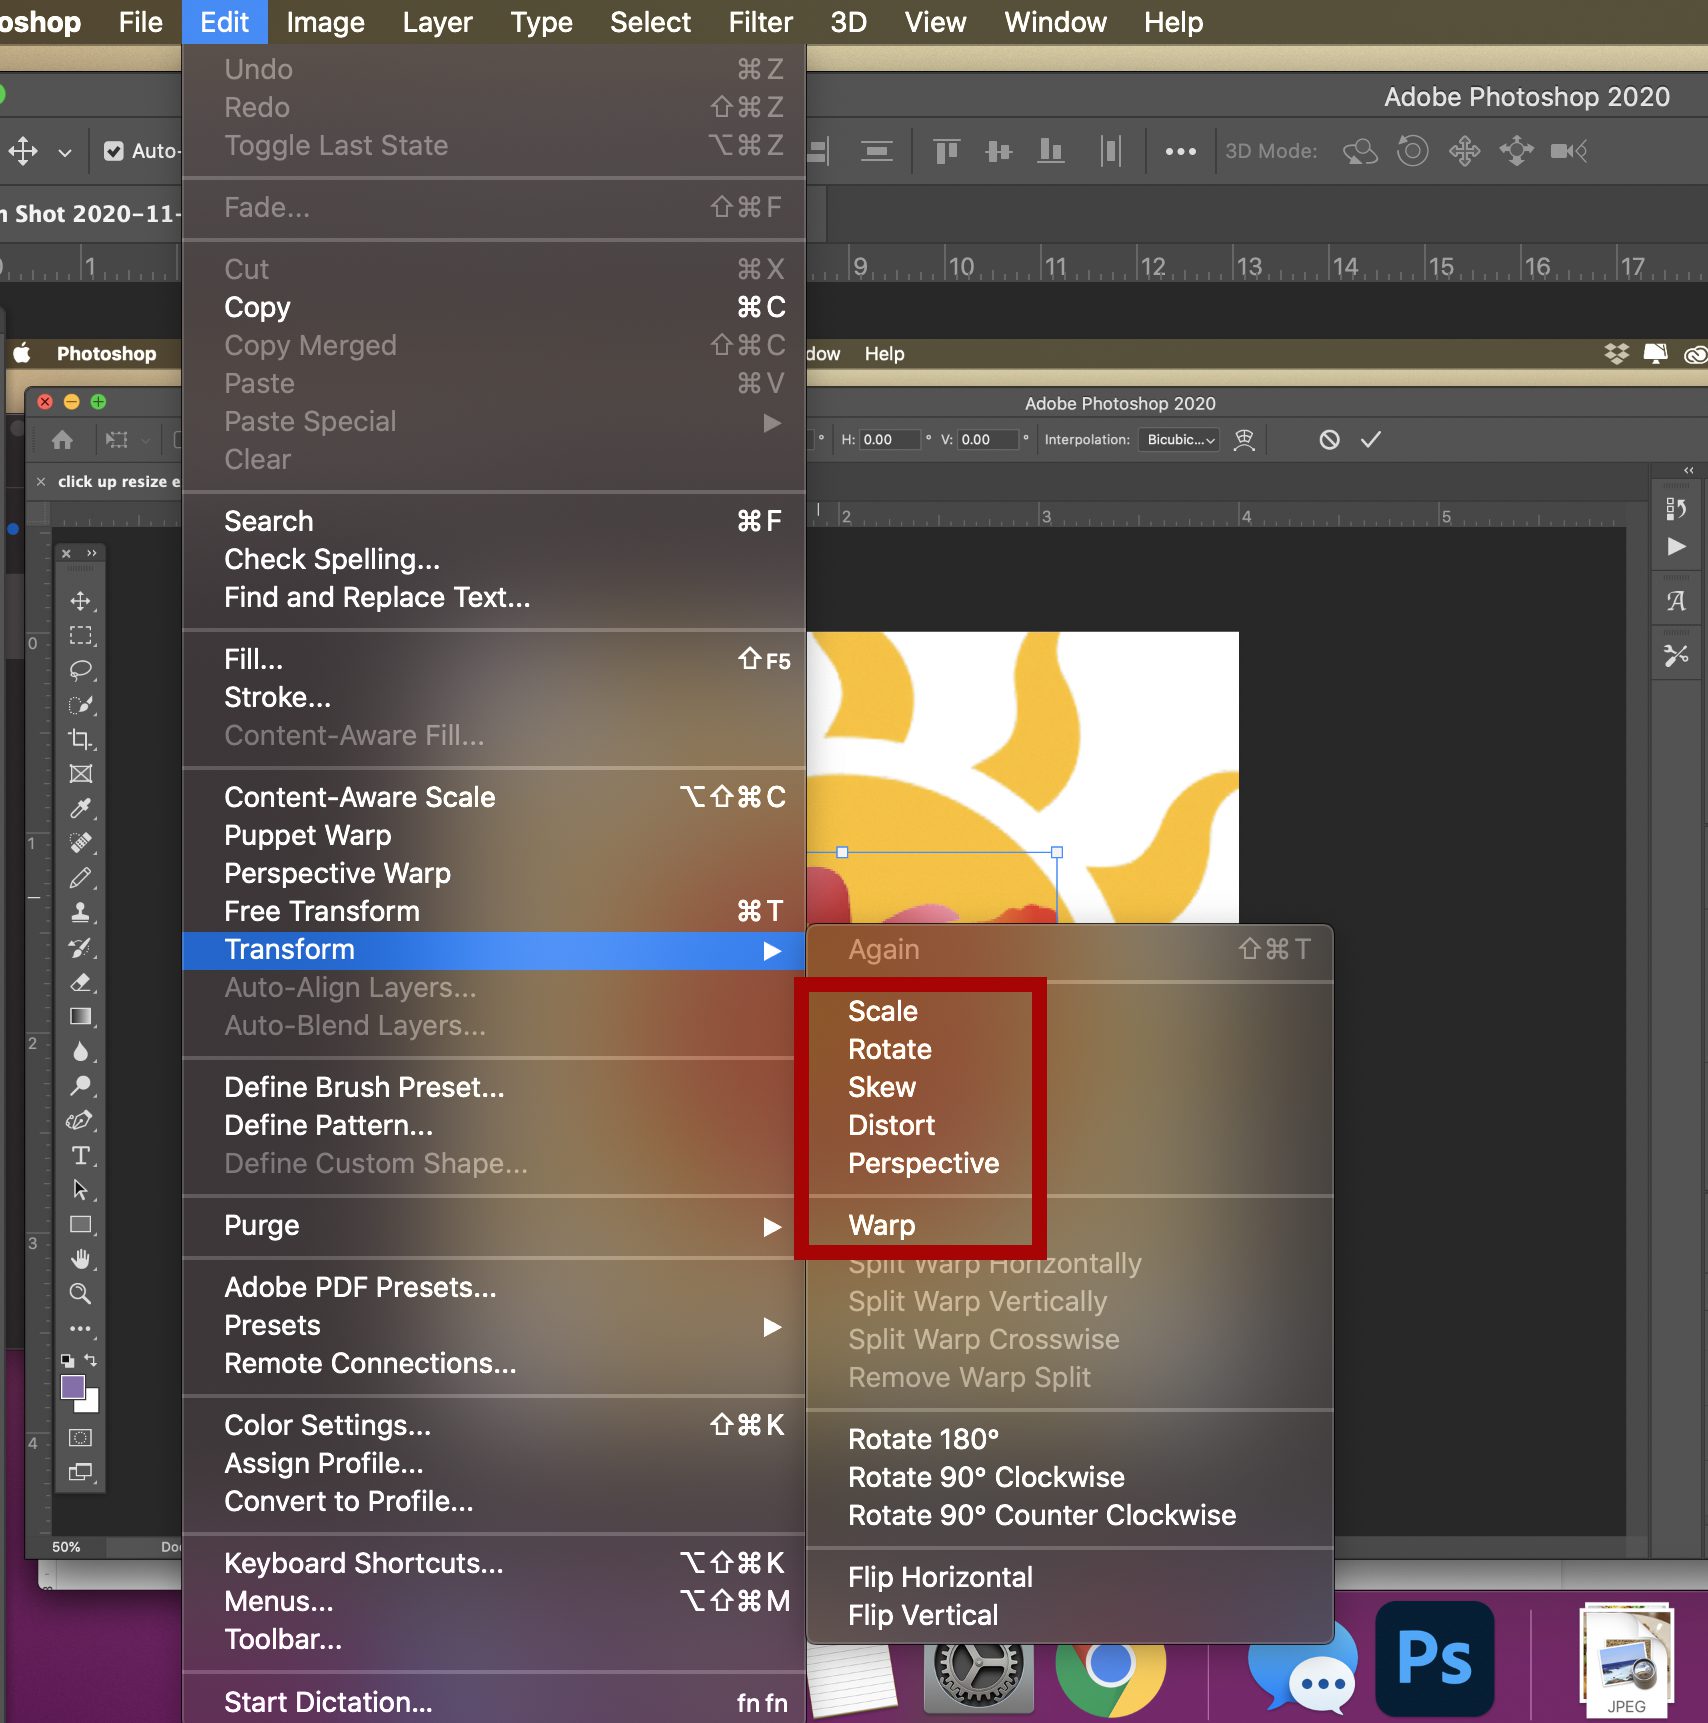
The Edit > Transform menu houses several sub-options that allow for more complex manipulation of your layers. These are more than just resizing tools; they are artistic instruments for shaping and bending reality within your digital art.
- Rotate: As mentioned, this allows you to rotate your object around a fixed reference point. Holding Shift constrains rotation to 15-degree increments. This is perfect for adjusting elements in aesthetic images or subtle tweaks in a composition.
- Skew: This function allows you to slant your object vertically and horizontally. By dragging a side handle while in Skew mode (or holding
Ctrl/Commandand dragging a side handle during Free Transform), you can create dynamic angles, useful for adding motion or a unique perspective to graphic design elements. - Distort: Distort gives you free rein to stretch your object in all directions. You can drag any corner handle to independently manipulate the shape, which is invaluable for precise photo manipulation, such as fitting an image onto an irregular surface. To activate during Free Transform, hold
Ctrl/Commandand drag a corner handle. - Perspective: Applies a one-point perspective to the chosen object. Drag a corner handle, and the opposite corner on the same side will mirror your movement, making the object appear to recede or advance in space. This is a powerful tool for adding depth to scenes, making elements like backgrounds or abstract shapes feel more three-dimensional. To activate during Free Transform, hold
Shift + Ctrl + Alt(Windows) orShift + Command + Option(Mac) and drag a corner handle. - Warp: The most versatile of the transform options, Warp allows for detailed manipulation of an object’s shape using a mesh grid. When activated, a “mesh” appears over the image. You can drag control points, lines, or even areas within the mesh to bend and mold your object into almost any form. This is a go-to tool for advanced photo manipulation, creating unique visual designs, or adapting elements to complex contours.
These sub-functions, often combined with Free Transform, unlock vast possibilities for creative expression. They allow you to turn simple images into sophisticated visual narratives, aligning perfectly with Tophinhanhdep.com’s commitment to visual design and inspiring artistic endeavors.
The Power of Smart Objects for Non-Destructive Scaling
One of the most crucial techniques for maintaining image quality during repeated transformations, especially when frequently resizing layers, is the use of Smart Objects. This is a cornerstone of professional digital photography and editing styles, ensuring your high-resolution images remain pristine.
What is a Smart Object? A Smart Object is a special layer type in Photoshop that contains all the original image data, regardless of how you scale or transform it. Instead of directly altering the pixels on the layer, Photoshop performs transformations on a “proxy” version, always referencing the original data embedded within the Smart Object.
Why use Smart Objects for scaling? Imagine you have a beautiful nature photograph or a detailed stock photo that you need to shrink for a web thumbnail, then later enlarge it for a print design. If you resize a regular pixel layer down, Photoshop discards the “extra” pixel information. When you try to enlarge it again, Photoshop has to “guess” at the missing pixels, resulting in blurriness and pixelation—a definite quality loss.
However, if you convert that layer to a Smart Object first, you can scale it down to a tiny size, then scale it back up to its original dimensions (or even slightly larger) multiple times without any loss of quality from those transformations. The original high-resolution data is always preserved. While you cannot enlarge a Smart Object beyond its original pixel dimensions without some quality loss (as Photoshop still has to create new pixels), it ensures you retain the maximum possible detail compared to working with a standard rasterized layer.
To convert a layer to a Smart Object:
- Select the Layer: Choose the layer you want to protect in the Layers panel.
- Convert: Right-click on the layer and select Convert to Smart Object. The layer thumbnail in the Layers panel will now display a small icon, indicating it’s a Smart Object.
- Transform: Now, use Free Transform (
Ctrl + T/Command + T) or any other transform tools. You can resize, rotate, skew, or distort to your heart’s content, knowing that the original pixel data is safe within the Smart Object.
This non-destructive workflow is invaluable for digital art, photo manipulation, and any project where image quality and flexibility are paramount. It also works beautifully in conjunction with Tophinhanhdep.com’s focus on high-resolution photography and ensuring visual integrity.
Optimizing Image Quality and Workflow Efficiency
Achieving professional results in Photoshop involves more than just knowing where the tools are; it’s about understanding how to use them optimally to maintain image quality and streamline your workflow. This section delves into the nuances of resolution, resampling, and efficient keyboard shortcuts.
Choosing the Right Resampling Method
When you resize an image using Image > Image Size, the “Resample” option is critical, especially when changing the pixel dimensions. Resampling refers to how Photoshop adds or removes pixels when you change an image’s size, and the method you choose significantly impacts the final image quality.
Here’s a breakdown of common resampling methods and their implications:
- Automatic: Photoshop attempts to select the best resampling method based on whether you are enlarging or reducing the image. Often a good starting point for beginners.
- Preserve Details (enlargement) / Preserve Details 2.0: This is often the best choice for significantly enlarging images. It uses advanced algorithms to minimize noise and maintain sharper details. If direct enlarging images introduce too much pixelation or distortion, always opt for gradual scaling up using small increments with this method.
- Bicubic Smoother (enlargement): Generally preferred when you are enlarging an image. It interpolates pixels to create smoother tonal gradations, often producing better results than Bilinear for upsizing.
- Bicubic Sharper (reduction): Ideal when reducing the size of an image. It applies a slight sharpening during the downsampling process to help retain definition, which is beneficial for creating smaller versions like web thumbnails or icons without losing too much detail.
- Bicubic (smoother gradients): A more sophisticated interpolation method that analyzes the values of surrounding pixels. It generally produces smoother tonal gradations than Nearest Neighbor or Bilinear, suitable for both enlargement and reduction, but may be slightly less sharp than Bicubic Sharper for reduction and less detail-preserving than Preserve Details for enlargement.
- Bilinear (smoother results): A basic method that averages the color values of surrounding pixels. It produces smoother results than Nearest Neighbor but can sometimes lead to blurriness, especially with significant enlargements.
- Nearest Neighbor (hard edges): This is the fastest but least sophisticated method. It simply duplicates or deletes pixels, resulting in a “pixelated” or “blocky” appearance, especially when enlarging. It’s best used for illustrations with hard edges or when you want to intentionally preserve pixel-level detail for digital art.
Resolution Considerations: The appropriate resolution depends entirely on your output.
- Digital Displays (Web, Social Media, Screen Wallpapers): Typically, 72 to 96 DPI (dots per inch) is sufficient. Higher resolutions are often unnecessary and only increase file size, impacting website load times—a key factor Tophinhanhdep.com addresses with image optimization tools.
- High-Quality Print (Posters, Brochures, Fine Art Prints): A DPI setting of 300 or higher is recommended to ensure crisp and clear print outputs. Always aim for the highest possible resolution when your image might eventually go to print.
By choosing appropriate settings and understanding their effects within Adobe Photoshop, you ensure that when you resize images, they meet expectations without compromising on visibility or intent. No matter if you’re reducing file sizes for faster website load times or adapting resolutions for sharp prints, every step requires mindful adjustments, confirming that end results align with the original image in Photoshop and your creative vision.
Leveraging Keyboard Shortcuts for Faster Editing
Efficiency is key in any visual design workflow, and Photoshop’s extensive use of keyboard shortcuts can dramatically speed up your process. Keeping your hands on the keyboard reduces mouse travel and makes repetitive tasks much quicker.
Here are essential shortcuts for scaling and transforming:
- Activate Free Transform:
Ctrl + T(Windows) orCommand + T(Mac). This immediately places a bounding box around your selected layer or object. - Proportional Scaling (Newer PS versions): Just drag a corner handle.
- Non-Proportional Scaling (Newer PS versions): Hold
Shiftwhile dragging a corner handle. - Proportional Scaling (Older PS versions): Hold
Shiftwhile dragging a corner handle. - Resize from Center: Hold
Alt(Windows) orOption(Mac) while dragging any handle. - Proportional Resize from Center: Hold
Shift + Alt(Windows) orShift + Option(Mac) while dragging a corner handle. - Temporary Skew/Distort Mode (during Free Transform): Hold
Ctrl(Windows) orCommand(Mac) and drag a side or corner handle. - Temporary Perspective Mode (during Free Transform): Hold
Shift + Ctrl + Alt(Windows) orShift + Command + Option(Mac) and drag a corner handle. - Access Transform Sub-options Menu: Right-click (Windows) or
Control + click(Mac) anywhere inside the bounding box while Free Transform is active. - Confirm Transformation: Press
Enter(Windows) orReturn(Mac). - Cancel Transformation: Press
Escape(Esc) key.
Mastering these shortcuts will not only make you a more efficient editor but also enhance your ability to fluidly execute creative ideas and photo manipulation techniques, saving valuable time for more artistic exploration.
Advanced Techniques: Batch Processing and Troubleshooting
For professionals and enthusiasts managing extensive collections of images—be it high-resolution stock photos, thematic collections, or personalized wallpapers—manual resizing can become a daunting and time-consuming task. Photoshop offers powerful automation features, along with common troubleshooting steps for when things don’t go as planned.
Batch Resizing for Multiple Images
When you have multiple images to prepare for a presentation, website, or archive, automating the process in Photoshop using batch editing saves both time and effort. This aligns perfectly with the functionalities of Tophinhanhdep.com’s image tools like compressors and optimizers, providing a complete workflow for efficient image management.
Setting Up a Batch Resize Process:
- Organize Your Images: Ensure all your images are in one accessible source folder. This organization is crucial for the batch processor to locate and modify each file efficiently.
- Access Image Processor: Open Photoshop and navigate to
File > Scripts > Image Processor. - Select Folders:
- Step 1: Select the images to process. Choose the source folder where your original images are stored.
- Step 2: Select location to save processed images. Specify a different destination folder where the resized files will be saved. Never save resized images over your originals to avoid accidental data loss.
- Define Image Size and Quality:
- Under “File Type,” choose your desired output format (JPEG, PSD, TIFF). For web use, JPEG is common.
- Check the “Resize to Fit” box. Here, you can define the desired width and height. The Image Processor will automatically maintain aspect ratios if you input either a width or height and leave the other blank, or if you provide both, it will scale to fit within those dimensions while preserving proportions.
- Adjust JPEG Quality for web images (lower quality for smaller file sizes, higher for better visual fidelity).
- Automating with Actions (Optional but Powerful):
- For more complex resizing operations (e.g., resizing to a specific aspect ratio then cropping, or applying a watermark), you can record a Photoshop Action.
- Go to
Window > Actionsand create a new action. - Record your resizing steps:
Image > Image Size, adjust desired sizes, keeping an eye on maintaining the aspect ratio, thenFile > Save As(to your specified destination folder), and finallyFile > Close. Stop the action recording. - Back in the Image Processor dialog box, under “Step 4: Run Action,” select your recorded action from the dropdown menus.
- Run the Process: Click “Run” in the Image Processor dialog box. Photoshop will then process all images in your source folder, applying your defined resizing and saving parameters to the destination folder.
This powerful feature allows you to not just resize but also apply other Photoshop Actions like sharpening, color correction, or watermarking automatically across batches of photos, while still keeping each original image’s integrity well-preserved. This is invaluable for quickly preparing thematic collections or optimizing images for various platforms, a key feature in the Tophinhanhdep.com toolkit for image converters, compressors, and optimizers.
Common Resizing Challenges and Solutions
Even with a solid understanding of Photoshop’s tools, you might occasionally encounter issues when trying to resize. Knowing how to troubleshoot these common problems will save you time and frustration.
-
“Why can’t I resize an image in Photoshop?”
- Locked Layer: The most common reason. Check the Layers panel for a small lock icon next to your layer. Click it to unlock the layer. If it’s a “Background” layer, you may need to double-click it to convert it into a regular layer (e.g., “Layer 0”).
- Smart Object Limitations: While Smart Objects are fantastic for non-destructive scaling, certain operations (like direct pixel-level painting or filter application) require them to be rasterized first. If you can’t perform an action, right-click the Smart Object and choose “Rasterize Layer.” Remember, this removes the Smart Object benefits, so save a version first if you intend to preserve quality.
- Image Mode: Ensure the image is in a mode that allows resizing, such as RGB Color. Go to
Image > Modeand select RGB Color if it’s currently set to something restrictive like Bitmap or Indexed Color. - “Resample” Unchecked: When using
Image > Image Size, if the “Resample” box is unchecked, Photoshop will only change the print dimensions (document size) and resolution, not the actual pixel dimensions of the image. Make sure “Resample” is checked if you intend to change the pixel count. - Insufficient Permissions/Read-Only File: Sometimes, the file itself might be set to read-only due to system permissions or if it’s stored on a server. Check your file properties (right-click the file in your OS and select “Properties” or “Get Info”) to ensure it’s writable.
-
Preventing Distortion and Maintaining Quality:
- Always Maintain Aspect Ratio: As a general rule, always ensure the chain link icon (in
Image SizeorFree Transform’s Options Bar) is active, or use corner handles (without Shift in CC 2019+, with Shift in older versions) for proportional scaling. Distortion leads to unprofessional designs and inconsistent branding, which detracts from the beauty of high-resolution photography. - Start Large, Scale Down: It’s always better to start with a high-resolution image and scale it down. Scaling up too much from a small image inevitably leads to quality loss and pixelation. If you absolutely must enlarge, use Smart Objects and the “Preserve Details 2.0” resampling method, but expect some softening.
- Save for Web (Legacy): When preparing images for web use,
File > Export > Save for Web (Legacy)offers excellent tools for previewing compression artifacts and optimizing file sizes without sacrificing too much visual quality, directly supporting Tophinhanhdep.com’s focus on image optimization.
- Always Maintain Aspect Ratio: As a general rule, always ensure the chain link icon (in
Conclusion
Mastering how to scale images and layers in Photoshop is a foundational skill for anyone involved in digital imaging. From preparing stunning wallpapers and backgrounds, optimizing high-resolution photography for print or web, to executing intricate photo manipulation and creating unique digital art for Tophinhanhdep.com, these techniques are indispensable.
Just as a painter meticulously prepares their canvas, a digital artist must understand how to precisely control the dimensions and quality of their visual elements. The journey through Image Size, Free Transform, Smart Objects, and various resampling methods equips you with the power to realize your creative visions without compromise. You’ve learned to scale proportionally, manipulate shapes for artistic effect, and protect your image quality through non-destructive workflows, all while enhancing your efficiency with keyboard shortcuts and batch processing.
As a platform dedicated to providing beautiful photography, aesthetic images, and cutting-edge visual design tools, Tophinhanhdep.com encourages you to practice these techniques. Experiment with different transformations, understand the impact of resolution and resampling, and integrate Smart Objects into your daily routine. By doing so, you’ll not only enhance your technical proficiency but also unlock new possibilities for your artistic expression, ensuring every image you create is a masterpiece.
Explore further tutorials and resources on Tophinhanhdep.com to continue refining your expertise and transforming your digital creations. Your journey to mastering Photoshop’s scaling capabilities is a significant step towards elevating your craft!