Mastering Multi-Image Selection in Lightroom Classic: A Comprehensive Guide for Tophinhanhdep.com Users

In the dynamic world of digital photography, where every click adds to a growing library of visual stories, the ability to efficiently manage and process your images is paramount. For photographers, whether they are capturing stunning nature scenes, crafting intricate abstract compositions, or preparing high-resolution stock photos, Adobe Lightroom Classic stands as an indispensable tool. A fundamental, yet incredibly powerful, feature within this software is the capacity to select multiple images simultaneously. This seemingly simple action unlocks a world of streamlined workflows, enabling batch editing, seamless organization, and rapid project completion.
Tophinhanhdep.com is dedicated to providing resources for visual creators, covering everything from breathtaking wallpapers and aesthetic backgrounds to advanced photography techniques and essential image tools. Understanding how to select multiple photos in Lightroom Classic aligns perfectly with our mission to empower users with the knowledge needed for high-resolution photography, digital art, and creative visual design. This comprehensive guide will walk you through the various methods of multi-selection, explain their benefits, and show you how to integrate these techniques into your daily workflow to maximize efficiency and elevate your creative output.
The Foundation of Efficient Photo Management: Why Multi-Selection Matters
The sheer volume of photographs captured in a single shoot can be daunting. From a sprawling landscape series destined for a beautiful photography collection on Tophinhanhdep.com, to hundreds of portraits requiring consistent editing styles, managing images one by one is simply impractical. This is where the power of selecting multiple images in Lightroom Classic comes into play. It’s not just about convenience; it’s about optimizing your entire post-processing workflow, ensuring consistency, and significantly reducing the time spent on repetitive tasks.
Imagine a scenario where you’ve returned from a photoshoot with hundreds, or even thousands, of images. Without the ability to select multiple photos, you would be forced to apply edits, metadata, or organizational changes to each image individually. This labor-intensive process not only drains your time but also increases the risk of inconsistencies across your collection. Multi-selection, on the other hand, allows you to group similar images—perhaps all the photos from a specific lighting setup, or a sequence for a panorama—and treat them as a single unit for various operations. This capability is a cornerstone of professional digital photography and a key skill for anyone serious about managing their visual assets efficiently.

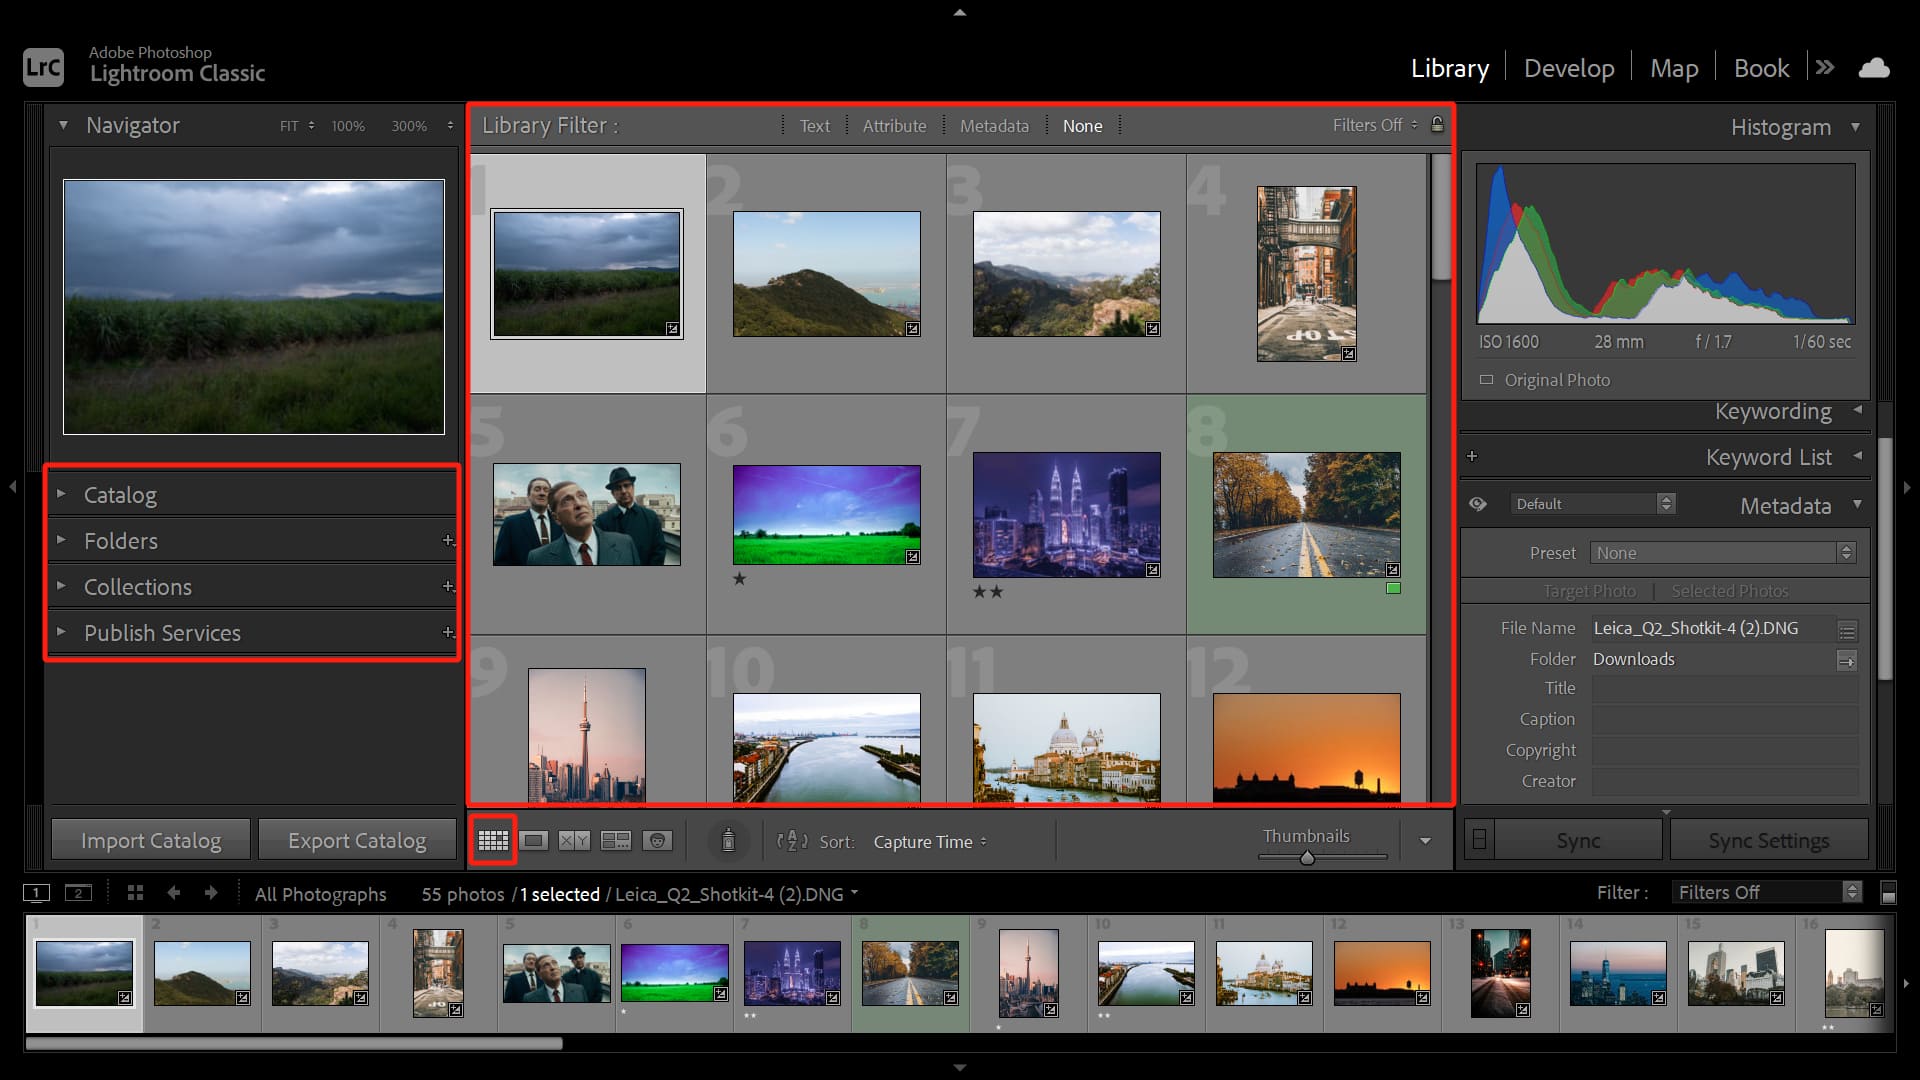
Understanding Lightroom Classic’s Interface
Before diving into the selection methods, it’s beneficial to have a clear understanding of Lightroom Classic’s primary workspace. When you open Lightroom Classic, you’ll typically land in the Library module. This module is your central hub for importing, organizing, and culling your photos. Within the Library module, the most common view for seeing multiple images is the Grid View (G), where photo thumbnails are displayed in a grid format. Below the main image display area, across all modules, you’ll find the Filmstrip, which also shows thumbnails of all photos in your current selection, folder, or collection.
Other modules, such as the Develop module (D) for detailed editing, the Map module for geotagging, or the Print module for layout design, also rely on the Filmstrip at the bottom of the screen for navigating and selecting images. Knowing these basic areas will help you apply the multi-selection techniques effectively, regardless of the task at hand.

Core Principles of Image Selection
The methods for selecting multiple images in Lightroom Classic are remarkably intuitive, often mirroring how you select files in your computer’s operating system (like Finder on a Mac or File Explorer on Windows). This familiarity makes them easy to learn and integrate into your workflow. The underlying principle is to combine mouse clicks with keyboard modifiers (Ctrl/Command, Shift) to achieve different types of selections.
Whether you’re curating a thematic collection for Tophinhanhdep.com, preparing images for graphic design projects, or simply managing your personal photo library, these core principles ensure that you can quickly pinpoint and group the exact images you need for any subsequent action. The ability to distinguish between sequential and non-sequential selections, and to select all images with a single command, forms the bedrock of an efficient post-processing routine.
Mastering Multiple Image Selection Techniques
Lightroom Classic offers several versatile methods to select multiple images, each tailored for different scenarios. Understanding these techniques is crucial for efficient photo editing and organization, especially when dealing with large volumes of high-resolution images common in digital photography. Tophinhanhdep.com users, focused on various image categories like aesthetic backgrounds or beautiful photography, will find these methods invaluable for streamlining their creative projects.
Quick Selection Methods (Keyboard Shortcuts & Mouse)
The fastest and most frequently used methods for selecting images involve a combination of your mouse and keyboard shortcuts. These techniques are applicable in the Library module’s Grid View and also within the Filmstrip across all other modules.
-
Non-sequential Selection (Specific Scattered Images):
- Purpose: To select individual photos that are not adjacent to each other in the grid or filmstrip.
- How-to: Hold down the Ctrl key (Windows) or Command key (Mac OS) on your keyboard, then click on each desired photo’s thumbnail. As you click, each image will be added to your selection. This is particularly useful when you’re culling a photoshoot and want to pick only the best shots, regardless of their original sequence.
- Visual Cue: Selected images will typically have a lighter gray border around their thumbnails, with the last clicked image (the active one) sometimes having an even lighter or brighter border.
-
Sequential Selection (A Consecutive Series of Images):
- Purpose: To select a continuous block of photos.
- How-to: Click on the first photo in the series you wish to select. Then, hold down the Shift key on your keyboard and click on the last photo in that series. All photos between your first and last click (inclusive) will be selected. This is perfect for grouping a burst of shots or a sequence for a panorama.
- Keyboard-only Sequential Selection: While holding Shift, you can also use the left/right arrow keys to extend your selection horizontally in the Filmstrip, or up/down/left/right arrow keys in Grid View to select rows or blocks of images.
-
Select All Photos:
- Purpose: To select every single photo visible in the current folder or collection.
- How-to: Click on any photo to make sure a photo is active, then press Ctrl + A (Windows) or Command + A (Mac) on your keyboard. This will instantly select all images in your active view, whether it’s a folder, a collection, or the results of a filter. This is excellent for applying a universal preset or exporting an entire batch of images.
These quick methods are the backbone of efficient photo management in Lightroom Classic. Practicing them will make them second nature, significantly speeding up your workflow for any photography project, from abstract art to preparing images for an AI upscaler.
Advanced Selection via Menus and Toolbars
Beyond the immediate keyboard shortcuts, Lightroom Classic provides additional methods for selecting groups of photos through its menu system and, in some modules, a dedicated toolbar. These options offer more structured ways to refine your selections, often based on specific criteria you’ve already applied.
-
Menu Options (Edit Menu):
- Select All: Available across all modules, simply go to
Edit > Select All. This provides the same functionality as theCtrl/Cmd + Ashortcut. - Invert Selection: This is a powerful, though less frequently used, option. First, select the images you don’t want to include (using Ctrl/Cmd+click). Then, go to
Edit > Invert Selection. Lightroom will then deselect your chosen images and select all the others in the current view. - Select Flagged Photos: In the Library module, you can go to
Edit > Select Flagged Photosto quickly select all images that you’ve marked with a “Pick” flag during your culling process. - Select By Flag/Rating/Color Label (Library Module Specific): The Library module offers more granular selection options based on your organization efforts. Under
Edit, you’ll findSelect By Flag,Select By Rating(e.g., all 5-star photos), andSelect By Color Label(e.g., all photos labeled “Red”). These are incredibly useful for curating thematic collections or finding specific subsets of images within a large project.
- Select All: Available across all modules, simply go to
-
Toolbar Options (Slideshow, Print, Web Modules):
- In the Slideshow, Print, and Web modules, a toolbar at the bottom of the screen (above the filmstrip) features a “Use:” dropdown menu. This menu typically includes:
- All Filmstrip Photos: Selects all photos currently visible in the filmstrip.
- Selected Photos: Uses the photos already selected in your filmstrip.
- Flagged Photos: Selects only the “picked” photos.
- While these options exist, many users find the keyboard shortcuts or menu options in the Library module to be more efficient for initial selection before moving to these specialized modules.
- In the Slideshow, Print, and Web modules, a toolbar at the bottom of the screen (above the filmstrip) features a “Use:” dropdown menu. This menu typically includes:
These menu and toolbar options provide a systematic approach to selecting images, allowing you to leverage the organizational metadata you’ve already applied to your photos. This is particularly beneficial for visual designers or photographers preparing their work for various output formats on Tophinhanhdep.com.
Special Selection Scenarios (Import, Map Module)
Beyond the standard grid and filmstrip views, Lightroom Classic offers unique selection opportunities in specific modules, further enhancing its utility for diverse photography needs.
-
Import Screen Selection:
- When you import new photos (e.g., from a memory card for your high-resolution photography collection), the Import dialog box automatically displays all detected images in a grid view. By default, all are usually selected.
- Check All/Uncheck All: At the top of the import screen, you’ll find “Check All” and “Uncheck All” buttons, allowing you to easily select or deselect all images.
- Manual Checkboxes: Each thumbnail also has a checkbox in the top-left corner, allowing for individual selection.
- Sequential/Non-sequential Selection: You can use the
Shift+clickfor sequential andCtrl/Cmd+clickfor non-sequential selection here, just as in the Library module. After making your selection, simply check the checkbox of one of the selected photos, and all other selected images will also be checked, ready for import. This saves significant time by allowing you to filter out unwanted shots before they even enter your catalog, keeping your Tophinhanhdep.com collections clean and relevant.
-
Map Module Selection:
- For photographers who utilize geotagging for their images (e.g., for nature or travel photography), the Map module offers an intuitive way to select photos based on their location.
- Location Markers: On the map, you’ll see red tabs with numbers indicating how many photos were taken in that specific location.
- Selecting by Location: Clicking on one of these tabs will highlight it (often turning yellow or orange) and automatically select all photos associated with that specific geographical marker in the Filmstrip below.
- Multiple Location Selection: You can hold down
Ctrl/Cmdand click on multiple location markers to select photos from various locations simultaneously. This feature is particularly useful for compiling travel logs or regional photo collections for Tophinhanhdep.com.
These specialized selection methods underscore Lightroom Classic’s comprehensive approach to photo management, allowing photographers to tailor their selection process to the context of their work, whether it’s initial import, detailed editing, or location-based organization.
Unleashing the Power of Batch Processing
The true strength of selecting multiple images in Lightroom Classic lies in its ability to facilitate batch processing. This concept is a game-changer for digital photography, allowing for consistent editing styles, efficient organization, and rapid output. For Tophinhanhdep.com users dealing with large volumes of images for wallpapers, backgrounds, or stock photos, batch processing is an indispensable skill.
Streamlining Your Workflow with Batch Editing
Batch editing refers to applying the same adjustments or presets to a group of photos simultaneously. This saves an immense amount of time and ensures visual consistency across similar images.
- Applying Presets:
- Once you’ve selected multiple photos in the Library module (Grid View or Filmstrip), navigate to the Quick Develop panel on the right side.
- From the “Saved Preset” dropdown menu, select any preset. This preset will be applied to all currently selected images. This is incredibly efficient for establishing a base look (e.g., a specific aesthetic or color grade) across an entire photoshoot. Tophinhanhdep.com recommends exploring various editing styles and presets to enhance your photography.
- Synchronizing Develop Settings:
- This is one of the most powerful batch editing features. First, make an edit to a single “source” image (the active image, usually marked with a brighter border).
- Then, select all the other images to which you want to apply these settings, ensuring the source image remains the active one.
- Click the “Sync…” button at the bottom of the Develop module’s right panel, or
Settings > Sync Settings...from the top menu. - A dialog box will appear, allowing you to choose precisely which settings you want to synchronize (e.g., white balance, exposure, cropping, noise reduction). This ensures that a series of images, perhaps from the same lighting conditions, maintain a cohesive look. This is crucial for maintaining consistency in photo manipulation or high-resolution photography projects on Tophinhanhdep.com.
Organizing and Exporting Your Tophinhanhdep.com Collections
Multi-selection extends beyond editing, providing significant advantages in organizing and outputting your images.
- Adding to Collections:
- Collections are virtual groupings of photos, independent of their physical folder location, perfect for creating thematic collections, mood boards, or special projects for Tophinhanhdep.com.
- To add multiple selected images to a collection, simply drag them from the Grid View or Filmstrip into the desired collection in the Collections panel.
- Alternatively, right-click on the selected images and choose
Add to CollectionorAdd to Target Collection(if you’ve designated one).
- Moving and Deleting Images:
- Moving: If you’ve imported photos into the wrong folder, select them all and drag them to the correct folder in the Folders panel. Lightroom Classic updates its catalog accordingly.
- Deleting: After culling (flagging or rating images to keep), you’ll often have a batch of unwanted images. Select these unwanted images and press the
Deletekey. Lightroom will ask if you want to remove them from the catalog or delete them from disk. This process ensures your Tophinhanhdep.com library remains clean and manageable.
- Exporting Images:
- Once your images are edited and organized, multi-selection makes exporting a breeze. Select all the photos you wish to export.
- Go to
File > Export...or pressCtrl + Shift + E (Windows) / Cmd + Shift + E (Mac). - The Export dialog box allows you to specify output settings (file type, resolution, watermarks, metadata) for all selected images at once. This is essential for creating high-resolution wallpapers, optimized web images, or compressed versions for sharing, all vital aspects of Tophinhanhdep.com’s focus on images and image tools.
Deselecting Images for Precision
Just as important as selecting images is the ability to deselect them when you’ve made a mistake or want to refine your selection.
- Deselect All:
- The quickest way to deselect all currently selected photos is to press Ctrl + D (Windows) or Command + D (Mac).
- Alternatively, simply click on an area of the interface where no photo thumbnail is present (e.g., the gray background in Grid View) or click on a single unselected photo thumbnail.
- Deselect Individual Photos from a Group:
- If you have a group of photos selected and realize you want to remove just one or two from that selection, hold down the Ctrl key (Windows) or Command key (Mac) and click on the thumbnail of the image you wish to deselect. This will remove only that image from the active selection without affecting the others.
These deselection techniques provide precision and flexibility, allowing you to quickly correct errors and maintain control over your image selections at every stage of the photography editing process.
Elevating Your Photography Workflow with Tophinhanhdep.com and Creative Tools
Mastering multiple image selection in Lightroom Classic is more than just a technical skill; it’s a foundational element for a highly efficient and creative photography workflow. For users exploring “Visual Design,” “Digital Art,” or curating “Image Inspiration & Collections” on Tophinhanhdep.com, these techniques are essential. They free you from tedious repetitive tasks, allowing more time to focus on the artistic aspects of your work.
Whether you’re batch editing a series of sad/emotional images to evoke a consistent mood, applying a trending style preset to a collection of aesthetic photos, or organizing a vast library of nature photography for future projects, the ability to select multiple images transforms your workflow. It ensures that your high-resolution photographs maintain a uniform appearance, that your stock photos meet specific stylistic requirements, and that your digital art projects are cohesively managed from start to finish.
The Role of External Tools in Enhancing Efficiency
While Lightroom Classic provides robust internal tools, external creative consoles can further amplify your efficiency. Tophinhanhdep.com recognizes the value of specialized “Image Tools” that complement software functionalities. For instance, devices like the TourBox creative console are beloved by photographers and digital artists for simplifying complex operations.
A TourBox allows you to map common keyboard shortcuts, like Ctrl/Cmd + A for “Select All” or Shift+click for sequential selection, to its customizable buttons and dials. This means you can perform multi-selection tasks, along with countless other photo management and editing operations, without ever touching your keyboard. Such tools enable a more tactile and fluid editing experience, allowing you to focus on the visual aspects of your work rather than memorizing shortcuts. Integrating a TourBox, or similar peripheral available through Tophinhanhdep.com’s recommended tools, can make your post-processing workflow even faster and more intuitive, further enhancing your productivity when curating wallpapers, backgrounds, or any other visual content.
In conclusion, becoming proficient in selecting multiple images in Lightroom Classic is a pivotal step towards becoming a more effective and productive photographer. It underpins virtually every bulk operation, from initial import to final export, and is an invaluable skill for anyone engaged in digital photography, visual design, or building rich image collections. Tophinhanhdep.com encourages all creators to practice these techniques until they become second nature, transforming your workflow and allowing your creative vision to flourish without logistical bottlenecks.