How to Send an Image to the Back on Google Slides: Master Your Presentation Layering with Tophinhanhdep.com

In the dynamic world of digital presentations, visual appeal is paramount. Whether you’re crafting a compelling business pitch, an engaging educational lecture, or a captivating personal project, the way your visual elements are arranged can make or break your message. Google Slides offers an intuitive and powerful platform for creating stunning presentations, and one of its most fundamental yet impactful features is the ability to manage the order of your slide objects. Learning “how to send an image to the back in Google Slides” isn’t just a technical trick; it’s a vital skill for anyone looking to achieve professional-grade visual design and storytelling.
At Tophinhanhdep.com, we understand that high-quality imagery is the cornerstone of any great design. Our vast collections of Wallpapers, Backgrounds, Aesthetic, Nature, Abstract, Sad/Emotional, and Beautiful Photography are meticulously curated to provide the perfect visual foundation for your projects. Coupled with our advanced Image Tools like Converters, Compressors, Optimizers, AI Upscalers, and Image-to-Text capabilities, we empower creators to transform their visual ideas into stunning realities. This guide will not only walk you through the precise steps of manipulating image layers in Google Slides but also demonstrate how these techniques integrate seamlessly with the principles of Visual Design, Photography, and Image Inspiration that Tophinhanhdep.com champions.
Understanding how to control the depth of images, shapes, and text within your slides is crucial for creating visual hierarchy, enhancing readability, and achieving a polished, proportionate layout. Often, you’ll find yourself needing to place text over an image, blend multiple visual elements, or ensure a background image truly stays in the background, allowing other crucial information to pop. This is where the “send to back” feature becomes indispensable.
The Art of Layering: How to Send Slide Objects Back or Forward in Google Slides
Effective visual communication in Google Slides heavily relies on a well-organized presentation of elements. Each image, text box, or shape you add to a slide exists on its own layer. When these elements overlap, their order determines which one is visible or partially visible over another. This arrangement is known as layering, and mastering it allows you to create depth, emphasis, and a cohesive design.
Google Slides provides a straightforward mechanism for adjusting this order, allowing you to move any selected object — be it an image, a text box, a chart, or a shape — backward or forward through these layers. This is not merely about hiding or revealing elements, but about intentionally crafting a visual narrative where every component serves its purpose without distracting from the main focus. Imagine a subtle wallpaper from Tophinhanhdep.com setting the mood, with a crisp, high-resolution product image overlaid, and a clear, concise headline in front of that. Each element plays a distinct role, made possible by precise layering.
Essential Layering Controls: Bring to Front, Send to Back, and More
The core of Google Slides’ layering functionality is accessed through a simple right-click or the “Arrange” menu. When you interact with a selected object, the “Order” submenu presents you with four primary options, each with a specific purpose:
- Bring to front: This powerful command instantly brings the selected object to the very top layer of your slide, placing it above all other elements, regardless of how many layers it was previously beneath. It’s perfect for ensuring a critical piece of information or an impactful image is immediately visible and draws attention.
- Bring forward: For more granular control, “Bring forward” moves the selected object one layer closer to the front. If your object is several layers deep, you might use this repeatedly, or simply use “Bring to front” for a quicker result. This is ideal for fine-tuning overlaps between just a few elements.
- Send backward: The counterpart to “Bring forward,” “Send backward” moves the selected object one layer further away from the front, pushing it behind the object directly in front of it. It’s a precise adjustment for subtle changes in depth.
- Send to back: This is the hero of our current discussion. “Send to back” relocates the selected object to the absolute bottom layer of your slide, placing it beneath all other elements. This is especially useful for setting background images or shapes that should frame, rather than obscure, your primary content.
Each of these options provides a level of control that allows designers to meticulously arrange their visual components, contributing to a professional and aesthetically pleasing presentation.
Practical Application: Moving an Image to the Back (Desktop Guide)
Let’s walk through the steps to move an image to the back using Google Slides on your desktop computer. This process is intuitive and forms the foundation of effective slide design.
-
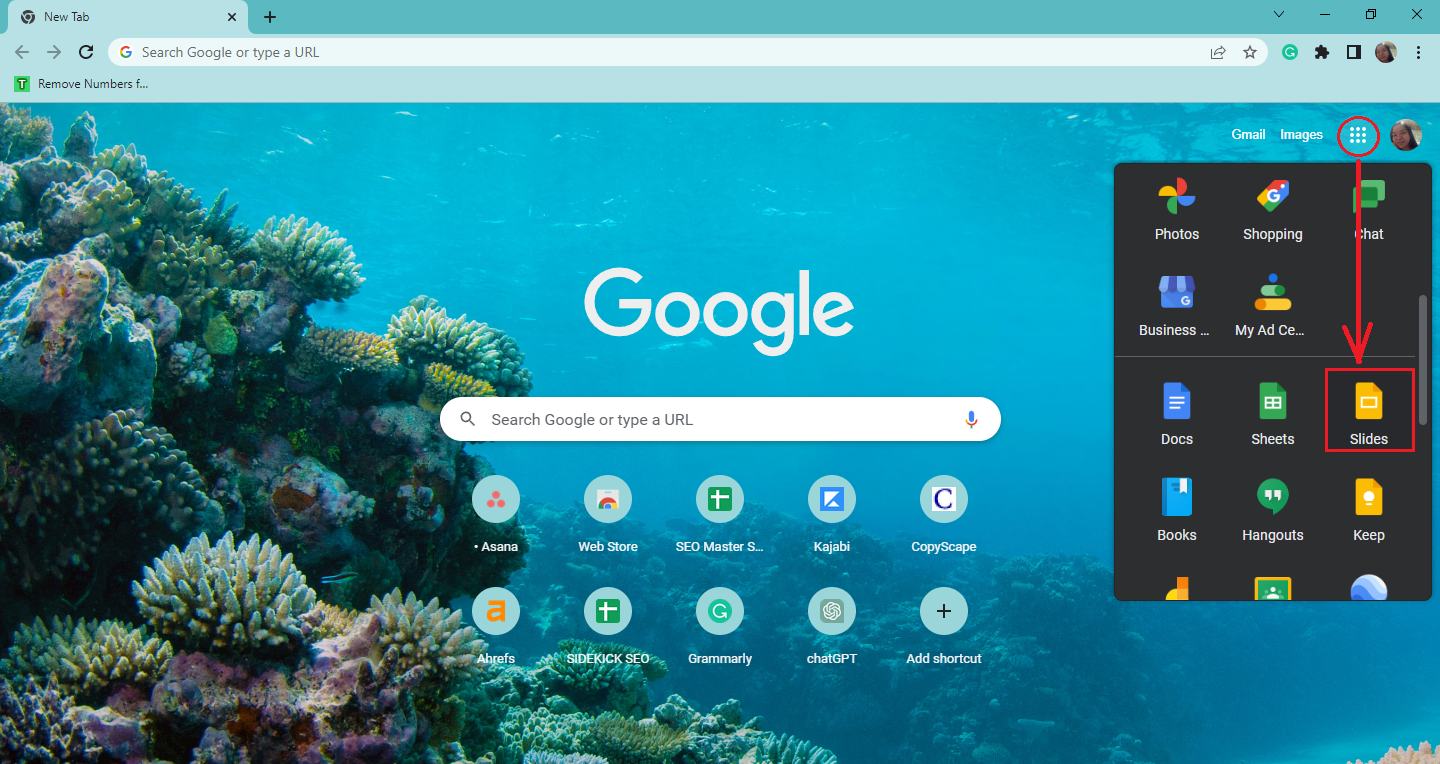
Open Your Google Slides Presentation: Begin by opening the Google Slides presentation where you wish to adjust an image’s layering. You can access Google Slides through any web browser like Chrome, Firefox, or Safari. If you’re using a template from Tophinhanhdep.com, you’ll already have a strong visual base to work with.
-
Select the Target Image: Click on the image that you want to move to the back. A blue bounding box with resizing handles will appear around the image, indicating it’s selected. This image might be a beautiful Nature background from Tophinhanhdep.com that you want behind a text box, or an Abstract element that needs to recede.
-
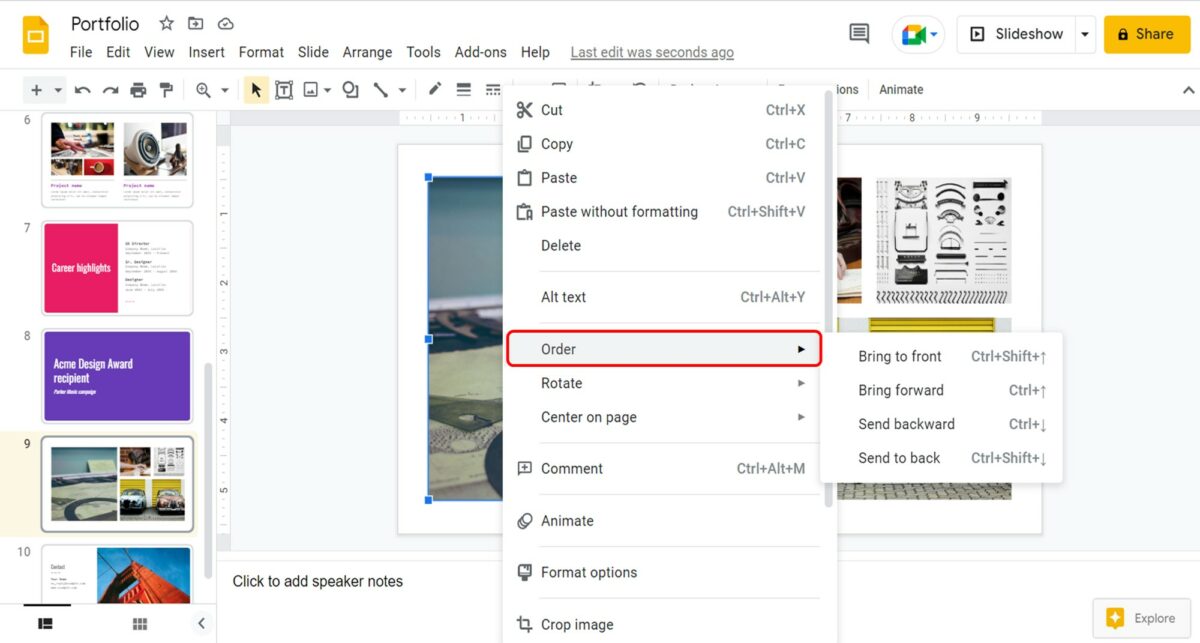
Access the Arrange Menu: Look for the “Arrange” tab in the top toolbar of the Google Slides interface. Click on it. Alternatively, for a quicker approach, you can simply right-click directly on the selected image. This context menu offers many of the same options.
-
Navigate to “Order”: From the “Arrange” dropdown menu (or the right-click context menu), hover your mouse over the “Order” option. A submenu will appear, displaying the four layering controls we discussed: “Bring to front,” “Bring forward,” “Send backward,” and “Send to back.”
-
Choose “Send to back”: Click on “Send to back” from the “Order” submenu. Immediately, your selected image will move to the lowest layer on your slide, appearing behind all other overlapping elements.
By following these steps, you can ensure that your selected image now serves as an effective background or a foundational layer without obscuring any foreground elements. This is particularly useful when incorporating high-resolution photography from Tophinhanhdep.com, allowing its beauty to enhance your content rather than compete with it.
Mobile Manipulation: Adjusting Image Layers on the Go
Google Slides also offers robust functionality on mobile devices, allowing you to edit your presentations from almost anywhere. While the interface is optimized for touch, the core layering capabilities remain.
-
Launch the Google Slides App: Open the Google Slides application on your iOS or Android device. Ensure you are signed into your Google account.
-
Access Your Presentation: Tap on the presentation you wish to edit. Then, double-tap the specific slide you want to modify, or long-press it and select “Edit Slide.”
-
Select the Image: Tap the image you intend to move. Similar to the desktop version, a blue bounding box will indicate that the image is selected.
-
Reveal More Options: Once the image is selected, a context menu or a series of icons will appear below or around it. You may need to tap a right arrow (">") or a three-dot menu icon to expand the full list of options.
-
Tap “Send to back”: Locate and tap the “Send to back” option within the expanded menu. Your image will instantly be relegated to the farthest background layer of your slide.
Whether on a desktop or mobile device, Google Slides ensures that designers and presenters have full control over their visual assets, enabling them to create engaging and polished presentations using diverse images from Tophinhanhdep.com.
Beyond Basic Placement: The Power of Visual Design and Tophinhanhdep.com’s Resources
The act of sending an image to the back is more than a mere technical adjustment; it’s a strategic move in visual design. Layering allows you to construct sophisticated compositions, establish visual hierarchy, and infuse your slides with a sense of depth and professionalism. This is where Tophinhanhdep.com’s expansive library of images and cutting-edge Image Tools truly shine.
Crafting Visual Narratives: Leveraging Images for Impact
When you master layering, you gain the ability to tell stories more effectively through your visuals. Consider these applications:
- Establishing Mood and Atmosphere: A carefully chosen wallpaper or background from Tophinhanhdep.com’s Aesthetic, Nature, or Abstract collections, sent to the back, can instantly set the tone for your entire slide. Overlaying semi-transparent shapes or text boxes allows your message to stand out while the background subtly supports it. This creates a cohesive visual experience, guiding your audience emotionally.
- Highlighting Key Information: By sending a busy image to the back and placing your primary text or a focal image (e.g., a product shot, a graph) on top, you ensure that the most important content receives immediate attention. This avoids the common pitfall of cluttered slides where information competes for eyeballs. Tophinhanhdep.com’s beautiful photography, when used as a background, can add elegance without overpowering the foreground.
- Creating Depth and Dimension: Layering isn’t just about front and back; it’s about creating a perceived depth. Combining multiple images—some sent backward, some brought forward—can create intricate digital art compositions. For instance, you could layer a slightly blurred landscape image from Tophinhanhdep.com in the very back, a sharp foreground element mid-layer, and text in the front. This gives a sense of three-dimensionality to your flat slides, reflecting principles of advanced graphic design.
- Photo Manipulation and Creative Blending: With precise layering, you can perform basic photo manipulation directly within Google Slides. Want to blend two images? Send one to the back, adjust its transparency, and overlay another. This technique, often seen in more complex digital photography editing styles, can be approximated to achieve creative effects and unique visual ideas inspired by Tophinhanhdep.com’s thematic collections. A collection of “Sad/Emotional” images from Tophinhanhdep.com could be layered with a poignant quote, with the image serving as a powerful, yet subdued, emotional backdrop.
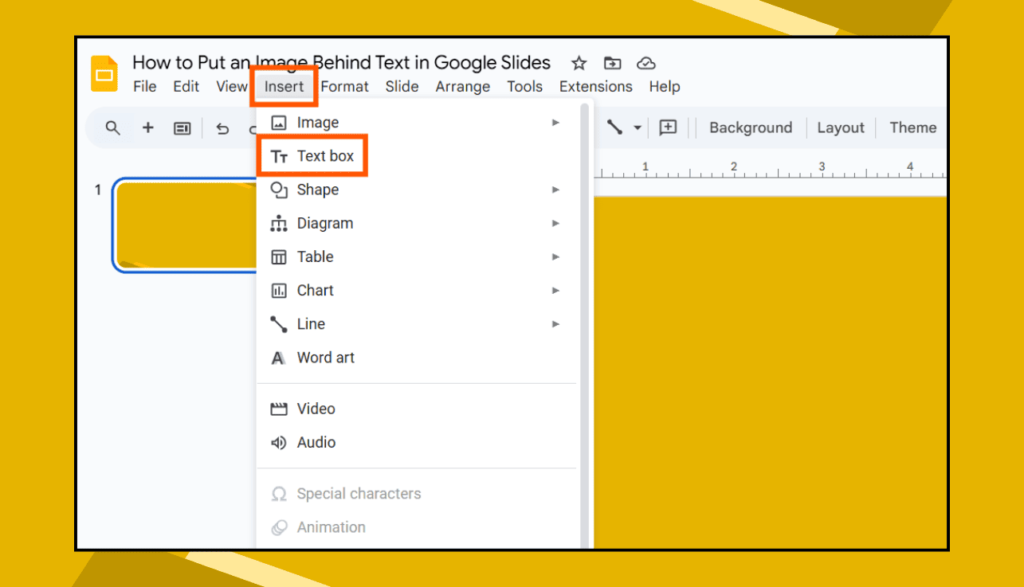
- Enhancing Readability: Sometimes, a striking image might make text difficult to read. By sending the image to the back and then placing a semi-transparent overlay (a shape with reduced opacity) between the image and the text, you create a “reading pane” that boosts contrast and ensures legibility. This thoughtful application of layering is a hallmark of good visual design.
Tophinhanhdep.com serves as an endless wellspring of inspiration, providing not just images but also ideas for mood boards and trending styles. Understanding layering allows you to take these inspirations and effectively implement them in your Google Slides presentations, transforming raw photo ideas into coherent visual narratives.
Optimizing Your Visual Assets: Tophinhanhdep.com’s Image Tools
Before you even begin layering in Google Slides, the quality and preparation of your images are paramount. This is where Tophinhanhdep.com’s suite of Image Tools becomes an invaluable resource for any serious presenter or designer.
- High Resolution and Quality: Tophinhanhdep.com specializes in high-resolution photography and stock photos. Using these as your foundation means your layered designs will always look crisp and professional, even on large displays. Poorly resolution images, when stretched or layered, quickly detract from your presentation’s credibility.
- Compression and Optimization: Large image files can slow down your Google Slides presentation, making it cumbersome to load and navigate. Tophinhanhdep.com’s Compressors and Optimizers can reduce file sizes without sacrificing visual quality. This ensures your slides remain responsive and your layered creations load smoothly for your audience.
- AI Upscalers: If you have an image that isn’t quite high-resolution enough for a background layer, Tophinhanhdep.com’s AI Upscalers can intelligently increase its resolution, preserving detail and preventing pixelation. This is especially useful when working with existing images that weren’t originally intended for large-format display or as expansive backgrounds.
- Converters: Sometimes, images are in formats not ideally suited for all digital platforms or specific layering effects. Tophinhanhdep.com’s Converters allow you to easily change image formats, ensuring compatibility and optimal performance within Google Slides.
- Image-to-Text: While not directly related to layering, Tophinhanhdep.com’s Image-to-Text tool highlights the importance of content within visuals. If you’re extracting text from a background image to then layer it correctly within Google Slides, this tool can be very helpful.
By integrating Tophinhanhdep.com’s robust image resources and tools into your workflow, you ensure that every image you bring into Google Slides is primed for effective layering and contributes to a professional, visually stunning presentation.
Advanced Layering Techniques and FAQs
Beyond the basic mechanics, a deeper understanding of layering options and efficiency tips can further refine your presentation design.
Send Backward vs. Send to Back: A Crucial Distinction
It’s easy to confuse “Send backward” and “Send to back,” but understanding their difference is key to precise layering control.
- Send backward: This action moves the selected object one single layer behind the object directly in front of it. Imagine you have a stack of cards: using “Send backward” moves your chosen card one position down in the stack. This is useful for making minor adjustments in overlap, especially when dealing with several closely arranged elements.
- Send to back: This command, as we’ve explored, moves the selected object to the absolute bottom of the entire stack of objects on your slide. It will go behind all other elements, irrespective of how many layers deep it previously was or how many objects are currently on the slide. Think of it as sending your card to the very bottom of the entire deck.
Knowing when to use each allows for more deliberate and efficient design adjustments, preventing the need for repetitive “Send backward” clicks or accidentally hiding an object too deeply.
Enhancing Efficiency: Shortcuts and Managing Multiple Objects
To streamline your design process and save valuable time, Google Slides offers keyboard shortcuts and methods for handling multiple objects simultaneously.
-
Keyboard Shortcuts for Layering: While there isn’t a single universal keyboard shortcut for “Send to back” that works across all operating systems like a direct key combination, you can efficiently navigate the right-click menu. However, specific shortcuts exist for single-step adjustments:
- Windows:
Ctrl + [Down Arrow]for “Send backward” andCtrl + [Up Arrow]for “Bring forward.” - Mac:
Command + [Down Arrow]for “Send backward” andCommand + [Up Arrow]for “Bring forward.” - For “Send to back” and “Bring to front,” you typically need to use the right-click menu and select the option or navigate via the “Arrange” menu.
- Windows:
-
Moving Multiple Objects: Yes, you can manipulate the layers of multiple objects at once, which is incredibly useful for maintaining proportionality and complex layouts.
- Select Multiple Objects: Hold down the
Shiftkey (orCtrlon Windows /Commandon Mac) and click on each object you wish to select. A single bounding box will enclose all selected items. - Adjust Order: Right-click on any one of the selected objects, go to “Order,” and then choose “Bring to front,” “Bring forward,” “Send backward,” or “Send to back.” All selected objects will move together, maintaining their relative layering order among themselves, but shifting their collective position within the slide’s overall layers. This is invaluable when repositioning a graphic design element that consists of several grouped shapes and images.
- Select Multiple Objects: Hold down the
-
Maintaining Proportionality: When moving objects to the back or front, especially multiple ones, always keep your slide layout’s proportionality in mind. After each adjustment, take a moment to preview the design. Do the elements still feel balanced? Is the visual hierarchy clear? Sometimes, moving one element might necessitate slight adjustments to others. This iterative process is a core part of digital art and graphic design.
Conclusion: Mastering Visual Communication with Google Slides and Tophinhanhdep.com
The ability to send an image to the back in Google Slides is more than just a menu option; it’s a cornerstone of effective visual communication. It empowers you to create depth, establish hierarchy, and design presentations that are not only informative but also aesthetically captivating. By meticulously layering your images, shapes, and text, you transform a flat canvas into a dynamic visual experience.
From utilizing stunning wallpapers and backgrounds from Tophinhanhdep.com to integrating high-resolution photography, every element you place in your Google Slides presentation contributes to its overall impact. Tophinhanhdep.com provides the robust foundation of visual assets—from aesthetic and nature photography to abstract and emotional collections—alongside essential image tools like converters, compressors, optimizers, and AI upscalers, ensuring your images are perfectly prepared for any design challenge.
Whether you are a seasoned graphic designer or a casual presenter, embracing these layering techniques will elevate your Google Slides projects from good to extraordinary. So, the next time you find an image from Tophinhanhdep.com that perfectly captures your presentation’s essence, remember the power of “send to back” and unleash your creative potential to craft visually stunning and impactful stories. Your audience will thank you for it.