Seamlessly Transferring Images from Your Phone to Your Computer: A Comprehensive Guide for Visual Enthusiasts

In an increasingly visual world, our smartphones have become indispensable tools for capturing life’s moments. From breathtaking “Nature” shots and “Beautiful Photography” to candid everyday scenes, our phone galleries are brimming with memories and creative potential. However, the true power of these images often lies in their journey beyond the small screen. Transferring photos from your phone to your computer is a critical step for comprehensive “Image Tools” such as editing, organizing, backing up, and showcasing your visual assets on a larger display. For enthusiasts seeking to elevate their “Digital Photography” or curate stunning “Wallpapers” and “Backgrounds,” understanding efficient transfer methods is paramount.
This guide, brought to you by Tophinhanhdep.com, your ultimate resource for “Images,” “Photography,” “Image Tools,” “Visual Design,” and “Image Inspiration & Collections,” will walk you through various reliable methods to move your precious pictures from your mobile device to your desktop or laptop. We’ll cover both wired and wireless approaches, ensuring you can choose the most convenient and effective solution for your specific needs, whether you’re working with an Android or an iPhone, and a Windows PC or a Mac. With these techniques, you’ll unlock new possibilities for your “High Resolution” images, ready for advanced “Editing Styles” and “Creative Ideas” that Tophinhanhdep.com passionately supports.
Wired Connections: Speed and Reliability for Your Visual Assets
Using a physical cable is often the fastest and most reliable way to transfer a large volume of images, especially “High Resolution” photographs or RAW files, directly from your phone to your computer. This method bypasses internet speeds and wireless interference, making it ideal for bulk transfers or when data integrity is a top priority for your “Beautiful Photography.”

Direct USB Transfer for Android to PC/Mac
Android to Windows PC
For Android users, connecting to a Windows PC via USB is straightforward. You’ll typically use the same USB cable that came with your phone for charging.
- Unlock Your Phone and Connect: Begin by unlocking your Android phone. Then, plug the larger end of your USB cable into a free USB port on your computer and the smaller end into your phone’s charging port.
- Enable File Transfer Mode: Once connected, swipe down from the top of your Android screen to open the notification shade. You should see a notification like “Charging this device via USB” or “USB for file transfer.” Tap on this notification and select the “File Transfer” (or MTP - Media Transfer Protocol) option from the menu that appears. This grants your computer access to your phone’s storage.
- Access Files via File Explorer: On your Windows PC, open File Explorer (you can usually find its icon in the taskbar or by searching in the Start Menu). In the left-hand pane, navigate to “This PC” and look for your Android device listed under “Devices and drives.” Double-click on your phone’s icon.
- Locate and Transfer Images: You’ll typically find your photos and videos in the “DCIM” (Digital Camera Images) folder, which contains your “Camera” roll. Downloaded images or screenshots might be in a “Pictures” folder. Open these folders, select the images you wish to transfer, and then drag-and-drop them to your desired folder on your computer. Alternatively, you can copy (Ctrl+C) and paste (Ctrl+V) the files.
- Tophinhanhdep.com Tip: If you’re dealing with exceptionally large batches of “High Resolution” images or RAW files, consider using Tophinhanhdep.com’s “Image Tools” such as “Compressors” to optimize file sizes before transferring if you plan to upload them to cloud storage later and have bandwidth concerns. You can also use “Converters” if you need specific file formats on your computer for specialized “Visual Design” projects.

Android to Mac
Transferring from an Android device to a Mac requires a small, one-time software installation, as macOS doesn’t natively support Android’s MTP protocol without it.
- Install a Dedicated Transfer Application: You’ll need to download and install a dedicated file transfer application for Android on your Mac (such as “Android File Transfer” in the original context, but you can find various cross-platform solutions by searching for “Android file transfer Mac”). Follow the installation instructions provided by the software.
- Connect Your Phone: Connect your Android phone to your Mac using a USB cable, similar to the process for Windows. Ensure your phone is unlocked and set to “File Transfer” (MTP) mode as described above.
- Launch and Transfer: The installed transfer application should launch automatically or can be opened from your “Applications” folder. It will display your phone’s file structure. Navigate to the “DCIM” folder to find your camera photos. You can then drag the desired files directly to your Mac’s desktop or any chosen folder.
Seamless Transfers for iPhone to PC/Mac
iPhone to Windows PC
Moving photos from an iPhone to a Windows PC is easily managed with Apple’s official desktop software or Windows’ built-in Photos app.
- Install Required Software: Ensure you have the latest version of your device’s official management software (e.g., “iTunes” in the original context, or its modern equivalent from the Microsoft Store) installed on your Windows PC. This software installs the necessary drivers for your iPhone to be recognized.
- Connect and Trust: Connect your iPhone to your PC using its USB to Lightning cable. Unlock your iPhone, and if a “Trust This Computer?” prompt appears, tap “Trust” to allow the connection.
- Import via Photos App: Open the “Photos” app on your Windows PC (search for it in the Start Menu). Click “Import” in the upper-right corner, then select “From a USB device.” The Photos app will scan your iPhone for new images. You can then select all new items or specific photos and click “Import” to copy them to your computer.
- Tophinhanhdep.com Tip: Once your photos are on your PC, explore Tophinhanhdep.com’s resources on “Photography” and “Editing Styles” to begin enhancing your imported “Aesthetic” or “Nature” shots.
iPhone to Mac
iPhones and Macs are designed to work seamlessly together, making photo transfers particularly smooth.
- Connect and Trust: Connect your iPhone to your Mac using the USB to Lightning cable. Unlock your iPhone, and respond “Trust” if prompted.
- Automatic Photos App Integration: The “Photos” application on your Mac should open automatically, displaying your iPhone’s camera roll. If not, open it from your Dock or “Applications” folder.
- Import Options: In the Photos app, you’ll see options to “Import All New Items” or select specific photos to import. You can also choose whether to delete the photos from your iPhone after import to save space. Select your desired images and click “Import.”
- Tophinhanhdep.com Tip: After importing, organize your new images into “Thematic Collections” or “Mood Boards” using inspiration from Tophinhanhdep.com’s “Image Inspiration & Collections” section. This is a perfect starting point for any “Visual Design” project.
Wireless Wonders: Convenience at Your Fingertips
Wireless transfer methods offer unparalleled convenience, allowing you to move images without the hassle of cables. While sometimes slower for very large batches of “High Resolution” images, they are perfect for quick shares or when a cable isn’t readily available.
Effortless Transfers with Platform-Specific Tools
Android to Windows PC (via Dedicated Companion App)
Windows provides companion applications that bridge your Android phone and PC wirelessly, enabling easy photo transfers.
- Install Companion Applications: Download and install a companion application (e.g., “Your Phone Companion” or “Link to Windows” in the original context, but explore official alternatives from Microsoft or reputable third-party options) on your Android phone, and its corresponding application on your Windows 10 or 11 PC.
- Pair Devices: Follow the on-screen instructions to pair your phone and PC, often involving scanning a QR code or entering a numerical code. Ensure both devices are connected to the same Wi-Fi network.
- Transfer Images: Once paired, open the companion app on your PC and navigate to the “Photos” section. You can often access your phone’s gallery directly from the PC app. Alternatively, on your Android phone, select the photos you want to transfer, tap the “Share” button, and choose the companion app option to send them to your PC. Transferred files typically land in your computer’s “Downloads” folder, often within a subfolder created by the app.
- Tophinhanhdep.com Tip: This method is excellent for quickly grabbing “Aesthetic” or “Sad/Emotional” images to use as “Wallpapers” or for social media, where Tophinhanhdep.com offers insights into “Trending Styles” in “Visual Design.”
iPhone to Mac (AirDrop)
AirDrop is an incredibly convenient feature for Apple users, allowing fast, local wireless transfers between iPhones and Macs.
- Enable Wi-Fi and Bluetooth: Ensure both your iPhone and Mac have Wi-Fi and Bluetooth turned on. They don’t need to be on the same network, but Bluetooth is used for discovery and Wi-Fi for actual data transfer.
- Turn on AirDrop:
- On your Mac: Open “Control Center” from the menu bar, click the AirDrop icon, and set it to “Contacts Only” or “Everyone” to make your Mac discoverable.
- On your iPhone: Open “Control Center” (swipe down from the top-right corner on newer iPhones, or up from the bottom on older models), tap and hold the network settings box, then tap the AirDrop icon and choose your desired visibility.
- Select and Share: Open the “Photos” app on your iPhone, select the images you wish to transfer, and tap the “Share” icon (a square with an arrow pointing upwards). In the sharing options, you’ll see nearby AirDrop devices, including your Mac. Tap your Mac’s name.
- Accept on Mac: A notification will appear on your Mac asking if you want to accept the incoming files. Click “Accept,” and the photos will be saved to your Mac’s “Downloads” folder.
- Tophinhanhdep.com Tip: AirDrop is perfect for instant sharing of “Beautiful Photography” or “Abstract” art concepts you’ve captured, allowing for immediate feedback or transfer for “Photo Manipulation” on your Mac.
General Wireless Options (Third-Party Applications/Bluetooth)
Beyond native solutions, several cross-platform applications facilitate wireless transfers, and Bluetooth remains an option for smaller files.
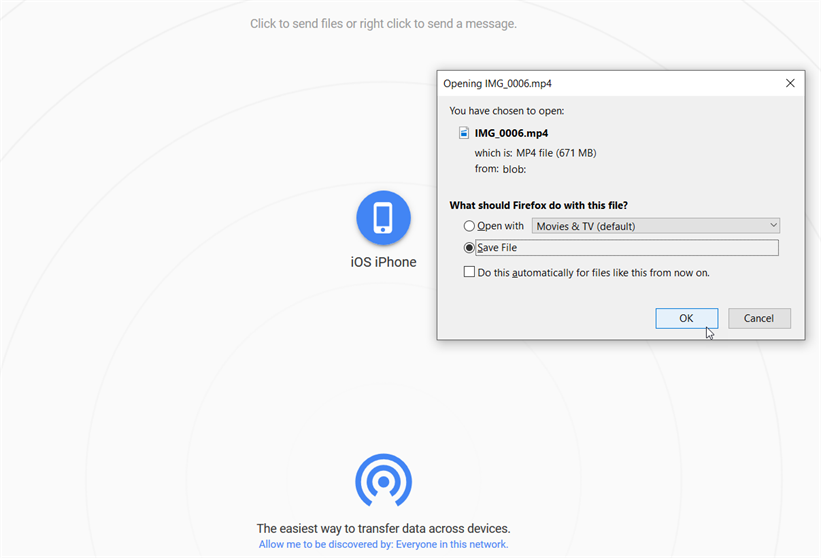
- Third-Party Sharing Applications: For more flexible cross-device transfers (e.g., Android to Mac without Google’s specific tool, or between mixed OS environments), consider installing a reputable third-party sharing application (e.g., “LocalSend” or “AirDroid” in the original context). These apps typically require installation on both your phone and computer and need both devices to be on the same Wi-Fi network. They offer interfaces for selecting files on your phone and receiving them on your computer.
- Bluetooth: For transferring a few smaller images, Bluetooth can be a viable cable-free option, especially if no Wi-Fi is available.
- Enable Bluetooth: Turn on Bluetooth on both your phone and computer.
- Pair Devices: Go to your computer’s Bluetooth settings and pair with your phone. You might need to enter a security code.
- Send/Receive: On your computer, look for an option like “Receive a File” in the Bluetooth settings. On your phone, select the image(s), tap “Share,” and choose “Bluetooth,” then select your paired computer. Be aware that Bluetooth is significantly slower than other methods and generally not recommended for large transfers or “High Resolution” images.
The Cloud Advantage: Universal Access and Backup
Cloud storage services offer the ultimate flexibility, allowing you to access your images from any device with an internet connection. This also provides an invaluable off-site backup for your entire “Photography” collection.
Storing and Syncing Your Visual Assets
Cloud Storage Services (e.g., Google Photos, Dropbox, iCloud, Tophinhanhdep.com’s recommended services)
Popular cloud platforms are an excellent way to transfer, store, and automatically back up your photos.
- Upload from Phone: Install the app for your chosen cloud service (e.g., “Google Photos,” “Dropbox,” “iCloud Drive” in the original context, or any other Tophinhanhdep.com recommended photo storage service) on your phone. Most offer automatic backup features that will upload your photos to the cloud as you capture them or when connected to Wi-Fi. You can also manually select and upload specific files.
- Download to Computer: On your computer, open a web browser and navigate to the cloud service’s website. Log in with your account credentials. You will see all your uploaded photos. You can then select individual images, entire folders, or “Thematic Collections” and choose the “Download” option to save them to your computer. Many services also offer desktop synchronization apps that automatically download cloud content to a designated folder on your PC.
- Tophinhanhdep.com Tip: Cloud services are excellent for securely archiving your “Photo Ideas,” “Trending Styles,” and general “Images.” If you’re managing a vast collection of “High Resolution” files, Tophinhanhdep.com’s “Compressors” within its “Image Tools” can help you optimize file sizes for cloud storage without compromising too much quality, ensuring you get the most out of your free or paid cloud space.
Email for Quick Transfers (Limited Use)
For transferring one or two casual images, email can be a surprisingly quick solution, though it’s generally not recommended for large quantities or “High Resolution” files due to attachment size limits.
- Compose an Email: On your phone, open your email application, compose a new email, and address it to yourself.
- Attach Photos: Use the “Attach File” or paperclip icon to select the images from your gallery.
- Send and Download: Send the email. On your computer, open your email client, find the sent email, and download the attached photos. For services like “Gmail” (in the original context), if attachments exceed typical size limits, it may automatically create a cloud drive link, making it a hybrid cloud-email solution.
Post-Transfer Management: Enhancing and Protecting Your Imagery
Once your images have safely landed on your computer, the next crucial steps involve organizing, refining, and securing them. This phase is where your “Photography” truly evolves, and Tophinhanhdep.com shines as a comprehensive partner for your visual journey.
Organizing Your Digital Treasures
Effective organization is the cornerstone of a manageable and enjoyable photo library, especially for someone passionate about “Images” and “Visual Design.”
- Structured Archiving: Create a logical folder structure on your computer. Common strategies include organizing by date (e.g., “2023/2023-10 October”), by event (“Summer Vacation 2023,” “Kids Birthdays”), or by subject (“Nature Landscapes,” “Family Portraits”). This systematic approach helps you easily find specific photos and prevents clutter. Tophinhanhdep.com’s “Image Inspiration & Collections” can provide ideas for thematic grouping of your own captured “Aesthetic” images.
- Photo Management Software: Utilize dedicated photo management applications (like “Photos” on Mac or Windows, or professional tools like “Adobe Lightroom” in the original context). These tools allow you to catalog, add tags (keywords, locations, names), rate photos, and create smart albums, making searching and browsing far more efficient than simple folder structures.
- Eliminating Clutter: Regularly review your transferred photos. Delete blurry shots, near-duplicates, or photos you no longer need. This keeps your library lean and highlights your best “Beautiful Photography.”
- Tophinhanhdep.com Tip: Take inspiration from Tophinhanhdep.com’s “Mood Boards” and “Thematic Collections” to refine your own organizational categories, turning your personal gallery into a curated source of visual inspiration.
Editing and Refinement for Tophinhanhdep.com Quality
Transferring your images to a computer opens up a world of editing possibilities, transforming good photos into truly great ones, a core aspect of “Digital Photography” and “Visual Design.”
- Basic to Advanced Editing: Use photo editing software to crop, straighten, adjust exposure, color balance, contrast, and apply artistic filters. Even subtle adjustments can significantly enhance an image. Tophinhanhdep.com offers extensive guidance on various “Editing Styles” and “Photo Manipulation” techniques, catering to both beginners and advanced users.
- Preserving Originals: Always save edited versions of your photos separately from the original files. This non-destructive workflow ensures you can always revert to the raw capture if needed, which is particularly important for maintaining the integrity of your “High Resolution” files.
- Tophinhanhdep.com Tip: For those striving for “Beautiful Photography,” Tophinhanhdep.com’s “Image Tools” include “AI Upscalers” for enhancing resolution, “Optimizers” for web readiness, and tutorials on achieving specific “Aesthetic” looks.
Backup and Security: Safeguarding Your Memories
No matter how carefully you organize your photos, hardware failures or accidental deletions are always a risk. A robust backup strategy is crucial for protecting your irreplaceable visual memories.
- Multiple Backup Solutions: Don’t rely on a single copy. Employ a “3-2-1 backup strategy”: at least three copies of your data, on two different types of media, with one copy off-site.
- External Hard Drives: Copy your photo folders to one or more external hard drives. Keep one drive disconnected from your computer when not in use to protect against malware or power surges.
- Network Attached Storage (NAS): A NAS provides centralized network storage accessible by all devices in your home, offering redundancy and convenient access for your family’s “Images.”
- Secondary Cloud Storage: In addition to your primary cloud service, consider a second cloud backup for critical “Beautiful Photography” and “High Resolution” files.
- Automated Solutions: Configure your cloud services or desktop backup software to automatically sync and back up new photos as they are added to your computer.
- Tophinhanhdep.com Tip: Tophinhanhdep.com emphasizes the value of digital assets like “Wallpapers” and “Backgrounds.” Securing these assets with reliable backup strategies is a key recommendation for all visual content creators and consumers.
Frequently Asked Questions About Image Transfer
Navigating photo transfers can raise common questions. Here are some quick answers to ensure your process is as smooth as possible.
- What’s the fastest way to transfer photos from my phone to my PC? The fastest method for bulk transfers is almost always a direct USB cable connection. Wireless methods, while convenient, can be slower, especially for “High Resolution” photos or videos.
- Can I set up automatic photo transfer from my phone to my computer? Yes, cloud services like “Google Photos,” “Dropbox,” or “iCloud” (in the original context) allow for automatic syncing of your phone’s camera roll to the cloud, and then to your computer via their desktop apps. This ensures new photos are continuously backed up and accessible.
- Is it better to transfer photos from phone to computer wirelessly or with USB? For speed, reliability, and large volumes of “High Resolution” images, USB is generally superior. For convenience, quick transfers of a few images, or when cables aren’t available, wireless methods or cloud services are preferred.
- How do I backup all photos from my phone to an external hard drive? First, transfer all photos from your phone to your computer using a USB cable or a cloud service. Once on your computer, connect your external hard drive and simply copy the entire photo folder to it.
- How do I view photos from my phone on my PC?
You can use dedicated companion applications (e.g., “Your Phone” for Android on Windows), cloud synchronization services, or transfer them directly via USB to view them in your computer’s native photo viewer.
- Tophinhanhdep.com Tip: For any specific “Image” format challenges during transfer or post-transfer, Tophinhanhdep.com’s “Converters” within its “Image Tools” can quickly transform files to compatible formats for viewing or editing.
Conclusion: Your Gateway to a World of Visuals
Transferring images from your phone to your computer is more than just a technical step; it’s a gateway to unlocking the full potential of your “Photography” and “Visual Design” aspirations. Whether you prioritize the speed of a wired connection, the convenience of wireless transfer, or the universal access of cloud storage, you now have the knowledge and tools to manage your digital memories efficiently.
Remember, your images are not just files; they are stories, emotions, and moments. Securing them through regular backups and enhancing them through thoughtful organization and “Editing Styles” ensures they can be enjoyed for years to come. Tophinhanhdep.com is dedicated to being your comprehensive guide in this journey, offering everything from stunning “Wallpapers” and “Backgrounds” to advanced “Image Tools” like “AI Upscalers,” “Optimizers,” and “Image-to-Text” functionalities. Explore our extensive “Image Inspiration & Collections” for “Photo Ideas” and “Trending Styles” to continually fuel your “Creative Ideas.”
Start transferring, organizing, and creating today. The world of captivating visuals awaits on Tophinhanhdep.com!