How to Sharpen an Image for Breathtaking Clarity and Detail

In the vast and vibrant world of digital imagery, where every pixel tells a story, the pursuit of perfection often leads photographers and visual artists to one crucial technique: image sharpening. Far from merely tweaking a setting, sharpening is a nuanced art form that enhances the visual impact of your photographs, making them pop with clarity and detail. Whether you’re a professional photographer aiming for high-resolution masterpieces, a graphic designer perfecting a client’s vision, or simply someone who loves creating beautiful aesthetic images for social media, understanding how to effectively sharpen an image is an indispensable skill.
At Tophinhanhdep.com, we understand the profound importance of image quality across all visual mediums, from stunning wallpapers and evocative backgrounds to abstract art and compelling stock photos. Our comprehensive collection of resources on Photography, Image Tools, and Visual Design is tailored to help you elevate your craft. This guide dives deep into the techniques and tools available to transform your images from soft and subtle to crisp and captivating, ensuring your digital photography consistently achieves professional-grade clarity.

The Science and Art of Image Sharpening
Before we delve into specific techniques, it’s vital to grasp what image sharpening truly entails. Contrary to common belief, sharpening doesn’t magically “fix” a blurry photo or recover lost focus. A truly out-of-focus image will remain so, regardless of how much sharpening is applied. Instead, sharpening is an optical illusion, a clever manipulation of contrast that makes the in-focus areas of your image appear clearer and more defined.
The magic happens at the edges. Photoshop and other image editing software define an “edge” as any area where there’s a significant, abrupt change in brightness between adjacent pixels. When you sharpen an image, the software increases the contrast along these detected edges. It makes the lighter side of an edge even lighter and the darker side even darker, creating a more pronounced separation. Your brain, processing this increased contrast, interprets it as enhanced sharpness. The more pronounced this edge contrast, the sharper the image appears to the human eye.
The importance of this technique cannot be overstated across various image categories featured on Tophinhanhdep.com. For nature photography, it brings out the intricate textures of leaves, the glint in an animal’s eye, or the fine details of a landscape. In high-resolution images destined for print, proper sharpening ensures that minute details are preserved and visible. For stock photos, clarity is paramount to meet professional standards and appeal to a broad audience. Even in creating aesthetic or abstract images, controlled sharpening can define forms, enhance textures, and guide the viewer’s eye. Mastering this skill is a cornerstone of digital photography and a key component of effective photo manipulation and visual design, allowing you to create creative ideas and impactful thematic collections.
Mastering Traditional Sharpening Techniques in Advanced Photo Editing Software
While modern AI tools offer incredible ease, understanding traditional sharpening filters in powerful software like Photoshop provides unparalleled control and precision. Tophinhanhdep.com’s tutorials frequently highlight these foundational techniques, equipping you with the knowledge to handle any image sharpening challenge.
The Unsharp Mask Filter: A Classic Approach
The Unsharp Mask filter might sound counterintuitive, as if it’s designed to blur rather than sharpen. However, its name originates from a traditional darkroom technique where a blurred, or “unsharpened,” copy of an image was used as a mask to enhance sharpness. Photoshop’s digital rendition works on the same principle, albeit behind the scenes. It’s often considered the easiest, most basic, yet highly effective sharpening filter available.
To begin, Tophinhanhdep.com’s guides always recommend converting your image layer into a Smart Object. This crucial step enables non-destructive editing, meaning the sharpening effect is applied as a “Smart Filter.” This preserves your original image data and allows you to go back and tweak settings at any time without degrading the image quality – an essential practice for any serious digital photography workflow or photo manipulation project.
Once your layer is a Smart Object, navigate to Filter > Sharpen > Unsharp Mask. The dialog box presents three key sliders:
-
Amount: This slider controls the intensity of the sharpening effect by determining how much contrast is added along the edges. A higher percentage means stronger contrast and a more noticeable sharpening. Default settings (e.g., 50%) often provide a subtle effect, while pushing it too high can lead to an “oversharpened” look, characterized by blown-out highlights and crushed shadows, resulting in lost detail. Tophinhanhdep.com generally recommends an Amount of 150-200% for large, high-resolution images destined for print and 50-70% for smaller images intended for web or email, recognizing the difference in how pixels are perceived in print versus on screen.
-
Radius: The Radius slider defines the thickness of the edges being affected by the sharpening. It specifies how many pixels extending outward from an edge should be included in the sharpening process. A small radius (e.g., 1 pixel) affects only the immediate border pixels, resulting in finer sharpening. A larger radius (e.g., 10 pixels) expands this area, making the edge thicker and the contrast more obvious. However, excessive Radius values can introduce distracting “halos” – light or dark outlines – along the edges, a clear sign of over-sharpening that detracts from beautiful photography. For print, a Radius of 1-2 pixels is often ideal, potentially up to 3 for very large images. For web, values between 0.5 and 0.7 pixels are usually sufficient.
-
Threshold: This critical slider prevents unwanted sharpening in smooth areas, such as skin tones, skies, or blurred backgrounds. By default, Unsharp Mask sharpens all pixels equally. The Threshold value tells the filter to only sharpen pixels that differ in brightness from their neighbors by a specified amount (measured in brightness levels from 0 to 255). For example, a Threshold of 10 means only pixels at least 10 brightness levels lighter or darker than their surroundings will be sharpened. This effectively isolates the true edges. Tophinhanhdep.com suggests keeping the Threshold low, typically between 2 and 10 levels, to prevent patchy or random sharpening, ensuring only the areas that need clarity receive it.
After setting these parameters, there’s one final, crucial step: changing the blend mode. By default, Unsharp Mask affects both pixel brightness and color, which can lead to color shifting or oversaturation. To prevent this, double-click the Blending Options icon next to the Unsharp Mask Smart Filter in the Layers panel and change the blend mode from Normal to Luminosity. This ensures sharpening is applied only to the brightness values, preserving your original colors and maintaining the integrity of your aesthetic images.
Harnessing the Power of the High Pass Filter
Another powerful and often preferred method for sharpening, particularly among advanced users, is the High Pass filter. Unlike Unsharp Mask, which works on pixel values, High Pass is an edge-detection filter that isolates edges, making it incredibly precise for sharpening. Tophinhanhdep.com’s tutorials emphasize its simplicity and effectiveness.
Again, start by converting your image to a Smart Object for non-destructive editing. Then, go to Filter > Other > High Pass. Immediately, your image will turn gray.
The High Pass dialog box is simpler, featuring only a Radius slider. High Pass works by filling the entire image with a flat, neutral gray. It then identifies edges – areas of abrupt brightness changes – and highlights them by making the light side lighter and the dark side darker, while non-edge areas remain gray. The Radius slider controls the width of this edge highlighting.
- Radius Setting: The goal is to set the Radius just large enough to clearly see the edges highlighted, but small enough that these highlights remain tight around the edges. Start with a very low value (e.g., 0.1 pixels), which typically results in a solid gray image. Slowly increase the Radius until thin, subtle outlines appear around the main details of your subject. Avoid pushing it too far, as a high Radius will highlight too much of the image, including unwanted blurred areas, making the sharpening less effective and potentially introducing halos. Generally, Tophinhanhdep.com recommends Radius values between 2 and 5 pixels for optimal results, depending on the image size and detail.
Once you click OK, the gray High Pass filter is applied as a Smart Filter. To bring the sharpening effect to life, you need to change the blend mode of this Smart Filter. Double-click the Blending Options icon next to the High Pass filter and experiment with the following blend modes:
- Overlay & Soft Light: These are the most commonly used. Overlay provides a higher contrast and stronger sharpening effect, while Soft Light offers a more subtle and gentle enhancement. Both hide the neutral gray areas, leaving only the edge enhancements visible.
- Hard Light & Linear Light: If Overlay isn’t strong enough, Hard Light and Linear Light offer even more intense sharpening, with Linear Light being the most aggressive. These should be used with caution to avoid an unnatural, over-sharpened appearance.
After choosing a blend mode, you can further fine-tune the intensity of the sharpening by adjusting the Opacity of the High Pass Smart Filter. Lowering the opacity reduces the overall effect, allowing you to achieve the perfect balance. This method offers incredible control, making it a favorite for enhancing high-resolution digital photography and precise photo manipulation.
Other Specialized Sharpening Tools
Beyond the Unsharp Mask and High Pass, Tophinhanhdep.com recognizes several other tools that cater to specific sharpening needs:
- Smart Sharpen: Often touted as a more advanced filter than Unsharp Mask, Smart Sharpen offers greater control over sharpening, especially for targeted enhancements. It allows you to reduce noise in low-contrast areas while sharpening edges, and provides separate controls for shadows and highlights. This is particularly useful for delicate image manipulation where preserving subtle details is critical.
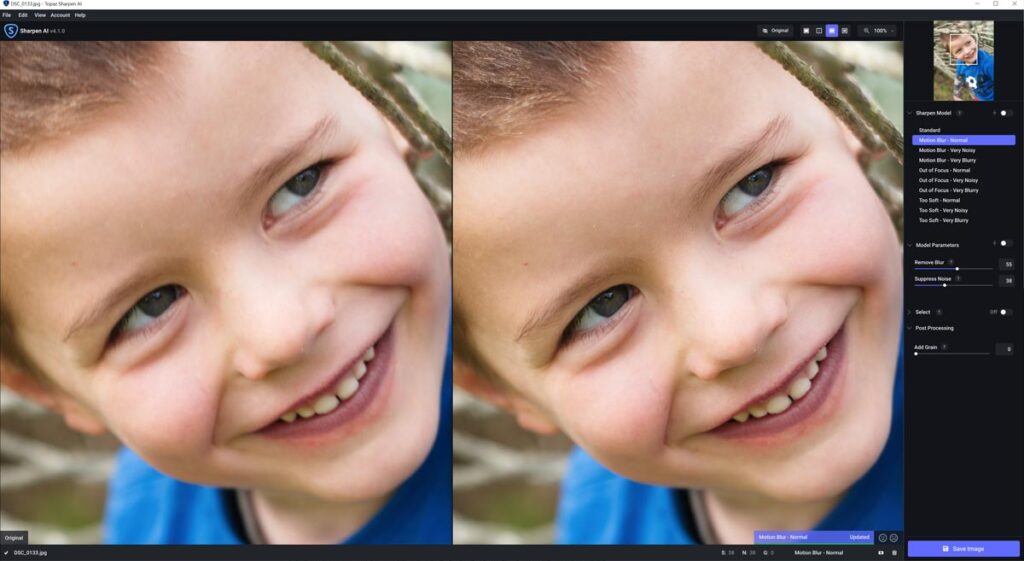
- Shake Reduction Filter: A savior for slightly blurry images caused by camera motion. This intelligent filter can analyze the nature of the blur (linear, arc-shaped, rotational) and apply appropriate corrections to minimize shakiness. While it can’t fix severely blurred shots, it’s an excellent tool for salvaging otherwise perfect photos with minor motion blur, a common challenge in digital photography.
- The Sharpen Tool (Brush): For localized, brush-based sharpening, the dedicated Sharpen tool acts directly on pixels. You can control its strength and blending mode, allowing you to selectively enhance specific areas (e.g., eyes in a portrait, specific textures in a nature shot) while leaving other areas untouched. It’s ideal for adding depth and emphasis in creative ideas and digital art.
The Future of Clarity: AI-Powered Image Sharpening Tools
The landscape of image editing is rapidly evolving, and Tophinhanhdep.com is at the forefront, showcasing the revolutionary capabilities of AI-powered “Image Tools.” For those seeking efficiency, speed, and automation, AI sharpeners offer a compelling alternative to manual slider adjustments.
The rise of AI in image enhancement signifies a shift towards more intelligent and user-friendly solutions. Tophinhanhdep.com’s integrated AI image sharpener allows you to enhance clarity and details in seconds, often with just “one click.” This dramatically speeds up workflows, making it easier to prepare images for any purpose, from high-resolution stock photos to trending aesthetic images.
The benefits are numerous:
- Automatic Clarity and Detail Enhancement: AI algorithms analyze your image, intelligently identifying blurred edges and areas in need of enhancement. They automatically adjust settings like radius, strength, and threshold, performing complex calculations that would traditionally require extensive manual tweaking.
- Speed and Ease: Simply upload your photo, and the AI takes over, delivering a sharpened image in seconds. This eliminates the laborious process of repeating steps and adjusting multiple sliders, greatly optimizing your workflow.
- Prevention of Over-sharpening and Halos: Advanced AI models are designed to sharpen precisely, increasing contrast along edges without introducing the harsh halos or brittle textures that can result from aggressive manual adjustments. This ensures a natural, authentic look.
Tophinhanhdep.com highlights various advanced AI capabilities that go beyond simple sharpening:
- Intelligent Detail Recovery: AI tools like “Supersharp AI” are specifically designed to tackle general fuzziness, motion blur, and even enhance blurry faces. They effectively restore image edges and intricate details, making images sharper and more defined.
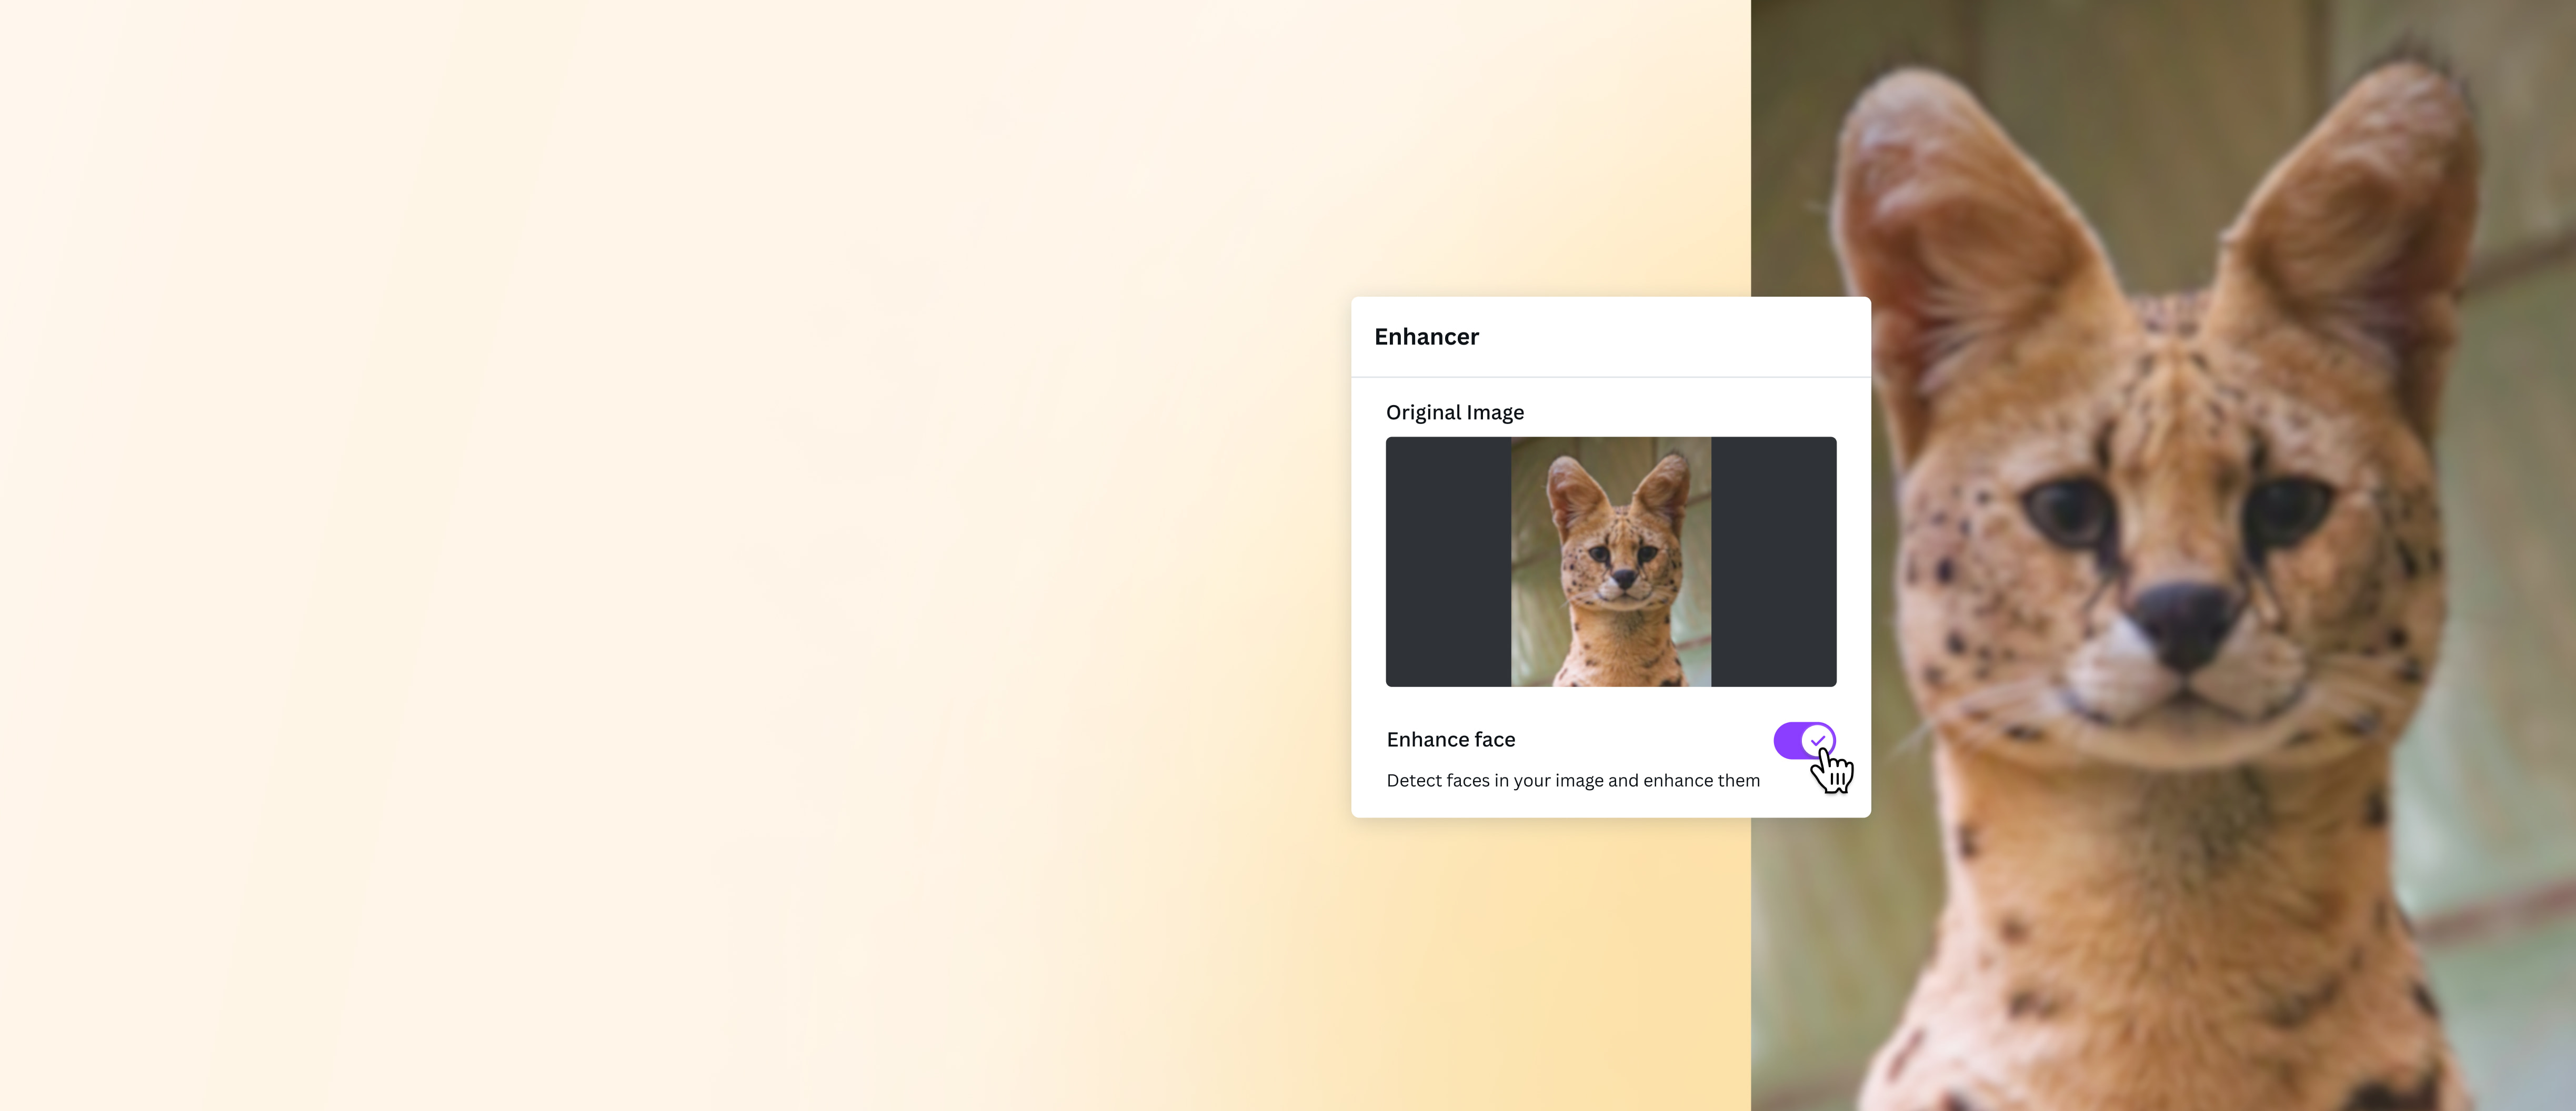
- Selective Enhancement: AI solutions like “Structure AI” can selectively apply enhancements, boosting clarity and details while intelligently avoiding areas like human faces where sharpening might look unnatural, thereby simplifying photo manipulation for portraits.
- Text Clarity: For images containing text, AI photo clarifiers can sharpen text, making it more readable without amplifying noise in smooth regions, which is incredibly useful for graphic design and document-related images.
- Old Photo Repair: AI can also play a crucial role in repairing old pictures, restoring their original clarity and even transforming precious blurry visuals into high-resolution images with a single click.
Furthermore, Tophinhanhdep.com emphasizes the cross-platform accessibility of these tools. Many AI sharpeners are available as apps for mobile devices, allowing you to sharpen photos, remove blur, eliminate pixelation, and increase details wherever and whenever inspiration strikes. These AI sharpeners are part of a broader suite of image tools, working seamlessly with AI upscalers, converters, and compressors to provide a complete workflow for optimizing your visual content.
Best Practices for Sharpening Your Images
Regardless of the tools or techniques you employ, adhering to certain best practices will ensure you achieve the most impactful and natural-looking results:
- Start with a Quality Image: The most crucial rule: sharpening cannot fix a fundamentally blurry or out-of-focus image. It enhances existing detail. Always strive to capture the sharpest possible image in-camera. If you’re working with stock photos or backgrounds, ensure they are high-resolution to begin with.
- Zoom to 100% for Accurate Preview: When sharpening, it’s imperative to view your image at 100% zoom. This “actual pixels” view provides the most accurate representation of how the sharpening affects individual pixels, preventing you from over-sharpening or misjudging the effect.
- Always Work Non-Destructively: As championed throughout Tophinhanhdep.com’s tutorials, converting your image layer to a Smart Object before applying any sharpening filter is non-negotiable. This preserves your original image and allows for infinite adjustments without quality loss, a cornerstone of professional digital photography and photo manipulation.
- Consider Targeted Sharpening with Masks: Not every part of an image needs the same amount of sharpening. Often, you’ll want to sharpen your main subject (e.g., a face, an animal, a detailed texture) more than softer areas like backgrounds, skies, or bokeh. Use layer masks in conjunction with your sharpening filters to selectively apply the effect, painting it in where needed and masking it out where it would be detrimental.
- Tailor Settings for Your Output: The sharpening needs for a large print are vastly different from those for a small web image or a social media background. Pixels are denser and appear smaller in print, requiring more sharpening. Always consider the final destination of your image and adjust your Amount and Radius values accordingly.
- The “Less is More” Principle: Over-sharpening is one of the most common pitfalls in image editing. It leads to ugly halos, jagged edges, and an unnatural, brittle appearance that detracts from even the most beautiful photography. Always aim for subtle enhancements that look natural. If you can clearly see the sharpening effect, you’ve likely gone too far. Err on the side of caution; a slightly less sharp image is always preferable to an over-sharpened one.
By following these guidelines and leveraging the diverse range of tools and techniques discussed on Tophinhanhdep.com, you can confidently transform your images, making them crisper, clearer, and more impactful.
In conclusion, mastering image sharpening is a fundamental skill for anyone involved in digital photography or visual design. From the precise control offered by traditional filters like Unsharp Mask and High Pass in advanced editing software, to the speed and efficiency of cutting-edge AI-powered tools available through Tophinhanhdep.com, the options for enhancing your images are abundant. By understanding the principles behind sharpening, employing non-destructive workflows, and applying best practices, you can ensure your images consistently achieve breathtaking clarity and detail, whether they’re destined for a high-resolution print, an engaging social media post, or a captivating entry in a thematic collection. Explore Tophinhanhdep.com for more image inspiration, advanced tutorials, and the latest image tools to unlock your full creative potential.