Mastering Image Sharpening in Photoshop: A Comprehensive Guide for Tophinhanhdep.com Users

In the vibrant world of digital imagery, where every pixel counts, the clarity and crispness of a photograph can make all the difference. From breathtaking nature scenes to intricate abstract art, and from professional stock photos to personal aesthetic backgrounds, the impact of an image often hinges on its sharpness. At Tophinhanhdep.com, we understand the pursuit of visual excellence, providing users with a vast collection of high-resolution images, creative photography resources, and essential image tools. One of the most fundamental yet powerful techniques in image enhancement, crucial for anyone delving into photography or visual design, is sharpening.
Sharpening an image is not merely about making it “less blurry”; it’s an art and a science of enhancing perceived detail and making subjects truly pop. It adds contrast along the edges of objects, making them more defined, dramatic, and impactful. For the diverse range of images curated and shared on Tophinhanhdep.com – be it stunning wallpapers, evocative sad/emotional photography, or exquisite beautiful photography – proper sharpening is paramount. It ensures that the high-resolution quality is maintained, that digital art stands out, and that photo manipulation seamlessly integrates various elements.
While there are numerous tools and software available for image editing, Adobe Photoshop remains the industry standard, offering a robust suite of features for detailed photo manipulation and graphic design. However, its extensive capabilities can sometimes feel overwhelming. This guide from Tophinhanhdep.com aims to demystify the process of sharpening an image in Photoshop, covering various techniques from fundamental filters to advanced selective adjustments. We’ll also touch upon how AI-powered alternatives can offer a streamlined approach for those seeking efficiency without compromising quality, especially relevant for creators managing large thematic collections or trending styles. Whether you’re a seasoned photographer aiming to refine your digital photography, a graphic designer perfecting a visual design project, or simply someone looking to elevate their collection of aesthetic backgrounds, mastering sharpening in Photoshop is an indispensable skill.

Understanding the Essence of Image Sharpening: The Art of Perceived Detail
Before diving into the practical steps of sharpening, it’s crucial to grasp what image sharpening truly entails. Far from a simple “unblur” button, sharpening is an optical illusion, expertly crafted by image processing algorithms. For content creators on Tophinhanhdep.com specializing in high-resolution stock photos or intricate digital art, understanding this underlying principle is key to achieving optimal results without introducing unwanted artifacts.
Fundamentally, image sharpening works by increasing the contrast along the “edges” within your image. Photoshop, and indeed most image editors, defines an edge as any area where there’s a significant, abrupt change in brightness or color between neighboring pixels. When you apply a sharpening filter, the software identifies these transitional areas and subtly adjusts the pixels: making the lighter side of an edge slightly lighter, and the darker side slightly darker. Your brain then interprets this heightened local contrast as increased sharpness and clarity. This technique can bring out the delicate textures in nature photography, define the precise lines in abstract art, or add sparkle to a beautiful portrait.
The goal is to enhance this perceived detail without creating artificial-looking halos, noise, or an overly grainy appearance. This balance is particularly important when preparing images for various platforms, such as web optimization or printing high-quality wallpapers. Over-sharpening can detract from the natural beauty of an image, turning subtle details into jagged distortions, which is counter-productive to the high standards upheld by Tophinhanhdep.com for its image inspiration and collections. Therefore, a nuanced approach, understanding the tools at your disposal, and knowing when to stop, are all hallmarks of a professional editing style.
Essential Photoshop Tools for Image Sharpening
Photoshop offers a variety of sharpening filters, each with its unique characteristics and ideal use cases. For Tophinhanhdep.com users, knowing which tool to use and how to apply it non-destructively is vital for maintaining image quality across diverse categories like emotional photography or detailed graphic design.
The Versatile Unsharp Mask Filter
The Unsharp Mask (USM) filter is perhaps the most widely used sharpening tool in Photoshop. Despite its name, which harks back to traditional darkroom techniques, it is incredibly effective for digital sharpening. It operates by finding areas where pixels contrast with their neighbors and increasing that contrast. This is especially useful for bringing out details in beautiful photography or ensuring the crispness of wallpapers.
To apply the Unsharp Mask:
- Open your image in Photoshop. For Tophinhanhdep.com, consider starting with a high-resolution image to give yourself ample detail to work with.
- Convert to Smart Object: It’s highly recommended to first convert your image layer into a Smart Object (Layer > Smart Objects > Convert to Smart Object). This allows you to apply the Unsharp Mask as a Smart Filter, meaning you can non-destructively adjust or remove the sharpening at any time without altering your original pixels. This flexibility is crucial for photo manipulation and maintaining editing styles.
- Navigate to the Filter: Go to
Filter > Sharpen > Unsharp Mask. - Adjust the Sliders: The Unsharp Mask dialog box presents three key sliders:
- Amount: This controls the intensity of the sharpening effect. A higher amount means a stronger contrast boost along the edges. Be cautious not to overdo this, as it can quickly lead to an artificial, over-sharpened look or increased noise, especially in smooth areas like skies in nature photography or skin in portraits. For general use, values between 50-150% are common, but always adjust based on your image.
- Radius: This determines the width of the edge effect – how many pixels extending outward from the edge will be affected. A smaller radius enhances finer details, while a larger radius affects broader edges. For high-resolution images on Tophinhanhdep.com, a smaller radius (0.5 to 2.0 pixels) is often preferred to enhance fine textures without creating thick, unnatural halos. For larger details or specific graphic design elements, you might go slightly higher.
- Threshold: This slider dictates how much contrast must exist between pixels before Photoshop considers them an “edge” and applies sharpening. By increasing the Threshold, you tell Photoshop to only sharpen areas with a more pronounced contrast difference, thereby protecting smoother areas (like skin, skies, or bokeh backgrounds) from being sharpened and becoming noisy. This is invaluable for aesthetic or portrait photography where you want to sharpen eyes and hair but keep skin smooth. A threshold of 0 will sharpen everything, while higher values (e.g., 5-10 levels) will be more selective.
Experimentation is key, as the optimal settings vary significantly based on image size, resolution, and desired effect. Always zoom in to 100% to accurately assess the sharpening effect and avoid over-processing.
Smart Sharpen: Advanced Control for Precision
For Tophinhanhdep.com users demanding more refined control, especially for high-resolution stock photos or digital photography with subtle details, the Smart Sharpen filter is an excellent choice. It’s considered a more sophisticated alternative to Unsharp Mask because it offers advanced options, including the ability to minimize noise in low-contrast areas and separate controls for shadows and highlights.
Here’s how to effectively use Smart Sharpen:
- Open and Duplicate: Open your image in Photoshop. Duplicate the image layer (
Ctrl/Cmd + J) and then convert the duplicate to a Smart Object (Right-click layer > Convert to Smart Object). This ensures non-destructive editing. - Access the Filter: Go to
Filter > Sharpen > Smart Sharpen. - Basic Settings:
- Amount & Radius: Similar to Unsharp Mask, these control the intensity and width of the sharpening effect. Start with moderate values and adjust carefully. Increase the Radius until you just begin to see halo effects, then reduce it slightly to eliminate them.
- Reduce Noise: This is a powerful feature unique to Smart Sharpen. It helps prevent noise from being amplified in areas that shouldn’t be sharpened, which is critical for clean, high-resolution images and professional stock photos. Adjust this slider to find a balance between sharpness and noise suppression.
- Remove: This dropdown offers options to correct different types of blur (Gaussian Blur, Lens Blur, Motion Blur). For general sharpening, “Gaussian Blur” is often the default and a good starting point.
- Advanced Settings (Shadows & Highlights): Click the “Advanced” checkbox to reveal more granular controls:
- Fade Amount: Reduces the sharpening effect in either the shadows or highlights.
- Tonal Width: Defines the range of tones (e.g., very dark shadows or very bright highlights) that will be affected by the Fade Amount.
- Radius: Controls the size of the area where the Fade Amount is applied.
These advanced controls are invaluable for photographers working with challenging lighting or intricate details, allowing for targeted sharpening that preserves tonal integrity. For visual designers, this means more precise control over how elements appear.
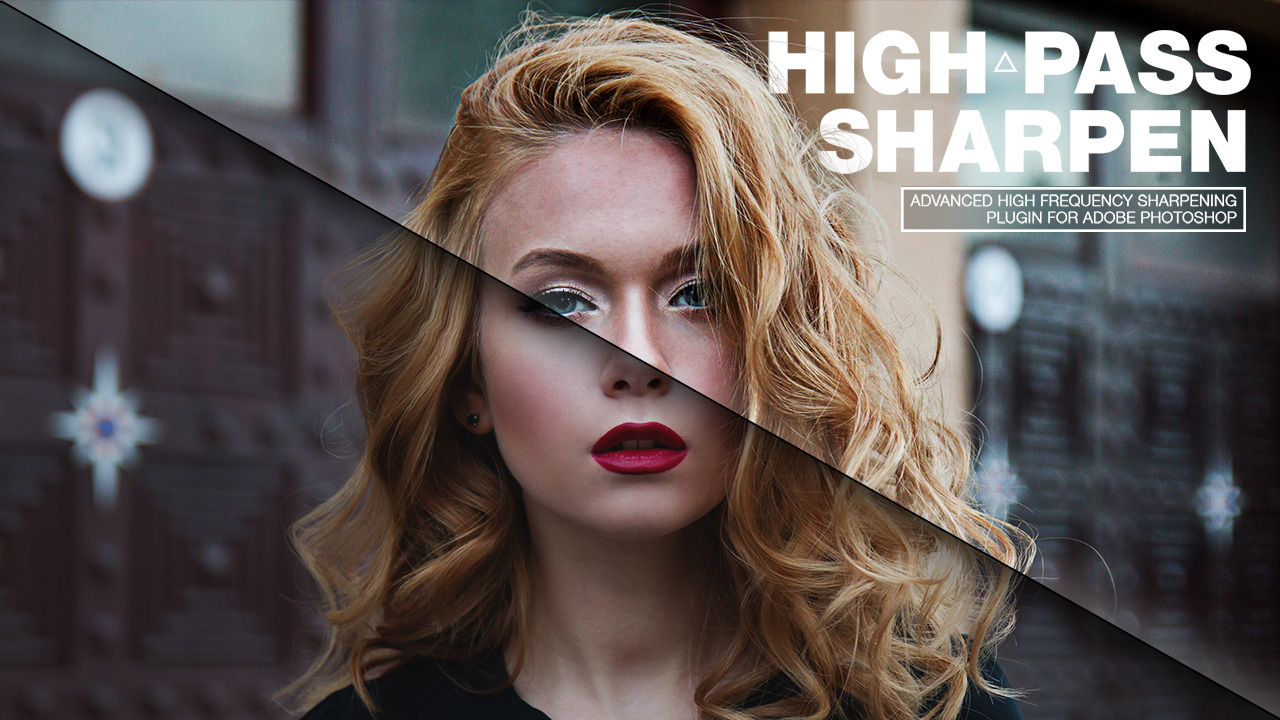
High Pass Filter: An Edge-Detection Powerhouse
The High Pass filter is a less conventional but highly effective method for sharpening, particularly favored by many graphic designers and photo manipulators on Tophinhanhdep.com for its simplicity and impactful results. It functions primarily as an edge-detection tool, making it excellent for isolating and enhancing fine details.
Here’s a step-by-step guide to sharpening with High Pass:
- Convert to Smart Object: As with other filters, start by converting your image layer to a Smart Object to ensure non-destructive editing. This is crucial for creative ideas and photo manipulation projects.
- Apply High Pass Filter: Go to
Filter > Other > High Pass. - Adjust the Radius: The image will turn gray. The High Pass filter fills the image with a flat, neutral gray and then highlights only the edges. The
Radiusslider controls the width of these highlighted edges.- Start by setting the
Radiusto a very low value (e.g., 0.1 pixels) so the image appears almost entirely gray. - Slowly increase the
Radiusuntil you see just the essential edge details of your subject highlighted against the gray background. You want enough detail to be visible to define the contours, but not so much that broad areas or noise become prominent. Typical values range from 2 to 5 pixels, depending on the image resolution and desired effect. For fine details in aesthetic photography, a lower radius is better.
- Start by setting the
- Change Blend Mode: Click OK to close the High Pass dialog box. In the Layers panel, find the “High Pass” Smart Filter entry. Double-click the “Blending Options” icon (the small square to the right of the filter name). In the Blending Options dialog, change the
Mode(Blend Mode) to one of the contrast-boosting options:- Overlay: A good starting point, providing a strong sharpening effect.
- Soft Light: Offers a more subtle and gentle sharpening.
- Hard Light / Linear Light: Provide even stronger, more intense sharpening. Use with caution, as these can quickly introduce artifacts.
The magic of these blend modes is that they hide the neutral gray areas of the High Pass filter, leaving only the enhanced edge contrast to affect your image. You can further fine-tune the intensity by adjusting the Opacity of the High Pass Smart Filter layer in the Layers panel. This method provides clean, crisp sharpening and is often preferred for its ease of use and professional finish in visual design.
Combatting Blurriness with the Shake Reduction Filter
Sometimes, an image isn’t soft due to a lack of sharpening but rather because of camera motion blur. For digital photography captured handheld or in low light, the Shake Reduction filter in Photoshop can be a lifesaver. This tool is specifically designed to minimize blurring caused by various types of camera movement (linear, arc-shaped, rotational, zigzag). It’s invaluable for restoring clarity to images that might otherwise be unusable, helping to transform a slightly blurry capture into a viable candidate for your Tophinhanhdep.com collections.
Here’s how to use it:
- Open the Image: Open the blurry image in Photoshop.
- Access the Filter: Go to
Filter > Sharpen > Shake Reduction. - Automatic Analysis: Photoshop will automatically analyze the image, identify the nature of the blur, and attempt to apply corrections. A “Blur Trace” region will appear, indicating the area Photoshop is analyzing.
- Adjust if Needed: The corrected image will appear in the dialog box. You can adjust the “Blur Trace Settings” (e.g.,
Blur Trace Bounds,Smoothness,Artifact Suppression) manually if Photoshop’s automatic correction isn’t perfect. You can also define your own blur region for more targeted correction. - Preview and Save: Use the
Previewcheckbox to compare the before-and-after. Once satisfied, click OK.
While not a general sharpening tool, Shake Reduction is crucial for addressing a specific type of blur, enabling photographers to recover potentially valuable shots for their thematic collections or stock photo libraries.
Selective Sharpening with the Sharpen Tool and Layer Masks
Sometimes, you don’t want to sharpen the entire image; instead, you want to bring out detail in specific areas, such as the eyes in a portrait, the intricate patterns in abstract art, or a particular element in a graphic design layout. Photoshop offers the dedicated Sharpen Tool for brush-based selective sharpening, and a powerful combination of filters with Layer Masks for more controlled results.
Using the Sharpen Tool:
- Activate the Tool: Select the Sharpen tool from the Tools panel. It might be nested under the Blur tool, so click and hold the Blur tool icon to reveal it.
- Set Options: In the options bar, choose a brush tip, set the
Strength(how intensely the sharpening is applied), and select aBlending Mode.Protect Detailis often a good option to check, as it aims to enhance details while minimizing pixelated artifacts. Deselect it for a more dramatic, but potentially harsher, effect.Sample All Layers: If you’re working with multiple layers, check this to sharpen based on all visible layers.
- Brush Over Areas: Carefully drag the brush over the specific parts of the image you want to sharpen. Build up the effect gradually to avoid over-sharpening.
Advanced Selective Sharpening with Layer Masks: A more professional and flexible approach for selective sharpening, especially relevant for photo manipulation and digital photography, involves applying a sharpening filter (like High Pass or Unsharp Mask) as a Smart Filter, and then using a layer mask:
- Apply Filter as Smart Filter: Follow the steps for applying Unsharp Mask, Smart Sharpen, or High Pass, ensuring it’s applied to a Smart Object layer.
- Add a Black Layer Mask: With the Smart Filter layer selected in the Layers panel, hold down
Alt/Optionand click the “Add Layer Mask” icon at the bottom of the Layers panel. This will add a black layer mask, completely hiding the sharpening effect. - Paint to Reveal: Select the
Brush Tool (B), set your foreground color to white, and choose a soft-edged brush. Now, paint over the areas where you want the sharpening effect to appear (e.g., eyes, specific textures). - Refine and Adjust: You can adjust the brush
OpacityorFlowfor subtle control. If you overdo it, switch to a black brush to paint out the sharpening. You can also adjust theOpacityof the entire Smart Filter layer or double-click the filter in the Layers panel to fine-tune its settings at any time.
This technique is incredibly powerful for portraits (sharpening eyes and lips while leaving skin smooth), landscapes (bringing out detail in specific foliage or rocks), or graphic design (ensuring crispness on logos or text elements against softer backgrounds). It embodies the essence of creative ideas and allows for highly customized visual design.
Integrating Sharpening into Your Tophinhanhdep.com Workflow
Mastering image sharpening in Photoshop goes beyond knowing how to use individual tools; it’s about integrating these techniques intelligently into a comprehensive editing workflow, especially crucial for those who provide images for Tophinhanhdep.com. From high-resolution digital photography to aesthetic backgrounds, a methodical approach ensures consistent quality and optimal results.
The Importance of Non-Destructive Editing
As highlighted throughout this guide, the cornerstone of professional image editing in Photoshop is non-destructive editing. This means making changes in a way that doesn’t permanently alter your original image pixels. For anyone contributing to Tophinhanhdep.com’s collections or engaging in extensive photo manipulation, this is not just a best practice, but a necessity.
- Smart Objects and Smart Filters: Always convert your image layer to a Smart Object before applying sharpening filters like Unsharp Mask, Smart Sharpen, or High Pass. This transforms the filter into a Smart Filter, allowing you to:
- Re-edit Filter Settings: Double-click the filter in the Layers panel to reopen its dialog box and tweak settings whenever needed.
- Adjust Opacity: Control the overall strength of the sharpening by adjusting the Smart Filter’s opacity.
- Use Layer Masks: Apply a layer mask directly to the Smart Filter to selectively reveal or hide the sharpening effect, as detailed in the “Selective Sharpening” section.
- Stack Multiple Filters: Combine different sharpening techniques or other filters non-destructively.
This flexibility is invaluable. Imagine you’ve sharpened a beautiful piece of nature photography for a wallpaper, and later decide it’s a bit too strong for a specific display. With Smart Filters, you can easily tone it down without starting from scratch.
When to Sharpen: A Crucial Step in the Editing Sequence
Sharpening is generally one of the final steps in your image editing workflow. Applying it too early can amplify noise or issues that you might later correct (e.g., color correction, noise reduction, or retouching). The typical sequence looks something like this:
- Basic Adjustments: Exposure, contrast, white balance, color grading.
- Cropping and Straightening: Define your composition.
- Noise Reduction: If your image has significant noise, address it before sharpening, as sharpening can exaggerate noise.
- Retouching/Healing: Remove blemishes, distractions, or perform skin smoothing.
- Global Sharpening: Apply a general sharpening filter to the entire image.
- Selective Sharpening: Refine specific areas like eyes, hair, or key textures.
- Output Sharpening: A final, subtle sharpening pass might be applied based on the final output medium (web, print, specific device display). This is particularly important for image tools like compressors or optimizers, as subtle sharpening can counteract any slight softening introduced during optimization.
Adhering to this order ensures that you’re sharpening a clean, well-processed image, leading to superior results for any high-resolution image on Tophinhanhdep.com.
Avoiding Over-Sharpening: The Pitfalls and How to Prevent Them
Over-sharpening is a common mistake that can ruin an otherwise excellent photograph. For images intended for professional use or display on Tophinhanhdep.com, it can degrade quality and professionalism. Watch out for these tell-tale signs:
- Halos: Bright or dark fringes appearing around high-contrast edges. This often indicates a
Radiussetting that’s too high orAmountthat’s too aggressive. - Increased Noise/Grain: Especially noticeable in smooth areas like skies or shadows. If this happens, try increasing the
Thresholdin Unsharp Mask, using theReduce Noiseslider in Smart Sharpen, or applying a layer mask to protect those areas. - Jaggies/Aliasing: Edges appearing rough or pixelated, losing their natural smoothness.
The best way to avoid over-sharpening is to always zoom in to 100% or even 200% when adjusting sharpening settings. Apply the effect subtly, and err on the side of slightly less sharpening rather than too much. Remember, the goal is perceived sharpness, not exaggerated edges.
Sharpening for Different Image Types and Output
The ideal sharpening approach can also vary based on the specific type of image and its intended use, aligning perfectly with the diverse categories on Tophinhanhdep.com:
- Wallpapers & Backgrounds: Often require a balance. You want crispness, especially in foreground elements, but without overly aggressive sharpening that might distract or create noise when viewed large. High Pass with an Overlay blend mode is often effective here.
- Nature & Landscape Photography: Focus on textures (foliage, rocks, water). Smart Sharpen with its
Reduce Noisefeature can protect clear skies while enhancing intricate details. Selective sharpening with masks can make specific elements pop. - Portraits & Aesthetic Photography: Critical to avoid over-sharpening skin. Use
Thresholdin Unsharp Mask or selective sharpening with layer masks to focus on eyes, hair, and clothing, while keeping skin smooth. - Abstract & Digital Art: Depending on the style, sharpening can emphasize lines, patterns, or create a more graphic feel. The High Pass filter can be excellent for making edges pop.
- Stock Photos & High Resolution: These demand impeccable detail. A combination of Smart Sharpen for overall clarity and selective sharpening for key features is often used. Ensure noise is minimal.
- Images for Web (Optimizers/Compressors): Even after initial sharpening, images lose some quality during compression. A slight additional sharpening might be applied at the very end to counteract this, often referred to as “output sharpening.” Image tools like compressors and optimizers on Tophinhanhdep.com can work hand-in-hand with this final sharpening pass to ensure files are small yet visually impactful.
Streamlined Sharpening with AI-Powered Tools like Luminar Neo
While Photoshop offers unparalleled depth, for Tophinhanhdep.com users prioritizing speed and efficiency, especially when handling large batches of images for thematic collections or trending styles, AI-powered alternatives like Luminar Neo can be incredibly advantageous. Luminar Neo is celebrated for matching many of Photoshop’s capabilities while harnessing artificial intelligence for faster, more intuitive edits, a perfect complement to digital photography workflows.
Luminar Neo provides several intelligent tools for enhancing clarity and sharpness:
- The Sharpness Tool: Found in the
Developcategory, this tool offersSharpen,Radius, andMaskingsliders.- Sharpen: Controls the overall intensity.
- Radius: Adjusts the width of the sharpened edges. Keep it below 50% for a natural look in fine details.
- Masking: A standout feature, this allows you to automatically protect smooth areas (like skin or sky) from sharpening while focusing on high-contrast edges (e.g., eyes or foliage). This is an AI-driven equivalent to Photoshop’s
Thresholdor manual layer masking, but significantly faster, making it ideal for processing many aesthetic images.
- Structure AI: Located in the
Edittab, Structure AI intelligently enhances clarity and details without creating an unnatural look. Critically, it selectively applies enhancement, often avoiding human faces where sharpening can be unflattering. This is a huge time-saver for portrait and lifestyle photography. - Supersharp AI (Extension): For more complex cases of general fuzziness or motion blur, Supersharp AI, an extension for Luminar Neo, is a pro-level tool. It can tackle various types of blur, even enhancing blurry faces, making it an excellent “image unblur” solution for Tophinhanhdep.com photographers.
- Synchronization Settings: A major benefit for managing image inspiration and collections, Luminar Neo allows you to copy and paste your sharpening settings across multiple photos. This means if you find the perfect sharpening for a batch of nature photos, you can apply it to all of them with a few clicks, drastically speeding up your workflow.
For photographers and visual designers who require high-quality results on a tight schedule, Luminar Neo emerges as a compelling alternative, allowing for rapid enhancement of images for any of Tophinhanhdep.com’s diverse categories without the steep learning curve of Photoshop’s intricate tools. It aligns perfectly with the need for efficient image tools and cutting-edge editing styles.
FAQ: Sharpening Your Images with Tophinhanhdep.com Insights
As we conclude our deep dive into image sharpening, let’s address some common questions that Tophinhanhdep.com users frequently ask, offering insights grounded in practical application and the diverse needs of digital photography and visual design.
Is there a Sharpen tool in Photoshop?
Yes, Photoshop offers a dedicated “Sharpen” tool, which functions like a brush, allowing you to manually paint over specific areas you wish to sharpen. Additionally, it provides several powerful filters under the Filter > Sharpen menu, including the widely used “Unsharp Mask,” the more advanced “Smart Sharpen,” and the specialized “Shake Reduction” filter. For users on Tophinhanhdep.com looking for precise control over their aesthetic backgrounds or detailed photography, these options offer a comprehensive toolkit. Furthermore, the “High Pass” filter, found under Filter > Other, is another highly effective method for achieving crisp sharpness, particularly favored in professional photo manipulation workflows.
How do you Sharpen a blurry picture in Photoshop?
Sharpening a blurry picture in Photoshop can be approached in several ways, depending on the nature of the blur. For general blur or softness, the “Unsharp Mask” and “Smart Sharpen” filters are excellent starting points. If the blur is specifically due to camera motion, the “Shake Reduction” filter is your best bet:
- Open the image in Photoshop.
- Select
Filter > Sharpen > Shake Reduction. Photoshop will automatically analyze the blur and suggest corrections. - Review the corrected image in the dialog box. Adjust settings like
Blur Trace BoundsorSmoothnessif needed. - Click OK to apply.
For more general blur, apply either the “Unsharp Mask” or “Smart Sharpen” as a Smart Filter (after converting your layer to a Smart Object), and carefully adjust the
Amount,Radius, andThreshold(for Unsharp Mask) orReduce Noise(for Smart Sharpen) sliders. Remember that while sharpening can greatly improve perceived clarity, it cannot fully restore detail lost to extreme blur. For best results on Tophinhanhdep.com, starting with high-resolution, well-focused images is always ideal.
How do I increase clarity in Photoshop?
Increasing clarity in Photoshop goes hand-in-hand with sharpening, often addressing micro-contrast rather than just edge contrast. Several methods can achieve this, enhancing the overall punch and definition of your digital photography:
- Camera Raw Filter (Recommended):
- In the Layers Panel, select your image layer.
- Right-click on the layer and choose “Convert to Smart Object.”
- Navigate to
Filter > Camera Raw Filter. - Within Camera Raw, open the
Basic Panel. - Adjust either the
Textureslider (for finer, more natural detail enhancement) or theClarityslider (for a stronger, mid-tone contrast boost). Experiment with both. - Click OK to apply changes and exit Camera Raw.
- Using
CurvesorLevels: You can subtly increase mid-tone contrast without affecting highlights or shadows too much, which can enhance clarity. - High Pass Filter: As discussed, applying the High Pass filter with a contrast-boosting blend mode (like
Overlay) can also significantly increase perceived clarity by emphasizing edges.
These techniques, especially when combined with careful sharpening, can transform your images, making them more vibrant and detailed for Tophinhanhdep.com’s beautiful photography and aesthetic collections.
What is a better alternative to Photoshop?
While Photoshop is undeniably powerful, many Tophinhanhdep.com photo editing enthusiasts are seeking alternatives that offer a more streamlined, AI-driven experience without sacrificing professional results. We highly suggest Luminar Neo by Skylum as an outstanding alternative.
Luminar Neo impresses with its cutting-edge AI-based tools that simplify complex tasks. For sharpening specifically, its Sharpness tool with intelligent Masking, Structure AI for smart detail enhancement that avoids faces, and the powerful Supersharp AI extension for blur correction, make it incredibly efficient. Beyond sharpening, Luminar Neo excels in AI-based sky enhancements, seamless object removal, detailed portrait touch-ups, and offers robust tools for managing large thematic collections with its synchronization settings. For those aiming for innovative, high-quality edits quickly, Luminar Neo stands out as a top contender, perfectly aligning with Tophinhanhdep.com’s focus on high-resolution, aesthetically pleasing imagery and modern editing styles.
Conclusion: The Sharpening Edge for Tophinhanhdep.com
Sharpening, when wielded with skill and discernment, is a transformative step in image editing. It breathes life into pixels, turning merely good images into visually compelling stories. For the diverse and high-quality content presented on Tophinhanhdep.com, from captivating wallpapers and intricate digital art to evocative photography and inspiring collections, mastering these sharpening techniques is not just an enhancement but a fundamental requirement for maintaining excellence.
Whether you choose the meticulous control of Photoshop’s Unsharp Mask and Smart Sharpen, the elegant simplicity of the High Pass filter, or the intelligent efficiency of AI-powered tools like Luminar Neo, the core principle remains: enhance perceived detail without introducing artificiality. Understanding how contrast along edges translates into sharpness, and practicing non-destructive editing, will empower you to refine your visual designs and elevate your photography to professional standards.
The journey of digital image creation is one of continuous learning and refinement. By integrating these sharpening strategies into your workflow, you ensure that every image shared on Tophinhanhdep.com resonates with clarity, impact, and a polished aesthetic, truly showcasing the beauty and detail that your creative vision deserves. Experiment, refine, and let the sharpness of your images speak volumes.