How to Shrink an Image in GIMP: A Comprehensive Guide for Optimization and Visual Design

In the vast and vibrant world of digital imagery, the ability to control and manipulate image sizes is a fundamental skill. Whether you’re a professional photographer, a graphic designer, a webmaster, or simply someone looking to optimize your personal image collection, knowing how to efficiently shrink an image is paramount. The GNU Image Manipulation Program, or GIMP, stands as a powerful, free, and open-source solution for all your image editing needs. Tophinhanhdep.com recognizes the critical role GIMP plays in various aspects of image management, from optimizing high-resolution photography for web display to preparing visual elements for intricate digital art projects.
Shrinking an image in GIMP isn’t just about making it physically smaller; it’s about optimizing it for its intended purpose. For instance, a stunning nature photograph captured in high resolution might be perfect for print, but completely unsuitable for a website background due to its large file size. A colossal image can slow down website loading times, frustrate users, and negatively impact search engine rankings. Conversely, a precisely shrunken image ensures rapid loading, maintains visual quality, and seamlessly integrates into visual designs and thematic collections. On Tophinhanhdep.com, we understand the balance between aesthetic appeal and practical performance.

This comprehensive guide will walk you through the various methods GIMP offers to shrink images, layers, and even specific selections. We’ll explore the distinctions between these methods and how they apply to different scenarios, from preparing beautiful photography for online galleries to refining elements for graphic design and digital art. We’ll also cover essential post-resizing steps, such as cropping and exporting, to ensure your images are perfectly optimized and ready for use in any project, aligning with Tophinhanhdep.com’s commitment to providing tools and inspiration for all your image needs.
Understanding Image Resizing in GIMP: Image vs. Layer
Before diving into the practical steps, it’s crucial to understand the distinction between resizing an entire image (the canvas and all its contents) and resizing an individual layer within a multi-layered composition. GIMP offers distinct tools for each, and choosing the right one depends on your objective.
When you resize the entire image, you’re adjusting the dimensions of the entire canvas and, consequently, all the layers contained within it. This is typically done when you need to change the overall resolution of your final output, for example, making a large wallpaper image suitable for a specific screen size or shrinking a high-resolution stock photo for use as a web background. All elements within the image will scale proportionally, maintaining their relative positions and sizes. This method is incredibly useful for standardizing images for thematic collections or mood boards on Tophinhanhdep.com, ensuring consistency across your visual assets.
On the other hand, resizing an individual layer allows you to manipulate the dimensions of a single image or graphic element independently of the main canvas or other layers. This is indispensable for visual design, digital art, and photo manipulation, where you might be combining multiple images, logos, or textual elements into a single creative idea. Imagine you’re crafting a digital art piece by overlaying several abstract shapes or pieces of sad/emotional photography; you’ll need the flexibility to scale each element individually to fit your creative vision. GIMP’s tools cater to both these fundamental needs, providing precision and control.
Resizing the Entire Image (Canvas): The “Scale Image” Method

The “Scale Image” feature in GIMP is your go-to tool when the goal is to change the overall dimensions and resolution of your entire composition. This method resizes everything on your canvas uniformly, making it ideal for preparing final images for web use, printing, or fitting specific display requirements. It’s a key tool in optimizing images for Tophinhanhdep.com’s collections of wallpapers, backgrounds, and beautiful photography.
Here’s how to use the Scale Image feature:
- Open Your Image in GIMP: Launch GIMP and open the image you wish to shrink. Navigate to
File > Open, select your image, and click “Open.” If prompted by a color profile dialog, simply click “Convert.” - Access the Scale Image Menu: Once your image is open, go to
Image > Scale Image. This will bring up the “Scale Image” dialog box, which presents several options for controlling the resizing process. - Adjust Width and Height:
- You’ll see input fields for “Width” and “Height.” These represent the current dimensions of your image.
- To shrink the image, simply input smaller numerical values into these fields. For example, if your image is 4000 pixels wide and you want it to be 1920 pixels wide, type “1920” into the “Width” field.
- Lock Aspect Ratio: Crucially, observe the “chain-link” icon located between the Width and Height fields. By default, this icon is usually “locked,” meaning that when you change one dimension (e.g., width), GIMP automatically calculates and adjusts the other dimension (height) to maintain the original aspect ratio. This prevents your image from becoming stretched or squished, preserving the integrity of your beautiful photography or aesthetic background. Unless intentional distortion is desired for a creative idea, always keep this locked.
- Units of Measurement: To the right of the dimensions, there’s a dropdown menu (often showing “px” for pixels). You can change this to other units like percentage, millimeters, or inches, depending on your project needs. For web-based images, pixels are the standard.
- Set Resolution:
- Below the dimensions, you’ll find “X resolution” and “Y resolution,” typically measured in pixels per inch (ppi) or pixels per millimeter. This setting is vital, especially for print.
- For Web Use: A common resolution for images intended for screens (websites, digital displays) is 72 ppi. This keeps file sizes small without noticeable loss of quality on screen.
- For Print: If you intend to print your final composition, a higher resolution like 300 ppi is recommended to ensure sharp details and prevent pixelation.
- Adjust these values as necessary, keeping in mind that reducing the physical dimensions of the image while maintaining a high PPI will result in a denser, higher-quality image for its size.
- Apply Changes: Once you’ve entered your desired dimensions and resolution, click the “Scale” button. GIMP will process the image, and your entire composition will be resized to the new specifications.
This method effectively resizes the entire image canvas and its contents, making it perfect for preparing high-resolution stock photos or digital photography for a variety of uses, from web galleries on Tophinhanhdep.com to compact email attachments, all while preserving image quality.
Resizing Individual Layers with the Scale Tool
When your visual design involves multiple layers—perhaps a composite of abstract images, text overlays, or elements extracted from various beautiful photographs—you’ll often need to scale individual components without affecting the overall canvas. This is where GIMP’s “Scale Tool” comes into play, offering precise control over each layer. This is a fundamental technique for digital art and photo manipulation.
Here’s how to resize individual layers using the Scale Tool:
- Prepare Your Composition with Layers:
- Start by creating a new composition (
File > New) or opening an existing one. Tophinhanhdep.com recommends setting appropriate dimensions (e.g., 1920x1080 pixels for web backgrounds) and resolution (e.g., 72 ppi) for your canvas upfront. - Import your images as layers by navigating to
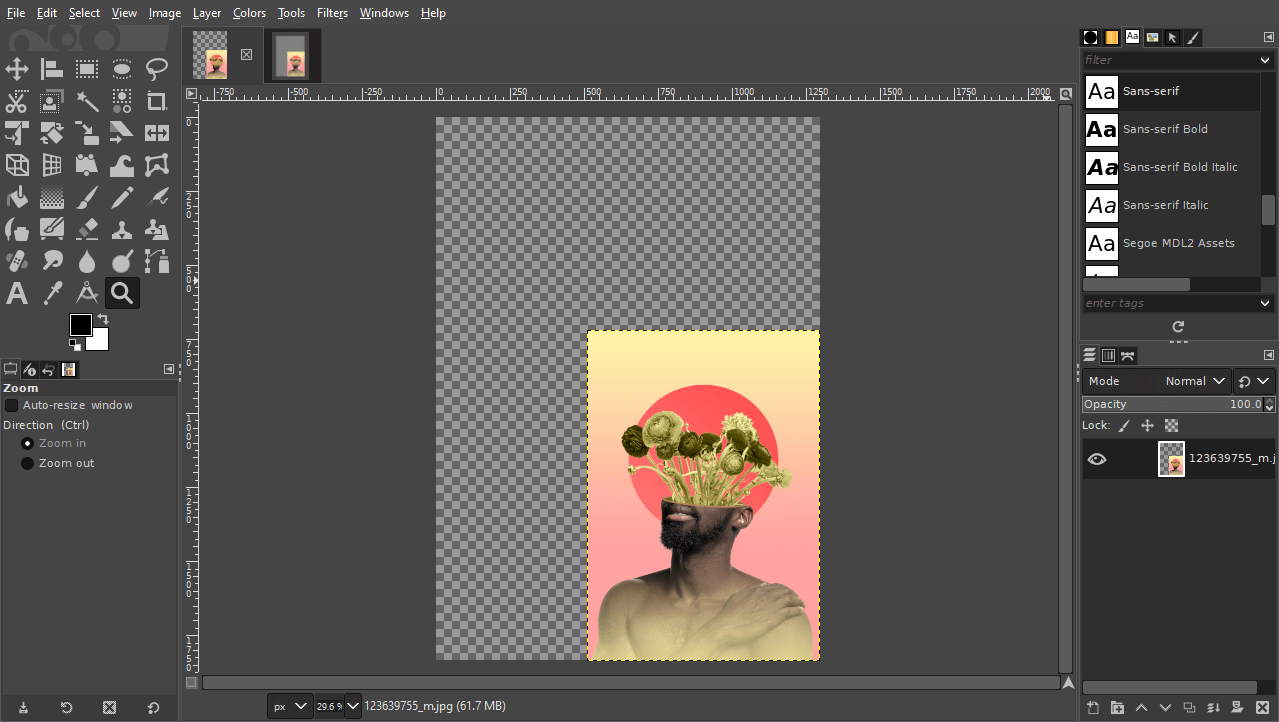
File > Open as Layers. Select the images you want to use, and GIMP will add them as new layers to your composition. You can also create new blank layers via the “New Layer” icon in the Layers panel. Rename layers for easier identification (e.g., “Pink Background,” “Yellow Model”).
- Start by creating a new composition (
- Activate the Target Layer: In the Layers panel (usually located in the bottom-right of your GIMP workspace), click on the specific layer you wish to resize. This makes it the “active” layer, ensuring that the Scale Tool will only affect this element.
- Select the Scale Tool:
- You can find the Scale Tool in GIMP’s Toolbox (typically on the left side of your screen). It often looks like a square with diagonal arrows.
- Alternatively, use the keyboard shortcut
Shift + S. - For GIMP 2.10.18 and later, tools are often grouped. Look for the “Transformation” group and select “Scale.”
- Click on the Active Layer: Once the Scale Tool is active, click anywhere within the boundaries of your chosen layer on the canvas. This action will make a bounding box with “transform handles” (small squares) appear around the layer. A “Scale” dialog box will also pop up, showing the layer’s current dimensions.
- Understanding Transform Handles and Aspect Ratio:
- The transform handles are located at the corners and midpoints of the bounding box. These are what you’ll drag to visually resize your layer.
- Lock Aspect Ratio: In the Scale dialog box (or in the Tool Options panel), ensure the chain-link icon between “Width” and “Height” is locked. This is crucial for preventing distortion, keeping your aesthetic images from looking stretched or squished.
- Scaling from the Center: To scale the layer uniformly from its center point, hold down the
Ctrlkey while dragging any of the corner transform handles inward (to shrink) or outward (to enlarge). This is particularly useful for precise placement in graphic design projects. - Scaling from a Corner: If you want to scale the image relative to a specific corner, simply drag that corner handle (or the opposite corner) without holding
Ctrl. - Numerical Input: You can also precisely define the new “Width” and “Height” values directly in the Scale dialog box, choosing your preferred units. This is ideal when you need elements to fit exact dimensions for a layout.
- Repositioning: The middle transform handles (or clicking and dragging within the bounding box) allow you to move the layer around the canvas without scaling it.
- Apply the Scale: Once you’re satisfied with the new size and position of your layer, click the “Scale” button in the Scale dialog box. Your individual layer will now be resized.
- Repeat for Other Layers: If you have multiple layers to adjust, simply select the next layer in the Layers panel and repeat steps 2-6. This iterative process is key to building complex visual designs or perfectly aligning elements for photo manipulation. For example, if you’re comparing two beautiful photographs side-by-side, you can individually scale and position them to match.
This method offers immense flexibility for artists and designers, enabling detailed control over each component of their creative ideas within a single composition.
Fine-Tuning Your Composition: Cropping and Canvas Adjustments
After resizing images or layers, especially when shrinking, you might find that your canvas no longer perfectly matches your content, or that there’s unwanted space. GIMP provides tools to adjust the canvas itself, ensuring your final image is clean, optimized, and visually balanced. These adjustments are vital for creating polished aesthetic images and professional graphic designs.
Cropping for Precision and File Size Reduction
Cropping is an essential step that often goes hand-in-hand with shrinking an image. It allows you to remove unwanted portions of an image, focus on key elements, and further reduce file size by eliminating unnecessary pixels. For web optimization, cropping away excess space around your subject can significantly impact loading times, especially for images used in Tophinhanhdep.com’s galleries.
Here’s how to use the Crop Tool:
- Open Your Image: Ensure your image is open in GIMP.
- Select the Crop Tool: Find the Crop Tool in the Toolbox (it looks like a utility knife or two overlapping right angles). You can also use the shortcut
Shift + C. - Define Your Crop Area: Click and drag your mouse over the image to draw an initial rectangular selection. This is your desired crop area.
- Adjust the Crop: Once the initial selection is made, you’ll see handles at the corners and edges of the rectangle. Click and drag these handles to precisely refine the crop area. The darkened areas outside the selection indicate what will be “cut” away.
- Apply the Crop: Once you’re happy with your selection, press
Enteron your keyboard, or click inside the cropped area. GIMP will trim the image to your specified dimensions, removing the unwanted pixels and effectively shrinking the overall image dimensions and file size.
Cropping is particularly useful for focusing on specific aesthetic or emotional elements within a sad/emotional photography piece, or for extracting a perfect background from a larger wallpaper image.
Adapting the Canvas: Crop to Content & Fit Canvas to Layers
When you scale down a layer with the Scale Tool, the canvas itself doesn’t automatically shrink with it. This can leave transparent (checkerboard pattern) or blank areas around your resized content. Conversely, if you scale a layer up, parts of it might extend beyond the original canvas boundaries. GIMP offers specific functions to address these canvas discrepancies.
-
Crop to Content:
- Purpose: This feature automatically resizes the canvas to perfectly fit the boundaries of your image content, effectively eliminating any surrounding blank or transparent space. It’s especially useful after you’ve scaled down layers or cropped extensively and want the canvas to match the new, smaller content.
- How to Use: After resizing or cropping your image or layers, go to
Image > Crop to Content. GIMP will instantly shrink the canvas to the tightest possible fit around your visible content. This ensures a clean, optimized image, free from unnecessary padding, crucial for presenting aesthetic images on Tophinhanhdep.com.
-
Fit Canvas to Layers:
- Purpose: If you’ve scaled a layer up and it now extends beyond the original canvas edges, making parts of it invisible or “clipped,”
Fit Canvas to Layerswill automatically expand the canvas to encompass all layers entirely. This ensures that all elements of your digital art or photo manipulation are fully visible. - How to Use: Go to
Image > Fit Canvas to Layers. GIMP will expand the canvas to ensure that every pixel of every layer is contained within the composition, providing a complete view of your creative ideas.
- Purpose: If you’ve scaled a layer up and it now extends beyond the original canvas edges, making parts of it invisible or “clipped,”
These canvas adjustment tools are vital for maintaining a clean and professional workspace, especially when working on complex visual designs or preparing multi-layered imagery. They ensure that your shrunken images are not only optimized in size but also perfectly framed within their digital environment.
Advanced Resizing for Specific Elements: Scaling Selections
Beyond resizing entire images or individual layers, GIMP also provides the powerful capability to scale a specific selection within a layer. This technique is invaluable for precise photo manipulation, digital art, and refining details in images. Imagine you want to shrink just a person’s head in a portrait or reduce the size of a specific object in an abstract composition without affecting anything else; scaling a selection makes this possible.
Here’s how to scale a selection in GIMP:
-
Draw Your Selection: First, you need to define the area you want to scale. GIMP offers numerous selection tools for this:
- Rectangle Select Tool (R): For rectangular areas.
- Ellipse Select Tool (E): For circular or elliptical areas.
- Free Select Tool (F) / Lasso Tool: For irregular, freehand selections.
- Fuzzy Select Tool (U): Selects areas of similar color.
- Select by Color Tool (Shift+O): Selects all pixels of a particular color range across the image.
- Paths Tool (B): For creating precise vector paths that can be converted to selections.
- Once your selection is drawn, you’ll see a “marching ants” border around it.
-
Activate the Scale Tool and Change its Mode:
- Select the Scale Tool from the Toolbox (
Shift + S). - Crucial Step: Change Transform Mode: Go to the “Tool Options” panel (usually below the Toolbox or customized to another side). Look for an area labeled “Transform:” with a series of icons. By default, the Scale Tool is set to transform the “Layer.” You need to click the icon that represents a “Selection” (it often looks like a red dotted box). This changes the tool’s behavior to apply transformations only to the active selection, not the entire layer. Tophinhanhdep.com advises users to remember to switch this mode back to “Layer” after scaling selections to avoid confusion in subsequent operations.
- Select the Scale Tool from the Toolbox (
-
Click on the Selection: Now, click anywhere inside your active selection with the Scale Tool. A bounding box with transform handles will appear around the selection, and the “Scale” dialog box will pop up.
-
Scale the Selection: The process of scaling a selection is very similar to scaling a layer:
- Lock Aspect Ratio: Ensure the chain-link icon in the Scale dialog box is locked to maintain the selection’s original proportions and prevent distortion.
- Drag Handles: Click and drag any of the corner transform handles inward to shrink the selection.
- Scale from Center: Hold down the
Ctrlkey while dragging handles to scale the selection from its center point. - Numerical Precision: Enter precise “Width” and “Height” values in the Scale dialog box if you need specific dimensions.
- Reposition: You can move the entire selection (without scaling) by dragging the center of the bounding box.
-
Apply the Scale: Once you’re satisfied with the scaled selection, click the “Scale” button in the dialog box. GIMP will then apply the transformation only to the pixels within that selection, shrinking them down. The marching ants will remain, indicating that the selection area itself has been transformed.
This advanced technique offers unparalleled control for creative ideas and detailed photo manipulation. It allows you to selectively shrink parts of an image, making it an indispensable tool for complex digital art and refining fine details in high-resolution photography.
Optimizing Your Output: Exporting Shrunken Images
After successfully shrinking your images, layers, or selections in GIMP, the final crucial step is to properly save and export your work. While “saving” in GIMP typically refers to preserving your project in its native .xcf format (which retains all layers, paths, and undo history), “exporting” is how you create a usable image file (like JPG, PNG) that can be shared, uploaded to a website, or used in other applications. Tophinhanhdep.com stresses the importance of this step for ensuring your efforts in optimization translate into real-world benefits.
Here’s how to export your shrunken images, focusing on web optimization:
-
Save Your Project (Optional but Recommended):
- Before exporting, it’s always a good practice to save your GIMP project in its native
.xcfformat. This preserves your work in an editable state, allowing you to return and make further adjustments later. Go toFile > Save As, choose a location, and GIMP will default to.xcf. - If you need to edit the file in other applications like Adobe Photoshop or Affinity Photo, you might save it as a
.psd(Photoshop Document) if GIMP’s export options support it or via a plugin.
- Before exporting, it’s always a good practice to save your GIMP project in its native
-
Access the Export Dialog:
- To export your image, navigate to
File > Export As(or use the shortcutCtrl + Shift + E). This will open the “Export Image” dialog box.
- To export your image, navigate to
-
Choose File Format and Location:
- File Name and Extension: Here, you can rename your file and specify its file type. You can type the desired extension (e.g.,
.jpg,.png) directly after the file name, or click the “Select File Type (By Extension)” dropdown to browse a list of available formats. - Location: Choose the folder on your computer where you want to save the exported image.
- Common Formats for Shrunken Images:
- JPEG (.jpg or .jpeg): Ideal for photographs (like nature, aesthetic, sad/emotional, or beautiful photography) with many colors and gradients, especially for web use. JPEG uses “lossy” compression, meaning some data is discarded to achieve smaller file sizes.
- PNG (.png): Best for images that require transparency (e.g., logos, graphic design elements, digital art with transparent backgrounds). PNG uses “lossless” compression, preserving all image data, but often results in larger file sizes than JPEGs for complex photos.
- GIF (.gif): Suitable for simple animations or images with limited color palettes (up to 256 colors) and transparency.
- TIFF (.tif or .tiff): A high-quality, lossless format, often used for print or archival purposes, but generally too large for web.
- File Name and Extension: Here, you can rename your file and specify its file type. You can type the desired extension (e.g.,
-
Adjust Quality Settings (for JPEG):
- If you choose to export as JPEG, a “Export Image as JPEG” dialog will appear. This is where you can fine-tune the compression.
- Quality Slider: You’ll see a “Quality” slider, typically ranging from 0 to 100. A higher number means better image quality but a larger file size.
- Web Optimization: For web use, a quality setting between 60-80 is often a good balance between visual fidelity and small file size. Experiment to find what works best for your specific image. This is a direct way to further compress and optimize your image for faster loading, a key concern for any web background or online portfolio.
- Progressive JPEG: Consider enabling “Progressive” for JPEGs intended for the web. This makes the image load gradually, appearing blurry at first and then sharpening, which can improve perceived loading speed for users with slower connections.
-
Click Export: Once all settings are configured, click the “Export” button. GIMP will then save your shrunken and optimized image.
By mastering the export process, you ensure that your images are not only visually appealing but also technically optimized for their intended platform. Tophinhanhdep.com offers a range of online tools, including image compressors and optimizers, that can further reduce file sizes after exporting from GIMP, making your images even more web-friendly without significant quality loss.
Conclusion
Shrinking images in GIMP is more than a simple size adjustment; it’s a critical skill for image optimization, visual design, and efficient digital workflows. Whether you’re preparing high-resolution photography for the web, crafting intricate digital art, or assembling thematic collections, GIMP provides a robust suite of tools to meet your needs. From precisely scaling entire images and individual layers to fine-tuning compositions with cropping and canvas adjustments, GIMP empowers users to achieve professional-grade results.
The ability to control image dimensions and file size directly impacts everything from website performance (ensuring quick loading of your beautiful photography and aesthetic backgrounds) to the clarity of your printed materials. By understanding the distinction between Scale Image for overall compositions and the Scale Tool for individual layers and selections, you gain granular control over your creative process. Furthermore, diligent export practices, including selecting the right file format and adjusting quality settings, complete the optimization cycle, delivering images that are both stunning and practical.
At Tophinhanhdep.com, we believe that great images deserve to be seen and experienced optimally. By applying the techniques outlined in this guide, you can ensure your visual creations are perfectly prepared for any platform, maintaining their quality while achieving efficient file sizes. Explore Tophinhanhdep.com for more image tools, inspiration, and collections to fuel your next creative endeavor.