How to Shrink an Image Without Losing Quality: The Essential Guide for Visual Creators

In today’s visually-driven digital landscape, images are no longer just decorative elements; they are vital components that captivate audiences, convey messages, and significantly impact user experience. Whether you’re curating stunning wallpapers, designing aesthetic backgrounds, showcasing beautiful photography, or optimizing stock photos for your website, the quality and performance of your images are paramount. However, a common challenge many content creators face is the need to adjust image dimensions without compromising their visual integrity. Large, high-resolution images, while beautiful, can slow down websites, frustrate visitors, and diminish overall impact.
At Tophinhanhdep.com, we understand this dilemma deeply. Our platform thrives on providing a rich collection of images—from nature and abstract art to sad/emotional and inspirational thematic collections—alongside powerful image tools and insights into visual design and photography. This article serves as your comprehensive guide to mastering the art of shrinking images without losing quality, ensuring that your digital assets always look their best and perform optimally. We’ll delve into the fundamental principles, explore professional software, highlight effective free tools, and share advanced techniques to empower you in your visual journey.
Understanding Image Resizing and Its Impact on Quality
The journey to perfectly optimized images begins with a clear understanding of what happens when you alter an image’s size and how this process affects its inherent quality. Many assume “resizing” is a straightforward affair, but there’s more to it than meets the eye, especially when aiming for lossless results.
The Fundamentals of Pixels and Image Formats
At their core, most digital images you encounter online—such as JPEGs and PNGs—are what we call bitmap files. Imagine these images as intricate mosaics composed of thousands, sometimes millions, of tiny square pixels. Each pixel holds specific color and positional data. When you zoom in closely on any bitmap image, you’ll eventually see these individual squares, defining the image’s structure.
The choice of image format plays a crucial role in how quality and file size are balanced:
- JPEG (Joint Photographic Experts Group): This is perhaps the most common format for photographs due to its excellent compression capabilities. JPEGs are “lossy,” meaning they discard some image data during compression to achieve smaller file sizes, which is ideal for faster web loading. However, repeated saving and editing can lead to noticeable quality degradation.
- PNG (Portable Network Graphics): PNGs are “lossless,” preserving all image data during compression. They offer superior quality, especially for images with sharp edges, text, or transparent backgrounds. The trade-off is often larger file sizes compared to JPEGs, which can impact page speed.
- GIF (Graphics Interchange Format): Popular for simple animations and images with limited color palettes, GIFs maintain small file sizes but are generally not suitable for detailed photographs due to their 256-color limit.
It’s crucial to understand that while you can convert between these formats using powerful programs, converting a low-resolution JPEG to a high-resolution PNG will not magically restore lost quality or detail. The original pixel information must exist to be retained. This fundamental understanding is key for anyone involved in digital photography, high-resolution image management, or visual design.
Resizing vs. Resampling: A Critical Distinction
The term “resizing” is often used broadly, but when it comes to manipulating pixels, there are two distinct methods: resizing (or scaling) and resampling. Understanding the difference is paramount for achieving quality results, especially for web optimization.
- Resizing (Scaling): This is the more basic method, where you simply enlarge or decrease the display size of an image without changing the actual number of pixels within the image. When you scale an image down, the existing pixels become smaller; when you scale up, they become larger. While this method can work for minor adjustments, it doesn’t change the underlying data. If you scale a small image up significantly, the original pixels become visibly larger, leading to a pixelated, “blocky” appearance.
- Resampling: This is a more sophisticated process that changes the number of pixels in an image.
- Downsampling (reducing size): When you reduce an image’s dimensions using resampling, the software analyzes the image and intelligently discards pixels. This is the most appropriate tool for optimizing images for the web, as it directly reduces the file size by lowering the pixel count, leading to faster loading times.
- Upsampling (enlarging size): When you enlarge an image using resampling, the software generates new pixels based on the existing ones. This is a complex process where the program tries to intelligently interpolate (estimate) what the new pixel colors and positions should be. While modern algorithms (like bicubic interpolation or those used in AI upscalers) can do an impressive job, upsampling always carries a risk of introducing blurriness or artifacts, as the software is essentially “guessing” missing information.
Therefore, if your goal is to reduce image size without losing quality (especially for web), resampling down is your best friend. For enlarging images, especially beyond their original dimensions, caution and the right tools are essential. This distinction directly impacts website speed and the overall quality of any digital photography or visual design project.
Why Image Optimization Matters for Tophinhanhdep.com Users
For users of Tophinhanhdep.com, whether you’re a casual browser seeking aesthetic backgrounds or a professional leveraging our stock photos and image tools, properly optimized images are non-negotiable.
- First Impressions and Visual Appeal: Poorly resized images—blurred, pixelated, or distorted—are immediately obvious. They convey a lack of professionalism and can drive visitors away. High-quality, perfectly scaled images, whether they are nature shots, abstract art, or beautiful photography, make a positive first impression and enhance the user’s engagement.
- Website Performance and Page Speed: Images arriving directly from high-resolution cameras often have massive file sizes. Each pixel takes time to load on a web browser. If your website is laden with unoptimized images, your page speed will suffer dramatically. Slow loading times lead to higher bounce rates, poor SEO rankings, and a frustrating user experience. For any content creator, particularly those managing online portfolios or e-commerce sites, reducing the resolution and file size of images before uploading is crucial for a smooth browsing experience. Tophinhanhdep.com emphasizes that picture quality and page speed are equally important factors for maximum impact.
- Storage and Bandwidth Efficiency: Optimized images consume less storage space on your server and less bandwidth during transfer, leading to cost savings and improved scalability for your digital presence.
Mastering how to resize images without losing quality is not just a technical skill; it’s an essential tool for creating a compelling and efficient online presence, making your visual design and photography truly shine.
Mastering Image Quality Retention: Techniques and Best Practices
Now that we understand the ‘why,’ let’s dive into the ‘how.’ Various tools and techniques can help you resize images effectively, ranging from industry-standard professional software to highly capable free alternatives and convenient online solutions.
Leveraging Professional Software for Uncompromised Results
For serious photographers, graphic designers, and anyone demanding the highest quality, professional image editing software offers unparalleled control and features.
Adobe Photoshop and Smart Objects
Adobe Photoshop stands as the most popular premium photo editing software, used globally by professionals. While it has a learning curve, its capabilities for image manipulation are extensive. The best method in Photoshop for resizing images without losing quality is through the use of Smart Objects.
What are Smart Objects? A Smart Object is essentially a container that holds your image data. When you convert a layer to a Smart Object, Photoshop embeds the original image data within this container. Any transformations you apply—scaling, rotating, skewing—are done to the container, not to the original image pixels inside it. This makes edits non-destructive.
Why Smart Objects are Revolutionary for Resizing: Normally, when you scale an image down, Photoshop discards pixels. If you then try to scale it back up, Photoshop has to guess the missing information, leading to blurriness or pixelation. With Smart Objects, the original high-resolution image is always preserved within the container. You can scale the Smart Object down, and then scale it back up to its original size (or any size smaller than the original) with zero loss of quality. The image inside remains intact, always looking crisp and sharp.
How to Use Smart Objects for Resizing in Photoshop:
- Open your image in Photoshop.
- Convert to Smart Object: In the Layers panel, right-click (Windows) or Control-click (Mac) on your image layer and choose “Convert to Smart Object.” You’ll see a small icon appear on the layer thumbnail, indicating it’s now a Smart Object.
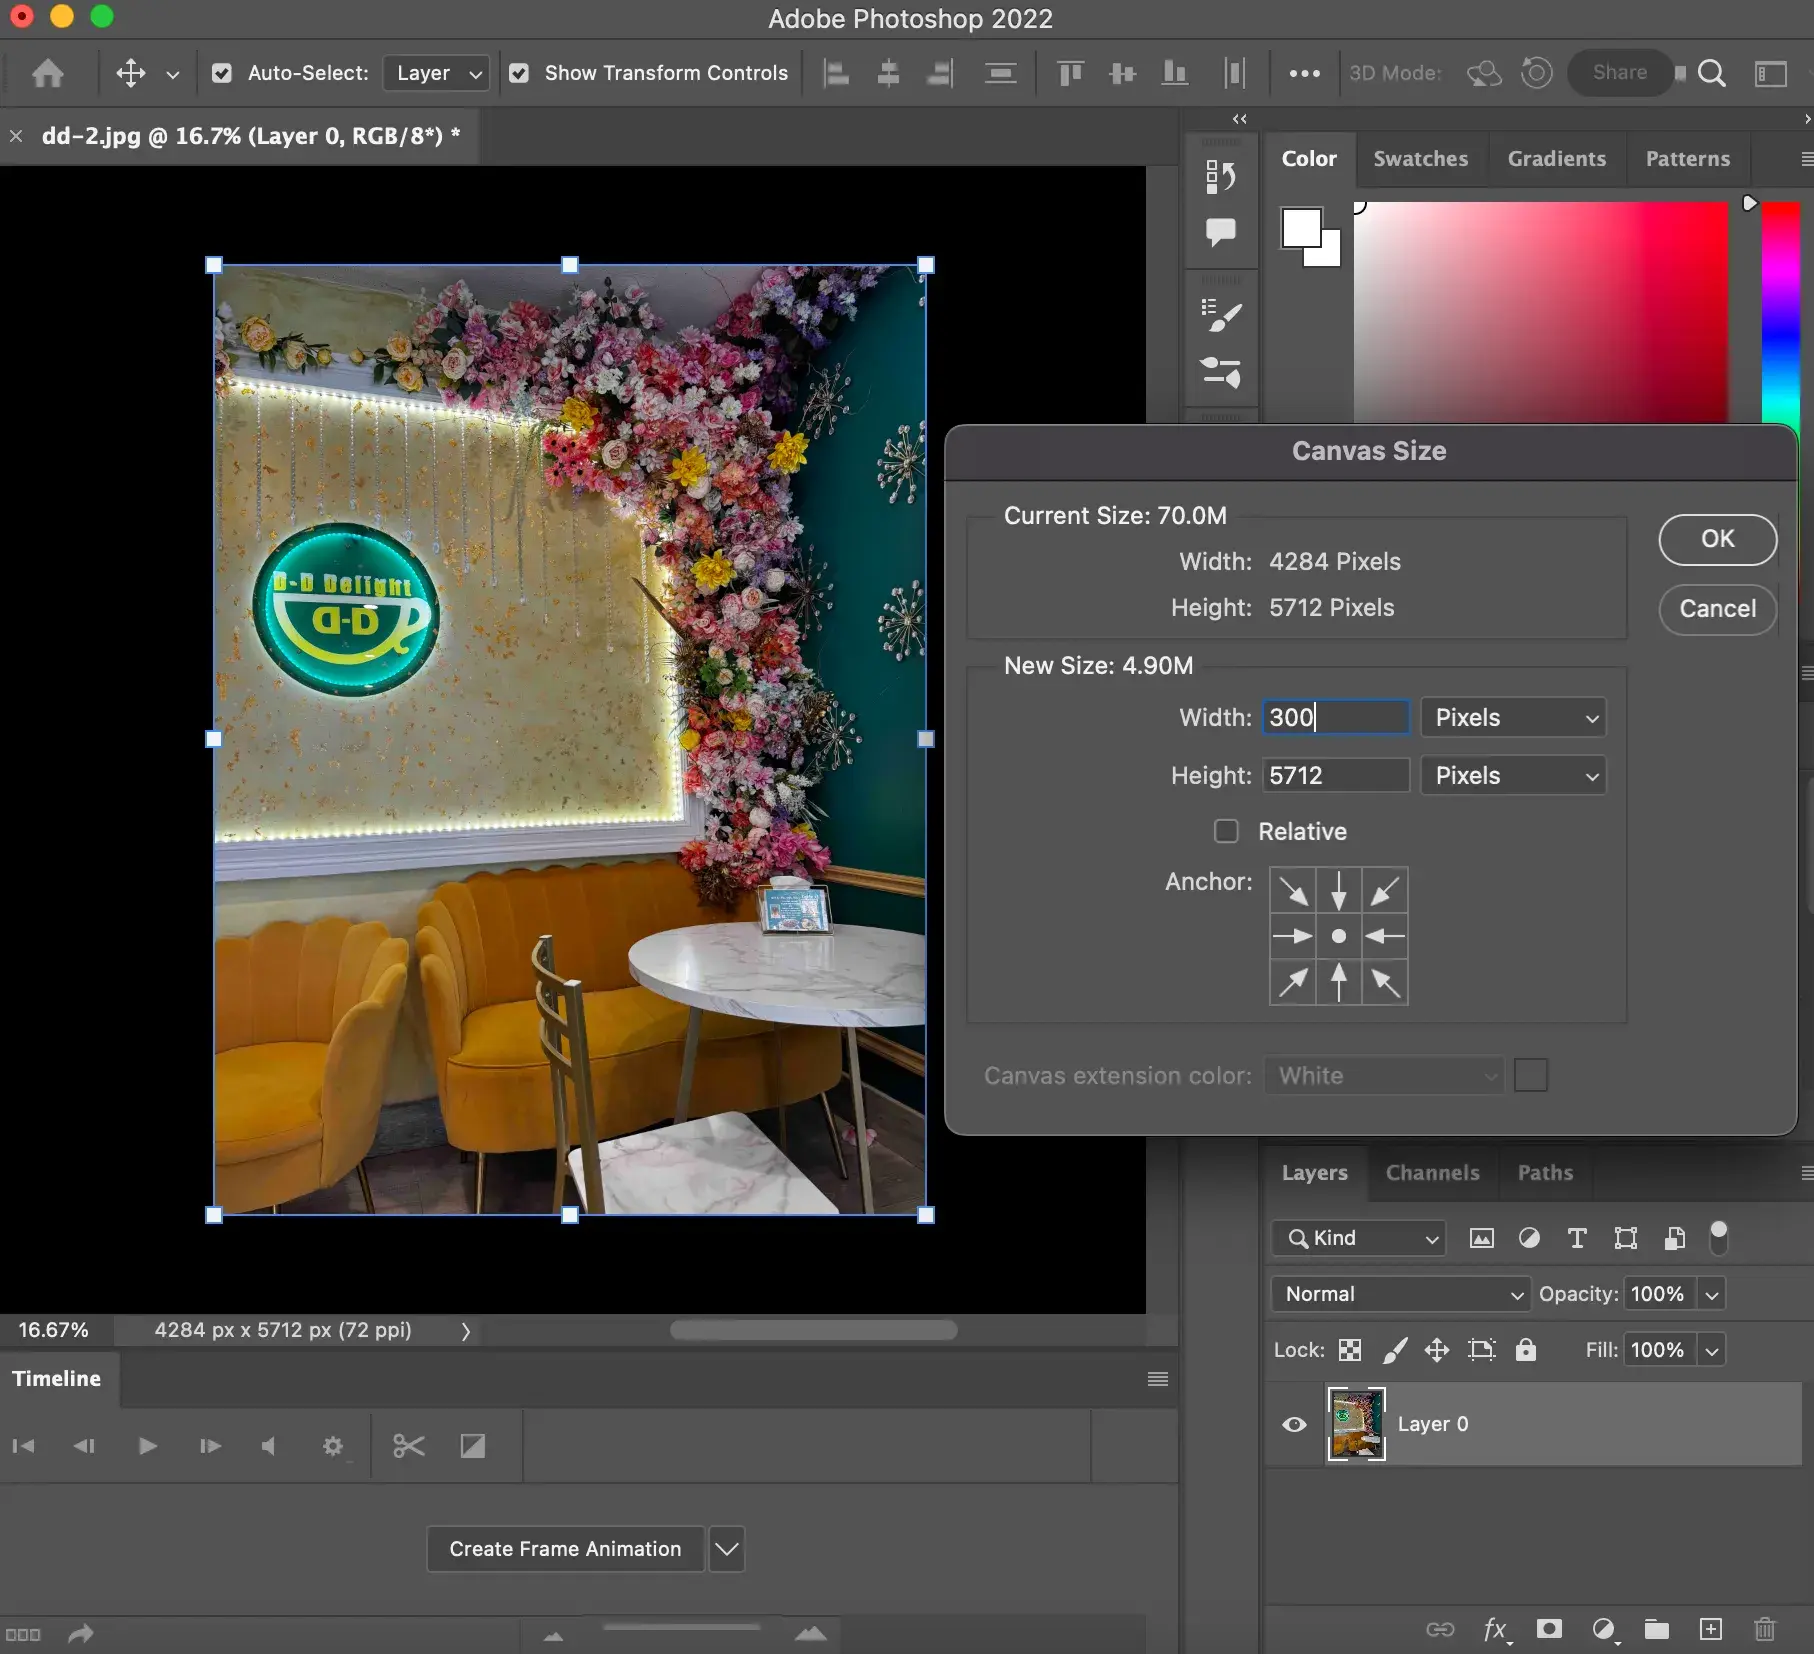
- Resize with Free Transform: Go to
Edit > Free Transform(or pressCtrl+T/Cmd+T). - Scale: Drag a corner handle while holding
Shift(to maintain aspect ratio) andAlt(to scale from the center) to adjust the size. Alternatively, input exact percentages (e.g., 50%) in the Width (W) and Height (H) fields in the Options Bar at the top (ensure the link icon between W and H is active). - Apply Changes: Press
Enter(Windows) orReturn(Mac) twice to apply the transformation.
This method is invaluable for digital photography, photo manipulation, and graphic design, allowing for flexible adjustments without committing to permanent pixel loss.
Dedicated Resizing Tools (e.g., ON1 Resize)
While Photoshop’s native Smart Objects are powerful, some professional photographers also use dedicated tools or plugins for specific resizing needs, particularly for extreme enlargements. For instance, ON1 Resize 2019.6 (mentioned in one of the references) utilizes advanced fractal interpolation technology to enlarge images up to 1000% while aiming to preserve clarity and detail. These tools often offer features like gallery wrap for prints, numerous presets, and mosaic tiling, making them invaluable for businesses requiring regular, high-quality image printing. While Photoshop's Perfect Resize functionality might be a built-in feature or a legacy reference, the concept of specialized algorithms for resampling is crucial for maintaining “high resolution” standards when scaling beyond common limits.
Effective Free Tools for Quality Resizing
Not everyone has access to premium software, and for many users, free alternatives offer robust functionality for resizing images without compromising quality.
GIMP: The Open-Source Powerhouse
GIMP (GNU Image Manipulation Program) is a highly popular, free, and open-source alternative to Adobe Photoshop. It provides a comprehensive suite of image editing tools, including effective options for quality-preserving resizing. While it might have a steeper learning curve than some simpler tools, its power makes it suitable for various visual design and creative ideas.
How to Resize an Image with GIMP:
- Open your image in GIMP.
- Go to
Image > Scale Image. - In the “Scale Image” dialog box, you can input your desired
WidthandHeightin pixels, inches, or other units. Ensure the chain icon next to Width and Height is linked to maintain the aspect ratio. - Crucially, under
Quality, select an appropriateInterpolationmethod:- Sinc (Lanczos3): This method uses a Sinc mathematical function for advanced interpolation, often providing excellent results for resizing, especially when maintaining quality.
- Cubic (or Bicubic): This option calculates new pixel colors based on the eight surrounding pixels, generally yielding good quality for both reduction and moderate enlargement.
- Click
Scaleto apply the changes. SaveorExportyour resized image.
GIMP is an excellent tool for moderate resizing projects and for users looking to manage digital photography and creative ideas on a budget.
Irfanview (for Windows Users)
Irfanview is a remarkably lightweight, fast, and versatile multimedia viewer and editor specifically for Windows operating systems. Despite its somewhat dated user interface, it’s incredibly efficient in terms of system resources, making it ideal for quick image resizing tasks, even for large files. It’s a practical “image tool” for compressors and optimizers.
How to Resize an Image with Irfanview:
- Open your image in Irfanview.
- Go to
Image > Resize/Resample. - In the “Resize/Resample” pop-up window, enter your desired dimensions in the
Set Image Sizesection. - Under the
Size methodsection, selectResample. - Choose
Lanczos (slowest)as the resampling method for the best quality, especially when reducing. - Optionally, select
Apply Sharpen After Resamplefor improved results, particularly after slight enlargements or reductions. - Click
OKand thenSaveyour image.
Irfanview serves as a robust tool for fast, quality-preserving resizing on Windows platforms, perfect for everyday image optimization.
Online Resizers (e.g., Tophinhanhdep.com’s own tool)
For those who prefer not to download software or need quick, on-the-go solutions, online image resizers offer immense convenience. Tophinhanhdep.com provides and recommends such “Image Tools” for converters, compressors, and optimizers. These platforms are designed for simplicity and speed, often supporting a wide range of file formats.
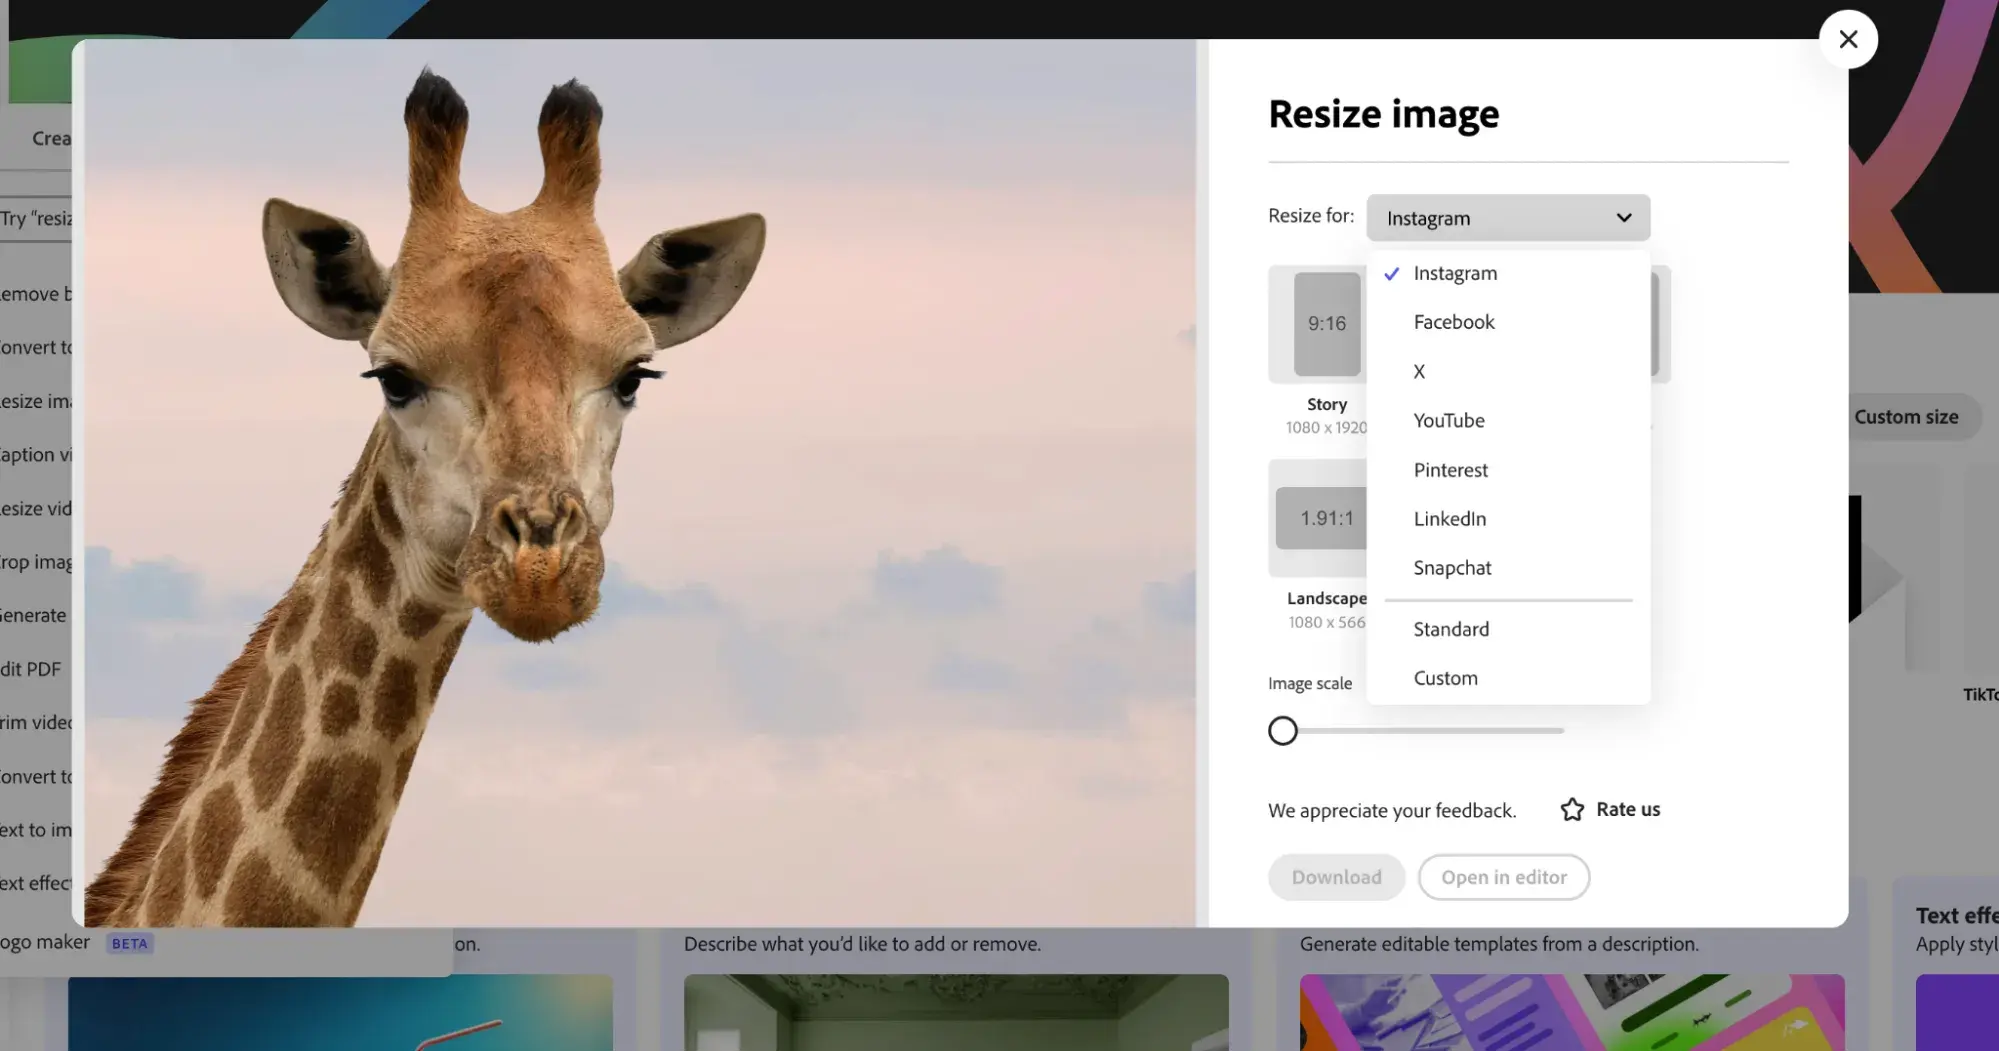
Generic Workflow for Online Resizers:
- Upload your image: Typically, you can drag and drop your file (GIF, JPEG, BMP, PNG, HEIC, TIFF, etc.) or select it from your device gallery.
- Choose your settings: Specify your desired dimensions (width/height), percentage scaling, or even target file size. Many tools also allow you to select the output format (JPEG, PNG, WEBP) and optimization level.
- Apply changes and download: After confirming your settings, the tool processes the image, and you can instantly download the resized version to your device.
These online tools are excellent for quick adjustments for social media, email attachments, or general web use, ensuring your wallpapers, backgrounds, and aesthetic images are perfectly sized.
Advanced Considerations for Image Enlargement and Optimization
While shrinking images is often about efficiency, there are times when you need to enlarge them. This process is inherently more challenging than reduction, as you’re asking the software to create information that wasn’t originally there. However, with advanced techniques and tools, quality can still be maintained to a remarkable degree.
Strategic Image Enlargement (When Up-Scaling)
Enlarging an image, or “upscaling,” can easily lead to pixelation or blur if not handled carefully. Here are some strategic tips:
- Enlarge Gradually: Instead of making a single, drastic increase in size (e.g., from 100 pixels to 1000 pixels), experts advise enlarging gradually. Incrementally increasing the image size by smaller percentages (e.g., 10-20% at a time) and applying the changes before repeating the process can sometimes yield better results, giving the interpolation algorithm more steps to refine the new pixels.
- Start with High-Resolution Originals: The success of enlargement heavily depends on the source material. Images taken with high-megapixel cameras will always fare better when enlarged than those from low-resolution sources. More original pixels mean more data for the software to work with, minimizing guesswork. This highlights the importance of “high resolution” digital photography from the outset.
- Use Image Sharpening Tools Judiciously: After an image has been enlarged, it often appears slightly soft. Professional practice sometimes involves enlarging an image close to the point of noticeable distortion and then applying a subtle sharpening filter. This can help to restore perceived detail and definition, enhancing the overall quality. Be careful not to over-sharpen, as this can introduce halos or artifacts.
- Avoid Going Beyond Original Size with Smart Objects (for Enlargement): While Smart Objects in Photoshop are fantastic for downscaling and then restoring to original size, they offer no advantage when trying to scale an image larger than its original dimensions. At that point, Photoshop still has to invent pixels, and the result will be similar to upscaling a regular pixel-based image.
The Role of AI Upscalers
The advent of Artificial Intelligence has brought about a significant leap in image upscaling capabilities. AI Upscalers are specialized “Image Tools” that use machine learning algorithms to intelligently “recreate” missing pixels and add detail when enlarging images. Instead of simply making existing pixels bigger (which leads to blur), AI models analyze patterns, textures, and structures within the image to generate new, convincing details.
Tophinhanhdep.com recognizes AI upscalers as a powerful solution for those needing to turn low-quality images into higher resolution visuals. They are particularly beneficial for:
- Enlarging old or small photographs.
- Preparing images for print when only low-resolution versions are available.
- Improving the clarity of digital art or graphic design elements.
While still evolving, AI upscaling represents the cutting edge of image quality enhancement, proving that sometimes, you can get more from less, or at least significantly better results than traditional methods.
Image Formats and Web Optimization
Beyond resizing, selecting the correct image format and applying further optimization techniques are crucial for web performance.
- Choosing the Right Format: For most photographs, JPEG remains the standard due to its balance of quality and small file size. For images with transparency, sharp lines, or text (like logos or graphic design elements), PNG is generally preferred despite its larger file size. WEBP is a modern format developed by Google that offers superior compression for both lossy and lossless images, often resulting in significantly smaller file sizes than JPEGs or PNGs while maintaining similar quality. As web browser support for WEBP grows, it’s becoming an increasingly popular choice for “stock photos” and other web content.
- Image Compressors and Optimizers: Even after careful resizing, images can often be further optimized. Dedicated “Image Tools” like compressors and optimizers (which Tophinhanhdep.com offers or recommends) analyze image data and remove unnecessary metadata (like camera information) or apply additional lossy/lossless compression techniques without visibly degrading quality. This step is critical for ensuring lightning-fast website speeds and overall “website quality assurance.”
By combining proper resizing with smart format choices and optimization, you create a powerful synergy that benefits both the visual appeal and the technical performance of your content.
Beyond Resizing: The Tophinhanhdep.com Approach to Visual Excellence
Mastering image resizing is a fundamental skill, but it’s just one piece of the puzzle in achieving visual excellence. At Tophinhanhdep.com, our mission extends to empowering you across the entire spectrum of visual creation and appreciation.
Curating and Creating Stunning Visuals
The techniques discussed in this guide directly contribute to the impact and utility of the diverse visual content available on Tophinhanhdep.com and created by our users. When you correctly resize and optimize your images, you unlock their full potential for:
- Images: Perfectly sized wallpapers and backgrounds enhance any device. Aesthetic images, nature scenes, abstract art, sad/emotional photography, and beautiful photography collections maintain their intended impact when displayed without distortion or slow loading.
- Photography: High-resolution digital photography can be expertly prepared for any platform, ensuring that every detail is preserved or intelligently scaled. Our stock photos can be customized to fit your specific design needs.
- Visual Design: Graphic design projects, digital art, and photo manipulation benefit immensely from properly prepared source images, leading to creative ideas that truly stand out.
- Image Inspiration & Collections: Whether you’re building mood boards or thematic collections, or following trending styles, having control over image quality and size ensures your visual narratives are compelling and consistent.
Achieving quality visual content isn’t just about the raw image; it’s about how effectively you manage and present it. Every pixel, every load time, contributes to the story you tell and the impression you leave.
Tophinhanhdep.com: Your Partner in Image Mastery
Tophinhanhdep.com is committed to being your comprehensive resource for all things visual. We provide not only a vast array of inspiring images but also the essential knowledge and image tools to help you create, transform, and optimize your visual content. From easy-to-use compressors and converters to advanced AI upscalers, our platform is designed to support your creative endeavors. We continuously strive to offer solutions that simplify complex image tasks, allowing you to focus on the artistic and communicative aspects of your work.
We encourage you to explore our website, delve into our curated collections, and leverage our image tools to enhance your digital photography, graphic design projects, and personal image libraries. Mastering the art of shrinking images without losing quality is a powerful step towards elevating your visual content and making a lasting impact in the digital world.
Conclusion
Shrinking an image without losing quality is a crucial skill for anyone operating in the digital realm. It’s a delicate balance between preserving visual fidelity and optimizing for performance. By understanding the distinction between resizing and resampling, leveraging the non-destructive power of Photoshop’s Smart Objects, utilizing effective free tools like GIMP and Irfanview, or opting for convenient online solutions, you can achieve professional-grade results. Furthermore, incorporating advanced strategies like gradual enlargement and exploring AI upscalers can help overcome even the toughest challenges.
Ultimately, whether you’re managing a website, curating a portfolio of beautiful photography, or simply sharing aesthetic images, the quality of your visuals dictates engagement and impact. Tophinhanhdep.com is here to be your trusted partner on this journey, offering the inspiration, knowledge, and tools you need to achieve visual success. Embrace these techniques, and ensure every image you publish is a testament to quality and performance.