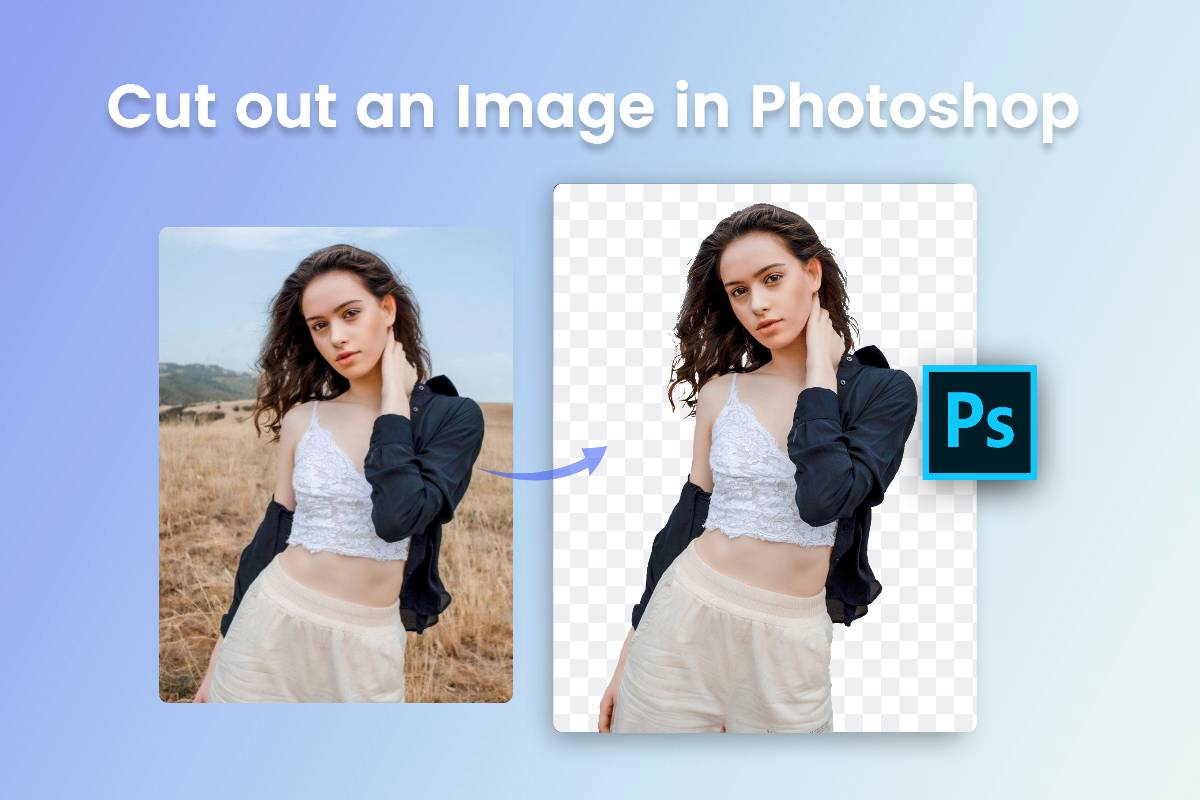
Seamless Object Splicing in Photoshop: Your Comprehensive Guide to Image Manipulation

In the vast and dynamic world of visual design, the ability to flawlessly splice an object from one image into another, or isolate it within its original context, stands as a fundamental skill. This intricate process, often referred to as “cutting out” or “extracting,” is a cornerstone of photo manipulation, digital art, and graphic design. It empowers creators to transcend the limitations of original photographs, enabling the construction of breathtaking collages, compelling advertisements, and entirely new visual narratives. Whether you’re aiming to craft a unique aesthetic wallpaper, design a striking background for a product, or simply refine an existing piece of beautiful photography, mastering the art of object splicing in Adobe Photoshop is indispensable.
At Tophinhanhdep.com, we understand the profound impact of high-quality image manipulation. Our platform is dedicated to providing image inspiration, diverse collections from nature to abstract, and essential image tools to elevate your creative projects. This in-depth guide will walk you through various powerful Photoshop techniques for splicing objects, from basic selections to advanced refinements, ensuring your creations achieve professional-grade precision and integrate seamlessly with your visual design goals. We’ll explore methods suitable for different image complexities, helping you choose the right tool for every task and ultimately transform your digital photography into stunning visual assets.

Foundational Splicing Techniques: Manual and Automated Selections
Photoshop, the industry-standard software for image editing, offers a rich array of tools for isolating elements from photos. The choice of tool often depends on the complexity of the object’s edges, the contrast with its background, and your desired level of precision. For those new to Photoshop or seeking efficient methods for cleaner, well-defined subjects, starting with manual and semi-automated selection tools is key. These foundational techniques pave the way for more intricate manipulations and form the backbone of effective photo editing.
Precision with the Polygonal Lasso Tool
The Polygonal Lasso Tool is an excellent starting point for objects with straight lines or angular edges, making it a reliable choice for beginners. Its simplicity allows for quick, controlled selections, and it serves as a fantastic exercise for developing selection precision. While it may not be ideal for subjects with soft or complex curves, it’s remarkably effective for many common splicing tasks.
To utilize the Polygonal Lasso Tool:
- Open Your Image: Launch Photoshop and load the image containing the object you wish to splice. For best results, always begin with a high-resolution photograph, ensuring ample detail for precise cuts.
- Select the Tool: Locate the Polygonal Lasso Tool in the toolbar on the left side of your workspace. It’s typically grouped with other lasso tools.
- Outline Your Object: Carefully click along the outline of your object. Each click creates an anchor point, and a straight line will connect it to the previous point. Continue this process, meticulously tracing the edges of your figure. Zoom in close to achieve maximum accuracy.
- Complete the Selection: To finalize the selection, click on your initial anchor point. A marching ants animation will appear around your object, indicating a successful selection.
- Create a New Layer: With your selection active, press
Ctrl+J(Windows) orCmd+J(Mac). This action automatically creates a new layer containing only your selected object, completely separated from its original background. - Initial Error Check: Add a solid color layer beneath your newly created object layer (e.g., a bright contrasting color like red or green). This contrasting background will immediately highlight any noticeable mistakes or jagged edges, allowing for easier correction later. This step is crucial for achieving clean aesthetic photography.
Swift Selections with Quick Select and Magic Wand
For objects with clear boundaries or backgrounds of uniform color, Photoshop offers more automated and speed-oriented tools: the Quick Selection Tool and the Magic Wand Tool. These are particularly useful when you need to quickly remove a background or isolate a prominent figure, contributing to efficient digital photography workflows.
Quick Selection Tool:
The Quick Selection Tool works by “painting” a selection. It intelligently detects edges and expands the selection to similar pixels, making it ideal for subjects that stand out from their surroundings through color or contrast.
- Load Your Image: Open your target image in Photoshop.
- Choose Quick Selection: Select the Quick Selection Tool from the left toolbar, or press
W. - Paint Your Selection: Click and drag the tool over the object you want to select. Photoshop will automatically expand the selection. Adjust the brush size as needed for different areas.
- Refine and Adjust: If the selection extends beyond your object, hold
Alt(Windows) orOption(Mac) and drag over the excess area to subtract it. Conversely, if parts of your object are missed, simply paint over them without holdingAlt/Option. - Isolate Your Object: Once satisfied, right-click within the selection and choose “Layer via Copy” or “Layer via Cut” to place your spliced object onto a new layer.

Magic Wand Tool:
The Magic Wand Tool is a classic for selecting areas of similar color. It’s incredibly effective for images with solid-color backgrounds, simplifying what could otherwise be a tedious manual selection process.
- Add Your Image: Place your image on the Photoshop canvas.
- Activate Magic Wand: Select the Magic Wand Tool (also accessible via
Wif grouped with Quick Selection). - Adjust Tolerance: In the options bar at the top, adjust the “Tolerance” value. A lower tolerance selects fewer colors (good for precise selections on uniform backgrounds), while a higher tolerance selects a broader range of similar colors (useful for gradient backgrounds or subtle color variations).
- Click to Select: Click on the background area you wish to remove. The Magic Wand will select all adjacent pixels within the tolerance range. If the background isn’t contiguous, uncheck “Contiguous” in the options bar to select all similar color pixels throughout the image.
- Invert Selection (Optional): Often, with the Magic Wand, it’s easier to select the background. If you’ve selected the background, go to
Select > Inverseto select your object instead. - Extract Your Object: Right-click the selection and choose “Layer via Copy” or “Layer via Cut.” Your object is now on a new layer, free from its original background.
Mastering Complex Edges with the Pen Tool
When absolute precision is paramount, especially for objects with intricate curves or smooth, organic shapes, the Pen Tool is the ultimate choice. While it has a steeper learning curve, mastering it is a game-changer for professional photo manipulation and visual design, producing perfectly crisp edges that are critical for high-resolution stock photos.
- Open Your Image: Load your image into Photoshop.
- Select the Pen Tool: Activate the Pen Tool from the left toolbar (shortcut
P). - Create Anchor Points: Click to create your first anchor point on the edge of the object. For straight lines, simply click subsequent points.
- Draw Curved Paths: For curves, click and drag to create Bezier handles. These handles allow you to precisely control the curvature of the line. Practice is key here to smooth transitions.
- Complete the Path: Continue placing anchor points and adjusting curves around your entire object. Close the path by clicking on your initial anchor point.
- Convert Path to Selection: Right-click anywhere on the path you’ve created and choose “Make Selection.” A dialog box will appear. You can optionally add a “Feather Radius” (1-2 pixels is often a good start) to slightly soften the edges, helping the spliced object blend more naturally later. Click “OK.”
- Isolate Your Object: With the selection active, press
Ctrl+J(Windows) orCmd+J(Mac) to create a new layer with your meticulously cut-out object. This technique ensures superior quality for any graphic design or digital art project.
Advanced Splicing and Refinement Strategies
Beyond the basic selection tools, Photoshop offers sophisticated functionalities that empower users to handle challenging subjects like hair, fur, or semi-transparent elements, and to integrate spliced objects with creative flair. These advanced techniques are vital for producing polished results that stand up to scrutiny in professional applications, from beautiful photography edits to complex photo collages.
Leveraging Select and Mask for Intricate Details
Introduced as a powerful successor to “Refine Edge,” the Select and Mask workspace is a comprehensive environment designed for perfecting selections, especially those with challenging edges like wispy hair, delicate textures, or blurred outlines. It’s an essential tool for achieving natural-looking splices in complex aesthetic compositions.
- Initial Selection: Start by making a rough selection of your object using any preferred tool (e.g., Quick Selection, Lasso, or Pen Tool). Even a loose selection provides a starting point.
- Enter Select and Mask: With your selection active, click the “Select and Mask” button in the options bar at the top, or go to
Select > Select and Mask. - Choose Your View Mode: In the Properties panel on the right, experiment with different “View Modes” (e.g., “On Layers,” “On Black,” “Overlay”) to find the one that best highlights the edges you need to refine. Adjust the opacity of the overlay to your preference.
- Refine Edge Brush Tool: On the left toolbar within the Select and Mask workspace, choose the “Refine Edge Brush Tool.” Use this brush to paint over problematic areas, particularly around hair, fur, or soft edges. Photoshop’s intelligent algorithms will attempt to separate the foreground from the background, creating a more accurate and natural selection.
- Global Refinements: Utilize the “Global Refinements” sliders in the Properties panel:
- Smooth: Reduces jaggedness, making the selection outline smoother.
- Feather: Softens the edge, aiding in better blending.
- Contrast: Sharpens the transition between selected and unselected areas.
- Shift Edge: Expands or contracts the selection boundary.
- Decontaminate Colors (Optional): If your object has color fringing (remnants of the old background color), check “Decontaminate Colors” and adjust the amount. This helps remove unwanted color spill, making the splice cleaner.
- Output to New Layer with Layer Mask: In the “Output Settings,” select “New Layer with Layer Mask” as your “Output To.” Click “OK.” This creates a new layer with your refined selection applied as a non-destructive mask, allowing for future adjustments. This is critical for flexible digital art and photo manipulation.
Creative Splicing with Clipping Masks and Custom Shapes
Beyond simply cutting out an object, Photoshop allows for creative ways to “splice” an image into a specific shape, often without permanently altering the original pixels. Clipping Masks, combined with custom shapes or text, offer immense possibilities for graphic design, creating unique image elements for mood boards or thematic collections.
- Open Your Image: Load the picture you want to cut into a shape.
- Create a New Layer from Background: If your image is a “Background” layer, convert it by going to
Layer > New > Layer from Background...and naming it. This makes it editable. - Choose a Custom Shape: Select the “Custom Shape Tool” from the Shapes toolset in the toolbar. In the options bar, pick a desired shape (e.g., a heart, star, or speech bubble) from the dropdown menu.
- Draw Your Shape: Draw the custom shape on your canvas where you want your picture to appear. This shape will initially cover part of your image.
- Arrange Layers: Open the Layers palette (
Window > Layers). Drag the shape layer below your picture layer. - Create Clipping Mask: Right-click on the picture layer in the Layers palette and select “Create Clipping Mask.”
- Result: Your picture layer will now be “clipped” to the shape layer below it, effectively appearing inside the shape. Both layers remain independent, allowing you to move, resize, or transform either the image or the shape without affecting the other, offering incredible flexibility for creative ideas and trending styles.
- Add Graduated Transparency (Optional): To make the edges of your clipped image fade out, select the shape layer, right-click, and choose “Rasterize Layer” (or “Simplify Layer” in Photoshop Elements). Then, go to
Filter > Blur > Gaussian Blurand apply a significant radius. The blurred edges of your shape layer will translate into a graduated transparency for your image, creating a soft, aesthetic look.
Harnessing Color Range for Smart Background Removal
The Color Range command is a smart, color-based selection method that shines when dealing with subjects against fairly uniform, yet potentially non-contiguous, backgrounds. It’s particularly effective for isolating objects with fine details or complex outlines where manual selection would be tedious, such as a tree against a sky.
- Open Color Range: With your image open, go to
Select > Color Range. A dialog box will appear. - Sample the Color: Ensure “Sampled Colors” is selected in the dialog. Use the eyedropper tool to click on the color of the background you want to remove. The preview window in the dialog will show what’s being selected (white represents selected, black represents unselected, grey represents partially selected).
- Adjust Fuzziness: Drag the “Fuzziness” slider to the right. This expands the range of similar colors included in the selection. Increase it until most of your background appears white in the preview, but stop before your main object starts to turn white.
- Add/Subtract Colors: Use the “+” eyedropper to click on additional shades of the background that were missed, or the “-” eyedropper to remove unwanted colors from your selection.
- Refine and Cut Out: Click “OK” to convert the color range into a selection. You’ll likely need to perform further refinements using the Select and Mask workspace or a Layer Mask to achieve perfection. Once refined, press
Ctrl+J(Windows) orCmd+J(Mac) to create your spliced object on a new layer. This method is excellent for thematic collections and abstract images where color plays a significant role.
Post-Splicing Enhancements and Applications
Splicing an object is often just the first step in a larger creative process. Once an object is isolated, the real magic of photo manipulation and digital art begins. Refining its edges, applying stylistic effects, and preparing it for diverse applications are crucial for achieving a professional and visually compelling outcome. These steps integrate seamlessly with Tophinhanhdep.com’s focus on editing styles and creative ideas.
Refining Edges: Smoothing and Blurring for Seamless Integration
Even with the most meticulous selection, spliced objects can sometimes have slightly harsh or pixelated edges, making them look unnatural when composited onto a new background. Refining these edges is paramount for a believable integration.
- Contract the Selection: After creating a new layer with your cut-out object, re-select its outline by
Ctrl-clicking (Windows) orCmd-clicking (Mac) on the layer thumbnail in the Layers panel. Go toSelect > Modify > Contractand contract the selection by 1 or 2 pixels. This effectively removes any stray pixels or minor fringe artifacts along the edge. - Inverse and Delete: After contracting, inverse the selection (
Ctrl+Shift+IorCmd+Shift+I). Then, pressBackspace(Windows) orDelete(Mac) to eliminate the outer contracted pixels. - Fade Edges with Gaussian Blur: For a softer transition, re-select your object’s outline (as in step 1). Contract the selection again, perhaps by 3 pixels this time. Inverse the selection. Now, go to
Filter > Blur > Gaussian Blur. Adjust the radius to introduce a subtle blur to the very edge of your object. This helps it blend beautifully with new backgrounds, much like natural depth of field. This technique enhances the overall aesthetic quality of your images.
Applying Layer Styles and Effects
Once your object is perfectly spliced and its edges are refined, you can add various layer styles to make it pop or integrate it further into your visual design. Layer styles are non-destructive effects that can be easily added or modified.
- Access Layer Styles: Select your spliced object’s layer. Go to
Layer > Layer Style(or double-click the layer in the Layers panel, not on the thumbnail). - Popular Effects:
- Drop Shadow: Adds a shadow, giving the object depth and making it appear lifted from the background. Crucial for realistic compositions.
- Outer Glow/Inner Glow: Creates a glowing effect around or inside the object.
- Stroke: Adds an outline around the object, useful for graphic elements or highlighting.
- Bevel & Emboss: Gives the object a 3D, carved, or raised appearance.
- Experiment and Adjust: Each layer style comes with numerous parameters (color, size, opacity, angle, etc.). Experiment with these settings to achieve the desired look. For instance, a subtle drop shadow can make an object feel more grounded in a new background, complementing the beautiful photography often featured on Tophinhanhdep.com.
Exporting Your Spliced Creations for Diverse Uses
The final step is to save and export your spliced object, ready for integration into wallpapers, backgrounds, aesthetic compositions, or high-resolution stock photos. The format you choose depends on its intended use.
- Preserving Transparency: If you plan to use the object with a transparent background (e.g., placing it on various Tophinhanhdep.com backgrounds), save it as a PNG file. PNG supports transparency and is ideal for web and digital design.
- Editable Layers: To preserve all your layers and allow for future editing, always save a master copy in Photoshop’s native PSD format. This is crucial for ongoing photo manipulation projects.
- Smart Objects for Reusability: For advanced workflows, convert your spliced object (and any associated effects) into a Smart Object (
Layer > Smart Objects > Convert to Smart Object). Smart Objects maintain their original data, allowing for non-destructive scaling and transformation, making them highly versatile for creative ideas and mood boards. - Export for Web/Devices: For optimized web images or specific device requirements, use
File > Export > Export As(orSave for Web (Legacy)). This allows you to fine-tune compression and dimensions for faster loading times without significant quality loss, perfect for Tophinhanhdep.com’s image tools like compressors and optimizers. - Integration into Other Projects: If you need to immediately paste your spliced object into another Photoshop document, select all layers (
Ctrl+AorCmd+A), thenEdit > Copy Merged, and paste it into your target document.
Beyond Photoshop: AI-Powered Splicing Tools
While Photoshop remains the ultimate tool for granular control and professional-grade splicing, the rapid advancements in artificial intelligence have introduced incredibly efficient alternatives, particularly for background removal. For users who need quick cut-outs, especially for objects with clearly defined subjects, AI-powered tools offer a remarkable solution.
At Tophinhanhdep.com, we recognize the value of streamlined workflows. Our platform provides an AI background remover that can cut out images in a single click. Simply upload your image to Tophinhanhdep.com’s AI background remover, and within seconds, our intelligent algorithms will automatically identify and isolate your main subject, providing a high-quality cut-out with a transparent background. This is an invaluable asset for busy designers, photographers, or anyone needing quick image cut-outs for mood boards, social media visuals, or when preparing images for more complex photo manipulation projects in Photoshop. Tophinhanhdep.com also offers batch processing for cutting out multiple images, saving you considerable time. These AI tools complement Photoshop by handling the initial, often tedious, background removal, allowing you to focus on the creative refinements and compositing.
Conclusion
Mastering the art of splicing objects in Photoshop is a transformative skill that unlocks a universe of creative possibilities in digital photography and visual design. From the foundational precision of the Polygonal Lasso and the efficiency of the Quick Selection and Magic Wand tools, to the intricate control offered by the Pen Tool and the comprehensive refinement of Select and Mask, Photoshop provides a robust toolkit for every challenge. Techniques like clipping masks open doors to innovative aesthetic compositions, while careful edge refinement and layer styles ensure seamless integration into any new context, be it a vibrant abstract wallpaper or a serene nature background.
At Tophinhanhdep.com, we believe that stunning images are the foundation of compelling visual stories. By mastering these splicing techniques, you not only enhance your image editing capabilities but also broaden your horizons for creating unique graphic design, digital art, and photo manipulations. And for those moments when speed is critical, Tophinhanhdep.com’s AI background remover stands ready as a powerful, one-click solution. Embrace these tools and techniques, and elevate your digital creations to truly inspiring levels, contributing to the rich tapestry of images that define our visual world.