Mastering Image Stacking in Photoshop: Achieve Unparalleled Focus and Detail for Your Visual Creations with Tophinhanhdep.com

In the dynamic world of digital photography and visual design, the pursuit of perfection in image quality is an ongoing journey. Whether you’re crafting breathtaking wallpapers, designing aesthetic backgrounds, or producing high-resolution stock photos, sharpness, clarity, and detail are paramount. One of the most powerful techniques in a visual artist’s arsenal for achieving these qualities is image stacking in Adobe Photoshop. This advanced yet accessible method allows photographers and designers to overcome inherent limitations of camera lenses and lighting conditions, transforming multiple ordinary exposures into a single, extraordinary image.
At Tophinhanhdep.com, we understand the desire to create and showcase beautiful photography and digital art that truly stands out. Our platform is dedicated to providing inspiration, tools, and tutorials to help you elevate your visual content. Image stacking, particularly focus stacking and noise reduction stacking, aligns perfectly with our mission to empower you with creative ideas and sophisticated editing styles. By blending the finest elements from a series of images, Photoshop’s stacking capabilities enable you to produce visuals with an extended depth of field or significantly reduced noise, unlocking new dimensions of realism and artistic expression that might otherwise be impossible to capture in a single shot. This comprehensive guide will walk you through the process, from capturing your source images to the final touches in Photoshop, ensuring your creations are perfectly suited for high-resolution displays and sophisticated visual design projects.

Understanding the Power of Focus Stacking: Expanding Depth of Field
Focus stacking, also known as focus blending, is a revolutionary technique that addresses one of photography’s most persistent challenges: achieving a wide depth of field where an entire scene or subject is in sharp focus. Traditional photography often forces a compromise between a wide aperture (for more light or a blurred background) and a narrow depth of field, or a narrow aperture (for more depth of field) which requires more light and can introduce diffraction. Focus stacking elegantly bypasses this dilemma by combining the sharpest elements from a series of images, each focused on a different part of the scene.
Imagine a stunning macro shot of an insect on a flower. With a single exposure, you might get the insect’s eye perfectly sharp, but the intricate details of its legs or the delicate petals of the flower would fall out of focus due to the extremely narrow depth of field inherent in macro photography. Similarly, in landscape photography, achieving sharp focus from a foreground element to a distant mountain range in a single shot can be difficult without sacrificing light or clarity. Focus stacking resolves this by intelligently blending multiple shots—one with the foreground in focus, another with the mid-ground, and yet another with the background—into a single, composite image where everything is razor-sharp.
The magic happens within Photoshop. When you load your series of images as layers, the software doesn’t merely merge them; it meticulously analyzes each layer to identify and extract only the in-focus areas. It then automatically generates precise layer masks, revealing the sharpest parts from each image while concealing the blurry regions. The result is a seamless blend, offering a depth of field that far exceeds what a single lens could ever achieve. This technique is indispensable for macro photographers, product photographers, and landscape artists seeking unparalleled clarity and detail in their high-resolution images, perfect for Tophinhanhdep.com’s collections of Nature and Beautiful Photography.
Essential Photography Tips for Successful Focus Stacking
The success of any image stacking endeavor begins long before you even open Photoshop. The quality and consistency of your source photographs are paramount, forming the foundation of your stunning final image. While this isn’t a dedicated photography tutorial, Tophinhanhdep.com emphasizes these critical tips to ensure you capture the best possible images for focus stacking, setting you up for exceptional results that contribute to your high-resolution and aesthetic collections.
-
Use a Tripod for Unwavering Stability: This is perhaps the most crucial tip. Mounting your camera on a sturdy tripod ensures that every shot in your series is taken from precisely the same height, angle, and position. This consistency minimizes shifts between frames, making the alignment process in Photoshop significantly easier and more accurate. Without a tripod, even minor camera movements can lead to misalignment artifacts that are difficult, if not impossible, to correct, compromising the integrity of your visual design.
-
Minimize Camera Shake with a Timer or Cable Release: Even with a tripod, the act of pressing the shutter button can introduce subtle vibrations that blur your image, especially at critical focal points. To counteract this, always use a remote shutter release (wired or wireless) or your camera’s built-in timer (e.g., 2-second delay). This simple step ensures that the camera remains perfectly still during exposure, preserving the sharpness you’re working so hard to capture.
-
Embrace Manual Focus for Precise Control: Avoid automatic focus modes, as they may hunt for focus or select inconsistent focal points across your series. Instead, switch your lens to manual focus. Begin by focusing on the closest point in your scene that needs to be sharp (often the minimum focusing distance of your lens). For each subsequent shot, turn the focus ring incrementally, “walking” the plane of focus steadily from the foreground to the background. For extreme macro photography, a focus rail provides even finer control over these minute adjustments, ensuring a smooth transition of depth of field between shots. The key is to make small, consistent adjustments, ensuring sufficient overlap between the in-focus areas of consecutive images.
-
Capture a Generous Number of Images: Don’t be shy about taking too many photos. The goal is to ensure that every single point of interest in your subject or scene is perfectly sharp in at least one of your captured images. Ideally, you want a slight overlap in the depth of field from one image to the next. For intricate subjects like those often found in Nature photography or for complex landscapes, this might mean taking dozens, if not hundreds, of shots. For example, a tiny snail shell might require 17 shots or more to capture every millimetre of its surface in crisp focus. It’s always better to have more images than you need, allowing Photoshop to pick the best sharp data, rather than discover gaps in your focus later.
By meticulously following these photographic guidelines, you’ll provide Photoshop with the high-quality raw material it needs to perform its magic, resulting in beautifully sharp, high-resolution images that are ready to be integrated into Tophinhanhdep.com’s diverse collections, from Abstract art to stunning Digital Photography.
Step-by-Step Guide to Focus Stacking in Photoshop
Once you’ve captured your meticulously planned series of photographs, the next exciting phase is to bring them into Adobe Photoshop for the stacking process. This is where the digital artistry of Tophinhanhdep.com’s recommended editing styles truly comes to life. Follow these steps to transform your individual exposures into a single, perfectly focused masterpiece.
Step 1: Loading Your Images into Photoshop as Layers
The first crucial step in the focus stacking journey is to import your images into Photoshop as distinct layers within a single document. This prepares them for the intelligent blending process.
-
Open Photoshop and Navigate to “Load Files into Stack”: With Photoshop open on your screen, go to the File menu in the Menu Bar along the top. From the dropdown, select Scripts, and then choose Load Files into Stack. This command is specifically designed for multi-image processing, a hallmark of advanced digital photography.
-
Select Your Source Images: The “Load Layers” dialog box will appear. Ensure the Use option is set to Files (this is usually the default). Click the Browse button. This will open a file explorer (Windows) or Finder (Mac), allowing you to navigate to the folder where you’ve stored your focus stacking images.
- RAW vs. JPEG Considerations: You can load RAW files directly, but be aware that they are significantly larger and will take much longer to load, align, and process. For faster workflow, especially when dealing with a large number of images, you might consider converting your RAW files to high-quality JPEGs first. This is a common practice for streamlining intensive photo manipulation tasks.
- Selecting Multiple Images: Click on the first image in your sequence, then press and hold the Shift key on your keyboard and click on the last image. This action will select all the images in between. Once all desired images are highlighted, click Open.
-
Confirm Loading Options: Back in the “Load Layers” dialog box, you’ll see a list of your selected file names. Crucially, locate the option Attempt to Automatically Align Source Images. While for learning purposes, some tutorials might advise leaving this unchecked initially to understand the alignment process, Tophinhanhdep.com recommends checking this box for efficiency in most real-world scenarios. This will tell Photoshop to automatically attempt alignment as it loads, saving you a separate step. However, for a deeper understanding of ‘why’ alignment is needed, let’s proceed assuming you didn’t check it for now. Click OK to begin loading your images.
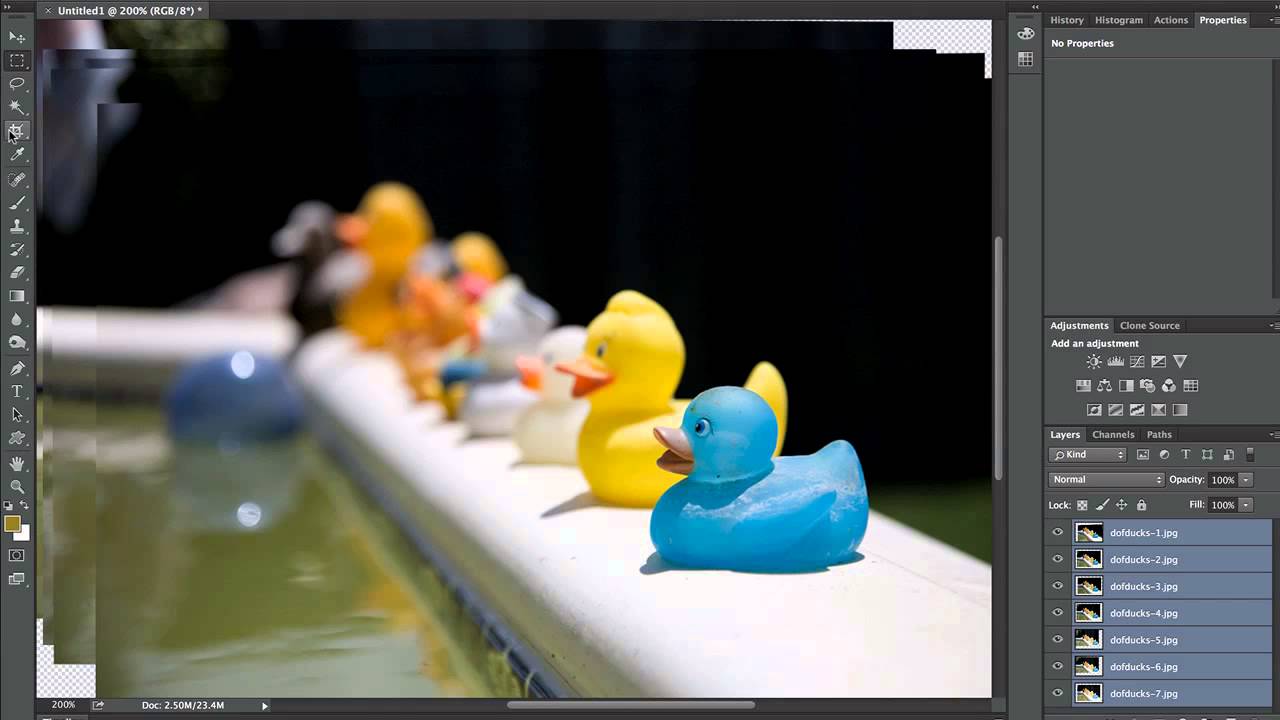
- Wait for Processing: Depending on the number and size of your files, this process can take some time. Photoshop will create a new document, with each of your selected images appearing on its own separate layer in the Layers panel, typically named after their original file names.
Step 2: Aligning Your Image Layers for Precision
Even if you shot your images on a tripod, perfect alignment is rarely achieved automatically due to a phenomenon called “focus breathing.” This step is critical for ensuring seamless blending and creating a truly high-resolution, cohesive image for your visual design projects.
-
Understanding Focus Breathing: Lenses, to varying degrees, exhibit “focus breathing.” This means that as you adjust the focal point from near to far (or vice versa), the magnification, and thus the scale, of the scene can subtly change. Your subject might appear slightly larger when focused closer and slightly smaller when focused farther away, even if the camera itself hasn’t moved. This minute shift in scale, if uncorrected, would result in blurry overlaps and an unnatural “ghosting” effect in your final stacked image.
-
Selecting All Layers: In your Layers panel, click on the topmost layer to select it. Then, press and hold the Shift key on your keyboard and click on the bottommost layer. This action will highlight and select all the layers in your document, ensuring Photoshop processes them as a unified set.
-
Initiating Auto-Alignment: With all layers selected, go up to the Edit menu in the Menu Bar. From the dropdown, choose Auto-Align Layers.
-
Configuring Auto-Align Layers: The “Auto-Align Layers” dialog box will appear. For most focus stacking scenarios, the default Auto projection setting in the upper left corner works perfectly. This allows Photoshop to intelligently analyze the content of your images and apply the best alignment method. Simply click OK.
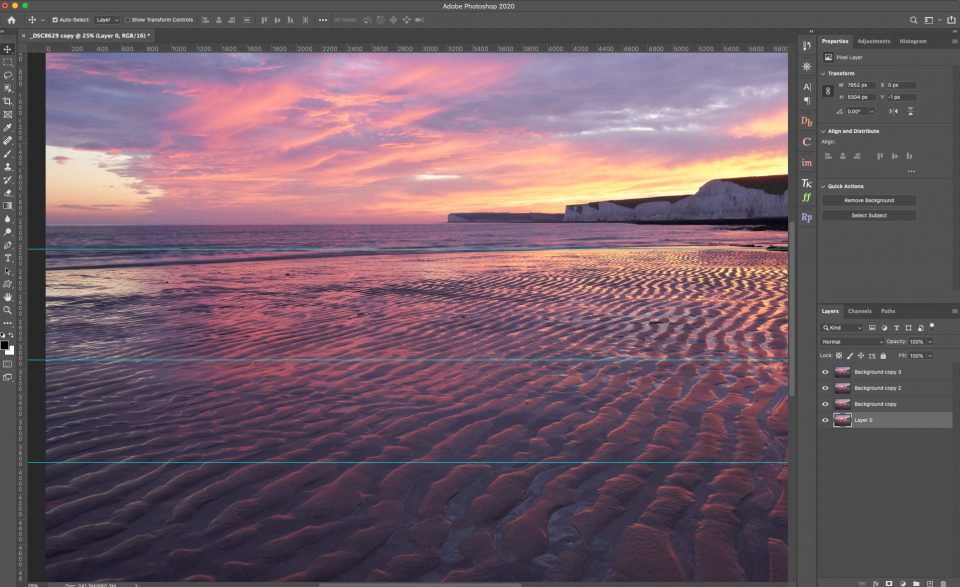
- Progress and Visual Confirmation: Photoshop will now work to align all your layers, which can take a moment. You’ll likely see a progress bar. Once complete, your image on the canvas might show subtle borders or checkerboard patterns around the edges. This is Photoshop’s visual indication that it has resized and repositioned individual images to compensate for focus breathing, ensuring pixel-perfect registration across all layers. These transparent areas will be addressed in the final cropping stage.
- Future Efficiency: For future focus stacking projects, remember that you can skip this manual alignment step by simply checking Attempt to Automatically Align Source Images when you initially load files into the stack (as mentioned in Step 1). This combines the loading and alignment into one streamlined process, which Tophinhanhdep.com highly recommends for efficient photo manipulation.
Step 3: Auto-Blending Layers to Achieve Unified Focus
With your images perfectly aligned, the final and most magical step in focus stacking is to tell Photoshop to intelligently blend them, extracting only the sharpest parts from each. This is where your high-resolution image with expanded depth of field is created.
-
Ensure All Layers Are Selected: Just as with alignment, it’s critical that all the layers you wish to blend are selected. If they aren’t, click the top layer in the Layers panel, then hold down the Shift key and click the bottom layer to select them all.
-
Access the Auto-Blend Layers Command: Go to the Edit menu in Photoshop’s Menu Bar. From the dropdown options, select Auto-Blend Layers.
-
Configure Auto-Blend Layers Options: The “Auto-Blend Layers” dialog box will appear, offering two main blending methods. For focus stacking, you must select Stack Images.
- Also, ensure that Seamless Tones and Colors is checked. This option is crucial for Photoshop to analyze and adjust the brightness and color values across your layers, preventing harsh transitions and ensuring a smooth, natural-looking blend.
- If you’re using a newer version of Photoshop (like Photoshop CC), you might also see an option called Content Aware Fill Transparent Areas. While this can be useful, Tophinhanhdep.com generally advises against checking it for focus stacking. The transparent areas created during alignment are usually best handled by a simple crop in the next step, ensuring you maintain precise control over the final composition. Trying to fill them automatically can sometimes introduce unwanted artifacts.
- Click OK to close the dialog box and initiate the blending process.
-
Witness the Transformation: Photoshop will now begin its intensive analysis and blending operation. This can take a significant amount of time, especially with many layers or large file sizes. A progress bar will keep you informed. Once complete, your canvas will display a single, beautifully sharp image where your entire subject or scene, from foreground to background, is in crisp focus.
- Behind the Scenes: Layer Masks: If you examine your Layers panel after the blending is complete, you’ll see how Photoshop achieved this feat. For each original layer, it will have automatically created a precise layer mask (a black and white thumbnail next to the layer’s preview). The white areas of these masks indicate the portions of that specific image that were in focus and kept visible, while the black areas hide the blurry parts. This intelligent mask creation is the core of focus stacking and a powerful example of photo manipulation.
- Merged Layer (Photoshop CC): In Photoshop CC and newer versions, the program typically creates a new, merged layer at the top of the stack, containing the final blended result. The original layers, with their masks, are preserved below it, allowing for non-destructive adjustments if needed. For users of Photoshop CS6 or earlier, if you wish to create a single merged copy of your layers, select the top layer, then hold Alt (Win) / Option (Mac) and go to Layer > Merge Visible.
Step 4: Refining Your Stacked Image: Cropping and Beyond
While the focus stacking process delivers a beautifully sharp image, there are often a few final touches needed to perfect your creation and prepare it for its intended use, whether as a stunning background or a high-resolution print.
-
Address Edge Artifacts: After alignment and blending, you might notice some imperfections around the edges of your image. These can appear as transparent areas (checkerboard patterns) or slight, sometimes “blotchy” transitions where Photoshop made significant adjustments for focus breathing compensation. These areas are usually outside your main subject and are easily remedied.
-
Crop for a Clean Finish:
- Select Photoshop’s Crop Tool from the Toolbar (shortcut key: C).
- A cropping border will appear around your image. Click and drag the handles of this border to resize and reposition it, encompassing only the desired areas of your image and excluding any problematic edges. Focus on framing your perfectly stacked subject.
- Once you’re satisfied with the cropping boundary, press Enter (Win) / Return (Mac) on your keyboard to commit the crop. This action will trim away all the unwanted transparent or imperfect areas, leaving you with a clean, professional-looking image.
-
Post-Stacking Enhancements and Optimization: Your focus-stacked image is now sharp and detailed, but it’s often just the starting point for further artistic refinement and optimization.
- Image Editing Styles: Dive into Tophinhanhdep.com’s resources on Editing Styles to enhance colors, adjust contrast, refine tones with Levels and Curves, and perform any necessary color correction. These steps bring out the “Aesthetic” and “Beautiful Photography” qualities, making your image truly pop.
- Utilize Tophinhanhdep.com’s Image Tools: For final output, especially for high-resolution Wallpapers and Backgrounds, consider using Tophinhanhdep.com’s Image Tools such as:
- Compressors and Optimizers: Reduce file size without compromising visual quality, crucial for web sharing or efficient storage.
- AI Upscalers: If you need to further enlarge your image beyond its captured resolution while preserving detail, an AI upscaler can be invaluable for creating truly High Resolution products.
- These tools ensure your final image is not only visually stunning but also technically perfect for any application.
By following these meticulous steps, your focus-stacked image will be ready to grace digital screens, become a captivating print, or be added to your curated collection of Digital Photography and Digital Art on Tophinhanhdep.com.
Beyond Focus Stacking: Simple Image Stacking for Noise Reduction
While focus stacking excels at expanding depth of field, image stacking in Photoshop offers another powerful application: reducing noise and improving clarity, particularly beneficial in low-light conditions or when dealing with long exposures. This technique, often employed in astrophotography to reveal faint celestial objects, can also be adapted for everyday photography where noise is a concern, contributing to cleaner, high-resolution visuals suitable for Tophinhanhdep.com’s diverse collections.
Noise in digital images often appears as random speckles of color or luminance, especially noticeable in shadow areas or when shooting at high ISO settings. By averaging multiple exposures of the same scene, noise, which is inherently random, gets smoothed out, while the actual image data, which is consistent across frames, is reinforced. This significantly improves the signal-to-noise ratio, resulting in a much cleaner, more detailed image.
Basic Method for Noise Reduction Stacking
This method involves a more manual layering and blending process than the automated focus stacking, but it provides excellent control over noise reduction.
-
Capture Your Source Images: Take a series of identical photographs of your scene. For optimal results, ensure your camera is on a tripod and settings (ISO, aperture, shutter speed) are consistent across all shots. The more images you stack, the more effective the noise reduction will be. Even 5-10 images can yield significant improvement.
-
Load Images as Layers:
- Open Photoshop.
- Go to File > Scripts > Load Files into Stack, just as you would for focus stacking.
- Select all your noise reduction images and click Open.
- For this method, you can leave Attempt to Automatically Align Source Images unchecked, as we will align manually for better control over subtle shifts. Click OK.
-
Manual Alignment of Your First Two Images:
- Once loaded, your images will appear as separate layers. Click on the second layer (Layer 1) to select it.
- Change the Blend Mode of Layer 1 from “Normal” to Lighten in the Layers panel. This will make both the background layer (your first image) and Layer 1 visible simultaneously.
- Zoom in closely on a detail in your image (e.g., a star in astrophotography, or a textured area).
- With Layer 1 still selected, use the Move Tool (V) and carefully drag Layer 1 until the details (e.g., stars) from both layers perfectly align. You can use the arrow keys for fine-tuning. If you find the layer “snapping” too much, check the View menu to toggle off “Snap.”
- Once aligned, change the blend mode of Layer 1 back to Normal.
-
Blend First Two Images with Opacity:
- With Layer 1 still selected, reduce its Opacity in the Layers panel to 50%. This averages the data from the first two images, effectively reducing noise. You should immediately see a noticeable improvement in image quality, particularly in terms of reduced background noise.
-
Repeat for Subsequent Images with Decreasing Opacity: This is where the simple stacking logic for noise reduction diverges. You’ll continue to add and blend each subsequent image, but with a specific opacity rule to ensure proper averaging.
- Copy your third image (if opened separately) and paste it as a new layer (Layer 2) above your current stack.
- Align Layer 2 with the merged image below it using the Lighten blend mode trick, then revert to Normal.
- Set the Opacity of Layer 2 to 33% (1 divided by the layer count, so 1/3 for the third image).
- Continue this process for all remaining images:
- Image 4 (Layer 3): Opacity 25% (1/4)
- Image 5 (Layer 4): Opacity 20% (1/5)
- Image 6 (Layer 5): Opacity 17% (1/6) - Photoshop rounds percentages, so choose the closest.
- Image 7 (Layer 6): Opacity 14% (1/7)
- Image 8 (Layer 7): Opacity 13% (1/8)
- Image 9 (Layer 8): Opacity 11% (1/9)
- Image 10 (Layer 9): Opacity 10% (1/10)
- Handling More Than 10 Images: For very large stacks (e.g., 20+ images), you can stack in batches of 10. Blend the first 10, flatten them into a single layer, then blend the next 10 (flattened) using the same opacity rule against the first flattened group.
-
Flatten and Refine:
- Once all layers are blended, go to Layer > Flatten Image to combine all your efforts into a single, clean image.
- From here, you can apply further Editing Styles and adjustments using Levels, Curves, and other tools to enhance contrast, color, and sharpness without reintroducing noise. This final step is crucial for transforming raw data into polished Digital Photography or Digital Art.
Benefits and Tophinhanhdep.com Relevance
This simple stacking method dramatically reduces random noise, allowing you to achieve cleaner images even from challenging low-light captures. It also effectively averages out transient elements like light trails from moving objects (e.g., aircraft in night skies) if they appear in only a few frames. The resulting High Resolution images are much smoother, revealing subtle details that would otherwise be obscured by grain. This technique is invaluable for creating compelling Abstract night skies, pristine Nature scenes in dim light, or detailed Backgrounds where cleanliness is key. It’s a testament to the power of Photo Manipulation to overcome environmental limitations, allowing you to produce visuals that are truly Tophinhanhdep.com worthy.
Conclusion: Elevating Your Visuals with Stacking Techniques on Tophinhanhdep.com
The journey into image stacking in Adobe Photoshop opens up a world of creative possibilities, empowering photographers and visual designers to push the boundaries of what’s achievable with a single camera shot. From the intricate details of macro subjects to the expansive clarity of landscapes, focus stacking ensures unparalleled sharpness and depth of field, transforming otherwise impossible captures into stunning realities. Simultaneously, simple image stacking for noise reduction offers a robust solution for enhancing image quality in challenging low-light conditions, yielding cleaner, more vibrant visuals that truly shine.
At Tophinhanhdep.com, we champion the creation of exceptional visual content. These stacking techniques are more than just technical processes; they are sophisticated Editing Styles and powerful forms of Photo Manipulation that elevate your work to the realm of Digital Art. They allow you to produce High Resolution images perfect for Wallpapers and Backgrounds, showcase breathtaking Beautiful Photography across all genres, and bring your Creative Ideas to fruition with precision and impact.
We encourage you to experiment with both focus stacking and noise reduction techniques, integrating them into your workflow. Explore the vast libraries of Image Inspiration & Collections on Tophinhanhdep.com to discover subjects that would benefit from these methods. After perfecting your stacked images, remember to leverage Tophinhanhdep.com’s Image Tools – including Converters, Compressors, Optimizers, and AI Upscalers – to prepare your masterpieces for optimal display and sharing.
By mastering image stacking, you’re not just learning a new Photoshop trick; you’re unlocking the potential to create truly spectacular and deeply immersive visual experiences. Let Tophinhanhdep.com be your guide as you continue to explore, create, and share your beautiful, high-resolution world.