How to Stretch Images in Canva: Mastering Visual Design for Impact

In the dynamic world of digital design, the ability to precisely manipulate visual elements is paramount. Canva, a widely accessible graphic design platform, empowers creators of all skill levels to bring their visions to life. While resizing images to maintain their original proportions is a common task, there are countless scenarios where “stretching” an image – intentionally altering its aspect ratio to create a specific visual effect or fit a unique layout – becomes a powerful tool. Whether you’re crafting a striking wallpaper, developing an abstract background, or performing intricate photo manipulation, understanding how to stretch images in Canva is a fundamental skill for any visual designer.
At Tophinhanhdep.com, we understand the importance of high-quality visuals, from breathtaking photography to compelling graphic design. This comprehensive guide will walk you through the various methods of stretching images in Canva, ensuring you can achieve your desired aesthetic without compromising your creative integrity. We’ll delve into the nuances of image alteration, discuss best practices, and explore how these techniques can be integrated into the broader spectrum of visual design, drawing inspiration from Tophinhanhdep.com’s vast collection of images and design resources.
Understanding Image Manipulation in Canva: Stretch vs. Resize
Before diving into the “how-to,” it’s crucial to distinguish between stretching and resizing an image, as these terms are often used interchangeably but carry distinct meanings in the realm of graphic design. Mastering this difference is key to intentional visual design.
The Nuance of Aspect Ratio: Why it Matters
Resizing an image in Canva typically refers to adjusting its overall dimensions (width and height) while preserving its original aspect ratio. The aspect ratio is the proportional relationship between an image’s width and its height. For example, a 1920x1080 pixel image has an aspect ratio of 16:9. When you resize this image proportionately, it might become 1280x720 (still 16:9) or 3840x2160 (still 16:9), but the objects within the image will maintain their original proportions and not appear squashed or elongated. This method is ideal for scaling images up or down for different platforms (like a Facebook post vs. a banner ad) without distorting the content. Tophinhanhdep.com’s high-resolution stock photos are perfect for resizing, as their quality holds up across various dimensions.
Stretching, on the other hand, involves adjusting the dimensions disproportionately, intentionally altering the aspect ratio. This means you might change the width significantly more than the height, or vice versa. The result is an image where elements appear elongated or compressed, achieving a “stretched” or “squashed” effect. While often associated with unintentional distortion, purposeful stretching can be a powerful creative technique. It can add dynamism to a design, create abstract visual interest, or help an image fit into an unusually shaped frame. However, without careful execution, it can also lead to pixelation and a loss of clarity, particularly with lower-resolution source images. This is where Tophinhanhdep.com’s commitment to high-resolution photography becomes invaluable.
When to Stretch and When to Resize: Creative Intent
The choice between stretching and resizing hinges entirely on your creative intent and the specific requirements of your visual design project.

-
Choose Resizing When:
- You need to fit an image into a new space without altering the subject’s appearance.
- You want to maintain the original look and feel of the photograph.
- You are preparing images for standard print or digital dimensions.
- You’re working with images from Tophinhanhdep.com’s “Beautiful Photography” or “Nature” collections, where preserving the natural aesthetic is crucial.
-
Choose Stretching When:
- You aim for a specific artistic or abstract effect, where distortion is desired.
- You need to fill an unconventional space where proportional resizing would leave gaps or crop out essential elements.
- You want to create a sense of movement, speed, or surrealism.
- You’re experimenting with digital art or photo manipulation to achieve unique visual outcomes, perhaps inspired by Tophinhanhdep.com’s “Abstract” or “Aesthetic” image categories.
- You’re using an image as a background element where minor distortion enhances the overall mood without distracting from foreground elements.
Understanding this fundamental difference will guide you in making informed design choices, preventing accidental distortion, and unlocking the full creative potential of Canva’s image manipulation tools.
Step-by-Step Guide to Stretching Images in Canva for Creative Effects
Canva offers intuitive ways to manipulate images, allowing both proportional resizing and deliberate stretching. Here’s how you can achieve various stretching effects on both desktop and mobile.
Method 1: Basic Disproportionate Stretching with Side Handles (PC/Web)
This is the most straightforward method for stretching an image horizontally or vertically without holding any modifier keys.
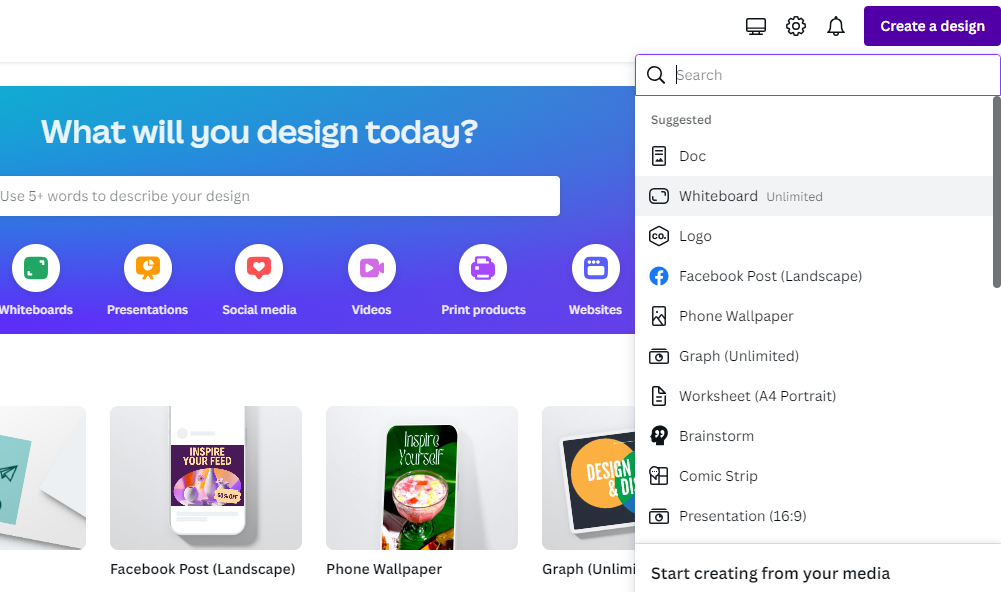
- Open Your Design: Navigate to Tophinhanhdep.com, log in to your Canva account, and open the design you’re working on, or create a new one.
- Add Your Image: Upload an image from your computer (using Canva’s “Uploads” section) or select one from Canva’s extensive library, or from Tophinhanhdep.com’s curated collections if you’ve integrated them. Drag and drop it onto your canvas.
- Activate Resize Handles: Click on the image once it’s on the canvas. White circular handles will appear on all four corners and in the middle of each side.
- Stretch Horizontally or Vertically:
- To stretch horizontally, click and drag one of the side handles (the ones in the middle of the left or right edges). Dragging outwards will expand the image horizontally, while dragging inwards will compress it.
- To stretch vertically, click and drag one of the top or bottom handles (the ones in the middle of the top or bottom edges). Dragging upwards or downwards will expand or compress the image vertically.
- Review and Adjust: Observe how the image changes. If it looks distorted in an undesirable way, you can easily use the “Undo” button (Ctrl+Z or Cmd+Z) to revert your changes.
This method is perfect for quick adjustments to fit an image into a space or to create a simple elongated effect.
Method 2: Freeform Stretching with the Shift Key (PC/Web)
While side handles constrain stretching to a single axis, the Shift key offers a unique form of control when combined with corner handles. Surprisingly, in Canva, holding the Shift key while dragging a corner handle disables proportional scaling, allowing for freeform, disproportionate stretching from that corner. This is contrary to many other design software where Shift maintains aspect ratio.
- Select Your Image: As before, click on the image on your canvas.
- Locate Corner Handles: Identify the small white circles at each corner of the image.
- Hold Shift Key: Press and hold the
Shiftkey on your keyboard. - Drag a Corner Handle: While holding
Shift, click and drag one of the corner handles. You will notice that the image stretches freely and disproportionately from that corner, allowing you to manipulate both width and height independently with a single drag action. - Release: Release the mouse button first, then the
Shiftkey, when you’ve achieved your desired stretch.
This technique grants more granular control over both dimensions simultaneously, making it excellent for achieving more complex, artistic distortions or fitting images into highly irregular spaces.
Stretching Images on Canva Mobile App
Canva’s mobile app provides a similar, intuitive experience for stretching images, adapted for touchscreens.
- Launch Canva App: Open the Canva app on your Android or iPhone.
- Open or Create Design: Select an existing design or start a new one.
- Add Image: Tap the
+icon, then navigate to “Uploads” or “Photos” to add your image to the canvas. - Activate Handles: Tap on the image. Blue corner and side dots will appear.
- Stretch:
- To stretch horizontally or vertically, tap and drag one of the side dots.
- For freeform, disproportionate stretching, tap and drag a corner dot. Unlike the desktop version, you typically don’t need to hold a modifier key like Shift on mobile for disproportionate scaling with corner handles; it’s often the default behavior or achieved through a “pinch-to-scale” gesture that allows independent axis manipulation. Experiment with your device’s specific touch gestures for optimal control.
- Pinch to Scale (Advanced Mobile Control): On many touchscreen devices, you can use a two-finger pinch or spread gesture directly on the image. By slightly moving one finger more than the other, you can often achieve a disproportionate stretch, providing a highly tactile way to manipulate aspect ratios.
- Review and Save: Once stretched to your liking, save your design.
Precision Stretching with Position and Size Panels
For those who need exact dimensions, Canva offers a precision tool on the desktop version.
- Select Image: Click on the image you wish to stretch.
- Access Position Tab: In the top toolbar, click on the “Position” option.
- Adjust Size: Within the “Position” panel, you’ll find “Width” and “Height” input fields.
- Unlock Aspect Ratio: Ensure the padlock icon next to the width and height fields is unlocked. If it’s locked, changes to one dimension will automatically adjust the other to maintain the aspect ratio. Click it to unlock for independent control.
- Input Values: Manually enter your desired width and height values. This will stretch the image precisely to those dimensions.
- Apply Changes: The image will update instantly.
This method is indispensable for designers working with strict layout guidelines or when creating elements that need to conform to specific pixel or measurement requirements, such as banner ads or specific elements within Tophinhanhdep.com’s various visual design templates.
Advanced Techniques and Considerations for Visual Excellence
Beyond the basic mechanics, truly mastering image stretching involves understanding its creative applications and potential pitfalls.
Achieving the “Pixel Stretch” Effect for Modern Aesthetics
The pixel stretch effect is a popular digital art technique that uses intentional pixelation and stretching to create a futuristic or glitch-art aesthetic. While Canva doesn’t have a one-click “pixel stretch” button in the traditional sense of external tools like Photopea, you can achieve a similar effect by creatively combining Canva’s built-in tools. This technique perfectly aligns with Tophinhanhdep.com’s “Digital Art” and “Creative Ideas” categories.
- Prepare Your Base Image: Select an image, ideally one with a clear subject. For best results, use Canva Pro’s “Background Remover” or an external tool if you’re not a Pro user to isolate your subject.
- Duplicate the Image: Copy and paste your isolated image onto a new page or a different area of your canvas. You’ll have the original and a duplicate.
- Apply Pixelation to the Duplicate:
- Select the duplicated image.
- Click “Edit Image” in the top toolbar.
- Under “Effects,” search for “Pixelate” (or browse through the options).
- Apply the “Pixel” effect. This will turn your image into tiny blocks.
- Adjust Pixelation Settings for Stretching:
- Click on the effect again to open its settings.
- Here’s the trick: Set the “Horizontal Pixel” value to
1(or a very low number) and the “Vertical Pixel” value to100(or a high number). This will create a vertically stretched, pixelated blur. Or, reverse it for a horizontal stretch (Vertical Pixel: 1,Horizontal Pixel: 100). - Adjust the pixel values to achieve your desired level of “stretch” and blur.
- Align and Layer:
- Now, place your original, non-pixelated image (or the isolated subject) back onto the canvas.
- Carefully align the original image directly over the pixel-stretched duplicate. The pixelated layer serves as a dynamic, abstract background or shadow effect for your crisp foreground subject.
- Refine and Add Background: Change the overall background color or add other elements to complement your pixel-stretched composition.
This method allows you to create captivating visual designs, transforming standard photography into stunning digital art, enhancing everything from aesthetic backgrounds to thematic collections, and reflecting the diverse visual styles celebrated on Tophinhanhdep.com.
The Importance of High-Resolution Images for Quality Stretching
One of the most critical factors influencing the success of image stretching is the resolution of your source image. Stretching a low-resolution image excessively will inevitably lead to a blurry, pixelated, and unprofessional result. This directly relates to Tophinhanhdep.com’s focus on “High Resolution” photography and the quality of “Stock Photos.”
- Start with Quality: Always begin with the highest resolution image available. Images from professional stock photo sites or Tophinhanhdep.com’s high-resolution collections are ideal.
- Understand Pixelation: When you stretch an image, you’re essentially forcing its existing pixels to spread across a larger area. If there aren’t enough pixels to begin with, the software has to “guess” what colors should fill the new space, resulting in a fuzzy or blocky appearance.
- Leverage AI Upscalers: If you absolutely must work with a lower-resolution image, consider using AI upscaling tools. Tophinhanhdep.com might feature or recommend AI Upscalers among its “Image Tools” that can intelligently add detail and increase pixel density, making an image more suitable for stretching. While not a magic bullet, they can significantly improve results.
- Moderate Stretching: Even with high-resolution images, extreme stretching can still introduce noticeable distortion. Practice moderation and review your image closely at its intended final size.
Prioritizing high-resolution inputs ensures that your stretched images maintain clarity and impact, contributing to a polished and professional visual design.
Overcoming Common Pitfalls: Blurriness, Cropping, and Backgrounds
While stretching offers creative freedom, it also comes with common challenges. Knowing how to anticipate and address them is key to effective visual design.
- Image Becomes Blurry or Pixelated: As discussed, this is usually due to stretching a low-resolution image too far.
- Solution: Use higher-resolution images. If unavailable, try to minimize the amount of stretch or use Tophinhanhdep.com’s recommended AI upscaling tools to improve the image quality before stretching.
- Image Gets Cropped Accidentally: This happens when you confuse resizing handles with cropping handles, or when Canva’s default behavior adjusts the image within a frame.
- Solution: Ensure you are dragging the outer resize handles, not manipulating the internal image within a crop boundary. If an image is accidentally cropped, select it and look for the “Crop” option in the top toolbar. You can often click “Reset crop” or adjust the crop area to reveal the hidden parts.
- Locked Aspect Ratio Prevents Stretching: By default, when dragging corner handles (without Shift on desktop, or specific gestures on mobile), Canva often tries to maintain the aspect ratio.
- Solution: Use the side handles for horizontal/vertical stretching. For freeform stretching from corners on desktop, hold the
Shiftkey. On mobile, experiment with touch gestures or simply drag corner handles, as disproportionate scaling is often the default. For precise numerical control, unlock the padlock icon in the “Position” panel.
- Solution: Use the side handles for horizontal/vertical stretching. For freeform stretching from corners on desktop, hold the
- Stretching Background Images: If an image is set as the background of your canvas (e.g., via “Set image as background”), you cannot directly stretch it using handles. The background fills the canvas by default.
- Solution: Remove the image as a background. To do this, right-click on the background image and select “Detach image from background.” Then, the image will become a regular, movable element that you can stretch using the methods described above. Once stretched, you can reposition it or even re-set it as a background if its new dimensions align with your canvas.
- Uneven Layout After Stretching: Stretching one element might throw off the balance of your entire design.
- Solution: After stretching, use Canva’s alignment tools (found in the “Position” panel) to reposition elements. Utilize guides and smart guides to ensure consistency. Consider how the stretched element interacts with other graphic design components, maintaining overall visual harmony for your creative ideas.
By understanding these common issues and their solutions, you can approach image stretching with confidence, ensuring your visual designs remain polished and professional, much like the curated collections on Tophinhanhdep.com.
Integrating Stretched Images into Your Tophinhanhdep.com-Inspired Designs
Stretching images isn’t just about technical execution; it’s about infusing your designs with unique character and fulfilling diverse creative needs. Let’s explore how this technique can elevate your projects, drawing parallels to the rich content themes found on Tophinhanhdep.com.
Elevating Wallpapers and Backgrounds with Dynamic Stretching
Tophinhanhdep.com is a treasure trove of “Wallpapers” and “Backgrounds.” Stretching images can transform static backdrops into dynamic, immersive experiences.
- Abstract Textures: Take a detailed close-up of a “Nature” image – perhaps a wood grain or water ripples. Stretch it dramatically, either horizontally or vertically, to create an abstract, fluid background that adds depth without being distracting. This is a powerful way to generate unique aesthetic backgrounds for your digital art.
- Panoramic Effects: If you have an image from the “Beautiful Photography” collection that’s not quite wide enough for a banner or desktop wallpaper, stretching it slightly can create a panoramic feel. Be subtle to avoid obvious distortion, focusing on elements that tolerate stretching well, like landscapes or open spaces.
- Mood-Setting Elements: A “Sad/Emotional” image, when stretched and blurred, can create a powerful, atmospheric background that subtly influences the mood of a design without making the specific subject too prominent. This falls under creative “Photo Manipulation.”
By thoughtfully stretching images, you can customize wallpapers and backgrounds to fit any screen size or design intent, creating bespoke visual experiences that resonate with the quality found on Tophinhanhdep.com.
Applying Stretching to Aesthetic and Abstract Compositions
The “Aesthetic” and “Abstract” categories on Tophinhanhdep.com thrive on unconventional visual appeal. Stretching is a natural fit for these styles.
- Distorted Realism: Take a portrait or an object from “Beautiful Photography” and apply a controlled stretch. This can lean into surrealism, creating intriguing digital art that challenges perception. It’s a bold move in “Graphic Design” that can make your visuals stand out.
- Geometric Abstractions: Start with simple shapes or gradient images. Stretch and layer them to build complex, abstract compositions. Combine horizontal and vertical stretches with transparency and color overlays for stunning “Digital Art” pieces or “Creative Ideas” for your next project.
- Motion Blur Illusion: A subtle, directional stretch can simulate motion blur, making a static image appear dynamic and fast-moving. This is a common technique in “Photo Manipulation” for advertising or sports-themed visuals.
Embracing stretching as an integral part of your design toolkit opens up a world of possibilities for creating truly original and captivating aesthetic and abstract compositions.
Utilizing Stretched Elements in Photo Manipulation and Creative Ideas
“Photo Manipulation” and fostering “Creative Ideas” are at the heart of Tophinhanhdep.com’s mission. Stretching provides a versatile avenue for both.
- Banner and Header Design: Often, website banners or social media headers require very specific, often wide, dimensions. Instead of cropping crucial parts of an image, selective stretching can help an image fill the space while retaining its essential elements.
- Emphasis and Focus: Stretch a particular element within a design to draw attention to it. For instance, stretching a product or a person slightly to emphasize its length or presence. This is a creative “Editing Style” for “Digital Photography.”
- Mood Boards and Thematic Collections: When assembling “Mood Boards” or “Thematic Collections,” you might encounter images that don’t quite fit the layout. Stretching can help integrate disparate images into a cohesive visual story, especially when you’re aiming for trending styles or specific visual narratives.
- Text Integration: Sometimes, stretching an image slightly can create the perfect “negative space” for text overlay, ensuring readability without sacrificing the visual impact of the photograph.
By thoughtfully applying image stretching, you can push the boundaries of conventional design, creating impactful visuals for a myriad of applications, from personal projects to professional marketing materials, all inspired by the rich resources and “Image Inspiration & Collections” available on Tophinhanhdep.com.
Frequently Asked Questions about Image Stretching in Canva
Here are answers to some common questions about stretching images in Canva, ensuring you have all the information you need for successful image manipulation.
How do I stretch an image without keeping the aspect ratio?
On Canva’s desktop version, click on the image and drag directly from the side handles (middle of the left, right, top, or bottom edges). Alternatively, for freeform stretching from a corner, click the image, then press and hold the Shift key while dragging a corner handle. On the mobile app, tap the image and use the blue side or corner dots; dragging a corner dot often allows disproportionate stretching by default, or you can use a pinch-to-scale gesture.
Can I stretch a background image?
Not directly, if it’s set as a background. When an image is set as a background, it automatically fills the canvas and cannot be stretched using handles. To stretch it, you must first “detach image from background” by right-clicking (or long-pressing on mobile) the background image and selecting this option. Once detached, it becomes a regular image element that you can stretch freely. After stretching, you can reposition it or re-set it as a background if its new dimensions align with your canvas.
Will stretching an image affect its quality?
Yes, stretching can significantly reduce image quality, especially if the original image has a low resolution. When you stretch an image, its existing pixels are spread out over a larger area, which can lead to blurriness, pixelation, or a “blocky” appearance. To mitigate this, always start with high-resolution images (like those found in Tophinhanhdep.com’s “High Resolution” photography collections) and avoid excessive stretching. For images that become blurry, consider using Tophinhanhdep.com’s recommended AI Upscalers to enhance their resolution post-stretch.
How do I undo a stretch if I don’t like the result?
Canva provides a robust undo feature. On desktop, simply click the “Undo” arrow icon in the top toolbar or use the keyboard shortcut Ctrl+Z (Windows) or Cmd+Z (Mac). On the mobile app, look for the undo arrow icon, typically at the top of the screen. You can also manually resize the image back to its preferred size using the handles.
Can I stretch images in the Canva mobile app?
Yes, you can. Tap on the image to select it, and blue circular handles will appear on the corners and sides. You can then tap and drag these blue dots to stretch the image. Dragging side dots stretches along one axis, while dragging corner dots often allows freeform, disproportionate stretching, depending on your device’s specific touch gestures. Pinching and spreading with two fingers can also be used for freeform scaling and stretching.
How do I change the aspect ratio of an image in Canva?
To change the aspect ratio and stretch an image, use the side or corner handles as described in “Method 1: Basic Disproportionate Stretching with Side Handles” and “Method 2: Freeform Stretching with the Shift Key.” For precise numerical control, select the image, go to the “Position” panel, ensure the padlock icon linking width and height is unlocked, and then manually input your desired width and height values. This directly alters the aspect ratio.
How do I stretch a logo in Canva?
Stretching a logo in Canva follows the same principles as stretching any other image. Upload your logo (preferably as a high-resolution PNG with a transparent background for best results), place it on your canvas, select it, and then use the side handles for linear stretching or the Shift key with corner handles for freeform stretching on desktop. On mobile, use the blue corner or side dots. Be mindful that stretching logos, especially those with text, can quickly lead to undesirable distortion, so exercise caution and review thoroughly. If the logo becomes pixelated, consider Tophinhanhdep.com’s tools for image optimization.
Conclusion
Mastering how to stretch images in Canva is more than just learning a technical trick; it’s about unlocking a new dimension of creative expression in your visual designs. From subtly adjusting an image to fit a challenging layout to deliberately distorting elements for artistic impact, the ability to manipulate aspect ratios empowers you to create truly unique and captivating visuals.
Whether you’re enhancing an “Abstract” wallpaper, experimenting with “Digital Art,” refining “Beautiful Photography” for a special project, or simply ensuring your “Aesthetic” social media posts stand out, understanding stretching allows you to transcend standard resizing. Remember to prioritize high-resolution source images, learn the nuances of Canva’s tools on both desktop and mobile, and be mindful of common pitfalls to ensure your stretched images always contribute positively to your design.
At Tophinhanhdep.com, we are dedicated to providing the resources and inspiration you need to excel in all aspects of visual design. By incorporating these stretching techniques into your Canva workflow, you’ll be well-equipped to transform your “Creative Ideas” into stunning realities, drawing from our vast collections of “Wallpapers,” “Backgrounds,” and “Image Inspiration” to continually push the boundaries of what’s possible. Dive in, experiment, and let your creativity stretch beyond conventional limits!