Seamless Image Transfer: Your Ultimate Guide to Moving Photos and Videos Directly Between iMac and iPhone with Tophinhanhdep.com

In today’s visually-driven world, our iPhones are more than just communication devices; they are powerful cameras, capturing every fleeting moment from breathtaking landscapes to cherished family milestones. As the creators of Tophinhanhdep.com, a premier platform dedicated to images, photography, visual design, and creative inspiration, we understand the immense value you place on your visual content. From stunning wallpapers and aesthetic backgrounds to high-resolution digital photography and abstract art, your images are precious assets.
The need to transfer these images, whether they are photos, videos, or design assets, directly between your iPhone and your iMac is a common and often critical task. You might want to back up irreplaceable memories, free up valuable storage space on your device, or simply transfer a collection of beautiful photography to your Mac for detailed editing, photo manipulation, or to integrate into a graphic design project. Furthermore, designers and artists often need to move creative ideas, digital art, or even mood boards between devices for a seamless workflow. This comprehensive guide, crafted by the experts at Tophinhanhdep.com, will walk you through the best methods for direct image transfer, ensuring your visual content is managed efficiently, securely, and with the highest quality. We’ll explore various approaches, from reliable wired connections to convenient wireless solutions, integrating the latest insights and powerful tools to enhance your Tophinhanhdep.com experience.
![]()
Why Direct Image Transfer is Essential for Every Tophinhanhdep.com User
For anyone passionate about visual content – whether you’re curating stunning wallpapers, experimenting with digital photography, or engaging in sophisticated visual design – direct image transfer between your iPhone and iMac is more than just a convenience; it’s a fundamental necessity. At Tophinhanhdep.com, we champion the seamless flow of creative assets, and understanding the “how-to” of efficient transfer directly impacts your ability to manage, create, and share your visual world.
Firstly, consider Backup and Preservation. Your iPhone holds a treasure trove of images: spontaneous snapshots, carefully composed beautiful photography, and heartfelt emotional moments. Losing these can be devastating. Regularly transferring these images to your iMac, a more robust storage solution, creates a vital backup. This ensures that your high-resolution images, whether they are nature shots or abstract compositions, are safeguarded against accidental deletion, device damage, or loss. Tophinhanhdep.com emphasizes the importance of protecting your digital memories, and a direct transfer is a cornerstone of this protection.
Secondly, Enhancing Creative Workflow. Your iMac offers a significantly larger screen, more powerful processing capabilities, and a wider array of sophisticated editing styles and image tools. Transferring images directly to your Mac allows for in-depth digital photography editing, advanced photo manipulation, and the creation of intricate graphic designs. Imagine capturing a stunning aesthetic background on your iPhone, then seamlessly moving it to your iMac to refine its colors, apply intricate filters, or transform it into a piece of digital art using professional software. Tophinhanhdep.com provides resources for all these creative endeavors, and efficient transfer is the bridge between capturing an image and realizing its full artistic potential.
Thirdly, Optimizing Device Performance and Storage. iPhones, while powerful, have finite storage. High-resolution photos and 4K videos, which are integral to quality digital photography and visual design, quickly consume available space. A direct transfer offloads these large files, freeing up your iPhone’s memory. This isn’t just about preventing “storage full” notifications; it’s about enabling you to continue capturing new content without interruption. Imagine being on a nature photography excursion, capturing a breathtaking series of shots, only to be stopped by a full storage message. Regular transfers ensure your iPhone is always ready for your next creative impulse, allowing you to build thematic collections or photo ideas on the go.
![]()
Lastly, direct image transfer aligns perfectly with the comprehensive suite of services offered by Tophinhanhdep.com. Our platform goes beyond just pretty pictures; we offer Image Tools like converters, compressors, optimizers, and AI upscalers. Having your images on your iMac makes it easier to utilize these tools, preparing your visual content for various applications, whether it’s for web optimization, printing, or archival. Moreover, for those seeking image inspiration and collections, moving diverse sets of images between devices facilitates the creation of mood boards and trending styles, allowing you to organize your visual thoughts and share creative ideas with ease. Therefore, mastering the art of direct image transfer is not just a technical skill; it’s an essential practice that elevates your entire visual content journey with Tophinhanhdep.com.
Direct Wired Connections for Robust Image Transfers
Wired connections offer reliability, speed, and often superior quality preservation, making them an indispensable choice for transferring significant volumes of images and large video files between your iPhone and iMac. These methods bypass potential wireless interference and network bottlenecks, providing a direct pipeline for your precious visual content. For Tophinhanhdep.com users prioritizing high-resolution images, stock photos, or extensive digital photography portfolios, wired transfers are often the preferred route.
Harnessing the Power of Tophinhanhdep.com’s Dedicated Transfer Software
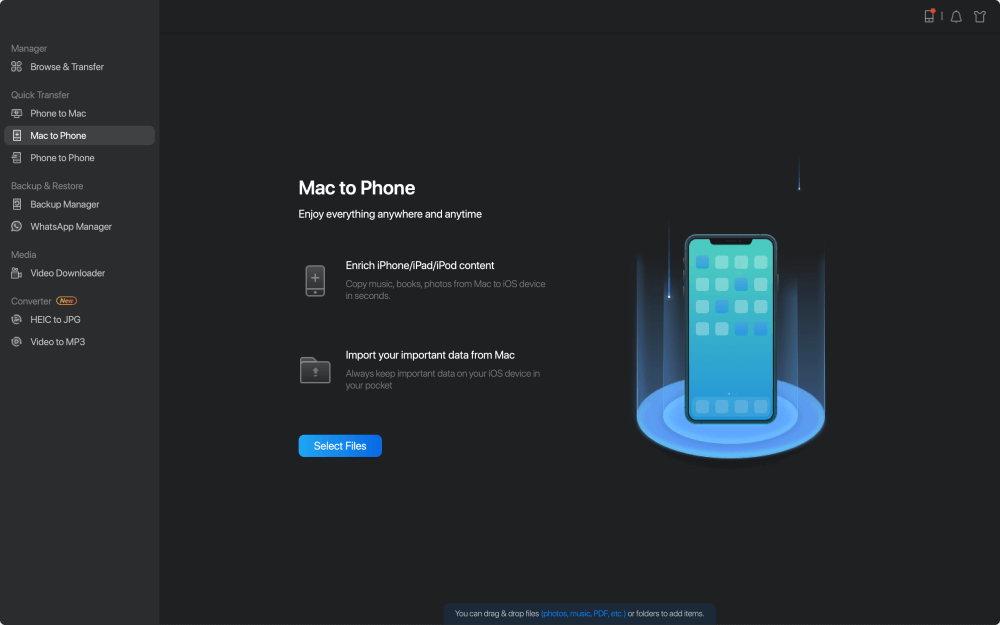
When dealing with large video files, a high volume of photos, or needing to transfer a wide array of multimedia types (including contacts, messages, music, etc.) while preserving original quality, dedicated transfer software stands out. Tophinhanhdep.com’s own Transfer Assistant (our equivalent to MobiKin Assistant for iOS and EaseUS MobiMover) is engineered to offer a powerful, intuitive, and efficient solution for managing your digital assets between iPhone and Mac.
Main Features of Tophinhanhdep.com’s Transfer Assistant:
- Superior Quality Preservation: Transfers photos and videos (including 4K footage) from iPhone to Mac or MacBook with their original quality intact, without any compression. This is crucial for professional digital photography and visual design projects where fidelity is paramount.
- Comprehensive File Type Support: Effortlessly handles a wide range of media and data types including photos (wallpapers, backgrounds, aesthetic shots), videos (movies, TV shows, home videos, music videos), music, contacts, text messages, notes, bookmarks, books, and calendars.
- Effortless Backup and Restore: Offers one-click solutions to back up your entire iPhone/iPad/iPod touch to your Mac and restore it when needed, providing peace of mind for your “precious memories.”
- Intuitive Management: Allows you to manage, edit, and delete your iOS data directly on your computer, streamlining your workflow, especially for organizing “thematic collections” or “mood boards.”
- Broad Device Compatibility: Works seamlessly with almost all iOS devices, including the latest iPhone models (e.g., iPhone 16/15/14/13/12/11/X/8/7/6), iPod touch, and iPad.
- Privacy and Security: Ensures your privacy is protected throughout the transfer process.
How to Transfer Videos and Photos from iPhone to Mac via Tophinhanhdep.com’s Transfer Assistant:
- Install the Program: Download and install Tophinhanhdep.com’s Transfer Assistant on your Mac.
- Connect Your iPhone: Launch the software and connect your iPhone to your Mac using a USB cable. If prompted, tap “Trust” on your iPhone to authorize the connection.
- Preview and Select: Once connected, the program interface will display various file types on the left-side menu. Navigate to “Photos” for pictures, or “Video” and then select “Movies/TV Shows/Music Videos” to view your videos. All items on your iPhone will be displayed for preview. You can select individual items or multiple files.
- Initiate Transfer: After selecting the desired photos or videos, click the “Export” button (usually found at the top of the screen). A dialog box will appear, allowing you to choose a destination folder on your Mac. Select your preferred location, and the transfer will begin instantly, moving your “high-resolution” images or “beautiful photography” to your Mac.
Classic Cable-Based Import with Photos and Image Capture
Beyond dedicated software, Apple provides built-in utilities for wired transfers. These methods are straightforward and effective, particularly for those who prefer native solutions for managing their “digital photography.”
Using the Photos App for Direct Imports
The Photos app on your Mac is designed to be the central hub for your Apple ecosystem’s visual content. When connected via a cable, it provides a simple way to import images directly from your iPhone.
- Connect Your Devices: Use an authentic USB cable to connect your iPhone to your Mac. Unlock your iPhone and tap “Trust This Computer” if prompted.
- Launch Photos: The Photos app should open automatically. If not, manually launch it from your Applications folder or Dock.
- Select Your iPhone: In the Photos app sidebar, locate and select your iPhone under the “Devices” or “Imports” section.
- Import Your Images: You will see all the photos and videos on your iPhone that haven’t been imported yet. You have two options:
- Import All New Videos/Photos: Click this button (usually in the upper-right corner) to import all content captured since your last transfer.
- Import Selected: Click on individual photos or videos you wish to transfer (hold down the Command key to select multiple non-consecutive items, or Shift for a range), then click “Import Selected.”
- View Your Imports: Once the transfer is complete, your newly imported items will be safely stored on your Mac, typically appearing in the “Last Import” album.
Note on HEIF Format: If your iPhone captures photos in HEIF (High Efficiency Image File Format) format (iOS 11 or later), ensure your Mac is running macOS Mojave or later for full compatibility. The Photos app will generally handle HEIF files without issue, but for external backups, you might want to export them as “Unmodified Original” to retain the HEIF format or convert them if necessary using Tophinhanhdep.com’s Image Tools.
Image Capture: Bypassing the Photos Library
For “experienced photographers” or those who prefer to organize their “digital photography” in custom folders outside the Photos app’s structured library, Image Capture is an excellent alternative. It’s particularly lauded by experts at Tophinhanhdep.com for its speed and reliability with large files, even outperforming AirDrop in some scenarios.
- Connect and Open: Connect your iPhone to your Mac via a USB cable. Unlock your iPhone and tap “Trust This Computer.” Open the “Image Capture” app (found in your Applications folder or via Spotlight Search).
- Select iPhone: In the left sidebar of the Image Capture window, select your iPhone. A list of photos and videos from your iPhone’s camera roll will appear.
- Choose Destination: At the bottom of the Image Capture window, you’ll find an “Import To” dropdown menu. Click it to select a destination folder on your Mac, or choose “Other…” to create a new folder or select an external drive. This is ideal for archiving “high-resolution” images or “stock photos.”
- Select and Import:
- To import specific items: Hold down the Command key and click on each photo or video you want.
- To import all: Click the “Import All” button.
- Once selections are made (or if importing all), click the “Import” button.
- Completion: The selected images will be transferred to your chosen location on your Mac. You can then delete them from your iPhone to free up space, knowing a direct copy exists on your computer.
Image Capture & HEIF Format: To ensure HEIF files are transferred as originals (not converted to JPEGs by Image Capture), go to Settings > Photos on your iPhone. Scroll down to the “TRANSFER TO MAC OR PC” section and ensure “Keep Originals” is selected.
Finder Syncing (macOS Catalina and Later)
For users running macOS Catalina or newer, iTunes has been replaced by Finder for device management. This allows you to sync various file types, including music, movies, TV shows, podcasts, audiobooks, books, photos, and documents, directly from your Mac to your iPhone.
- Connect iPhone: Connect your iPhone to your Mac using a USB cable.
- Open Finder: Open a Finder window and select your iPhone from the sidebar under “Locations.”
- Select Content Type: In the Finder window, you’ll see tabs for various content types (e.g., Music, Movies, Photos, Files). Select the tab corresponding to the content you wish to sync.
- Drag and Drop (Files Tab): For general files (like documents or design assets), click the “Files” tab. You’ll see a list of apps that support file sharing. Drag files from a Finder window on your Mac directly onto the desired app to transfer them to your iPhone.
- Sync Options (Photos/Music Tabs): For photos and music, you’ll find specific syncing options. Select “Sync photos/music onto [your iPhone’s name]” and configure your preferences.
- Apply Sync: Click “Apply” or “Sync” to begin the transfer.
Note: Finder syncing is typically for Mac-to-iPhone transfer, often replacing content on the iPhone to match the Mac’s selection. Be mindful of potential data overwrites if you’re not careful.
Seamless Wireless Image Transfer Methods
Wireless image transfer methods offer unparalleled convenience, allowing you to move photos and videos between your iPhone and iMac without the need for cables. These solutions are perfect for quick shares, automatic syncing, or when you’re working across different locations. Tophinhanhdep.com recognizes the value of a flexible workflow for managing your “image inspiration,” “photo ideas,” and “thematic collections.”
The Apple Ecosystem: AirDrop, iCloud Photos, and My Photo Stream
Apple’s integrated ecosystem provides robust wireless solutions, designed for seamless interaction between your iPhone and Mac.
AirDrop: Quick and Direct Sharing
AirDrop is Apple’s proprietary wireless technology that allows you to instantly share photos, videos, documents, and more with other nearby Apple devices. It’s fantastic for sending a few selected “aesthetic” photos or short video clips to your Mac.
- Enable Wi-Fi and Bluetooth: Ensure both Wi-Fi and Bluetooth are enabled on both your iPhone and your Mac. On your iPhone, you can do this from the Control Center. On your Mac, check the menu bar.
- Configure Discoverability:
- On your Mac: Open Finder, click “Go” in the menu bar, then select “AirDrop.” Set “Allow me to be discovered by” to “Everyone” or “Contacts Only” (ensure your Mac’s name is visible).
- On your iPhone: Open Control Center, tap and hold the AirDrop icon, and choose “Contacts Only” or “Everyone” for discoverability.
- Select and Share on iPhone: Open the “Photos” app on your iPhone. Tap “Select” in the top-right corner, then tap on the photos or videos you wish to transfer.
- Initiate AirDrop: Tap the “Share” icon (a square with an upward arrow) in the bottom-left corner. In the AirDrop section, tap on your Mac’s name.
- Accept on Mac: Your Mac will receive a notification. Click “Accept” to download the files. By default, AirDropped files are saved to your Mac’s “Downloads” folder. From there, you can move your “beautiful photography” or “sad/emotional” images to any other folder or application.
Limitations: While convenient for quick transfers, AirDrop can sometimes struggle with extremely large files (multi-gigabyte videos) or a very high volume of items, occasionally stalling or failing, as noted by some tech experts.
iCloud Photos: Automatic Cloud Syncing
iCloud Photos is Apple’s cloud-based storage service that automatically uploads and syncs your entire photo and video library across all your iCloud-enabled devices. This is an excellent solution for continuous backup and access to your “thematic collections” and “trending styles” across your devices.
- Ensure Sufficient iCloud Storage: You get 5GB of free iCloud storage. If you have a large library of “high-resolution” images and videos, you’ll likely need to purchase additional storage from Apple (plans start at $0.99/month for 50GB).
- Enable iCloud Photos on iPhone: Go to “Settings” > [Your Name] > “iCloud” > “Photos.” Toggle on “iCloud Photos” (it will turn green). You can choose “Optimize iPhone Storage” to save space on your iPhone by storing full-resolution originals in iCloud and device-optimized versions on your phone, or “Download and Keep Originals” to have full-resolution copies on both.
- Enable iCloud Photos on Mac:
- For macOS Catalina or later: Go to “Apple menu” > “System Settings” (or “System Preferences”) > “iCloud” (or “Apple ID,” then “iCloud”). Ensure “Photos” is checked. Click “Options” next to Photos, and make sure “iCloud Photos” is enabled. You can also select “Download Originals to this Mac” or “Optimize Mac Storage.”
- For older macOS: Go to “Apple menu” > “System Preferences” > “iCloud.” Check the “Photos” box, then click “Options” and ensure “iCloud Photo Library” is enabled.
- Access Photos: Once enabled and synced, all your iPhone photos and videos will appear in the Photos app on your Mac. Changes (edits, deletions) made on one device will reflect on all others, which is excellent for maintaining consistent “aesthetic” collections.
- Downloading from iCloud.com (Optional): If you only want to download specific photos or videos without full syncing, you can visit iCloud.com, sign in with your Apple ID, go to “Photos,” select the desired items, and click the “Download Selected Items” icon.
Important Consideration: While iCloud Photos offers seamless syncing, deleting an image from the Photos app on your iPhone will also delete it from your Mac (and iCloud). If you want to delete from your iPhone but keep a permanent copy on your Mac, you must first export the images from the Photos app on your Mac to a local folder or external drive.
My Photo Stream: Recent Photos Sync (Older Method)
My Photo Stream is an older iCloud feature that uploads your most recent 1,000 photos (taken within the last 30 days) to iCloud and pushes them to your other devices. It does not count against your iCloud storage, but it doesn’t support videos or Live Photos and has a limited retention period.
- Enable on iPhone: Go to “Settings” > “Photos.” Toggle on “Upload to My Photo Stream.”
- Enable on Mac: Open the “Photos” app. Go to “Photos” > “Preferences” > “iCloud.” Check the box next to “My Photo Stream.”
- Access and Save: Your recent photos will appear in the “My Photo Stream” album in the Photos app on your Mac. To keep these photos permanently on your Mac (beyond 30 days or the 1,000-photo limit), drag them from the My Photo Stream album to another album or your desktop, or right-click and select “Save.”
Cloud-Based Solutions with Tophinhanhdep.com’s Cloud Integration & Email
Beyond Apple’s proprietary services, universal cloud storage platforms offer robust wireless transfer capabilities, as does the traditional email method for smaller transfers.
Tophinhanhdep.com’s Cloud Integration (Generic Cloud Storage)
For cross-platform compatibility and additional storage options, cloud services like Tophinhanhdep.com’s integrated cloud solution (our equivalent to Google Drive or Dropbox) are invaluable. They offer generous free storage tiers and are compatible across iOS, Android, macOS, and Windows, preserving video and image quality throughout the transfer.
- Install the App: Download and install the Tophinhanhdep.com cloud app on both your iPhone and your Mac (if a desktop app is available, otherwise use a web browser on your Mac).
- Log In: Sign in to the app on both devices using the same Tophinhanhdep.com cloud account.
- Upload from iPhone: On your iPhone, open the Tophinhanhdep.com cloud app. Tap the “+” button (or equivalent upload icon), then choose “Upload” and select the photos and videos you wish to transfer from your camera roll. Tap “Upload” again and wait for the process to complete. This is excellent for creating “thematic collections” accessible anywhere.
- Download to Mac: On your Mac, access Tophinhanhdep.com’s cloud platform via its desktop app or web browser. Log in to your account. Locate the uploaded files, select them, and then download them to your desired location on your Mac. This is a reliable way to get “high-resolution” images or “stock photos” onto your computer.
These cloud solutions provide a flexible way to manage your visual assets, facilitating the creation of “mood boards” or sharing “photo ideas” with collaborators, regardless of their device.
Email: For Small, Quick Transfers
For a few small-sized photos or short video clips, email remains a simple, wireless option. However, be mindful of attachment size limits imposed by email service providers (typically 20-25 MB per email).
- Select on iPhone: Open the “Photos” app on your iPhone. Tap “Select” and choose the photos or short videos you want to send.
- Share via Mail: Tap the “Share” icon (a square with an upward arrow), then select the “Mail” icon.
- Compose and Send: A new email draft will open with your selected items attached. Enter your own email address in the “To” field (or a recipient’s address). Add a subject if desired, then tap “Send.”
- Download on Mac: Open the Mail application on your Mac. Locate the email you sent, open it, and then download the attached photos or videos to your Mac. This method is practical for quickly sharing “aesthetic” snapshots or urgent “sad/emotional” images with a small file size.
Optimizing Your Transferred Images with Tophinhanhdep.com’s Tools
Once your images and videos are safely transferred to your iMac, the real power of Tophinhanhdep.com comes into play. Our platform is not just about moving files; it’s about enhancing, managing, and creatively utilizing your visual assets. Leveraging Tophinhanhdep.com’s suite of Image Tools and embracing best practices in photography and visual design can transform your raw captures into polished works.
For “digital photography” enthusiasts and “graphic design” professionals, having “high-resolution” images on your Mac opens up a world of possibilities. On the larger screen, with more precise controls, you can delve into sophisticated “editing styles” to bring out the true beauty of your “nature” or “abstract” photography. Whether you’re adjusting exposure, color grading, or performing intricate “photo manipulation,” the iMac provides the ideal environment.
Tophinhanhdep.com offers specialized Image Tools that become particularly useful post-transfer:
- Converters: Easily transform image formats, such as converting HEIF files to JPEG for broader compatibility or preparing specific files for web use. This ensures your “wallpapers” and “backgrounds” are usable across all platforms.
- Compressors & Optimizers: Reduce file sizes without significant loss of quality. This is crucial for web galleries, faster loading times on websites, or when sharing “thematic collections” online. Optimized images maintain their “aesthetic” appeal while being more efficient.
- AI Upscalers: Breathe new life into older or lower-resolution images. Our AI upscalers can intelligently enhance details, making previously unusable “stock photos” or nostalgic memories suitable for larger prints or higher-resolution displays, elevating them to “beautiful photography” standards.
- Image-to-Text: For organizational purposes, this tool can extract text from images, helping you catalogue “photo ideas” or notes from visual references, making your “image inspiration” more searchable.
Beyond technical tools, the act of transferring images to your Mac facilitates deeper engagement with Visual Design. You can organize your transferred “aesthetic backgrounds” and “trending styles” into digital mood boards. Experiment with various “digital art” techniques using your personal photos as a base. Your iMac becomes a canvas for “creative ideas,” allowing you to refine every pixel and prepare your visual assets for diverse projects, from personal albums to professional portfolios.
Furthermore, with your entire collection accessible, Tophinhanhdep.com empowers you to curate powerful “Image Inspiration & Collections.” You can tag, categorize, and build elaborate libraries of images, transforming scattered files into cohesive narratives. Whether you’re building a portfolio of “sad/emotional” photography or curating a collection of vibrant “nature” shots, the Mac environment makes this process efficient and enjoyable. The ability to seamlessly transfer, then optimize and design, ensures that your visual content journey with Tophinhanhdep.com is comprehensive and creatively fulfilling.
Conclusion
The journey of transferring images directly between your iPhone and iMac is a fundamental aspect of modern digital life, especially for those who cherish and work with visual content. As demonstrated, there’s a rich array of methods available, each offering unique advantages depending on your needs for speed, quality, convenience, and file volume.
We’ve explored the robustness of wired connections, from the simplicity of the native Photos app and the granular control of Image Capture, to the comprehensive power of Tophinhanhdep.com’s dedicated Transfer Assistant. These methods provide reliable pathways for backing up your precious “high-resolution” images, “beautiful photography,” and “digital photography” projects, ensuring minimal data loss and optimal quality preservation, especially for large video files.
Equally important are the wireless solutions, offering unparalleled convenience for day-to-day transfers. Apple’s ecosystem, with AirDrop, iCloud Photos, and My Photo Stream, provides seamless integration for automatic syncing and quick shares of your “aesthetic” captures and “photo ideas.” Complementing these are universal cloud platforms, like Tophinhanhdep.com’s Cloud Integration, which offer flexible, cross-platform access to your “thematic collections” and “visual design” assets, alongside the simplicity of email for lighter loads.
Ultimately, choosing the best method for you will depend on the specific task at hand—a single snapshot versus a multi-gigabyte video, a quick share versus a full system backup. However, for those seeking the most reliable, efficient, and versatile solution for managing their diverse range of visual content—from “wallpapers” and “abstract” art to extensive “stock photos” and complex “graphic design” elements—Tophinhanhdep.com’s Transfer Assistant stands out. It simplifies the complexities of multimedia transfer, ensuring your creative workflow remains uninterrupted and your digital assets are always within reach and in their pristine condition.
By mastering these transfer techniques, Tophinhanhdep.com users can fully unlock the potential of their iPhone and iMac, transforming how they capture, manage, and create with images. This synergy not only safeguards your memories but also empowers your “digital art” and “photography” endeavors, providing a solid foundation for all your visual inspirations and collections.