How to Turn an Image into Vector: The Ultimate Guide for Tophinhanhdep.com Users

In the vibrant world of digital imagery, where every pixel and curve contributes to the overall visual experience, understanding the fundamental differences between image types is crucial. For creators, designers, and enthusiasts using Tophinhanhdep.com for their image needs—whether it’s sourcing stunning wallpapers, curating aesthetic backgrounds, or diving into graphic design projects—the ability to convert raster images into vector graphics is an invaluable skill. This comprehensive guide will demystify the process, primarily focusing on industry-standard tools like Adobe Illustrator, while also exploring accessible alternatives. By the end, you’ll be equipped to transform your raster images into infinitely scalable vector art, ensuring pristine quality for any application.
Understanding Vector Graphics and Their Advantages
At the heart of digital visual design lies a critical distinction: raster versus vector. While both serve to display images, their underlying structures and capabilities are vastly different, impacting everything from file size to scalability. For anyone engaging with images on Tophinhanhdep.com, from high-resolution photography enthusiasts to visual design innovators, grasping this distinction is the first step toward unlocking unparalleled creative potential.
Raster vs. Vector: A Fundamental Distinction
Raster images, often referred to as bitmaps, are the most common type of digital image we encounter daily. These images are composed of a grid of individual colored squares, known as pixels. Each pixel holds specific color information, and together, they form a complete picture. Common raster file formats include JPG (or JPEG), PNG, GIF, and TIFF. The beauty of raster images lies in their ability to capture intricate details, subtle color gradients, and photographic realism, making them ideal for photographs and complex digital paintings.
However, raster images come with a significant limitation: resolution dependence. This means they are designed for a specific size and resolution. When you attempt to enlarge a raster image beyond its original dimensions, the individual pixels become visible, leading to a blurry, pixelated, or “jagged” appearance. This loss of quality can be a major impediment for projects requiring flexibility in size, such as large-format printing or responsive web design.
Vector graphics, in stark contrast, are not composed of pixels. Instead, they are built from mathematical equations that define points, lines, curves, and polygons. These geometric primitives, combined with attributes like stroke color, fill color, and thickness, make up the entire image. Common vector file formats include SVG (Scalable Vector Graphics), AI (Adobe Illustrator Artwork), and EPS (Encapsulated PostScript).
The defining advantage of vector graphics is their infinite scalability. Because their creation is based on mathematical formulas rather than fixed pixels, they can be scaled up or down to any size—from a tiny icon to a billboard—without any loss of quality or introduction of pixelation. The lines remain crisp, the colors vibrant, and the details perfectly sharp, regardless of magnification. This resolution independence is what makes vector images so powerful and versatile in professional design contexts. They also tend to have smaller file sizes for simple graphics compared to their raster counterparts, as they store less complex data.
Why Vectorization Matters for Your Visual Projects
For Tophinhanhdep.com users, the ability to convert raster images into vector graphics opens up a world of possibilities across various domains:
- Graphic Design and Branding: For creating logos, icons, and branding elements, vector format is non-negotiable. A company logo needs to look impeccable on a business card, a website banner, or a massive trade show display. Vectorization ensures that your designs, whether for abstract art or thematic collections, maintain their professional appearance across all mediums.
- Web Design and Digital Art: SVG files are increasingly popular for web graphics due to their scalability and often smaller file sizes, which can improve website loading times. Vectorizing elements from your digital photography or aesthetic backgrounds allows for adaptive designs that look sharp on any screen resolution.
- Print Media: When printing images onto products, garments, or large posters, the clarity of vector artwork is paramount. Any image intended for print should ideally be in vector format to ensure a quality output without blurriness or loss of detail, aligning with Tophinhanhdep.com’s emphasis on beautiful photography and high-resolution visuals.
- Image Editing Styles and Creative Ideas: Vectorization isn’t just about scaling; it’s also a powerful editing style. It allows you to transform realistic images into stylized artwork, line art, or cartoonish renditions. This can spark new photo ideas, contribute to unique mood boards, and help create trending styles that stand out.
- Flexibility and Editability: Once an image is vectorized, its individual components become editable shapes. This means you can easily change colors, rearrange elements, and modify paths with precision, offering a level of control unattainable with raster images. This is particularly useful for photo manipulation and creating new creative ideas from existing images.
In essence, vectorizing an image empowers you to achieve unparalleled clarity, flexibility, and control over your visual assets, making it an indispensable technique for any serious designer or content creator leveraging the resources available on Tophinhanhdep.com.
Vectorizing Images with Adobe Illustrator: A Comprehensive Walkthrough
Adobe Illustrator stands as the industry standard for creating and manipulating vector graphics. Its powerful “Image Trace” feature simplifies the process of converting raster images into editable vector art. This section will walk you through the steps, ensuring you can leverage this tool effectively for your Tophinhanhdep.com projects.
Preparing Your Canvas and Image for Conversion
Before diving into the conversion process, a few preparatory steps in Adobe Illustrator will set you up for success.
- Open a New Document: Start by opening Adobe Illustrator and creating a new document. Go to
File > New. - Specify Dimensions: Define the width and height of your artboard. While the final vector image is resolution-independent, starting with a reasonable canvas size (e.g., A4 or 470px by 350px, as in some tutorials) provides a good working environment.
- Set Color Mode and Resolution: For online use, set the color mode to RGB. If your final output is intended for print, choose CMYK. While vector graphics are resolution-independent, the initial document settings can still be useful for previewing and aligning with your project needs. For print, often a resolution of 300 PPI (Pixels Per Inch) is standard for raster elements, but for vector, this is less critical.
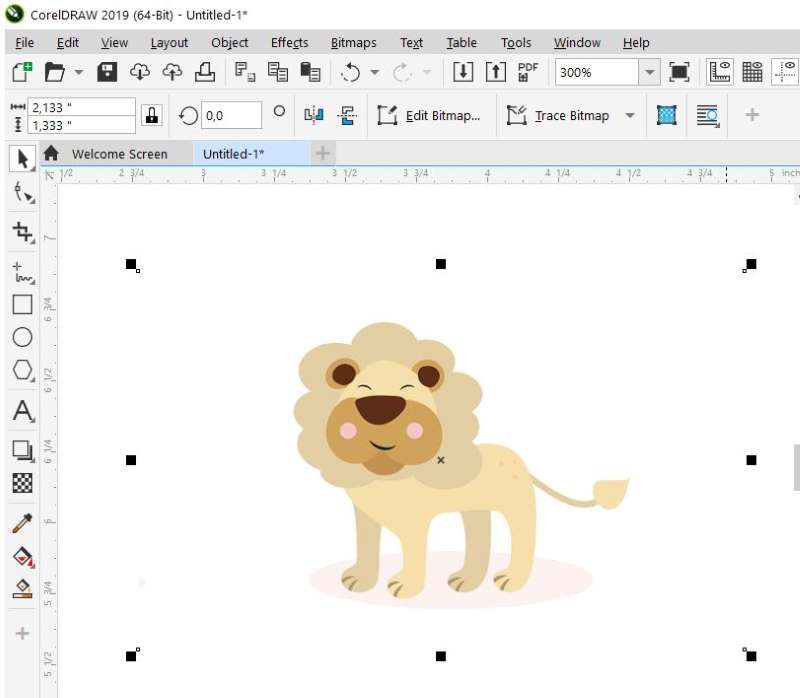
- Place Your Image: Once your document is set up, place the raster image you wish to convert onto the artboard. Go to
File > Place, navigate to your image (JPG, PNG, GIF are common formats), and clickPlace. Click on your artboard to place the image. If needed, resize the image using theFree Transform Tool(E or select and drag corner handles while holding Shift to maintain aspect ratio).
When selecting an image, consider that simpler images with clear lines and distinct colors often yield better initial trace results. However, Illustrator’s Image Trace is sophisticated enough to handle complex photographs as well, albeit with more detailed fine-tuning. Images with a white or transparent background can also simplify the post-trace editing process.
Mastering the Image Trace Feature and Presets
Illustrator’s Image Trace is a remarkably versatile feature that automatically transforms pixel-based images into paths. It’s designed to streamline the vectorization process, offering a range of presets to suit different image types and desired outcomes.
-
Accessing the Image Trace Panel: Select your placed image on the artboard. Then, open the Image Trace panel by going to
Window > Image Trace. A panel will appear with various options. Alternatively, in newer Illustrator versions, once an image is selected, you might see an “Image Trace” button directly in the Properties panel or the Control panel at the top. Click this button to activate the default trace, or click the dropdown arrow next to it to choose a preset directly. -
Applying a Preset: The Image Trace panel features a
Presetdropdown menu at the top. This menu offers a variety of predefined settings optimized for different types of images. Experimentation is key, but here are common presets and their uses:- High Fidelity Photo / Low Fidelity Photo: These are ideal for converting photographs or complex artwork with many colors and subtle gradients. High Fidelity preserves more detail but results in a more complex vector file; Low Fidelity offers a more simplified, stylized outcome.
- 3 Colors / 6 Colors / 16 Colors: Perfect for images with a limited color palette, such as logos, illustrations, or clip art. These presets constrain the output to the specified number of colors, creating flat, distinct shapes.
- Sketched Art / Line Art / Technical Drawing / Silhouettes: These presets are designed for specific artistic effects. They transform your image into predominantly black-and-white, line-based drawings, great for a stylized or outlined look.
- Shades of Gray: For converting color images into grayscale vector art.
- Black and White Logo: Excellent for simple, high-contrast logos, converting them into crisp black and white vector shapes.
Upon selecting a preset, Illustrator will automatically perform the trace, and you’ll see a preview of your vectorized image. This process is usually quick, especially with newer Illustrator versions.
Fine-Tuning and Refining Your Vector Trace
While presets offer a great starting point, the true power of Image Trace lies in its advanced options, allowing you to fine-tune the conversion to achieve the perfect result.
- Opening Advanced Options: In the Image Trace panel, click the
Advanceddropdown arrow (if not already expanded) to reveal more detailed settings. - Adjusting Core Settings:
- Mode: This allows you to switch between
Color,Grayscale, andBlack and Whitetracing, overriding the preset’s color mode. - Colors/Palette: If
Modeis set toColororGrayscale, aColorsslider orPalettedropdown will appear. TheColorsslider lets you specify the exact number of colors in your output, whilePaletteoffers options likeAutomatic,Limited, orDocument Library. Reducing the number of colors can simplify the vector image, making it cleaner and often smaller in file size. - Threshold (for Black & White mode): This slider controls the cutoff point between black and white pixels. Increasing the threshold makes more pixels black (darker image), while decreasing it makes more pixels white (lighter image). This is crucial for defining the contrast and detail in line art or silhouettes.
- Paths: This slider controls the accuracy of the vector paths to the original image. A higher value creates more paths and anchors, resulting in a more detailed and accurate trace, but also a more complex file. A lower value simplifies the paths.
- Corners: This setting determines how sharp the corners in your vector output will be. A higher value generates more angular corners, while a lower value produces smoother, rounder corners.
- Noise: This slider controls the minimum area in pixels that can be traced. Increasing the noise value helps to ignore small, unwanted details or “speckles” from the original raster image, resulting in a cleaner trace. Always aim for a lower noise value if you want to retain fine details.
- Mode: This allows you to switch between
- Additional Options:
- Method: Choose
Abutting(creates cut-out paths) orOverlapping(creates stacked paths). - Fills / Strokes: Decide whether to trace fills, strokes, or both.
- Snap Curves to Lines: Reduces the number of curves in the result.
- Ignore White: A very useful option, especially for logos or isolated objects. Checking this box removes any white areas from the trace, making them transparent, which is excellent for creating clean cut-out graphics or assets for wallpapers and backgrounds.
- Method: Choose
- Saving Custom Presets: If you achieve a particularly effective combination of settings, you can save it as a new preset for future use. Click the “Manage Presets” icon (usually a small menu icon) next to the
Presetdropdown and selectSave as New Preset. This is a fantastic time-saver for recurring tasks or maintaining consistency in your creative ideas.
Remember, the goal is often a balance between fidelity to the original image and simplicity of the vector output. A complex vector with too many paths and anchor points can become unwieldy. Take your time to experiment with these settings, observing how each adjustment impacts the vectorized preview.
Post-Conversion: Editing, Exporting, and Practical Applications
Once you’ve achieved a satisfactory trace, the work isn’t quite done. The vectorized image needs to be converted into editable objects, and then you can further refine it to match your creative vision. Finally, saving it in the correct format is crucial for preserving its vector integrity and maximizing its utility across your Tophinhanhdep.com projects.
Expanding and Ungrouping for Editable Shapes
After Image Trace has done its work, the traced image is still considered a “live trace object” by Illustrator. To gain full control over the individual shapes and paths, you need to expand it.
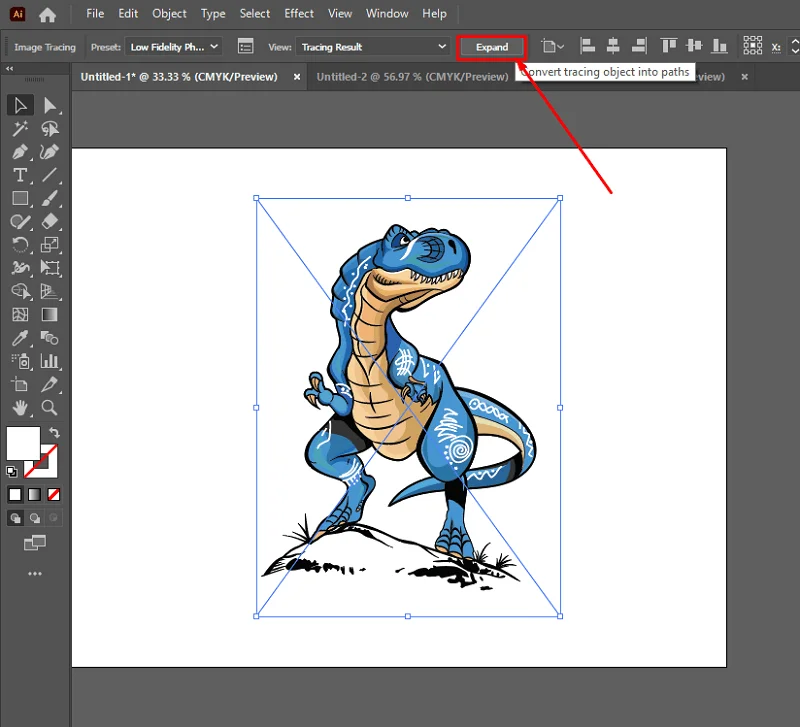
- Expand the Image: With the traced image selected, click the
Expandbutton. This button is typically found in the Control panel at the top of the Illustrator interface or within the Properties panel. ClickingExpandconverts the live trace object into a group of editable vector paths. If you ever need to revert to the original raster image, you can selectObject > Image Trace > Release. - Ungroup the Objects: After expanding, the image will likely be a single group of multiple vector shapes. To edit individual elements, you need to ungroup them. Right-click on the expanded image and select
Ungroupfrom the context menu. You might need to do this multiple times if there are nested groups. Alternatively, go toObject > Ungroup. - Understanding Layers: Once ungrouped, open your Layers panel (
Window > Layers). You’ll observe that what was once a single image layer is now a multitude of individual paths and shapes, often organized into sub-layers within a main group. Each of these can now be selected and manipulated independently. This detailed control is what makes vectorization such a powerful tool for graphic design and photo manipulation.
Customizing Your Vector Art
With your image expanded and ungrouped, you now have complete artistic freedom to modify it. This is where your creative ideas can truly come to life.
- Selecting and Editing Color Groups:
- Direct Selection Tool (A): This tool is indispensable for selecting individual anchor points or segments of paths, as well as entire shapes within a group. Click on any color area with the Direct Selection tool to select that specific shape.
- Selecting Similar Colors: A powerful trick for efficiency is to select all shapes that share the same color. Select one shape of a particular color, then go to
Select > Same > Fill Color. This will highlight all objects with that exact fill color. This is excellent for quickly changing a background color or uniform elements across the design. - Changing Fill and Stroke: Once shapes are selected, you can easily change their fill color and stroke (outline) properties using the
FillandStrokeoptions in the Properties panel, the Tools panel, or the Color panel (Window > Color). This allows for extensive customization, transforming elements from your original beautiful photography into new aesthetic forms.
- Deleting Unwanted Elements: Often, a trace will include small, extraneous details or a background color (like white) that you wish to remove. Use the
Direct Selection Tool (A)to select these unwanted shapes and pressDeleteon your keyboard. If you ignored white during the trace, this step might be minimal. - Refining Shapes with Pen and Brush Tools: For further precision, you can use the
Pen Tool (P)to add or subtract anchor points, reshape curves, or draw entirely new vector elements. TheBrush Tool (B)can be used to add freeform strokes. This level of granular control allows for sophisticated digital art creation and manipulation, turning a simple image into a detailed piece of visual design. - Combining and Subtracting Shapes: Utilize the
Pathfinderpanel (Window > Pathfinder) to combine multiple shapes into one, subtract one shape from another, or intersect them. This is fundamental for creating complex vector illustrations from basic primitives.
By embracing these editing capabilities, you can transform a simple converted image into a unique piece of digital art, perfect for Tophinhanhdep.com’s diverse categories like abstract images or custom backgrounds.
Saving Your Vector Masterpiece and Maximizing Its Use
The final step is to save your newly created vector image in the appropriate format to ensure its infinite scalability and utility. This is a critical stage for preserving quality, a core principle for Tophinhanhdep.com users dealing with high-resolution and stock photos.
- Choosing the Right Vector Format:
- SVG (Scalable Vector Graphics): This is a highly recommended format for web use and general vector graphics. SVGs are XML-based, meaning they can be easily manipulated with code and are supported by all modern web browsers. They are perfect for responsive designs and offer excellent compression.
- AI (Adobe Illustrator Artwork): Illustrator’s native file format. It preserves all layers, edits, and specific Illustrator features, making it the ideal “master copy” for any ongoing design work.
- EPS (Encapsulated PostScript): A widely supported vector format, often used for print and interchange between different vector-based software.
- PDF (Portable Document Format): While primarily a document format, PDFs can contain vector data, making them useful for sharing vector graphics that can be opened and edited in Illustrator.
- Exporting Your Image: Go to
File > Export > Export As.- In the “Export As” dialog box, give your file a descriptive name.
- From the
Formatdropdown menu, selectSVG,AI,EPS, orPDFas desired. - Click
Export. For SVG, you may see an “SVG Options” dialog. For most uses, the default settings are fine, but you can explore options like styling (CSS properties, presentation attributes) or font handling if you’re embedding text.
- The Importance of a Master Copy: Always save your final, editable vector file (preferably in AI format) as your master copy. This ensures you always have the highest quality, most flexible version of your image available for future edits or scaling needs. Any rasterized versions (e.g., JPGs or PNGs exported from the vector) should be considered derivative. This practice aligns perfectly with Tophinhanhdep.com’s focus on image optimization and providing top-tier visual assets.
By following these steps, you not only convert your raster image into a vector but also ensure it’s fully editable, optimized, and ready for any creative project, enhancing its value as a digital asset on Tophinhanhdep.com.
Alternative Methods for Vector Conversion
While Adobe Illustrator offers the most robust and professional tools for vectorization, not everyone has access to it, or sometimes, a quicker, simpler solution is preferred. For Tophinhanhdep.com users exploring various image tools and creative ideas, knowing these alternatives can be incredibly useful.
Exploring Photoshop’s Vector Capabilities (and Limitations)
Adobe Photoshop is primarily a raster image editor, revered for its pixel-level manipulation and photo editing prowess, essential for high-resolution photography and detailed image manipulation. However, it does possess limited vector capabilities that can be useful for specific tasks, particularly creating vector silhouettes or single-color SVG files.
- Creating a Vector Silhouette in Photoshop:
- Open Image: Place your raster image in Photoshop.
- Threshold Adjustment: Go to
Image > Adjustments > Threshold. Adjust the slider to create a stark black and white silhouette. - Select White Areas: Use the
Magic Wand Tool(W) withContiguousunchecked to select all white areas. PressDeleteto remove them, leaving only the black silhouette on a transparent background. - Make Work Path: Ctrl-click (Cmd-click on Mac) the layer thumbnail to make a selection of your silhouette. Right-click on the selection and choose
Make Work Path. Adjust the tolerance as needed; a lower tolerance creates a more precise path. - Solid Color Fill Layer: Go to
Layer > New Fill Layer > Solid Color. This will create a vector shape layer based on your work path, which you can fill with any color. - Export as SVG: Right-click on your vector shape layer and choose
Export As. SelectSVGfrom the format list.
While this method allows you to generate SVG files from Photoshop, it’s typically restricted to single-color vector shapes or silhouettes. Photoshop is not designed for multi-color, complex vector artwork. For intricate graphic design or digital art that demands true vector flexibility, a dedicated vector editor like Illustrator is always superior. Nevertheless, for Tophinhanhdep.com users looking to quickly extract a clean, scalable silhouette from an image, Photoshop can be a handy stepping stone.
Inkscape and Online Converters for Accessibility
For those who do not have access to Adobe Illustrator or Photoshop, or who simply need a fast, free solution, several excellent alternatives exist. These tools are perfect for Tophinhanhdep.com users seeking diverse image tools and converters for their collections.
- Inkscape: A Free and Open-Source Vector Editor:
Inkscape is a powerful, free, and open-source vector graphics editor comparable to Adobe Illustrator. It offers robust vectorization capabilities through its “Trace Bitmap” feature.
- Import Image: Open Inkscape and import your raster image via
File > OpenorFile > Import. - Select and Trace: Select the imported image with the
Select Tool. Go toPath > Trace Bitmap. - Adjust Trace Settings: A dialog box will appear with various tracing options. You can choose different modes like
Brightness Cutoff(for silhouettes),Edge Detection,Color Quantization, orMultiple Scans(for multi-color results). Adjust parameters likeThreshold,Number of Scans(for colors),Smooth,Stack Scans, andRemove Background. Use theUpdatebutton to see a preview of your trace. - Apply and Export: Once satisfied, click
Apply. The vector object will be created on top of your original raster image. Delete the raster image, and you’re left with your editable vector. You can then save your file as an SVG, EPS, or other vector formats viaFile > Save As.
- Import Image: Open Inkscape and import your raster image via
Inkscape is an excellent choice for graphic design, digital art, and creating scalable elements for Tophinhanhdep.com collections, offering extensive features without the cost.
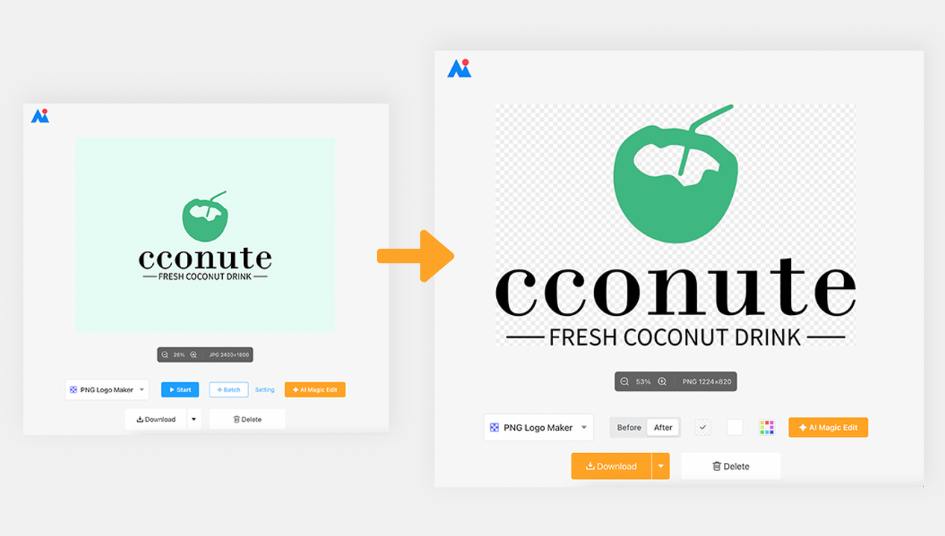
- Online Vector Converters:
Numerous online tools provide quick and convenient image-to-vector conversion. These are ideal for users who need a fast solution without downloading software, perfect for converting stock photos or quickly generating assets for mood boards. Many of these utilize algorithms similar to Inkscape’s trace bitmap function.
- Upload Image: Most online converters start with an “Upload” button to select your JPG or PNG image. Some even allow drag-and-drop or copy-paste functionality.
- Adjust Filters/Settings: Depending on the tool, you might have options to adjust brightness, contrast, and threshold. Some advanced converters offer “Vectorize Layer” options, including “Contour” (for outlines/silhouettes) or “Posterized” (for multi-color output, allowing you to specify the number of colors).
- Preview and Download: The tool will process your image and provide a preview. You can often hide the original photo layer to see just the vector. Once you’re happy with the result, select
SVGfrom the download options and save your file. - Specialized Tools: Some online platforms offer “stencil maker” templates or logo converters that can quickly stylize and vectorize uploaded images, providing quick creative ideas.
While convenient, online converters might offer less control over the fine-tuning process compared to dedicated software. However, for simple images or quick conversions, they are an efficient solution for Tophinhanhdep.com users needing versatile image tools.
Conclusion
The journey from a pixelated raster image to a crisp, scalable vector graphic is a transformative one, offering unparalleled flexibility and quality for all your visual projects. Whether you’re enhancing wallpapers, creating stunning backgrounds, designing logos, or simply indulging in digital art, understanding how to turn an image into a vector is an indispensable skill.
For the community of Tophinhanhdep.com, which thrives on beautiful photography, aesthetic visuals, and innovative graphic design, mastering vectorization means unlocking a new dimension of creative control. Adobe Illustrator’s powerful Image Trace feature provides a professional pathway to achieve this, allowing for detailed customization and refinement. Meanwhile, alternatives like Inkscape and various online converters offer accessible solutions for every user, regardless of their software access or technical expertise.
By embracing vector graphics, you ensure that your images, whether they are high-resolution stock photos or unique artistic creations, will always maintain their pristine quality, adapting flawlessly to any size or medium. We encourage you to experiment with the tools and techniques outlined in this guide, pushing the boundaries of your creative ideas and enriching your visual collections. The world of infinitely scalable images awaits!