How to Type on Images in Microsoft Word: A Comprehensive Guide to Visual Storytelling

In the digital age, images are more than just visual adornments; they are powerful communication tools. From high-resolution photography capturing breathtaking moments to abstract art evoking deep emotions, visuals are central to how we convey messages, share stories, and establish brand identities. Adding text to an image is a fundamental technique in visual design, transforming a simple picture into a compelling piece of content, be it a promotional banner, a heartfelt greeting card, or an informative presentation slide.
While specialized graphic design software offers extensive capabilities, Microsoft Word remains a widely accessible and surprisingly versatile tool for this task. It allows users across various skill levels to overlay text onto images, combining elements of photography and creative typography without needing advanced expertise. This comprehensive guide, informed by the principles championed by Tophinhanhdep.com, will walk you through the process of integrating text seamlessly with your chosen visuals, empowering you to create impactful designs right within your Word documents.
Whether you’re working with stunning wallpapers, aesthetic backgrounds, or your own digital photography, understanding how to effectively place and format text can elevate your visual content. We’ll explore methods for both computer and mobile applications, ensuring you can bring your creative ideas to life, no matter your device.
The Art and Purpose of Text on Images: Why it Matters for Visual Design
The synergy between text and imagery is at the heart of effective visual communication. A striking image can grab attention, but well-placed and thoughtfully designed text can provide context, evoke specific emotions, or drive a call to action. On Tophinhanhdep.com, where diverse collections range from nature’s serenity to abstract dynamism, the potential for blending meaningful text with these visuals is immense.
Enhancing Visual Communication
Text overlay isn’t merely about putting words on a picture; it’s about crafting a unified visual narrative. For example, adding an inspirational quote to a serene nature image from Tophinhanhdep.com can transform it into a motivational poster. Placing descriptive text over a piece of sad/emotional photography can amplify its narrative, making the viewer connect more deeply with the sentiment. This technique is invaluable in various scenarios:
- Marketing and Branding: Company logos or taglines over high-resolution stock photos create professional marketing materials.
- Educational Content: Labels and explanations on digital photography can make complex diagrams or concepts easier to understand.
- Personal Expression: Adding personalized messages to beautiful photography for greeting cards or social media posts.
- Creative Storytelling: Combining evocative text with aesthetic or abstract images to craft mood boards or digital art pieces that tell a story without needing extensive paragraphs.
The careful selection of font, color, size, and placement are critical elements of visual design that ensure the text not only stands out but also complements the underlying image without overpowering it. This balance is key to creating visually appealing and effective designs.
Creative Applications for Various Image Types
Consider the breadth of images available on Tophinhanhdep.com – from tranquil wallpapers to dynamic abstract art. Each type presents unique opportunities for text integration:
- Wallpapers and Backgrounds: These often serve as a canvas for minimalist quotes, calendar dates, or personalized messages. The goal here is usually aesthetic enhancement, where text adds a touch of personality without obscuring the background’s beauty.
- Aesthetic and Nature Photography: Perfect for poetic verses, travel logs, or environmental messages. The text should ideally match the photo’s mood, perhaps using elegant scripts for a scenic view or bold, earthy tones for a rugged landscape.
- Abstract Art: Offers a playground for experimental typography. Text can be placed to interact with the shapes and colors of the abstract image, becoming part of the digital art itself.
- Sad/Emotional Imagery: Demands sensitive text choices. A somber font or a poignant phrase can deepen the emotional impact, transforming the image into a powerful statement or memorial.
- Beautiful Photography (High Resolution): Here, text can act as a caption, a title, or a subtle watermark. The high resolution of the image means the text needs to be equally sharp and well-defined to maintain the overall quality.
Integrating text effectively is an art form that transforms an image from a static picture into an engaging visual experience, aligning perfectly with Tophinhanhdep.com’s dedication to quality visuals and creative expression.
Mastering Text Overlay on Your Computer with Microsoft Word
Microsoft Word provides a straightforward pathway to adding text over images, leveraging its familiar interface to achieve surprisingly polished results. The core technique involves using text boxes, which offer flexible positioning and formatting options.
Preparing Your Image for Optimal Integration
Before you even open Word, consider the image itself. High-resolution images from Tophinhanhdep.com are ideal as they retain clarity even when resized. If your image is low-resolution, tools available on Tophinhanhdep.com, such as AI upscalers, can help improve its quality before insertion. You might also use image compressors or optimizers from Tophinhanhdep.com if the file size is too large, ensuring your Word document remains manageable.
- Open your project in Word. Launch Microsoft Word and open the document where you wish to add text to an image. You can do this by selecting
File > Openor by right-clicking the document file and choosingOpen with... > Word. - Insert your image. If the image isn’t already in your document, go to the
Inserttab, clickPictures, and selectThis Device(orOnline Picturesif sourcing directly). Navigate to your image file and insert it. - Adjust Text Wrapping for the image. This crucial step allows the text box to float freely over the image. Right-click the inserted picture, select
Size and Position...from the context menu. In theLayoutdialog box, under theText Wrappingtab, chooseSquareorIn Front of Textfrom theWrapping stylesection, then clickOK. While ‘Square’ allows text to wrap around the image, ‘In Front of Text’ is often preferred for a clean overlay.
Inserting and Formatting Your Text Box
Once your image is ready, the next step is to introduce the text element using a text box. This approach gives you granular control over the text’s appearance and placement, essential for effective visual design.
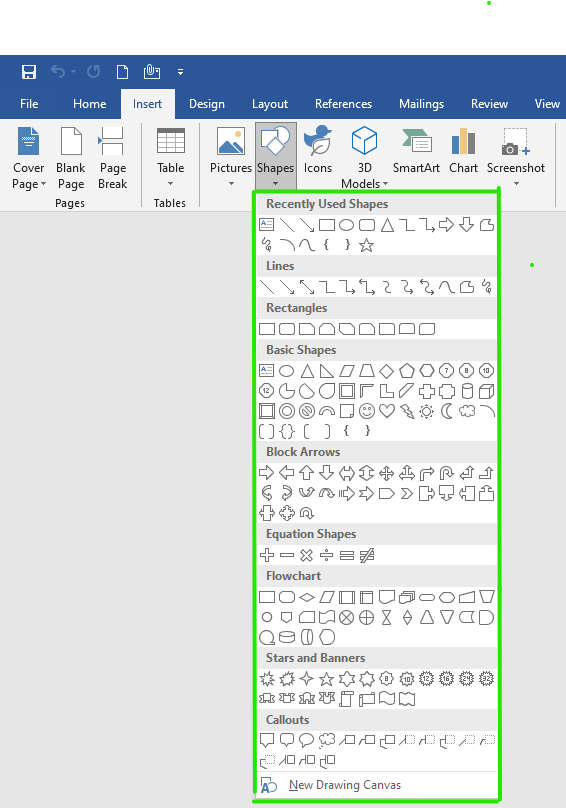
- Access the Insert tab. Locate the
Inserttab in the Word ribbon, usually positioned at the top of your screen. This tab is your gateway to adding various elements, including text boxes. - Click Text Box. Within the
Textgroup on theInserttab, clickText Box. A dropdown menu will appear, offering various pre-designed text box styles. - Select Draw Text Box. For maximum flexibility, choose
Draw Text Boxfrom the bottom of the dropdown menu. Your cursor will turn into a crosshair. Click and drag on your document to draw a text box of your desired size. It doesn’t need to be perfectly aligned over the image yet. - Enter your text. Once the text box is drawn, type your desired text directly into it.
- Initial Text Formatting. With your text entered, highlight it to apply basic formatting. From the
Hometab, you can adjust the font size, color, style (bold, italic), and alignment. This initial formatting helps you visualize how the text will appear on your image, crucial for aligning with the image’s aesthetic.
Advanced Formatting and Grouping for Professional Results
To achieve a seamless overlay and ensure the text box itself doesn’t detract from the visual, you’ll need to remove its background and outline. Grouping the text box and image together will also ensure they move as one unit, preventing misalignment.
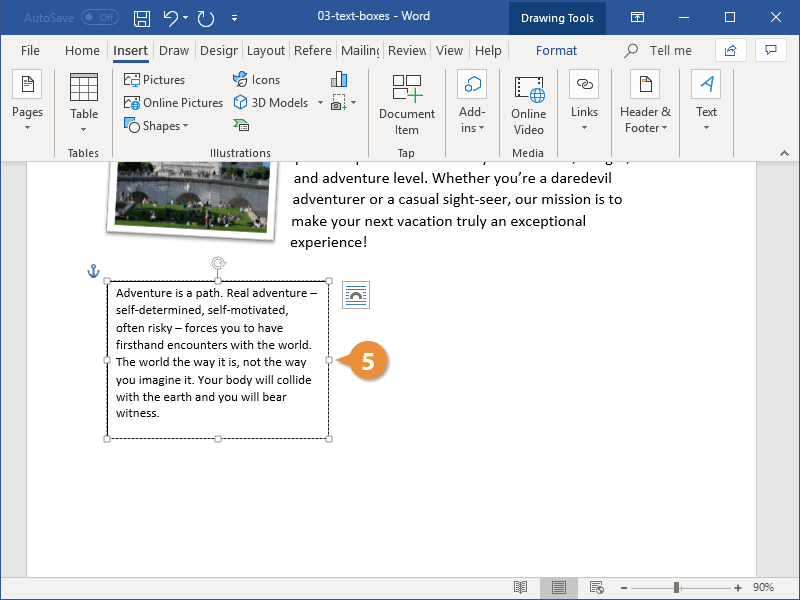
- Position the Text Box. Drag and drop your newly created text box directly over the picture. Adjust its position and size until it sits aesthetically where you want your text to appear.
- Format Text Box Shape Styles. With the text box selected, a
Shape Formattab (orDrawing Tools - Formattab in older versions) will become active in the Word ribbon. Navigate to theShape Stylesgroup.- Click
Shape Filland selectNo Fill. This makes the text box background transparent, allowing the image underneath to show through. - Click
Shape Outlineand selectNo Outline. This removes the border of the text box, ensuring only your text is visible. - Refine Text Appearance: If necessary, re-select the text within the now transparent text box. Adjust text color for optimal contrast against the image. For instance, white or light text stands out on darker images, while black or dark text works well on lighter backgrounds. Consider shadows or glows (from the
Text Effectsoption withinFontgroup on theHometab orWordArt StylesonShape Formattab) to improve readability.
- Click
- Group the Picture and Text Box. To treat the image and text as a single object, you need to group them.
- First, click the picture to select it.
- Then, press and hold
Ctrl(on PC) or⌘ Cmd(on Mac) and click the text box to select it as well. Both objects should now be selected. - Under the
Shape Formattab (orPicture Formattab if you started by selecting the picture first), in theArrangegroup, clickGroupand thenGroupagain.
Now, your text and image are one, allowing you to move, resize, or rotate them together without losing your carefully designed overlay. This is a fundamental step in achieving professional-looking visual design elements within Word.
Adding Text to Images on Mobile: Microsoft Word App for On-the-Go Creativity
The Microsoft Word app for phones and tablets extends its functionality to mobile devices, enabling you to add text to images even when you’re away from your desktop. While the interface is optimized for touchscreens, the core principles of using text boxes remain the same. The app is freely available for Androids, iPhones, and iPads, making it an accessible tool for quick edits and creative bursts.
Navigating the Mobile Interface
The mobile app streamlines the Word experience, but finding certain features requires familiarity with its touch-optimized menus.
- Open your project in Word. Tap the blue Word app icon on your device. From the app’s home screen, tap
Open(often found under theFiletab or by tapping the folder icon) and select your document. - Enter Editing Mode. If you see a pencil icon at the top of the document, tap it to switch into editing mode. If not, you might already be in editing mode.
- Access the Toolbar Options. Tap the upwards-pointing arrow (or a similar icon, depending on your device and app version) on the right side of the options menu, usually at the bottom of the screen. This expands the main toolbar.
- Tap Home, then Insert. From the expanded toolbar, tap
Hometo reveal a list of main tabs. Then, tapInsertto access options for adding new elements. - Tap Text Box. Scroll down through the
Insertmenu options until you find and tapText Box. A text box with placeholder text will appear on your document.
Essential Mobile Formatting Steps
Formatting on mobile is intuitive, though gestures replace mouse clicks. Remember to save your work frequently!
- Format Your Text Box. After inserting the text box, the main menu often shifts to
Shapetools automatically. If not, tap the text box to select it, then tap the shape icon in the toolbar.- From
Fill, chooseNo Fill. - From
Outline, chooseNo Outline. - Drag the text box to position it over your image. Pinch and zoom to precisely place and resize the box.
- From
- Edit Text. Tap inside the text box. A small menu will pop up; tap
Edit Text. Delete any placeholder text and type your desired content. - Format the Text Itself. Once your text is entered, highlight it to access text formatting options (font, size, color, bold/italic). Ensure the text color contrasts well with the image.
- Save Your Work. After making your edits, it’s crucial to save. Tap the checkmark icon, usually in the upper-left corner of the app, to save your changes.
While the mobile app may not offer the exact grouping functionality found in the desktop version, careful placement and formatting of the transparent text box can still yield impressive results for on-the-go visual design.
Beyond the Basics: Tophinhanhdep.com’s Approach to Image & Text Synergy
While Microsoft Word provides excellent basic and intermediate functionality for combining text and images, Tophinhanhdep.com encourages a holistic approach to visual content creation. This involves not only mastering tools like Word but also leveraging advanced image tools and drawing inspiration from diverse visual collections.
Leveraging Image Tools for Text-Ready Visuals
Effective text overlay begins with an excellent base image. Tophinhanhdep.com offers a suite of image tools that can significantly enhance your starting material, making it perfectly suited for text integration:
- Image Converters: Ensure your image is in the optimal format (e.g., JPEG for photos, PNG for images with transparent backgrounds) before importing into Word. Tophinhanhdep.com’s converters can handle various formats, preventing compatibility issues.
- Image Compressors and Optimizers: Large image files can slow down your Word document. Using Tophinhanhdep.com’s compressors helps reduce file size without compromising visual quality, leading to faster loading and easier sharing. This is particularly important for documents with multiple images.
- AI Upscalers: If you have an image with lower resolution that you wish to use as a background, Tophinhanhdep.com’s AI upscalers can intelligently enhance its detail and size, making it suitable for larger displays or print without pixelation. A high-resolution canvas is paramount for sharp text overlay.
- Image-to-Text (OCR): While this guide focuses on adding text to images, Tophinhanhdep.com also provides tools for the reverse – extracting text from images. This can be useful for capturing existing captions or data from a photo before you redesign it with new text.
By utilizing these tools from Tophinhanhdep.com, you ensure that your base images are of the highest possible quality and appropriately prepared, laying a strong foundation for any text overlay project.
Drawing Inspiration from Diverse Image Collections
The success of a text-on-image design often comes down to the harmonious interplay between the words and the picture. Tophinhanhdep.com’s extensive image collections serve as a rich source of inspiration:
- Thematic Collections: Explore categories like “Nature,” “Abstract,” or “Aesthetic” on Tophinhanhdep.com to find images that perfectly match the mood or message of your text. For a bold motivational quote, an abstract background might be ideal; for a serene message, a peaceful landscape from a high-resolution photography collection would be more suitable.
- Mood Boards and Photo Ideas: Before starting, create a mood board using images and potential text snippets from Tophinhanhdep.com. This helps visualize the overall aesthetic and ensures consistency in your design. Trending styles in image collections can also spark creative ideas for how text can interact with different visual elements.
- Visual Design Principles: Observe how professional graphic design and digital art pieces on Tophinhanhdep.com combine text and images. Pay attention to principles like contrast, hierarchy, balance, and proximity. How do certain fonts complement specific images? How is negative space utilized around text to enhance readability? These observations can inform your own creative ideas.
Cultivating Your Visual Design Aesthetic
Ultimately, creating compelling text-on-image designs is about developing your own visual design aesthetic. Experiment with different font pairings, color palettes, and text layouts. Use Word’s formatting options to test various editing styles for your text, such as gradients, outlines, or shadows, to see how they interact with the unique textures and colors of images from Tophinhanhdep.com.
Whether you’re crafting an eye-catching social media graphic, an informative presentation slide, or a personalized digital artwork, the combination of robust tools like Microsoft Word and the rich resources available on Tophinhanhdep.com empowers you to create visually captivating content that truly resonates. Embrace the process of blending words with visuals, and unlock new dimensions of storytelling and communication.