How to Unblur Images: A Comprehensive Guide to Restoring Clarity in Your Visuals

In the vast and vibrant world of digital imagery, a crisp, clear photograph holds unparalleled power. It captures moments with precision, conveys emotions vividly, and serves as the foundation for stunning visual design. However, it’s a common frustration for photographers and casual users alike to encounter a perfectly composed shot marred by blur. Whether it’s a treasured memory of a loved one, a breathtaking landscape, or a product photo for an e-commerce site, blur can significantly diminish its impact and usability.
Fortunately, with advancements in technology, particularly in Artificial Intelligence (AI) and sophisticated photo editing software, the ability to unblur images has become more accessible and effective than ever before. At Tophinhanhdep.com, we understand the importance of high-quality visuals, from aesthetic wallpapers and backgrounds to professional stock photos and digital art. This comprehensive guide will delve into the causes of blurry images, explore the best tools and techniques to restore clarity, and provide valuable tips to help you capture sharp photos from the outset. By mastering these methods, you can transform your blurry visuals into high-resolution masterpieces, enriching your image collections and empowering your creative ideas.
Understanding Blurry Images: Causes and Their Impact on Visual Storytelling
Before we dive into the solutions, it’s crucial to understand why images become blurry in the first place. Recognizing the root cause can not only help you choose the right unblurring technique but also prevent future occurrences, ensuring your beautiful photography remains consistently sharp.
Why Do Images Become Blurry?
Blur in an image can originate from several factors, often stemming from camera mechanics, environmental conditions, or photographer error. Here are some of the most common culprits:
- Motion Blur: This is perhaps the most frequent type of blur, occurring when either the camera or the subject moves during the exposure time. Fast-moving subjects like sports players or children, or a shaky hand holding the camera, can result in streaks and indistinct outlines. In videos, this is often exacerbated, leading to entire scenes lacking definition.
- Incorrect Focus Settings: The camera’s focus mechanism is designed to pinpoint a specific plane of depth to render sharply. If the focus point is off – either on the background instead of the foreground, or completely missed – the main subject will appear soft and out of focus. This is particularly common when using autofocus on moving subjects or in low light conditions where the camera struggles to lock focus.
- Low Lighting Conditions: In dimly lit environments, cameras typically compensate by increasing ISO sensitivity (which can introduce noise) or by slowing down the shutter speed. A slower shutter speed, as mentioned, makes the image more susceptible to motion blur from even slight camera movement.
- Poor Depth of Field: While sometimes intentional for artistic effect (like a bokeh background), an unintentionally shallow depth of field can leave important elements of your image out of focus. This is a common challenge for landscape photographers aiming for sharpness across an entire scene, or when capturing a group photo where not everyone is on the same focal plane.
- Lens Quality: Not all lenses are created equal. Lower-quality or “soft” lenses may not resolve fine details as sharply as premium optics, even under ideal conditions. Additionally, smudges, dust, or scratches on a lens can introduce blur or haze into an image.
The impact of blurry images extends beyond mere aesthetic imperfection. For those curating thematic collections or building mood boards, a lack of sharpness can detract from the overall coherence and professional appeal. For graphic designers and digital artists, starting with a blurred image means more work in photo manipulation to achieve the desired clarity, often leading to a compromise in quality. Therefore, understanding these causes is the first step toward achieving pixel-perfect results.
The Evolution of Unblurring: AI vs. Traditional Methods
For decades, photographers and editors relied on traditional image sharpening techniques embedded in software like Photoshop and GIMP. These methods, while effective to a degree, often involved manual adjustments and a deep understanding of image properties. The advent of Artificial Intelligence, however, has revolutionized image enhancement, offering more accurate, faster, and often automated solutions for unblurring.
Traditional Unblurring (e.g., Photoshop, GIMP): Traditional methods typically involve algorithms like the Unsharp Mask or Smart Sharpen. They work by detecting edges in an image and increasing the contrast along those edges.
- Accuracy: Often struggles with complex or severe blur. Over-sharpening can introduce artifacts like “halos” or exaggerate noise.
- Scalability: Requires manual effort for each image or layer, making batch processing cumbersome.
- Automation: Minimal, requiring significant user input and fine-tuning.
- Speed: Can be slower due to the iterative nature of manual adjustments.
- Enhanced Features: Primarily focused on sharpening; often requires separate tools for denoising or upscaling.
AI-Powered Unblurring (e.g., Tophinhanhdep.com’s AI Image Sharpener): AI tools leverage machine learning and neural networks, trained on vast datasets of both blurry and sharp images. This allows them to “understand” and intelligently reconstruct missing details rather than just enhancing existing edges.
- Accuracy: Significantly higher, especially for faces and subtle details, as AI can predict and restore information rather than just enhancing it.
- Scalability: Many AI tools offer efficient batch processing, handling large numbers of images quickly.
- Automation: Highly automated, often requiring just a single click to initiate the unblurring process.
- Speed: Generally much faster, delivering optimal results in seconds due to advanced algorithms and GPU acceleration.
- Enhanced Features: Often integrated with other AI capabilities like denoising, super-resolution (upscaling to 4K, 8K, or even 16K), color enhancement, and AI portrait enhancement, making them comprehensive image optimizers.
The comparison clearly shows AI’s advantage in efficiency and quality, making it the preferred solution for modern image enhancement. These cutting-edge “Image Tools,” particularly “AI Upscalers” and “Optimizers,” are transforming how we approach photo correction and visual design.
Top Tools to Unblur Your Photos and Videos
Whether you’re a seasoned professional or a casual shutterbug, a range of powerful tools is available to help you unblur your images and videos. From one-click AI solutions to detailed manual editing software, there’s an option for every skill level and need.
AI-Powered Online and Software Solutions
For quick, effective, and often free unblurring, AI-powered tools are a game-changer. These platforms simplify complex image restoration, making it accessible to everyone.
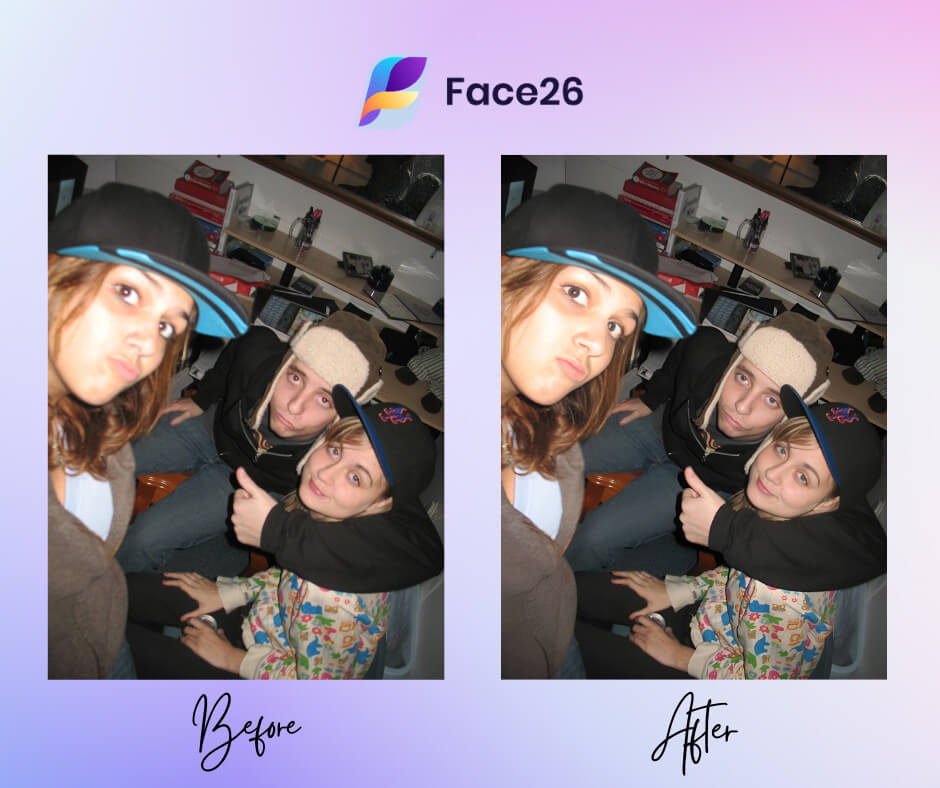
Tophinhanhdep.com’s AI Image Sharpener: As a leading platform for visual enhancement, Tophinhanhdep.com offers a state-of-the-art AI Image Sharpener designed to instantly transform blurry photos into clear, stunning visuals.
- Key Features:
- Instant Online Operation: Access it directly from your web browser on any device (PC, mobile, tablet) without any software installation.
- One-Click Unblurring: Simply upload your image, and Tophinhanhdep.com’s AI technology automatically detects and removes blur, enhancing sharpness and clarity.
- AI Portrait Enhancer: Specializes in deblurring faces and improving overall portrait quality, restoring lost details in cherished moments.
- Fixes Motion Blur: Effectively corrects blur caused by camera shake or subject movement, making it ideal for sports photos or action shots.
- Enhances Edges and Details: Sophisticated algorithms automatically enhance image details, edges, and colors, presenting a sharper visual effect.
- Data Safety & Privacy: Prioritizes user data security, often deleting uploaded images after a set period and using secure protocols (HTTPS).
- How to Use Tophinhanhdep.com’s AI Image Sharpener:
- Upload Blurry Image: Visit the Tophinhanhdep.com Image Sharpener page on your web browser. Click the “Upload Image” button or drag & drop your blurry photos into the designated area.
- Sharpen Image Automatically: Once uploaded, Tophinhanhdep.com’s AI technology will process and sharpen your image automatically within seconds.
- Download the Result: Preview the deblurred image and, if satisfied, click the “Download” button to get your clear, high-resolution photo. You may even have an option to adjust the sharpness level with a slider for fine-tuning.
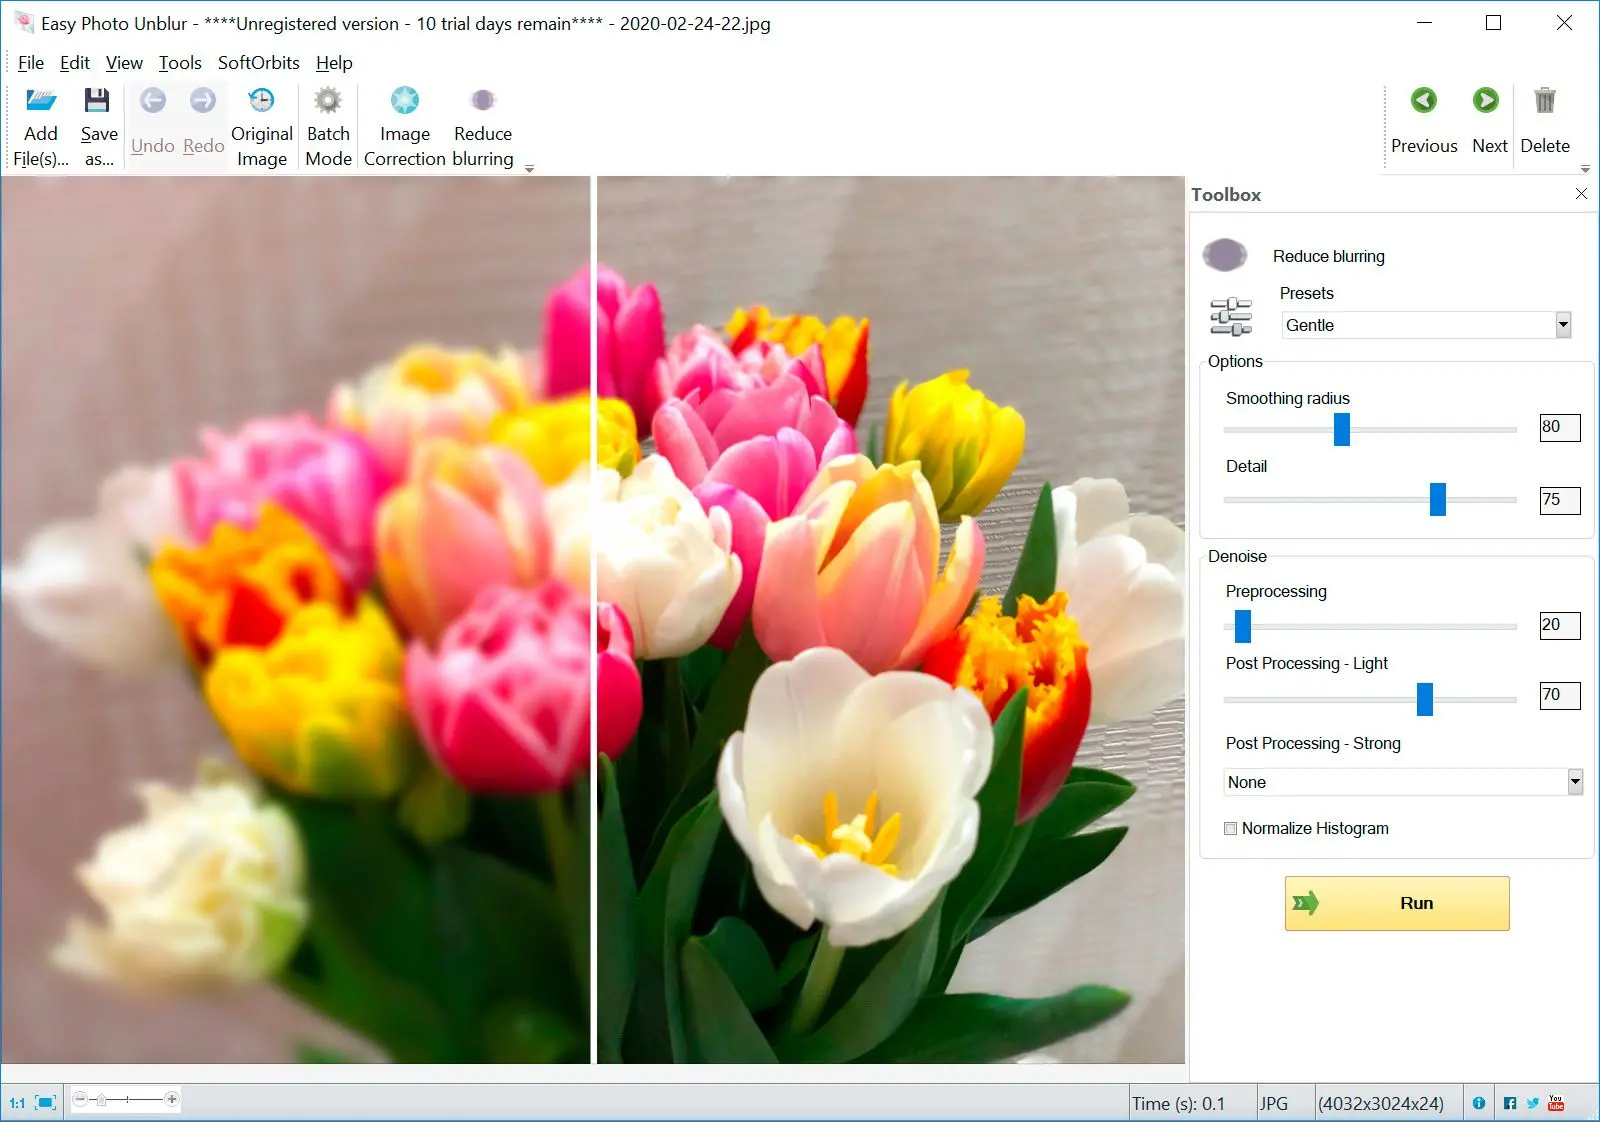
In addition to Tophinhanhdep.com’s robust offering, other leading AI-powered platforms provide similar capabilities. These generally focus on ease of use, delivering fast results for various types of blur, from general softness to severe out-of-focus issues. Many also integrate “AI Upscalers” to not only unblur but also increase the resolution of your images, making them perfect for “High Resolution” “Stock Photos” or “Digital Photography” applications.
Advanced Manual Editing with Tophinhanhdep.com-compatible Software (e.g., Photoshop, GIMP)
For those who prefer granular control and possess more advanced editing skills, professional software like Adobe Photoshop or the free alternative GIMP offers powerful manual unblurring tools. These are particularly valuable for “Photo Manipulation” and achieving specific “Editing Styles.”
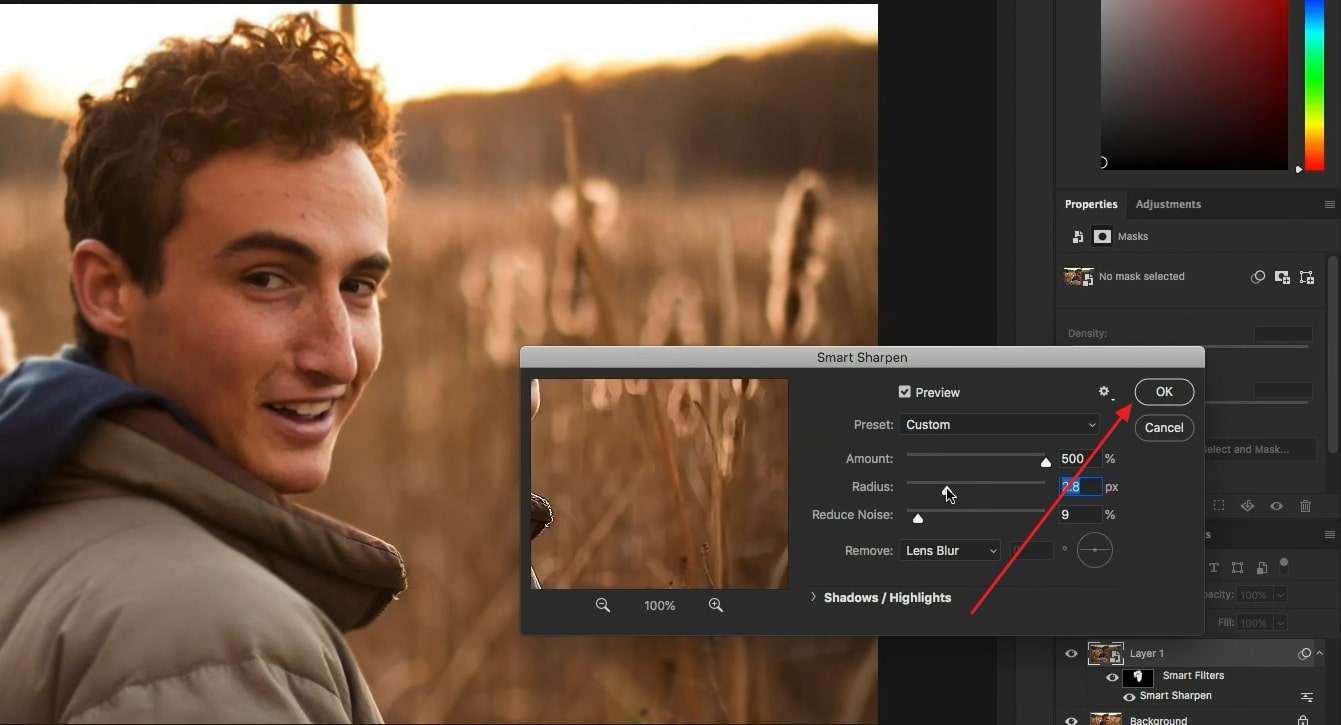
1. Smart Sharpening (Photoshop): This tool allows precise control over sharpening parameters and can even distinguish between different types of blur.
- Steps:
- Set Zoom to 100%: Ensure you view the image at actual pixel size for accurate assessment.
- Access Smart Sharpen: Go to
Filter > Sharpen > Smart Sharpen. - Adjust Sliders:
- Amount: Controls the contrast along edges. Higher values mean sharper edges.
- Radius: Determines how many pixels around an edge are affected. A small radius (1-2 pixels) is often best for high-resolution images.
- Reduce Noise: Minimizes camera grain, which can become more noticeable after sharpening.
- Select Blur Type: Choose
Lens Blurfor out-of-focus issues orMotion Blurif the image was blurred due to movement. For motion blur, adjust theAngleto match the direction of motion. - Refine Shadows and Highlights: (Under
Advancedor main controls) Adjust sharpening specifically in light and dark areas to prevent halo effects. - Apply: Click
OKto commit the changes.
2. Unsharp Mask (Photoshop): Despite its name, Unsharp Mask is a powerful sharpening tool that works by detecting differences between pixels and increasing their contrast.
- Steps:
- Select Layer: Work on a duplicate layer or convert your layer to a
Smart Objectfor non-destructive editing. - Selective Sharpening (Optional): Use the
Lasso Toolto select specific areas (e.g., a face) if you only want to unblur a part of the image. - Access Unsharp Mask: Go to
Filter > Sharpen > Unsharp Mask. - Adjust Sliders:
- Radius: Controls the width of the sharpening effect. Start with low values for high-res images.
- Amount: Determines the intensity of the contrast enhancement.
- Threshold: Sets how different a pixel must be from its neighbors to be considered an “edge” and be sharpened. This helps avoid sharpening noise.
- Prevent Color Shifting: Change the blend mode of the sharpened layer to
Luminosityin theLayers Panelto avoid color distortion.
- Select Layer: Work on a duplicate layer or convert your layer to a
3. Smart Sharpening (GIMP): GIMP, a robust free alternative to Photoshop, also offers similar sharpening capabilities. The “Smart Sharpening” process in GIMP often involves working with color channels (like LAB or HSV) to isolate luminosity information before applying sharpening, allowing for more controlled results.
- Key Idea: Duplicate the image, decompose it into LAB or HSV channels, hide color channels (A, B, or H, S) to work only on the luminosity channel (L or V). Apply edge detection and blur (Gaussian blur) to create a sharpening mask, then use this mask with the Unsharp Mask on the luminosity channel. Finally, recompose the image. This advanced workflow provides excellent control, similar to Photoshop’s selective sharpening.
These manual techniques are foundational for graphic design, enabling precise adjustments for flawless “Digital Art” and “Photo Manipulation.”
Unblurring Faces and Videos
The ability to unblur faces and videos is crucial for preserving precious memories and creating professional-grade content. Many AI tools are specifically optimized for this.
Unblurring Faces in Photos: As highlighted in Vidnoz’s content, blurry faces are a common issue. Tophinhanhdep.com’s AI Image Sharpener, with its “AI Portrait Enhancer,” excels at this. Other specialized AI unblur face tools also leverage deep learning to reconstruct facial features, improve skin texture, and restore clarity to eyes, going beyond simple sharpening. These tools are indispensable for portrait photography and any image where facial expressions are key.
Unblurring Videos: The challenges of blurry images are amplified in video, where blur can be continuous and pervasive. Fortunately, AI video enhancers offer powerful solutions.
- Tophinhanhdep.com-compatible AI Video Enhancers: These tools can take blurry video footage and apply sophisticated algorithms to:
- Upscale Resolution: Improve video quality to 4K, 8K, or even 16K, significantly reducing pixelation and making details sharper.
- Denoise Video: Clear up grain and noise, especially prevalent in low-light recordings.
- Stabilize Footage: Correct shaky video caused by handheld cameras, ensuring a smooth viewing experience.
- Enhance Details: Intelligently sharpen edges and improve overall visual appeal across frames.
- Batch Processing: Efficiently handle multiple video clips, a critical feature for video editors.
Whether you’re dealing with a family video, a marketing presentation, or content for social media, AI-powered video unblurring ensures your message is delivered with maximum visual impact, aligning with “Digital Photography” and “High Resolution” standards for moving images.
Mastering Clarity: Tips to Prevent Blurry Images
While unblurring tools are incredibly powerful, the best approach is always to capture clear images from the start. Here are some essential tips to help you prevent blur, enhancing your “Photography” skills and ensuring “High Resolution” results directly from your camera.
-
Stabilize Your Camera:
- Use a Tripod or Monopod: This is the most effective way to eliminate camera shake, especially in low light or with long exposures.
- Utilize Image Stabilization (IS/VR/OS): Many lenses and camera bodies feature built-in image stabilization. Make sure it’s turned on, especially when shooting handheld.
- Proper Hand Position: Hold your camera firmly with both hands, tucking your elbows close to your body for added support.
- Shutter Release Techniques: Press the shutter button gently to avoid jerking the camera. Use a remote shutter release or the camera’s self-timer for critical shots.
-
Optimize Shutter Speed:
- Fast Shutter for Motion: For moving subjects (people, animals, sports), use a fast shutter speed (e.g., 1/250s, 1/500s, or faster) to “freeze” the action.
- Rule of Thumb (Handheld): For handheld photos, your shutter speed should generally be at least 1/focal length (e.g., for a 50mm lens, use 1/50s or faster). Crop sensor cameras require an even faster speed.
- Panning for Creative Motion Blur: If you want a sharp subject against a blurred background (e.g., a racing car), use a slower shutter speed (e.g., 1/30s to 1/60s) and smoothly move your camera to track the subject.
-
Master Focus:
- Understand Autofocus Modes: Learn your camera’s autofocus modes (e.g., Single-Shot AF for static subjects, Continuous AF for moving subjects) and choose the appropriate one.
- Select Focus Points: Don’t rely solely on the camera’s default focus point. Manually select a focus point over your primary subject.
- Manual Focus (When Appropriate): For static scenes, macro photography, or challenging lighting, manual focus can offer more precision. Use
Live Viewand zoom in to ensure critical sharpness. - Check Depth of Field: Be mindful of your aperture setting. A wider aperture (smaller f-number) creates shallower depth of field, blurring more of the background/foreground. A narrower aperture (larger f-number) keeps more of the scene in focus.
-
Invest in Quality Equipment (When Possible):
- High-Quality Lenses: While expensive, good lenses significantly contribute to image sharpness. Even entry-level cameras can produce excellent results with sharp lenses.
- Clean Your Lens: Regularly clean your lens elements with a microfiber cloth to remove dust, smudges, and fingerprints that can soften images.
-
Post-Production Considerations (for Videos):
- Record in High Quality: Always shoot your videos at the highest resolution and bitrate your camera allows.
- Choose Appropriate Formats: Use efficient formats like .MP4 or H.264 for good quality and manageable file sizes.
- Cloud-Based Sharing: When sharing videos, use platforms that preserve quality (e.g., Google Drive, Dropbox, Tophinhanhdep.com’s cloud services) rather than those that heavily compress.
By integrating these practices into your photography workflow, you’ll dramatically reduce the occurrence of blurry images, leading to a consistently high standard for your “Images,” “Photography,” and “Visual Design” projects on Tophinhanhdep.com.
Conclusion
The frustration of capturing a moment only to find it blurred can be a thing of the past. With the remarkable advancements in AI technology, coupled with enduring traditional editing techniques, achieving crystal-clear images has never been more attainable. From the simplicity and power of Tophinhanhdep.com’s AI Image Sharpener, which effortlessly deblurs photos and videos with a single click, to the meticulous control offered by professional software like Photoshop and GIMP, you have a vast arsenal at your disposal.
Understanding the common causes of blur – be it motion, focus issues, or lighting – is the first step towards prevention and effective correction. By adopting proactive measures such as stabilizing your camera, optimizing shutter speed, mastering focus, and investing in quality equipment, you can capture breathtakingly sharp images and videos from the start.
At Tophinhanhdep.com, we are dedicated to helping you unlock the full potential of your visual content. Whether you’re enhancing an existing image for a beautiful wallpaper, preparing a high-resolution photo for a professional portfolio, or crafting dynamic visuals for digital art, the clarity you achieve will profoundly impact your work. Embrace these tools and tips to not only unblur your images but to elevate your entire collection, transforming every visual into a vibrant, compelling story. Start your journey to clearer, more impactful visuals today!