How to Upload Your Images to Tophinhanhdep.com and Beyond: A Comprehensive Guide for Visual Enthusiasts

In the digital age, sharing captivating visuals is more important than ever. Whether you’re a seasoned photographer, a digital artist, or simply someone who appreciates beautiful imagery, showcasing your work online allows you to connect with a global audience, inspire others, and build your creative presence. At Tophinhanhdep.com, we understand the power of a stunning image, from high-resolution wallpapers and aesthetic backgrounds to breathtaking nature photography and evocative abstract art. Our platform is dedicated to celebrating and distributing these visual treasures.
However, getting your carefully crafted images from your device onto a website can sometimes feel like a daunting task. It involves more than just a simple click; it requires understanding file formats, optimization techniques, and various upload methods to ensure your images look their best and load efficiently. This comprehensive guide will walk you through the essential steps to upload your images to any website, with a special focus on how to prepare and present your visuals for platforms like Tophinhanhdep.com, ensuring they maintain their quality and impact. We’ll delve into the technicalities, best practices, and innovative tools that empower you to effortlessly share your visual stories with the world.

Preparing Your Visuals for Web Upload: Quality and Optimization
Before your magnificent images, be they serene nature scenes, vibrant abstract compositions, or poignant emotional photography, ever leave your local drive, a critical preparation phase is necessary. This step ensures that your visuals not only retain their artistic integrity but also perform optimally once they are live on the web, contributing positively to the user experience and overall aesthetic of Tophinhanhdep.com.
Understanding Image Types and File Sizes
The digital world is rich with various image formats, each with its own strengths and ideal use cases. For website uploads, you’ll primarily encounter JPEG, PNG, and GIF.
- JPEG (Joint Photographic Experts Group): This is the most common format for photographs and complex images with many colors. JPEG uses “lossy” compression, meaning some data is discarded to achieve smaller file sizes. This makes it excellent for high-resolution photography, such as the stunning landscape and portrait shots featured on Tophinhanhdep.com, where minor detail loss is often imperceptible. However, repeated saving of a JPEG can degrade quality over time.
- PNG (Portable Network Graphics): PNG supports “lossless” compression, preserving all original image data. It’s ideal for images with sharp lines, large areas of uniform color, and transparency (like logos, graphic design elements, or digital art where crisp edges are paramount). While PNGs offer superior quality for certain image types, their file sizes can be significantly larger than JPEGs for photographs.
- GIF (Graphics Interchange Format): Best known for animated images, GIFs also use lossless compression but are limited to 256 colors. They are suitable for simple graphics, icons, and short animations. Tophinhanhdep.com might use GIFs for subtle aesthetic backgrounds or visual design accents.
Understanding these differences is crucial for selecting the right format for your image. A beautiful photography piece destined to be a wallpaper would thrive as a JPEG, while a creative digital art piece with transparent elements would benefit from PNG.
Checking Image Size: Before uploading, always verify your image’s file size. Many hosting services and platforms like Tophinhanhdep.com have upload limits to maintain server performance and user experience. If your image, despite its high resolution, exceeds these limits (e.g., 32 MB, 50 MB, or 200 MB for GIFs/videos on some platforms), you’ll need to optimize it further.
Optimizing for Performance: Speed and Aesthetics
The balance between visual fidelity and loading speed is paramount. Users expect fast-loading pages, especially when browsing image-rich content like Tophinhanhdep.com’s collections of aesthetic and trending styles. Large, unoptimized images can drastically slow down a website, leading to frustration and bounce rates. This is where image optimization tools come into play, integral to any visual designer’s toolkit.
- Compression: This is the process of reducing an image’s file size. Beyond the inherent compression of formats like JPEG, dedicated image compressors can further reduce file sizes without noticeable loss of visual quality. Tophinhanhdep.com encourages the use of such tools to ensure quick load times for its vast array of backgrounds and thematic collections.
- Resizing and Scaling: Uploading a 4000x3000 pixel image for a thumbnail that will display at 200x150 pixels is inefficient. Resizing your images to appropriate dimensions for their intended display on the web saves bandwidth and processing power. Modern browsers and content management systems can handle responsive image scaling, but it’s always better to start with dimensions closer to the maximum display size.
- Lazy Loading: While more of a website development technique, understanding lazy loading is beneficial. It means images only load when they become visible in the user’s viewport, improving initial page load times, especially for pages with many images, such as a mood board or a collection of beautiful photography.
Utilizing image optimizers, either online or as part of your editing software, can automatically apply the best compression and resizing techniques. This ensures that your abstract digital art or high-resolution stock photos load quickly while looking sharp.
Enhancing Image Quality: High Resolution and AI Upscaling
Quality is at the core of Tophinhanhdep.com’s mission. We showcase images that are visually stunning, whether they are high-resolution photography, intricate digital art, or creative visual designs.
- Starting with High Resolution: Always begin with the highest resolution version of your image. This gives you the most flexibility for editing, cropping, and optimizing without degrading quality. For professional photography, digital art, or creating beautiful wallpapers, high-resolution source files are non-negotiable.
- Digital Photography and Editing Styles: Before uploading, leverage photo editing software to enhance your images. Adjust colors, contrast, sharpness, and apply desired editing styles. This is where your creative ideas truly come to life, transforming a raw photograph into an aesthetic masterpiece or a trending visual.
- AI Upscalers: For older images, lower-resolution scans, or digital art that needs to be presented in a larger format, AI upscalers are revolutionary image tools. These sophisticated algorithms can intelligently increase image resolution and detail, transforming a moderately sized image into a high-resolution contender, perfect for backgrounds or detailed aesthetic pieces on Tophinhanhdep.com.
- Photo Manipulation: For unique visual designs or artistic expressions, photo manipulation techniques can create captivating images. Ensure that any manipulation is done skillfully and adheres to your artistic vision before the final upload.
By focusing on these preparation steps, you ensure that every image you upload to Tophinhanhdep.com or any other platform is a testament to quality, speed, and visual appeal, ready to inspire and engage.
Choosing Your Image Upload Method
Once your images are perfectly prepared, the next step is to choose the right method to get them online. The approach you take will depend on whether you’re uploading to a dedicated image-sharing platform like Tophinhanhdep.com, managing your own website, or utilizing a third-party service. Each method offers distinct advantages and caters to different needs, from simple drag-and-drop interfaces to more technical file transfer protocols.
Direct Uploads via Tophinhanhdep.com’s Platform
For users looking to contribute directly to Tophinhanhdep.com’s vast collection of wallpapers, backgrounds, and thematic collections, the most straightforward method is often through the platform’s native upload interface. Many modern content-driven websites, including specialized image hubs, provide intuitive tools designed for ease of use.
Typically, this involves:
- Logging In: Access your Tophinhanhdep.com user account.
- Locating the Upload Feature: Look for a prominent “Upload,” “Submit Image,” or similar button, usually found in your dashboard or a dedicated contribution section.
- Selecting Files: You’ll generally be presented with a file selection dialog or a drag-and-drop area. Here, you simply browse your computer to select your pre-optimized JPEG, PNG, or GIF files.
- Adding Metadata: This is crucial for discoverability. You’ll add titles, descriptions, categories (e.g., Nature, Abstract, Aesthetic, Sad/Emotional, Beautiful Photography), and relevant keywords or tags. For Tophinhanhdep.com, accurate tagging ensures your image reaches the right audience browsing for specific styles or mood boards.
- Review and Publish: After reviewing your selections and metadata, you’ll hit a “Submit” or “Publish” button. Some platforms might have a moderation queue, while others publish instantly.
This method is ideal for quick, direct contributions and takes advantage of the platform’s built-in image tools and organizational structure, making it perfect for sharing your latest photo ideas or trending styles.
Leveraging File Manager and FTP Clients
For those managing their own websites or who require greater control over their server’s file structure, using a web hosting control panel’s File Manager or a dedicated File Transfer Protocol (FTP) client is a common and robust solution. This is especially relevant if you’re hosting your own portfolio of high-resolution stock photos or digital art.
Using a Web Host’s File Manager
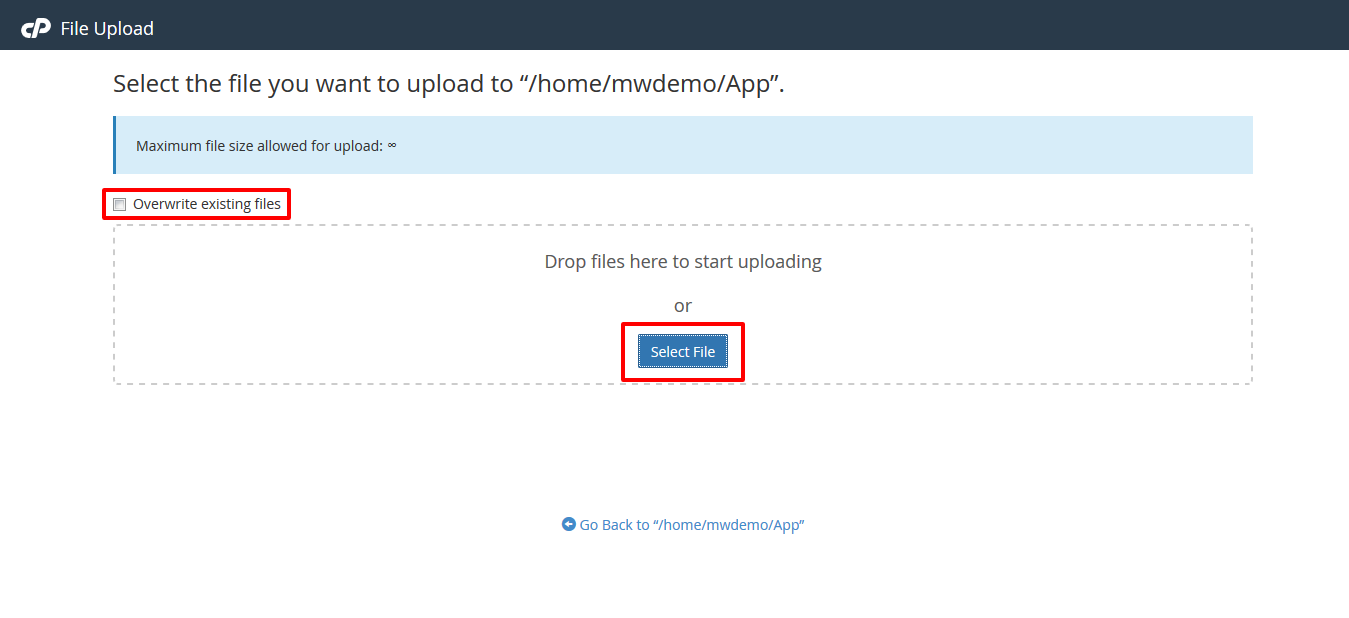
Most web hosting providers offer a browser-based File Manager (e.g., through cPanel, hPanel, or a custom interface). This tool provides a graphical interface to navigate, upload, and manage files on your web server.
- Log into your hosting account: Access your web hosting control panel.
- Find File Manager: Navigate to the “Files” section and click on “File Manager.”
- Navigate to your public_html directory: This is typically the root directory for your website’s public-facing files. If you’re uploading images for a specific section or collection, you might navigate to a subfolder like
/images/wallpapersor/assets/photography. - Upload Files: Look for an “Upload” button or icon. You can then select your images from your computer. Some file managers allow drag-and-drop, and many support uploading compressed archives (like
.zipfiles) which can then be extracted directly on the server, a time-saver for large thematic collections. Be aware of any file size limits imposed by the File Manager (e.g., 256MB for archives).
Using a File Transfer Protocol (FTP) Client
FTP clients are standalone software applications (like FileZilla) that provide a more powerful way to transfer files between your local computer and a web server. They are essential for uploading larger quantities of images or files that exceed web-based file manager limits.
- Install an FTP Client: If you don’t have one, download and install a reputable FTP client (e.g., FileZilla).
- Gather FTP Credentials: Your web hosting provider will supply you with FTP hostname, username, password, and port (usually 21 for FTP or 22 for SFTP, a more secure option). You can typically find these in your hosting control panel under an “FTP Accounts” section.
- Connect to Your Server: Open your FTP client, enter the credentials, and connect to your web server.
- Navigate Directories: The FTP client will display your local computer’s files on one side and the remote server’s files on the other. Navigate to the
public_html(orwwworroot) directory on the remote site panel, and locate your image folder (e.g.,/images/nature). - Upload Images: Select the prepared images (JPEG, PNG, GIF) from your local computer’s panel and drag them to the desired folder on the remote server’s panel. The FTP client will then transfer the files. This method generally has higher or no practical size limits compared to web-based managers, making it suitable for large batches of high-resolution stock photos or extensive image collections.
Utilizing Dedicated Image Hosting Services
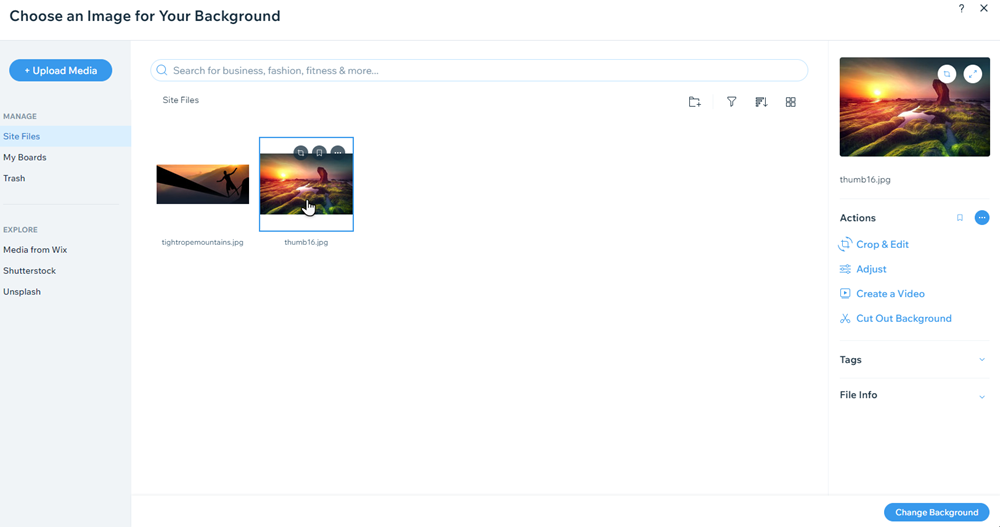
Beyond your own server or a direct platform like Tophinhanhdep.com, several free and paid third-party image hosting services exist (e.g., Imgur, ImgBB, Postimages, imgbox). These services store your images on their servers and provide you with URLs or embed codes to use on your website or share elsewhere.
- Benefits: They offload storage and bandwidth from your own hosting, often provide simple upload interfaces, and may include features like basic editing, automatic resizing, and gallery creation for photo ideas or mood boards. They can be particularly useful for embedding images into forums, blogs, or social media without taxing your primary website.
- Process: Typically, you’ll visit the service’s website, select your image files, and upload them. The service then provides various links: a direct link to the image, HTML code for embedding, and BBCode for forums. Pay attention to their terms regarding image retention (e.g., “keep forever” or auto-delete options) and any hotlinking restrictions for website content.
- Considerations: While convenient, relying on external services means your images are dependent on their availability and terms. Ensure they provide direct links if you plan to embed images directly into your HTML code for your personal blog or creative ideas section.
Integrating with Content Management Systems (CMS) and Website Builders
Many websites today are built using Content Management Systems (CMS) like WordPress or website builders (e.g., Squarespace, Wix, Shopify). These platforms offer highly integrated and user-friendly ways to upload and manage images, often with built-in optimization features.
- WordPress Migration Plugins: For WordPress users, dedicated plugins (like “All in One WP Migration”) can handle entire site migrations, including all your images and databases. However, for individual image uploads, the WordPress Media Library is your primary tool.
- Media Library: Within a CMS, you’ll typically find a “Media Library” where you can upload images directly. These systems usually handle file type validation, some level of compression, and generate multiple sizes (thumbnails, medium, large) for responsive display. This simplifies the process of adding aesthetic backgrounds to a page or embedding beautiful photography into a blog post.
- Website Builder Components: Drag-and-drop website builders allow you to add image “components” or “widgets” directly to your page. You then upload images through a simplified interface associated with that component. These builders often handle the technical aspects of file management, ensuring your visual design elements are correctly displayed.
- File Upload Pages/Plugins: If you need users to upload files (e.g., for a photography contest, submissions for a thematic collection, or custom orders), you can create dedicated file upload pages using plugins (like POWR File Upload for various platforms) or custom HTML forms. These allow visitors to submit documents, images, or creative ideas directly, streamlining your data collection process.
Regardless of the method, the overarching goal remains the same: to efficiently and effectively transfer your visual assets to the web, ensuring they contribute positively to the rich visual experience that Tophinhanhdep.com and similar platforms strive to deliver.
The Step-by-Step Process of Getting Your Images Online
Having prepared your images and chosen your preferred upload method, it’s time to execute the process. While the specific clicks may vary slightly depending on your chosen tool, the core sequence of actions remains largely consistent. This section outlines the essential steps to successfully upload your images and integrate them into your website or a platform like Tophinhanhdep.com.
Connecting to Your Web Server or Hosting Platform
This is the foundational step for any direct image upload to your own hosted website. If you’re using a direct upload feature on a platform like Tophinhanhdep.com or a third-party image host, this step is handled automatically when you log in or access their service.
- For File Manager: Log in to your web hosting control panel (e.g., cPanel, hPanel). This usually involves entering your username and password into your host’s client area. Once logged in, locate and click on the “File Manager” icon, typically found under a “Files” or “Website” section.
- For FTP Clients (e.g., FileZilla): Open your FTP client. You will need to enter your FTP credentials: Host (e.g.,
ftp.yourdomain.com), Username, Password, and Port (usually 21 or 22 for SFTP). After entering these, click “Connect.” Your client will then establish a connection to your web server, displaying your local files on one side and server files on the other. For secure connections, always prefer SFTP if your host supports it.
Navigating to the Right Directory: Public_html
Once connected to your server, you need to place your images in the correct location for them to be accessible by your website. This is crucial for displaying your aesthetic backgrounds or high-resolution photography.
- The Root Directory: For most websites, the main root directory where public-facing files are stored is
public_html. Sometimes it might be namedwww,htdocs, or simply the name of your domain. - Organizing Images: It’s a best practice to organize your images within a dedicated folder inside
public_html, such as/public_html/images,/public_html/assets/img, or more specific folders like/public_html/wallpapers/nature. This makes your website structure clean, easier to manage, and more SEO-friendly for image searches (e.g., “nature wallpapers Tophinhanhdep.com”). - Creating Folders: If the desired folder doesn’t exist, you can create it directly within the File Manager or FTP client. Right-click in the desired parent directory and select “Create New Folder” or similar.
Ensuring your images are in the correct, publicly accessible directory is fundamental for them to appear on your web pages.
Transferring Your Image Files
This is the actual act of moving your prepared images from your local computer to your web server.
- Using File Manager:
- In File Manager, navigate to your target directory (e.g.,
/public_html/images/aesthetic). - Click the “Upload” icon in the menu.
- Select your image files (or a
.ziparchive) from your computer. - Click “Upload” or “Open.” If you uploaded an archive, right-click it on the server and select “Extract” or “Unzip” to unpack the images into the folder.
- In File Manager, navigate to your target directory (e.g.,
- Using FTP Client (e.g., FileZilla):
- On the left panel (Local Site), navigate to the folder on your computer containing the images.
- On the right panel (Remote Site), navigate to the target directory on your server (e.g.,
/public_html/photography/high_resolution). - Select the image files you wish to upload from the left panel. You can select multiple files by holding
Ctrl(Windows) orCommand(Mac) and clicking, or select a range by clicking the first, then holdingShiftand clicking the last. - Drag the selected files from the left panel to the right panel. FileZilla will show the progress of the transfer.
Once the transfer is complete, your image files are physically located on your web server, ready to be displayed.
Embedding and Linking Images within Your Content
Having uploaded your images, the final step is to make them appear on your web pages or content. This involves referencing the image’s URL within your HTML, CMS, or website builder.
- Locating the Image URL: After uploading, your image will have a unique URL. For example, if your domain is
yourdomain.comand you uploadedbeautiful_sunset.jpgto/public_html/images/nature/, its URL would behttps://yourdomain.com/images/nature/beautiful_sunset.jpg. You can verify this by typing the URL directly into your browser. - Embedding in HTML: Use the
<img>tag to embed images directly into your HTML code.<img src="https://yourdomain.com/images/nature/beautiful_sunset.jpg" alt="Beautiful sunset nature photography" width="800" height="500">srcattribute: Points to the image’s URL.altattribute: Provides alternative text for accessibility and SEO. Describe the image for users who can’t see it (e.g., “Aesthetic abstract art wallpaper”).widthandheightattributes: Define the display dimensions. While often handled by CSS, including these can prevent layout shifts.
- Linking to Images: If you want users to click a text link to view a larger version of an image, use the
<a>tag:<a href="https://yourdomain.com/images/nature/beautiful_sunset_hires.jpg" target="_blank">View High-Resolution Sunset</a> - In CMS/Website Builders: These platforms provide user-friendly interfaces. When editing a page or post, you typically click an “Add Image” button, browse your Media Library (where your uploaded images reside), select the image, and insert it. The CMS automatically generates the correct HTML and often allows you to set alignment, size, and add captions or links without coding. For Tophinhanhdep.com, this process would be streamlined within its content submission interface.
By following these steps, your prepared images will transition from your local device to the global stage, enriching your website or contributions to visual platforms like Tophinhanhdep.com with your unique creative ideas and inspiring photography.
Best Practices for Managing Your Online Image Library
Effectively managing your online image library goes beyond just uploading files; it ensures long-term accessibility, discoverability, and continued visual impact. For a site like Tophinhanhdep.com, which thrives on extensive collections of high-resolution images, aesthetic backgrounds, and diverse photography, meticulous management is key to providing an unparalleled user experience.
Organizing Your Images for Easy Access
A well-structured image library is fundamental for both website visitors and for your own efficiency. Imagine browsing Tophinhanhdep.com for “nature wallpapers” only to find them scattered randomly. Proper organization facilitates discovery and reflects professionalism.
- Logical Folder Structure: On your web server (via File Manager or FTP) or within your CMS’s media library, establish a clear, intuitive folder hierarchy. Organize by category (e.g.,
/wallpapers/nature,/photography/abstract), by date (/images/2023/december), or by project. For Tophinhanhdep.com, this might mirror our thematic collections and trending styles. - Consistent Naming Conventions: Give your image files descriptive, keyword-rich names. Instead of
IMG_001.jpg, usebeautiful-autumn-forest-wallpaper.jpgorabstract-digital-art-blue.png. This improves SEO, making your images more likely to appear in image search results, and makes them easy to identify at a glance. Use hyphens (-) to separate words, not underscores (_) or spaces. - Utilize Metadata (Alt Text, Titles, Descriptions): For every image you upload, fill out the available metadata fields.
- Alt Text (Alternative Text): Absolutely crucial for accessibility and SEO. Describe the image accurately for visually impaired users and search engines. E.g.,
alt="High-resolution wallpaper of a misty mountain range at sunrise". - Titles: Often displayed when hovering over an image or in image galleries.
- Descriptions: More detailed information about the image, useful for content-rich image collections or creative idea showcases. These elements help categorize your images, make them searchable, and enhance the overall user experience on platforms like Tophinhanhdep.com.
- Alt Text (Alternative Text): Absolutely crucial for accessibility and SEO. Describe the image accurately for visually impaired users and search engines. E.g.,
Ensuring Image Security and Copyright Compliance
Protecting your visual assets and respecting others’ intellectual property is paramount in the online space.
- Secure Uploads: If using FTP, always prefer SFTP (SSH File Transfer Protocol) for encrypted connections, especially when transferring sensitive digital photography or original digital art. Ensure your website’s file permissions are set correctly to prevent unauthorized access.
- Copyright Notices and Watermarks: If your images are original beautiful photography or digital art you wish to protect, consider adding subtle watermarks or explicit copyright notices to deter unauthorized use. On Tophinhanhdep.com, respecting creators’ rights is fundamental.
- Respecting Licenses: When using stock photos or images from other sources for your visual design projects, always verify their licensing terms. Ensure you have the right to use, modify, and distribute them, especially if they are destined for public platforms or commercial use. Misuse can lead to legal complications.
- Backup Your Originals: Always keep backup copies of your original, high-resolution image files offline. Web-optimized versions are often compressed, and you’ll want the pristine originals for future editing, printing, or archiving.
Maintaining and Updating Your Visual Content
An online image library is not a “set it and forget it” endeavor. Regular maintenance ensures your content remains fresh, relevant, and performing at its best.
- Regular Audits: Periodically review your image collections. Are there outdated images that can be removed? Are there new trending styles or photo ideas you should incorporate? For Tophinhanhdep.com, staying current with aesthetic trends and popular themes is vital.
- Broken Links: Check for broken image links, where the
srcattribute points to an image that no longer exists on the server. This can negatively impact user experience and SEO. Tools and plugins are available to help identify these issues. - Re-optimization: As web technologies evolve, so do optimization techniques. Revisit older images to see if they can be further compressed or re-saved in more efficient next-gen formats (like WEBP or AVIF, which offer superior compression to JPEG/PNG) without compromising visual quality. This aligns with our focus on advanced image tools like compressors and optimizers.
- Image-to-Text Integration: For enhanced accessibility and content, consider integrating image-to-text tools for complex images, generating descriptions or searchable tags that go beyond simple alt text.
By diligently adhering to these best practices, you ensure that your images—whether stunning wallpapers, high-resolution stock photos, or intricate graphic design pieces—are not only successfully uploaded but also remain a valuable and accessible part of the digital visual landscape, enhancing the experience for all who visit Tophinhanhdep.com.
In conclusion, uploading images to the web is a multifaceted process that combines technical execution with an understanding of visual aesthetics and performance. By mastering image preparation, selecting the appropriate upload method, meticulously following the steps, and committing to ongoing management, you can confidently share your beautiful photography, digital art, and creative ideas with the world. Tophinhanhdep.com stands as a testament to the power of well-presented visuals, inviting you to contribute your unique perspective and enrich our collective appreciation for stunning imagery.