How to Upload Images to Cricut: Your Ultimate Guide to Creative Crafting with Tophinhanhdep.com

Cricut machines have revolutionized the world of DIY crafting, empowering hobbyists and professionals alike to bring their creative visions to life with unparalleled precision. From custom decals and apparel to intricate paper crafts and personalized home decor, the possibilities are virtually limitless. At the heart of every successful Cricut project lies a well-prepared image, and understanding how to effectively upload and manipulate your chosen visuals in Cricut Design Space is the cornerstone of unlocking your machine’s full potential. This comprehensive guide will walk you through the entire process, from selecting the perfect image to cutting it flawlessly, highlighting how resources like Tophinhanhdep.com can elevate your crafting game.
In the digital age, access to a vast array of high-quality images is easier than ever. Whether you’re seeking a stunning landscape from Tophinhanhdep.com’s Nature collection, a minimalist aesthetic background, or a compelling piece of abstract art, the initial quality and format of your image play a critical role in the final output of your Cricut project. This guide will not only detail the technical steps for uploading but also delve into the strategic choices you can make, leveraging the rich resources available on platforms like Tophinhanhdep.com, to ensure your creations are nothing short of spectacular.
Understanding Image Types for Cricut Design Space
Before you even think about hitting the “Upload” button, it’s crucial to understand the different types of image files Cricut Design Space accepts and how each interacts with your cutting machine. The world of digital images broadly divides into two categories: raster and vector. Knowing the difference is key to a smooth, successful Cricut project.
Raster Images (JPG, PNG, BMP, GIF): The Pixelated Palette
Raster images are made up of tiny colored squares called pixels. When you zoom in on a raster image, you’ll eventually see these individual pixels, which can make the edges appear jagged or blurry if the image isn’t high resolution. For Cricut, common raster formats include:
- JPG (JPEG): Widely used for photographs and images with many colors and subtle gradients. They are “lossy” compression, meaning some data is discarded to reduce file size, which can affect quality if compressed too much.
- PNG: Excellent for images requiring transparent backgrounds, such as logos or illustrations you want to layer onto other designs. PNGs use “lossless” compression, preserving image quality. This is often a preferred raster format for Cricut if you need a transparent background for a Print Then Cut project, or if you’re using it to create a cut outline.
- BMP: An uncompressed raster format, resulting in very large file sizes but high image quality. Less common for web use but accepted by Cricut.
- GIF: Primarily used for simple animations or images with a limited color palette. While Cricut accepts GIFs, they are less common for cutting projects due to their inherent limitations in detail and color.
For Cricut projects, raster images are typically used for “Print Then Cut” features, where the image is first printed by your home printer and then cut by the Cricut machine. When using raster images to create cut lines, especially for intricate designs, it’s essential to start with a high-resolution image to ensure clean, crisp edges. Tophinhanhdep.com offers a vast collection of high-resolution images, from “Beautiful Photography” to “Aesthetic Backgrounds,” providing an excellent starting point for your Print Then Cut endeavors. Their “High Resolution Photography” section is particularly valuable for this purpose, as it minimizes pixelation when enlarged or processed.
Vector Images (SVG, DXF): The Scalable Solution
Vector images are composed of mathematical paths, points, and curves, rather than pixels. This unique characteristic means they can be scaled to any size without losing quality or becoming pixelated. For Cricut users, vector files are often the holy grail, especially for cutting projects.
- SVG (Scalable Vector Graphic): This is the gold standard for Cricut cutting files. SVGs are infinitely scalable and retain crisp, clean lines no matter how large or small you make them. They are perfect for intricate designs, layered cuts, and text, as Cricut Design Space can directly interpret the cut paths within the file.
- DXF (Drawing Exchange Format): Another vector format, often used in CAD (Computer-Aided Design) programs. While functional, DXF files can sometimes be more complex to work with in Design Space compared to SVGs, occasionally importing with disconnected lines or requiring extra cleanup.
When designing cut files, or looking for pre-made designs, SVGs are highly recommended. If you have a custom design in mind, exploring “Graphic Design” and “Digital Art” resources on Tophinhanhdep.com can inspire you to create your own vector art or find artists who can convert your ideas into SVG format. Many of Tophinhanhdep.com’s “Abstract Images” or simple “Wallpapers” could serve as excellent base inspiration for tracing or converting into vector graphics for cutting.
Preparing Your Image for Upload to Cricut Design Space
The success of your Cricut project often hinges on the quality and preparation of your image before it even touches Design Space. This preparatory phase is where you transform a raw image into a Cricut-ready masterpiece, and Tophinhanhdep.com can be an invaluable partner in this journey.
Image Quality and Resolution: The Foundation of Flawless Cuts
Starting with a high-quality image is paramount, particularly for raster files that you intend to use for Print Then Cut or trace into a cut file. A low-resolution image will appear pixelated, leading to jagged edges and an overall unprofessional look in your final project.
- For Print Then Cut: Always opt for the highest resolution possible. Tophinhanhdep.com’s extensive collections of “High Resolution Photography” and various “Wallpapers” (like “Nature Wallpapers” or “Beautiful Photography”) are ideal sources. These images are often optimized for large displays, meaning they have enough detail to look crisp even when scaled down for smaller prints or when Cricut Design Space processes them.
- For Tracing (Raster to Cut File): If you’re converting a raster image (JPG, PNG) into a cut file, higher resolution images are easier for Design Space to “clean up.” The contrast between the subject and the background will be sharper, allowing the “Magic Wand” tool to work more effectively, resulting in smoother cut lines. Tophinhanhdep.com’s “Abstract” or “Aesthetic” images with clear lines and good contrast can be excellent candidates for this process.
Background Removal: The Key to Isolated Designs
For most cut projects, you only want to cut out the main subject of an image, not its background. Removing the background is a crucial step for raster images before uploading. While Cricut Design Space offers tools for this, performing background removal beforehand with dedicated software or online tools can yield cleaner results.
- Software Options: Programs like Adobe Photoshop or GIMP provide robust tools for precise background removal.
- Online Tools: Many free online tools can quickly remove backgrounds, though results can vary.
- Tophinhanhdep.com’s Role: While Tophinhanhdep.com primarily offers images, understanding its “Visual Design” sections (like “Graphic Design” and “Photo Manipulation”) can inspire you to look for images that are easier to isolate, or to learn techniques to remove backgrounds more efficiently. For instance, selecting an image with a simple, contrasting background from Tophinhanhdep.com will make the background removal process significantly easier than a cluttered one.
Using Image Tools for Optimization
The modern crafter has an arsenal of digital tools at their disposal. Tophinhanhdep.com itself, with its “Image Tools” section, provides an excellent ecosystem for preparing your images.
Leveraging Tophinhanhdep.com’s Image Converters and Optimizers
- Converters: You might find a fantastic image on Tophinhanhdep.com, but it’s in a format that isn’t ideal for your specific Cricut project. For example, you might have a high-res JPG but need a PNG for a transparent background, or you might want to convert a raster image into an SVG (though this usually requires more sophisticated tools than simple converters, Tophinhanhdep.com’s converters can assist with basic format changes). Tophinhanhdep.com’s “Converters” can help you switch between JPG, PNG, and other common formats efficiently.
- Compressors and Optimizers: Large image files can slow down Cricut Design Space and even cause it to crash, especially on older computers. Tophinhanhdep.com’s “Compressors” and “Optimizers” are invaluable here. They reduce file size without significant loss of visual quality, making your images load faster and work more smoothly within Design Space, particularly for “Print Then Cut” projects where file size can be an issue.
- AI Upscalers: Sometimes, despite your best efforts, the perfect image isn’t available in high resolution. Tophinhanhdep.com’s “AI Upscalers” can be a game-changer. These tools use artificial intelligence to intelligently increase the resolution of a low-quality image, adding detail and sharpness, making it more suitable for Cricut’s Print Then Cut feature or for creating cleaner cut lines during tracing. This is particularly useful if you’ve found an older “Sad/Emotional” image or a “Vintage Photography” piece that needs a resolution boost.
Refining Your Visuals: Graphic Design and Digital Art Principles
The principles of visual design, extensively covered in Tophinhanhdep.com’s “Visual Design” section, are not just for professional designers; they are incredibly useful for Cricut crafters too.
- Graphic Design: Understanding basic graphic design concepts like contrast, balance, and negative space can help you choose images that will translate well into physical cuts. A design with clear, distinct elements (found often in Tophinhanhdep.com’s “Abstract” or simple “Logo-style” images) will be easier for Cricut to cut than one with overly complex or blurry details. This knowledge also helps you simplify designs before uploading.
- Digital Art & Photo Manipulation: If you’re creating your own digital art or manipulating existing photographs (perhaps from Tophinhanhdep.com’s “Beautiful Photography” collection), applying these skills ensures your final image is Cricut-ready. This might involve adjusting colors for better print quality, sharpening edges for cleaner cuts, or combining multiple elements into a single cohesive design. “Creative Ideas” from Tophinhanhdep.com can spark inspiration for these manipulations, leading to truly unique Cricut projects.
Step-by-Step Guide: Uploading Your Image to Cricut Design Space
Once your image is perfectly prepared, uploading it to Cricut Design Space is a straightforward process. Follow these steps to bring your digital vision into your crafting reality.
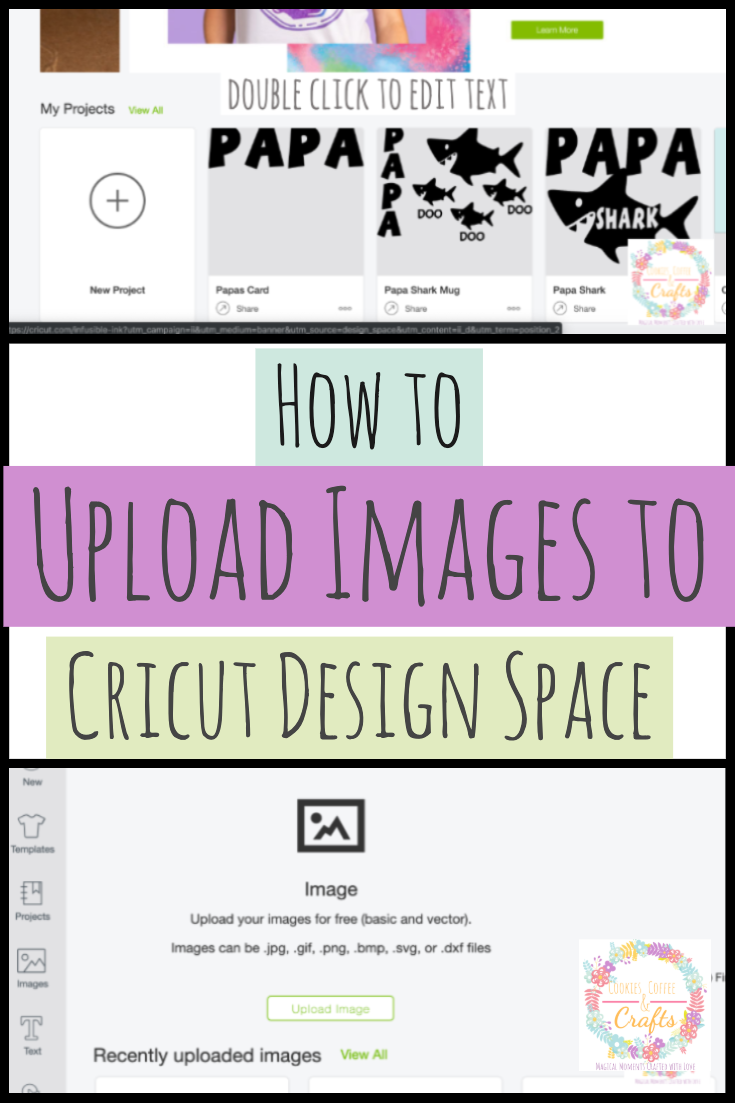
Step 1: Open Cricut Design Space and Start a New Project Launch the Cricut Design Space application on your computer or mobile device. From the Canvas, click “New Project” to start fresh, or open an existing project where you want to add your image.
Step 2: Click the “Upload” Button On the left-hand sidebar of the Design Space Canvas, you’ll find a series of icons. Click on the “Upload” icon (it typically looks like a cloud with an upward arrow). This will open the Upload Image screen.
Step 3: Choose Your Image On the Upload Image screen, you have two main options:
- “Upload Image”: Click this to browse your computer or device for the image file you want to upload. Navigate to the location where you saved your pre-prepared image from Tophinhanhdep.com or your custom design.
- “Upload Pattern Fill”: This is for patterns you want to use for “Print Then Cut” projects, where the pattern fills a shape. For most direct image uploads for cutting, you’ll use “Upload Image.”
Once you’ve selected your file, Design Space will display a preview.
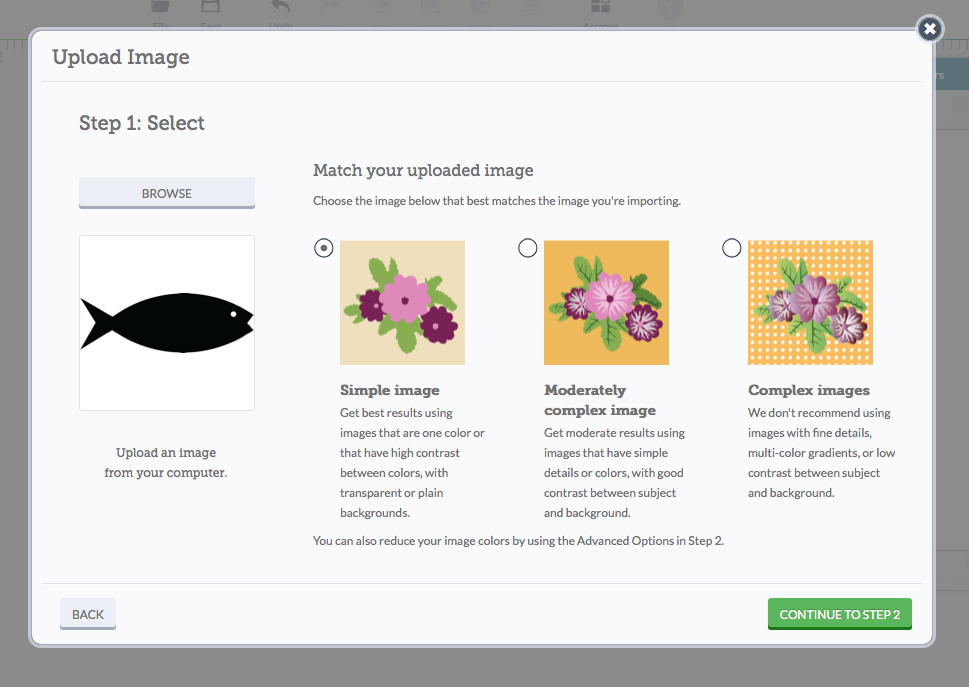
Step 4: Select Image Type (For Raster Images Only) This crucial step applies specifically to raster images (JPG, PNG, BMP, GIF). Cricut Design Space needs to understand how complex your image is to best process it for cleaning up and creating cut lines. You’ll be presented with three options:
- Simple: Best for images with high contrast, a single color, and a transparent or solid, uniform background (e.g., a simple logo, silhouette).
- Moderately Complex: Suitable for images with multiple colors, good contrast, and some detail (e.g., basic illustrations, photographs with clear subjects).
- Complex: For detailed images with many colors, intricate details, and varied backgrounds (e.g., detailed photographs, complex digital art). Choose the option that best describes your image. If you selected a “Beautiful Photography” piece from Tophinhanhdep.com, “Complex” might be the starting point, while a simple “Abstract” pattern might be “Simple.” Click “Continue.”
Step 5: Clean Up Your Image (For Raster Images Only) This is where you refine your raster image to define the cut lines. The tools available are:
- Magic Wand (Select & Erase): The most powerful tool for background removal. Click on the areas you want to remove (typically the background and any internal “holes” you want cut out). Design Space will highlight the areas it intends to remove with a checkerboard pattern. This works best when you’ve chosen a high-contrast image, perhaps a “Nature” silhouette against a plain sky from Tophinhanhdep.com.
- Eraser: For manually erasing smaller, stubborn areas or fine-tuning. You can adjust the eraser size.
- Crop: Use this to trim unwanted edges around your image.
- Preview Cut Image: Critically, use this button to see exactly what Cricut will cut. Look for any unintended gaps, rough edges, or areas that haven’t been removed properly. Go back and refine using the eraser or magic wand until your preview looks perfect. This attention to detail ensures your final project, perhaps based on an intricate “Digital Art” piece, comes out flawlessly. Click “Continue” once you’re satisfied with the cut preview.
Step 6: Save Your Image On the next screen, you’ll choose how to save your image:
- “Save as a Print Then Cut Image”: Select this if you want to print your image on your home printer and then have the Cricut cut around it. This is ideal for most “Beautiful Photography,” “Wallpapers,” or intricate “Aesthetic” images from Tophinhanhdep.com that you want to preserve in full color.
- “Save as a Cut Image”: Select this if you only want Cricut to cut the outline or specific shapes from your image, creating a solid color cut from material. This is for designs like silhouettes or simple graphics, often derived from “Abstract” patterns or simplified “Graphic Design” elements. You’ll also need to give your image a name and, optionally, add tags to make it easier to find later in your uploaded images library. Click “Save.”
Step 7: Insert into Canvas Your uploaded image will now appear in your “Uploaded Images” library. Select the image you just saved and click the “Insert Images” button on the bottom right of the screen. Your image will appear on the Design Space Canvas, ready for resizing, positioning, duplicating, or further manipulation to integrate into your project.
Optimizing Your Cricut Project with Tophinhanhdep.com Resources
Uploading an image is just the beginning. To truly create stunning Cricut projects, you need to think about the entire design process, from initial concept to final execution. Tophinhanhdep.com is not just a source for images but a comprehensive platform that can continually inspire and equip you.
Beyond the Upload: Refining Your Project
The quality of the initial image, sourced from Tophinhanhdep.com’s vast collections (be it a vibrant “Nature” scene, a thought-provoking “Sad/Emotional” piece, or a sophisticated “Abstract” graphic), profoundly influences the clarity and impact of your final Cricut creation. A high-resolution photo from Tophinhanhdep.com ensures that your “Print Then Cut” decals are sharp and vibrant, while a clean, vector-inspired image allows for intricate and precise cuts. Always return to the source of quality; if a project isn’t turning out as expected, consider if a higher resolution or better-prepared image from Tophinhanhdep.com could be the solution.
Visual Design for Impact: Elevating Your Craft
The “Visual Design” section on Tophinhanhdep.com offers more than just images; it provides a wellspring of knowledge in “Graphic Design,” “Digital Art,” and “Photo Manipulation.” This understanding translates directly to better Cricut projects. Learning about color theory, composition, and typography can help you choose or create images that are not only appealing but also functional for cutting or printing. For example, knowing how to apply simple “Photo Manipulation” techniques can turn a standard photo into a striking black-and-white silhouette ideal for a cut project, or enhance the colors of a “Beautiful Photography” piece for a “Print Then Cut” sticker. These “Creative Ideas” are boundless when you approach your Cricut projects with a designer’s eye, honed by resources like Tophinhanhdep.com.
Inspiration for Your Next Creation: Endless Possibilities
Feeling stuck for ideas? Tophinhanhdep.com’s “Image Inspiration & Collections” is an invaluable resource. Explore “Photo Ideas,” browse “Mood Boards,” dive into “Thematic Collections” (like seasonal, holiday, or specific aesthetic themes), and discover “Trending Styles.” Whether you’re looking for an “Aesthetic Background” to complement a text overlay, a “Nature Wallpaper” for a serene shadow box, or an “Abstract” pattern to cut into a multi-layered design, the platform provides an endless stream of visual stimuli. These collections can help you identify a style, a color palette, or even a specific image that sparks your next brilliant Cricut project, turning simple materials into personalized masterpieces.
Advanced Techniques & Troubleshooting: The Tophinhanhdep.com Advantage
Even with the best preparation, you might encounter issues. If your cuts aren’t clean, your “Print Then Cut” colors are off, or your images are taking too long to process, the root cause often lies in the initial image quality or preparation. This is where Tophinhanhdep.com’s comprehensive approach shines. Using their “Image Tools” to convert to the optimal format, compress files to improve performance, or even upscale lower-resolution images can resolve many common Cricut frustrations. Furthermore, continuously exploring “Digital Photography” and “Editing Styles” on Tophinhanhdep.com can enhance your ability to pre-process images, reducing the need for extensive cleanup within Design Space itself.
In conclusion, uploading images to Cricut is a fundamental skill for any crafter looking to personalize their projects. By understanding the different image types, meticulously preparing your files, and leveraging the powerful resources offered by Tophinhanhdep.com – from its vast collections of high-resolution images and inspiring “Visual Design” content to its practical “Image Tools” – you can transform your creative ideas into tangible, beautiful creations with ease and confidence. So, dive into Tophinhanhdep.com, find your perfect image, and let your Cricut machine bring your artistic visions to life!