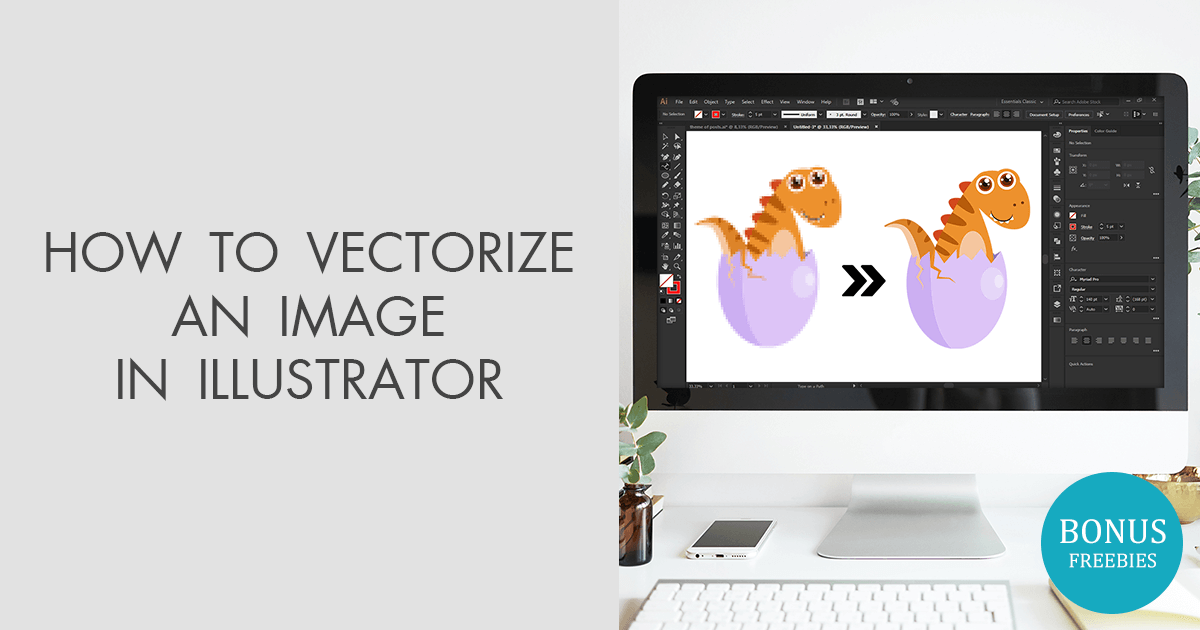
Mastering Image Vectorization in Illustrator: Your Guide to Crisp, Scalable Visuals

In the dynamic world of digital imagery, where visual quality dictates impact, understanding the fundamental differences between image types is crucial. When you browse the extensive collections of Wallpapers, Backgrounds, Aesthetic imagery, or Beautiful Photography on Tophinhanhdep.com, you’re primarily encountering raster images. These images, composed of countless tiny pixels, excel at capturing intricate detail and subtle color gradients, making them perfect for displaying rich photographic content. However, their pixel-based nature comes with a significant limitation: scalability. Attempt to enlarge a raster image beyond its native resolution, and you’re met with the dreaded pixelation—a fuzzy, blurred outcome that diminishes its professional appeal.
This is where vectorization enters as a transformative technique. Vector graphics, unlike their raster counterparts, are built from mathematical equations that define points, lines, and curves. This fundamental difference means they are resolution-independent. Whether you’re scaling an image to adorn a billboard or shrinking it for a tiny web icon, a vector graphic maintains its pristine sharpness and clarity without any loss of quality. For anyone involved in Visual Design, Graphic Design, or Digital Art, mastering the art of vectorizing images is not merely a skill; it’s a necessity. It ensures that your logos, illustrations, and design elements retain their integrity and impact across all mediums and sizes.
Adobe Illustrator has long been the industry standard for creating and manipulating vector graphics, offering a robust suite of tools, including its powerful Image Trace feature, to convert raster images into editable vector art. While Illustrator provides extensive control and precision, the process can sometimes feel intricate. Thankfully, innovative Image Tools like Linearity Curve also offer streamlined, AI-powered alternatives that simplify vectorization, making it more accessible for rapid creative workflows. This comprehensive guide will walk you through the essential steps of vectorizing an image in Adobe Illustrator, alongside exploring faster alternatives, ensuring your designs are always prepared for whatever your project demands, from a striking wallpaper to a crisp print.
Understanding the Power of Vector Graphics
To truly appreciate the process of vectorization, it’s essential to grasp the core differences between raster and vector images. This foundational knowledge empowers creators to make informed decisions about their image assets, especially when considering applications ranging from high-resolution digital photography to intricate graphic designs.
Raster Images: The Pixel-Perfect World (and Its Limitations) Raster images are the most common type of digital image. They are essentially a grid of tiny colored squares, or pixels, each containing specific color information. When you zoom in on a raster image, you eventually see these individual pixels. Popular raster file formats include JPEG, PNG, GIF, and TIFF. They are ideal for photographs and images with continuous tones and subtle color transitions, such as the stunning Nature and Abstract photography found on Tophinhanhdep.com. However, because they have a fixed number of pixels, enlarging a raster image requires the software to invent new pixels or stretch existing ones, leading to a noticeable degradation in quality, commonly known as “pixelation.” This limitation makes them unsuitable for designs that require frequent resizing, especially for large-format printing or brand assets.
Vector Images: The Scalable Solution In stark contrast, vector images are composed of mathematical descriptions of geometric primitives—points, lines, curves, and polygons—rather than pixels. Each of these elements has properties like color, thickness, and position defined by equations. This means that when a vector image is scaled, the software simply recalculates these mathematical descriptions to redraw the image at the new size. The result is consistently sharp, crisp lines and colors, regardless of how much it’s enlarged or reduced. Common vector file formats include SVG (Scalable Vector Graphics), AI (Adobe Illustrator Artwork), EPS (Encapsulated PostScript), and PDF (Portable Document Format, often containing vector data). Vector graphics are indispensable for logos, icons, illustrations, typography, and graphic designs that need to maintain impeccable quality across various scales and applications. For professionals relying on high-resolution stock photos or creating detailed digital art for commercial use, the ability to convert images to vector format is a game-changer.
The benefits of vectorization extend beyond mere scalability. Vector files are often smaller in file size for simple graphics compared to high-resolution raster images, and they allow for easier and more precise editing of individual shapes and colors. This makes them an invaluable asset for anyone looking to refine Creative Ideas, build comprehensive Mood Boards, or ensure the longevity and versatility of their Visual Design elements.
Step-by-Step Vectorization in Adobe Illustrator
Adobe Illustrator’s Image Trace feature is a powerful tool for converting raster images into vector graphics, offering a comprehensive workflow for designers seeking precision and control. This process is fundamental for anyone looking to transform photographs, scanned sketches, or low-resolution images into scalable vector art, ready for print or web deployment.
Preparing Your Raster Image for Optimal Tracing
Before diving into Illustrator, a little preparation can significantly improve your vectorization results. The quality and characteristics of your source raster image directly influence the output.
-
Image Selection and Characteristics:
- Simplicity is Key: Images with fewer colors, clear lines, and distinct shapes tend to vectorize more cleanly. While Illustrator can handle complex photos, simpler graphics (like logos, line art, or illustrations) yield better results with less manual cleanup.
- Background Matters: A white or transparent background often simplifies the tracing process, making it easier to isolate the main subject. If your image has a busy background, consider removing it in a raster editing tool like Photoshop beforehand.
- Resolution (Surprisingly): While vectorization aims to overcome resolution limitations, starting with a reasonably clear, though not necessarily high-resolution, image helps Illustrator interpret details more accurately. Extremely blurry or pixelated raster images will produce less refined vector paths.
- File Formats: JPG, PNG, GIF, and TIFF are commonly supported raster formats for import into Illustrator.
-
Setting Up Your Document:
- Open Adobe Illustrator: Launch the application.
- Create a New Document: Go to
File > New. In the new document dialog, choose a canvas size appropriate for your project. While the vector outcome is scalable, a larger artboard provides more room to work. Set the resolution to 300 PPI (Pixels Per Inch) if your work is intended for print, or 72 PPI for web-only use. - Color Mode: Select the correct color mode:
RGB(Red, Green, Blue) for digital displays and web content, orCMYK(Cyan, Magenta, Yellow, Key/Black) if the final output will be for commercial printing. This initial setup helps maintain color accuracy throughout your design process.
Leveraging Illustrator’s Image Trace Feature
Once your document is ready and your image is prepared, it’s time to unleash Illustrator’s core vectorization power.
-
Importing the Image:
- Go to
File > Place.... Navigate to your raster image file and clickPlace. - Click on your artboard to place the image. If needed, you can resize it by dragging the bounding box handles while holding
Shiftto maintain proportions.
- Go to
-
Accessing the Image Trace Panel:
- With your raster image selected, open the Image Trace panel. You can do this by going to
Window > Image Trace. Alternatively, you might find Image Trace options directly in the Control Bar at the top or the Properties Panel on the right side of your workspace.
- With your raster image selected, open the Image Trace panel. You can do this by going to
-
Exploring Image Trace Presets:
- The Image Trace panel offers a variety of presets designed to handle different types of raster images. Experimenting with these is often the quickest way to get a good starting point. Crucially, ensure the “Preview” checkbox is selected in the Image Trace panel to see real-time adjustments as you modify settings.
- High Fidelity Photo / Low Fidelity Photo: Best for complex photographic images or detailed artwork, these presets aim to preserve a high amount of detail and color.
- 3 Colors / 6 Colors / 16 Colors: Ideal for logos, cartoons, or artwork with a limited color palette. These presets simplify the image to a specified number of colors, creating flat, distinct shapes.
- Grayscale: Converts the image to shades of gray, useful for monochrome designs or preparatory steps.
- Black and White Logo: Creates a simple, stark black-and-white vector, perfect for simple line art or logos.
- Sketched Art / Silhouettes / Line Art / Technical Drawing: These presets are tailored for specific types of line-based or high-contrast imagery, producing results that emphasize outlines and shapes.
-
Adjusting Advanced Settings:
- After selecting a preset, open the
Advancedoptions in the Image Trace panel for fine-tuning. This is where you gain granular control over the vectorization process. - Mode: Re-select your color mode (Color, Grayscale, or Black & White) if the preset didn’t set it to your preference.
- Colors / Grays / Threshold: These sliders control the number of colors or shades captured, or the threshold for black and white conversion. Dragging left simplifies, dragging right adds more detail.
- Paths: Controls how tightly the vector paths hug the original image’s edges. Higher values create more precise, detailed paths; lower values create smoother, simpler paths.
- Corners: Determines the sharpness of corners. Higher values produce sharper angles; lower values result in rounder corners.
- Noise: Filters out small, unwanted details or “noise” from the original image. Increasing this value can clean up rough traces.
- Method (Abutting/Overlapping): Choose how adjacent paths interact. Abutting creates paths that meet precisely; Overlapping creates paths that slightly overlap.
- Ignore White: A handy option that automatically removes any white background, leaving only your vectorized design elements. This is excellent for isolating objects or creating transparent backgrounds.
- Don’t forget the ‘Preview’ checkbox! It’s your best friend for seeing the changes instantly.
- After selecting a preset, open the
Refining and Editing Your Vector Artwork
Once you’re satisfied with the preview, the tracing is complete, but the image is not yet fully editable vector art.
-
Expanding the Trace:
- Click the
Expandbutton in the Control Bar or the Image Trace panel. This crucial step converts the temporary Image Trace object into actual, editable vector paths and shapes. Until this is done, you can’t manipulate individual elements.
- Click the
-
Ungrouping Shapes for Individual Control:
- After expanding, your vectorized image will likely be grouped as a single object. To edit individual shapes or colors, you need to ungroup it.
- Right-click on the vectorized image and select
Ungroup, or go toObject > Ungroup, or use the shortcutShift + Ctrl + G(Windows) /Shift + Cmd + G(Mac). You might need to ungroup multiple times if there are nested groups.
-
Editing Individual Elements:
- Direct Selection Tool (A): Use this white arrow tool to select individual anchor points, paths, or segments within a shape, allowing for highly precise adjustments to curves and lines.
- Selection Tool (V): Use this black arrow tool to select entire shapes or groups of shapes.
- Modifying Colors: Select one or more shapes, then use the
FillandStrokecolor pickers in the Properties panel, Control Bar, or Tools panel to change their colors. - Batch Editing: To change all instances of a specific color, select a shape with that color, then go to
Select > Same > Fill Color. This will select all shapes with the exact same fill color, allowing you to change them simultaneously. - Removing Unwanted Elements: To remove an unwanted background (if you didn’t use “Ignore White” or it wasn’t effective), select it with the Direct Selection Tool and press
Delete. - Pen Tool (P) / Brush Tool (B): For more complex modifications, you can use the Pen Tool to add or subtract anchor points, redraw paths, or create entirely new vector shapes. The Brush Tool can be used to add artistic flourishes.
Saving and Exporting Your Vector Masterpiece
The final step is to save your newly created vector file in an appropriate format, ensuring its quality and versatility for future use.
-
Saving Your Project:
- Go to
File > SaveorFile > Save As.... - Choose
Adobe Illustrator (*.AI)as the format. This is Illustrator’s native file format and preserves all layers, editability, and vector information. It is crucial to always keep this.aifile as your master copy.
- Go to
-
Exporting for Various Uses:
- For wider compatibility or specific applications (like web design, T-shirt printing, or sharing with clients who may not have Illustrator), you’ll need to export your vector image.
- Go to
File > Export > Export As.... - Vector Formats:
- SVG (Scalable Vector Graphics): Excellent for web use, as it’s an XML-based vector image format that can be embedded directly into HTML and scaled responsively. Highly recommended for web graphics, icons, and logos.
- EPS (Encapsulated PostScript): A widely supported vector format for print production and interoperability between different design software.
- PDF (Portable Document Format): Often used for sharing documents and can contain vector data, preserving design elements for viewing and printing.
- Choose your desired format and click
Export. You may encounter additional dialogs for specific settings related to the chosen format (e.g., SVG options for responsiveness).
By following these steps, you will have successfully transformed a pixel-based raster image into a sharp, endlessly scalable vector graphic, ready to enhance your visual projects on Tophinhanhdep.com and beyond.
Beyond Illustrator: Streamlining Vectorization with Smart Tools
While Adobe Illustrator remains the gold standard for comprehensive vector design and precise image tracing, the design landscape is continually evolving, offering users innovative Image Tools that streamline complex tasks. For those seeking faster, more intuitive alternatives, especially when dealing with various types of raster images or working on the go, platforms like Linearity Curve provide compelling solutions.
Linearity Curve, for instance, distinguishes itself by offering an AI-powered Auto Trace feature, designed to convert raster images to vector shapes in just a few clicks. This is particularly beneficial for digital creatives who prioritize speed and efficiency without compromising quality. The workflow is significantly simplified:
- Import: Simply open your raster image as a new document or import it onto an existing artboard.
- Auto Trace: Select your image, and the Auto Trace panel appears. Adjust sliders like
ComplexityandContrastto refine the detail of your new vector image, then clickAuto Trace. - Export: Linearity Curve often auto-saves progress, allowing you to export your design in vector-friendly formats like SVG or PDF when satisfied.
What makes these smart tools particularly effective are their specialized Auto Trace Modes, enhanced with AI to automatically apply the best settings for different image types:
- Sketch Mode: Ideal for digitizing hand-drawn sketches into clean vector shapes, a boon for artists converting traditional artwork.
- Photography Mode: Transforms photos into artistic, vectorized images with a painting-like effect, offering a unique approach to image manipulation.
- Illustration Mode: Perfect for vibrant, flat illustrations, ensuring professional vector designs from your artwork.
- Basic Shapes Mode: Best for low-detail designs, simplifying images by generating fewer, simpler shapes for quicker editing.
These specialized modes, combined with intuitive sliders like Detail Level, Color Precision, and Gradient Smoothness, and features like Ignore White for effortless background removal, make vectorization straightforward. Such tools empower designers to quickly experiment with Creative Ideas, update logos, or prepare designs for printing, yielding high-quality results with minimal effort. They perfectly complement the array of image tools and visual design resources Tophinhanhdep.com advocates, offering diverse avenues for creativity.
For those without access to Adobe Illustrator or seeking free options, other tools exist, though they may require more manual effort or offer fewer advanced features:
- Adobe Photoshop: Primarily a raster editor, Photoshop’s Pen Tool can be used to manually trace over raster images, creating vector paths. This method is highly precise but notoriously time-consuming.
- Figma: Geared towards UI/UX design, Figma also includes a Pen Tool that allows for manual tracing of images on a new vector layer. It’s suitable for simpler shapes and outlines.
- Free Online Tools: Websites like AutoTracer, Vectorization.org, or Inkscape offer basic vectorization capabilities for simple graphics. While convenient for quick conversions, they often lack the advanced features and precision of professional software like Illustrator or AI-driven alternatives.
These diverse tools underscore the fact that vectorization, a core process for enhancing Image Quality and Visual Design, is becoming increasingly accessible, catering to various skill levels and project requirements.
Maximizing Your Designs with Vectorized Images
The ability to vectorize images unlocks a vast potential for creators, ensuring that your visual assets—from the Wallpapers and Backgrounds on Tophinhanhdep.com to intricate branding elements—always maintain peak quality and adaptability. Vectorization is not just a technical step; it’s a strategic move that fundamentally enhances your entire design workflow and output, aligning perfectly with Tophinhanhdep.com’s commitment to high-quality visual content.
Empowering Visual Design & Graphic Design
For Graphic Design and Digital Art, vectorized images are indispensable.
- Logos and Branding: A company logo must be a vector. This allows it to be scaled from a tiny favicon on a website to a massive banner on a building without any pixelation. Vectorization ensures brand consistency and professionalism across all marketing materials, both digital and print.
- Illustrations and Icons: Digital artists and illustrators benefit immensely from vectorization. It allows for the creation of sharp, clean lines and shapes that can be easily edited, recolored, and reused in various projects. Icons, crucial for user interfaces and web design, remain crisp regardless of display size.
- Print Media: For anything destined for print—brochures, posters, T-shirts, packaging—vector graphics guarantee sharp edges and vibrant colors, free from the blurriness that often plagues raster images when printed at larger scales. As mentioned on Tophinhanhdep.com, “clear artwork to ensure a quality print” is paramount.
Elevating Photography & Image Collections
While photography is inherently raster-based, vectorization offers a unique avenue for creative expression and utility, particularly for High Resolution Stock Photos and other Image Collections.
- Artistic Transformations: Vectorizing a photograph can transform it into an artistic illustration or a painting-like effect, as demonstrated by tools with “Photography Mode.” This opens up new Editing Styles and Creative Ideas for artists to reimagine Beautiful Photography.
- Thematic Collections and Mood Boards: Vector elements derived from photos can be incorporated into Mood Boards or Thematic Collections, providing scalable graphic accents or stylistic elements that maintain their clarity even when composited with other vector art.
- Digital Photography Enhancement: Although you don’t typically vectorize a portrait photo for viewing, extracting vector outlines or simplifying elements can be part of a broader photo manipulation process, creating unique visual effects or enhancing specific features.
Driving Creative Ideas & Image Inspiration
Vectorization serves as a powerful catalyst for Creative Ideas and Image Inspiration.
- Flexibility in Experimentation: Because vector graphics are easily editable and infinitely scalable, designers are freed to experiment more. Changes in color, shape, and size can be made non-destructively, encouraging iteration and refinement. This agility is vital for exploring Trending Styles or developing new visual concepts.
- Cross-Platform Consistency: In today’s multi-device world, visuals need to look good everywhere. Vectorized images ensure your designs are perfectly rendered across different screens, resolutions, and print outputs, providing a consistent and high-quality user experience.
- Resource for Image Tools: Understanding vectorization is key to leveraging advanced Image Tools like AI Upscalers, which often utilize vector-like principles to enhance raster images, or converters that allow seamless format transitions. It integrates into a holistic approach to managing and optimizing visual assets.
In essence, embracing vectorization is about future-proofing your designs. It means every logo, every illustration, and every graphic detail curated from Tophinhanhdep.com’s vast image library can be utilized with unwavering quality and impact, regardless of its final application. It empowers you to create with confidence, knowing your visuals will always be sharp, adaptable, and professional.
Conclusion: Unleashing Limitless Visual Potential
The journey from a pixelated raster image to a pristine, scalable vector graphic is a fundamental skill for anyone passionate about visual communication and design. Whether you’re a seasoned professional creating intricate digital art or a beginner exploring aesthetic backgrounds for a personal project, the ability to vectorize ensures your work is always presented with the highest fidelity. Adobe Illustrator, with its comprehensive Image Trace feature and extensive editing capabilities, offers a powerful platform for achieving precise vectorization, giving you granular control over every curve and line.
Furthermore, the emergence of intuitive Image Tools like Linearity Curve demonstrates how AI-powered solutions are making vectorization more accessible and efficient than ever, allowing for rapid transformation of various image types into scalable assets. This diverse toolkit means that whether you prefer the in-depth control of Illustrator or the streamlined approach of smart alternatives, quality vectorization is within reach.
On Tophinhanhdep.com, we understand the critical role that image quality plays in captivating audiences. From high-resolution photography to stunning abstract designs, every visual asset deserves to be displayed and utilized in its best form. By mastering image vectorization, you not only overcome the limitations of resolution but also unlock a realm of creative possibilities for your Visual Design projects, Graphic Design endeavors, and every artistic aspiration.
Embrace the power of vector graphics to ensure your logos, illustrations, and design elements maintain their integrity and impact across all mediums and scales. Explore the vast resources, inspiration, and tools available on Tophinhanhdep.com to further elevate your image creation and manipulation skills, ensuring your visual content is always crisp, versatile, and impactful. Start vectorizing today and transform your creative vision into a limitless reality.