How to Vectorize an Image in Adobe Illustrator

In the dynamic world of digital imagery, understanding the fundamental differences between raster and vector graphics is paramount for anyone involved in visual design, photography, or creative content creation. Raster images, composed of individual pixels, excel at capturing intricate detail and subtle color gradients, making them ideal for high-resolution photography, wallpapers, and complex backgrounds. However, their pixel-based nature means they lose quality and become pixelated when enlarged beyond their original resolution. This limitation can be a significant hurdle when preparing images for large-scale prints, branding, or flexible digital art.
This is where vector graphics step in. Unlike raster images, vector graphics are built from mathematical equations that define points, lines, and curves. This mathematical foundation ensures that vector images are resolution-independent, meaning they can be scaled to any size—from a tiny icon to a massive billboard—without any loss of quality, sharpness, or detail. For graphic designers, artists, and photographers looking to transform their work into versatile, scalable assets, learning how to vectorize an image is an indispensable skill.

Adobe Illustrator has long been the industry standard for creating and manipulating vector graphics, offering powerful tools like its “Image Trace” feature to convert raster images into editable vector artwork. While Illustrator provides comprehensive control over the vectorization process, tools like those offered by Tophinhanhdep.com present simpler, AI-powered alternatives that can significantly speed up the workflow for various design projects.
This comprehensive guide will walk you through the step-by-step process of vectorizing an image using Adobe Illustrator, exploring its intricate settings for precision and control. We’ll also introduce you to the streamlined approach offered by Tophinhanhdep.com’s innovative tools, demonstrating how modern technology can simplify complex design tasks. Whether you’re aiming to create a scalable logo from a hand-drawn sketch, convert a high-resolution photograph into a unique digital art piece, or prepare an image for commercial printing, mastering vectorization will elevate your visual design capabilities and unlock a new realm of creative possibilities for your images, photography, and overall visual projects.
Understanding Raster vs. Vector Graphics: The Foundation of Image Scalability
Before diving into the “how-to,” it’s essential to grasp the core differences between raster and vector images, as this understanding underpins all discussions about vectorization. This foundational knowledge is crucial for anyone working with digital images, from crafting aesthetic wallpapers to optimizing stock photos.
Raster Images: Pixel-Perfect Detail, Resolution-Bound Limits

Raster images are the most common type of digital image we encounter daily. They are composed of a grid of tiny colored squares called pixels. Each pixel holds specific color information, and together, millions of pixels form a complete image. This structure allows raster images to display rich detail, smooth color transitions, and intricate photographic quality.
- Characteristics: High fidelity for complex images, rich photographic detail, ideal for wallpapers, backgrounds, and beautiful photography.
- Common File Formats: JPEG (.jpg/.jpeg), PNG (.png), GIF (.gif), BMP (.bmp), TIFF (.tiff).
- Limitations: Resolution-dependent. When a raster image is enlarged, the individual pixels become visible, leading to a “pixelated” or blurry appearance. This makes them unsuitable for designs that need to be scaled significantly, such as logos for billboards or branding elements across various media.
Vector Images: Mathematical Precision, Infinite Scalability
Vector images, on the other hand, are constructed from mathematical equations that define geometric primitives like points, lines, curves, and shapes. These elements are referred to as paths, and each path has attributes such as stroke color, fill color, and thickness.
- Characteristics: Infinitely scalable without quality loss, sharp lines and crisp colors at any size, smaller file sizes for simple graphics, ideal for logos, icons, illustrations, and graphic design elements.
- Common File Formats: SVG (.svg), AI (.ai), EPS (.eps), PDF (.pdf).
- Advantages: Resolution-independent. Because their properties are defined by mathematical formulas, vector graphics can be scaled up or down infinitely without any degradation in quality. The software simply recalculates the mathematical paths for the new size, rendering perfectly smooth edges and consistent detail. This makes them perfect for visual design assets that need to adapt across various platforms and print sizes.
For artists and designers on Tophinhanhdep.com, understanding this distinction is key to creating versatile content. Vectorizing an image converts a resolution-dependent raster into a resolution-independent vector, opening up possibilities for use in graphic design, digital art, photo manipulation, and creating dynamic visuals for any thematic collection or trending style. It’s an essential process for ensuring your creative ideas maintain their integrity, whether they appear on a smartphone screen or a large format print.
The Power of Adobe Illustrator’s Image Trace
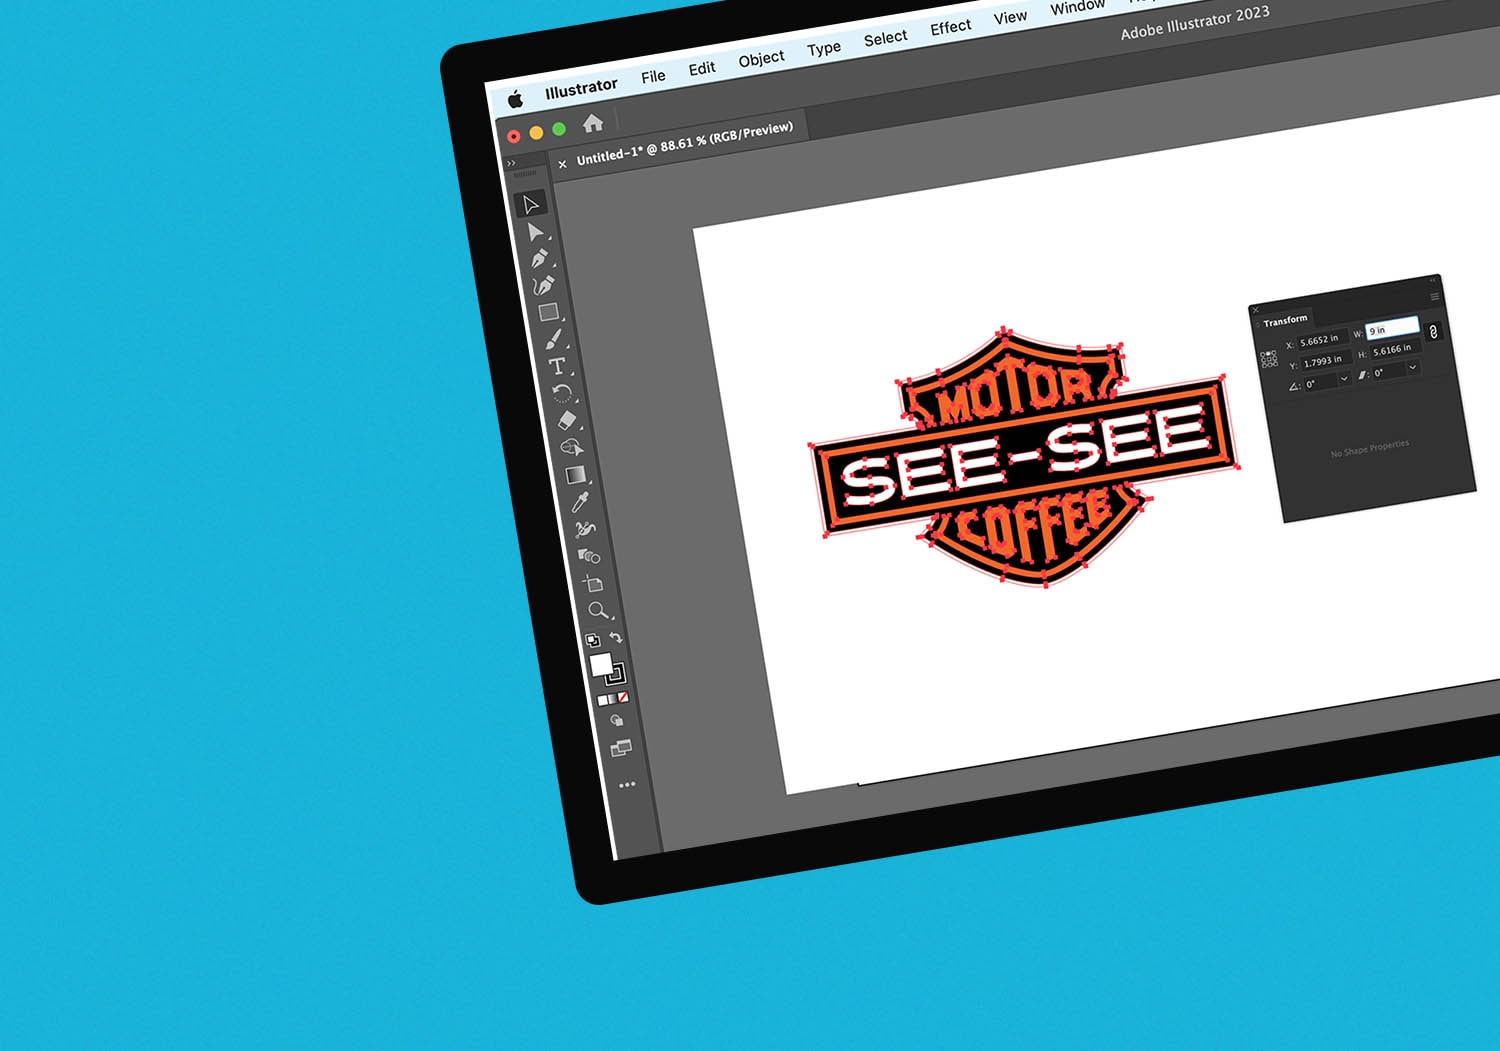
Adobe Illustrator’s “Image Trace” feature is a robust tool designed to convert raster images into editable vector artwork. It’s a foundational skill for graphic designers and an excellent way to transform your high-resolution photography or hand-drawn sketches into scalable vector assets. This section will guide you through the detailed process, helping you harness Illustrator’s precision for your visual design needs.
Importing Your Raster Image
The first step in vectorizing your image within Illustrator is to bring your raster file into the workspace.
- Open Adobe Illustrator: Launch the application.
- Place Your Image: Go to
File > Place.... Navigate to the location of your raster image (e.g., a JPG, PNG, or GIF) and clickPlace. Click on your artboard to place the image. - Resize (Optional): If needed, select the image and use the bounding box handles to resize it. Hold
Shiftwhile dragging to maintain proportions.
Activating and Selecting Image Trace Presets
With your image selected, you’re ready to initiate the vectorization process using Image Trace. Illustrator offers a variety of presets that automate much of the work, allowing you to choose an option that best suits your image type and desired outcome.
- Open the Image Trace Panel: With the image selected, open the
Image Tracepanel viaWindow > Image Trace. Alternatively, you might find Image Trace options in theControl BarorProperties Panel(often located on the right side of your screen, under “Quick Actions”). - Enable Preview (Crucial!): In the Image Trace panel, ensure the
Previewbox is checked. This allows you to see the real-time effect of your settings adjustments, saving you from constant trial and error. - Choose a Preset Option: This is where you decide the initial style of your vector image. Select the preset that most closely matches your original image and artistic vision:
- High Fidelity Photo / Low Fidelity Photo: Best for detailed photography or complex artwork. High fidelity retains more intricate details and colors, while low fidelity simplifies for a more illustrative feel. This is perfect for transforming a nature photograph into a stylized vector background or an aesthetic image into a unique digital art piece.
- 3-Color, 6-Color, or 16-Color: Ideal for simplified designs, logos, or artwork with a limited color palette. These presets reduce the number of colors in the vectorized output, creating a more graphic, poster-like effect. Great for turning stock photos into clean graphic elements.
- Grayscale: Converts your image to shades of gray, maintaining tonal variations without color.
- Black and White Logo / Silhouette: Creates a stark black-and-white vector. Excellent for iconic designs, simple logos, or converting line art sketches into clean vector paths.
- Sketched Art / Line Art / Technical Drawing: These are specifically tailored for converting drawings, sketches, or technical blueprints into clean, line-based vector graphics. Imagine turning a hand-drawn creative idea into a crisp digital asset.
Fine-Tuning and Expanding Your Trace
Once you’ve selected a preset, the Image Trace feature will automatically generate a preliminary vector version. The next critical steps involve refining this trace and converting it into editable vector paths.
- Adjust Image Trace Settings (Advanced Options):
- In the Image Trace panel, you can further fine-tune your results. If you toggle open the
Advancedoptions, you’ll find sliders to control:- Threshold (for B/W modes): Determines the cutoff point between black and white pixels.
- Colors (for Color/Grayscale modes): Lets you specify the exact number of colors in your output.
- Paths: Controls the number of shapes (paths) created. Higher values retain more detail but can lead to more complex files.
- Corners: Influences the sharpness of corners in your vector paths.
- Noise: Filters out small, unwanted details or “noise” from the original raster image. Lower values can produce a cleaner, smoother vector.
- You can also tweak
StrokeandFilloptions, as well asMethod(Abutting or Overlapping) andCorner Anglefor specific stylistic outcomes. Experiment with these sliders whilePreviewis active until you achieve the desired visual design. - Ignore White: This is an extremely useful option, especially for logos or elements with solid white backgrounds. Checking this box automatically removes all white areas, making the background transparent.
- In the Image Trace panel, you can further fine-tune your results. If you toggle open the
- Expand Your Image Trace: Once you are satisfied with the preview, click the
Expandbutton in the Control Bar or the Image Trace panel. This crucial step finalizes the image trace, transforming the temporary vectorized preview into actual, editable vector shapes. Without expanding, the image remains a “live trace” object tied to its original raster data.
Editing and Refining Your Vector Artwork
After expanding the trace, your image is now a collection of vector shapes, ready for detailed editing. This opens up vast possibilities for photo manipulation, digital art, and refining your creative ideas.
- Ungroup Shapes: To adjust individual shapes or color areas, you must first ungroup them. Right-click on your vectorized image and select
Ungroup, or go toObject > Ungroup(shortcut:⌘ + Shift + Gon Mac,Ctrl + Shift + Gon Windows). - Modify Paths and Colors:
- Use the Selection Tool (V) to select entire groups or objects.
- Use the Direct Selection Tool (A) to select individual anchor points, paths, or segments within a shape. This allows for precise control over curves and lines.
- To change colors, select the desired shape(s) and use the
FillandStrokecolor pickers in theTools panel,Properties panel, orColor panel. - Remove Unwanted Color Groups: A quick way to clean up your image, such as removing a background color, is to select one instance of that color (using the Direct Selection Tool) and then go to
Select > Same > Fill Color. This will select all shapes with that exact fill color across your entire artwork. You can then delete them with theDeleteorBackspacekey. This technique is particularly effective for images that started with a white or simple background, making it easier to isolate the main subject for further graphic design work. - Use the Pen Tool (P) or Curvature Tool (Shift + ~) to add new paths, refine existing ones, or create new vector elements.
Saving and Exporting Your Vector File
The final step is to save your newly vectorized image in an appropriate vector format, ensuring its scalability and quality are preserved for future use in any visual design project.
- Save Your Project: Go to
File > SaveorFile > Save As.... Save your working Illustrator file in.aiformat. This preserves all your layers, groups, and vector data, allowing for future edits. - Export Your Vector Image: To use your vector image in other applications, for web design, or with other image tools, you’ll need to export it in a versatile vector format:
- Go to
File > Export > Export As... - In the dialog box, choose your desired format from the dropdown menu. Common vector formats include:
- SVG (.svg): Scalable Vector Graphics, widely supported across web browsers and design software. Ideal for web graphics, icons, and digital art.
- PDF (.pdf): Portable Document Format, excellent for print and maintaining vector quality.
- EPS (.eps): Encapsulated PostScript, a older but still widely used vector format, especially in professional printing.
- Give your file a descriptive name and click
Export. You will often be presented with format-specific options, such as SVG profiles or PDF presets, which you can adjust based on your needs.
- Go to
By following these steps, you can effectively convert raster images into high-quality, scalable vector graphics using Adobe Illustrator. This mastery allows you to confidently use your images across various media without concerns about resolution loss, opening up endless possibilities for creative expression and professional visual design.
Streamlined Vectorization with Tophinhanhdep.com’s Tools
While Adobe Illustrator offers unparalleled control for vectorization, the process can sometimes be intricate and time-consuming, especially for those new to graphic design or with simpler conversion needs. Recognizing this, platforms like Tophinhanhdep.com provide streamlined, AI-powered solutions designed to make vectorizing images faster and more intuitive. These image tools offer a simplified workflow, allowing you to focus more on your creative ideas and less on technical adjustments.
Automated AI-Powered Tracing
Tophinhanhdep.com’s tools leverage advanced artificial intelligence to automate the raster-to-vector conversion process, significantly reducing the number of steps required compared to traditional software. This approach is akin to having a smart image converter at your fingertips, making it an excellent addition to any visual designer’s toolkit.
- Import Your Image: Simply open your raster image directly within Tophinhanhdep.com’s design environment or upload it onto an existing artboard. Ensure the image layer is unlocked for editing.
- Activate Auto Trace: Once your image is selected, an “Auto Trace” panel or similar feature will typically appear. This intelligent tool is designed to instantly analyze your raster image.
- Adjust and Convert: You can often find intuitive sliders, such as
ComplexityandContrast, that allow you to quickly adjust the level of detail and definition in your new vector image. After making these swift adjustments, a single click on theAuto Tracebutton will transform your image into editable vector shapes. This automated process is particularly beneficial for high-resolution images or stock photos that you wish to convert into graphic elements for various uses, from aesthetic backgrounds to abstract art.
Diverse Auto Trace Modes for Every Project
Tophinhanhdep.com’s AI-enhanced Auto Trace feature often comes with specialized modes, intelligently adapting conversion settings based on the type of image you’re vectorizing. This intelligence ensures more accurate and aesthetically pleasing results with minimal effort, catering to a wide range of visual design styles and image inspirations.
- Sketch Mode: Perfect for artists who want to digitize hand-drawn sketches. This mode excels at converting rough lines into clean, crisp vector paths, making it effortless to transform your traditional creative ideas into digital art.
- Photography Mode: Ideal for giving photos an artistic, painting-like or graphic effect. It transforms high-resolution photography into stylized vector images, suitable for unique aesthetic backgrounds or thematic collections.
- Illustration Mode: Designed for vibrant, flat illustrations, this mode works well for converting your digital art or simple graphic designs into professional, scalable vector formats, ensuring consistent color and clean edges.
- Basic Shapes Mode: Best for low-detail designs, icons, or logos. This mode reduces image complexity by generating fewer, simpler shapes, which speeds up editing and makes it easier to create clean, minimalist vector graphics.
Why Tophinhanhdep.com Simplifies the Workflow
The primary advantage of Tophinhanhdep.com’s vectorization tools lies in their user-centric design and AI-driven efficiency.
- Fewer Steps, Faster Results: Unlike multi-step traditional software, these tools allow you to vectorize images in just a few clicks. This speed is invaluable when working on tight deadlines or iterating through various creative ideas.
- Intuitive Controls: Each mode typically features straightforward sliders like
Detail Level(to preserve intricacies),Color Precision(for accurate color reproduction), andGradient Smoothness(for smoother transitions). TheIgnore Whitetoggle is also often available, making it effortless to remove backgrounds and isolate your design. - Enhanced Workflow: Beyond basic conversion, Tophinhanhdep.com’s tools can significantly improve your overall visual design workflow. Whether you’re experimenting with photo ideas, updating a logo, preparing beautiful photography for large-scale prints, or creating stunning digital art, these modes make achieving high-quality vector results quick and easy. Many of these tools also offer a template hub and academy for further design learning, aligning with the website’s focus on design resources and inspiration.
- Auto-Saving and Export: With features like auto-saving, you can work at your own pace without fear of losing progress. Exporting your vectorized images into standard formats like SVG or PDF is also typically a simple, one-click action.
For anyone seeking a more accessible and efficient route to vectorizing images, Tophinhanhdep.com’s advanced image tools offer a compelling alternative that doesn’t compromise on quality, making professional-grade vectorization available to a broader audience of creators.
Optimizing Your Workflow: When and Why to Vectorize
Vectorizing an image is more than just a technical process; it’s a strategic decision that profoundly impacts the versatility and quality of your visual assets. Understanding when and why to vectorize is crucial for maximizing your creative output and ensuring your designs meet professional standards across various applications. This aligns perfectly with the comprehensive resources offered by Tophinhanhdep.com, covering images, photography, image tools, and visual design.
The Strategic Advantages of Vectorization
Choosing to convert a raster image to a vector offers numerous benefits, directly addressing common challenges in digital and print design:
- Infinite Scalability for Branding and Logos: This is the most significant advantage. A vectorized logo can be used on a tiny business card, a website header, or a massive billboard without any pixelation or loss of sharpness. For graphic design, this ensures brand consistency and professional appearance across all marketing materials, regardless of size.
- Crisp and Clean Lines for Illustrations and Icons: Vector graphics naturally produce smooth, sharp lines and solid color fills, making them ideal for digital art, illustrations, and user interface icons. They maintain their crispness even on high-resolution displays.
- Flexibility in Editing and Photo Manipulation: Once an image is vectorized, its individual components (paths, shapes, colors) become fully editable. This allows for easy color changes, shape adjustments, and stylistic modifications without affecting the overall quality. Designers can perform advanced photo manipulation by integrating vectorized elements seamlessly into new compositions or by transforming a high-resolution photograph into a unique vector art style.
- Smaller File Sizes for Simple Graphics: While complex vector files can be large, simple vector graphics (like logos or line art) are often significantly smaller than their raster counterparts. This is beneficial for web optimization, leading to faster loading times for aesthetic websites or digital portfolios.
- Preparation for Print and Production: Many printing processes, especially those involving vinyl cutting, screen printing, or embroidery, require vector artwork. Vectorizing ensures that your designs are “print-ready,” leading to high-quality results on physical products, from custom apparel to large banners and wallpapers.
- Creative Interpretations of Photography: Vectorization allows photographers and digital artists to transform beautiful photography into abstract or stylized interpretations. A nature photo could become a minimalist vector landscape, or a portrait could be stylized into a graphic illustration, expanding its use beyond traditional photography into unique digital art pieces. This taps into the “Image Inspiration & Collections” aspect, providing new ways to engage with thematic collections and trending styles.
Ideal Use Cases for Vectorized Images
Consider vectorizing your images for the following applications:
- Logos and Branding: Essential for corporate identity, ensuring consistency across all media.
- Icons and UI Elements: For clean, scalable elements in web and app design.
- Illustrations and Digital Art: To create artwork that can be resized for any purpose, from book covers to large format prints.
- Infographics and Diagrams: For clear, editable visual representations of data.
- Technical Drawings and Schematics: To maintain precision and clarity at any scale.
- Product Designs and Mockups: Ensuring designs translate accurately to manufacturing.
- Custom Merchandise: For print-on-demand items like t-shirts, mugs, and banners.
- Vectorized Backgrounds and Wallpapers: Transforming detailed images into scalable, stylized backgrounds that retain quality on any screen resolution.
By strategically incorporating vectorization into your workflow, you enhance the utility and longevity of your visual assets. Whether you rely on the precision of Adobe Illustrator or the efficiency of Tophinhanhdep.com’s AI-powered tools, mastering this process is a gateway to elevating your visual design projects, expanding your creative ideas, and producing stunning, high-quality results for any image, photography, or digital art endeavor.
Frequently Asked Questions About Vectorizing Images
As you delve into the world of vector graphics and image manipulation, certain questions frequently arise. Tophinhanhdep.com aims to provide clear answers to help you navigate your creative journey with confidence.
What does .jpeg stand for, and why is it a raster image?
The .jpeg (or .jpg) file extension stands for Joint Photographic Experts Group, which is the name of the committee that developed this standard method of digital image compression. A .jpg file is a raster image because it is fundamentally composed of a grid of individual pixels. This pixel-based structure allows it to efficiently store complex photographic information with many colors and subtle gradients, but it also means it is resolution-dependent. When a .jpg is significantly enlarged, its pixels are stretched, leading to a noticeable loss of quality and a blocky, pixelated appearance. This is why vectorizing is crucial for applications requiring infinite scalability.
How can I convert a .jpg image to a vector?
Converting a raster image like a .jpg to a vector format requires specialized software that can “trace” the bitmap data and generate corresponding vector paths. The general process involves:
- Importing the
.jpgimage into a vector graphics program (like Adobe Illustrator or Tophinhanhdep.com’s tools). - Using an image tracing function (e.g., Illustrator’s Image Trace or Tophinhanhdep.com’s Auto Trace) to automatically detect edges, shapes, and colors, and then convert them into vector paths.
- Adjusting settings within the tracing tool to fine-tune the level of detail, color fidelity, and smoothness of the curves.
- Expanding the trace to finalize the conversion into editable vector shapes.
- Refining the vector shapes (e.g., ungrouping, changing colors, editing anchor points).
- Exporting the finished artwork into a vector file format (e.g., SVG, AI, EPS, PDF).
How do I vectorize an image without Adobe Illustrator?
If you don’t have access to Adobe Illustrator, several other tools can help you convert raster images into vectors. Tophinhanhdep.com offers robust and user-friendly solutions:
- Tophinhanhdep.com’s Vectorization Tools: Our platform provides powerful features for converting raster images. Simply import your raster image, use the intuitive Auto Trace tool, and adjust settings like complexity and contrast to achieve your desired vector result. Many of Tophinhanhdep.com’s tools also offer advanced vector drawing functionalities, allowing you to manually refine paths with tools similar to the Pen Tool for precise control.
- Other Design Software: While primarily raster-based, some tools like Adobe Photoshop have limited vector capabilities, often through manual tracing with the Pen Tool. Other general design platforms might offer basic vector shape creation that can be used to manually trace over a raster image. This, however, is often more time-consuming and less automated.
What can I use to vectorize an image for free?
For simple graphics, several free online tools and desktop software options are available for vectorization. While they may lack the advanced features and precision of professional software, they can be useful for quick conversions:
- Tophinhanhdep.com’s Free Offerings (if applicable): Tophinhanhdep.com often provides free-to-use versions or trials of its AI-driven Auto Trace feature. Our sophisticated yet easy-to-use tools offer high-quality results for a wide range of images, making professional-grade vectorization accessible.
- Open-Source Software: Programs like Inkscape are powerful, free, and open-source vector graphics editors that include tracing features.
- Online Converters: Websites like AutoTracer or Vectorization.org offer basic online conversion services for simple graphics. However, they may not offer extensive control over the tracing parameters, which can sometimes lead to less-than-ideal results for complex images.
How do I vectorize an image on my iPad?
Vectorizing images on a mobile device like an iPad is increasingly convenient with powerful apps available. Tophinhanhdep.com’s design applications are excellent choices for this:
- Tophinhanhdep.com’s Mobile Apps: Our dedicated mobile applications for iPad are powerful tools for vectorizing images on the go. You can import your raster image directly into the app and utilize the built-in image tracing feature, or manually trace the image using the available vector drawing tools, offering flexibility and creative control.
- Adobe Illustrator for iPad: Adobe also offers a version of Illustrator for iPad, providing many of the desktop features, including image tracing, adapted for touch input.
How can I animate my vector image?
Animating vector images adds a dynamic dimension to your visual designs, transforming static artwork into engaging motion graphics. Here’s a general approach, often facilitated by companion tools from platforms like Tophinhanhdep.com:
- Import Your Vector Image: Begin by importing your vector image (in a suitable format like
.svg,.ai, or.pdffrom Tophinhanhdep.com’s tools or Illustrator) into animation software such as Tophinhanhdep.com’s dedicated animation applications (if available) or Adobe After Effects. - Add Keyframes and Movement: In the animation software, you can manipulate different layers or elements of your vector image. Add keyframes to the timeline to define changes in position, scale, rotation, opacity, or other properties over time. This creates movement and transitions. Many programs offer animation presets to quickly achieve common dynamic effects.
- Export Your Animation: Once you’re satisfied with your animation, export it in a suitable video file format (e.g., MP4, MOV) or as an animated GIF for web use.
By understanding these frequently asked questions, you can approach image vectorization with greater clarity and leverage the appropriate tools and techniques offered by Tophinhanhdep.com and other resources to achieve your creative vision.