How to Write Text on Image in Word: A Comprehensive Guide to Visual Communication

In today’s visually-driven world, the ability to seamlessly integrate text with images is a powerful skill. Whether you’re crafting reports, designing presentations, or creating engaging marketing materials, overlaying text onto pictures in Microsoft Word can elevate your documents from merely informative to truly captivating. While Word isn’t a dedicated graphic design tool like Photoshop, its robust features allow for sophisticated photo manipulation and visual design, enabling users to achieve professional-looking results.
At Tophinhanhdep.com, we understand the importance of high-quality visuals, from stunning wallpapers and aesthetic backgrounds to high-resolution stock photos and inspiring digital photography. This guide will walk you through the essential techniques for adding and formatting text on images within Word, drawing on principles of visual design, graphic design, and creative ideas to help you achieve your desired aesthetic and convey your message effectively.
Mastering Image Integration: Preparing Your Visual Canvas
Before you even think about adding text, the foundation of your visual masterpiece lies in the image itself. The choice and preparation of your picture are crucial for a successful text overlay.
Selecting the Perfect Image for Your Message
The type of image you choose will significantly impact the readability and overall aesthetic of your text. Consider the following:
- Contrast and Clarity: For optimal readability, select images with areas of relatively uniform color or lower detail where your text can stand out. If your image is too busy, your text might get lost, no matter how well you format it. Tophinhanhdep.com offers a vast array of images, from abstract backgrounds to serene nature scenes, making it easier to find visually appealing and suitable canvases for your text.
- Aesthetic and Mood: The image should complement the tone and message of your text. Are you aiming for an elegant, corporate, or playful vibe? A beautiful photography piece with a calming vista might be perfect for an inspirational quote, while a bold, abstract image could be ideal for a striking headline. Explore Tophinhanhdep.com’s collections of aesthetic, sad/emotional, or beautiful photography to find the right mood.
- Resolution and Quality: Always start with a high-resolution image to ensure clarity, especially if your document will be printed or displayed on larger screens. Low-resolution images can appear pixelated or blurry when resized or manipulated, undermining your visual design efforts. Tophinhanhdep.com specializes in high-resolution photography and stock photos, providing an excellent starting point for your projects.
Efficiently Inserting and Adjusting Your Picture in Word
Once you’ve selected your ideal image, the next step is to insert it into your Word document and prepare it for text overlay.
- Open your Word document and place your cursor where you want the image to appear.
- Navigate to the Insert tab on the Word ribbon.
- In the Illustrations group, click Pictures. You can choose to insert a picture from “This Device” (your computer), “Online Pictures” (Word’s built-in stock photo integration), or “Stock Images.” For the best quality, we recommend downloading high-resolution images from Tophinhanhdep.com and inserting them from “This Device.”
- Browse and select your desired picture, then click Insert.
After insertion, your image might not be the right size or position. Adjusting it is simple:
- Resizing: Click on the picture to select it. Drag the corner handles inwards or outwards to resize the image proportionally. Avoid dragging the side handles, as this can distort the image’s aspect ratio. For precise control, use the “Size” group under the “Picture Format” tab, where you can input exact dimensions or percentages, ensuring the “Lock aspect ratio” box is checked. This attention to detail is crucial for maintaining the integrity of your digital photography.
- Placement: Initially, images are often inserted “In Line with Text,” which can be restrictive. To freely move your picture, you’ll need to adjust its text wrapping settings.
Understanding Text Wrapping for Optimal Layout Control
Text wrapping dictates how surrounding text interacts with your image. For overlaying text on the picture, we need to ensure the picture can be moved independently.
- Select the picture.
- Right-click the picture and choose Size and Position from the context menu, or click the Layout Options icon (a small square with a curved arrow) that appears near the top-right corner of the selected image.
- In the Layout dialog box, go to the Text Wrapping tab.
- For most text overlay scenarios, selecting “Square” or “Through” in the “Wrapping style” section provides good control, allowing you to drag the picture freely. Alternatively, you might opt for “Behind Text” or “In Front of Text” if you want the picture to float without affecting surrounding paragraphs, which is particularly useful when the image serves purely as a background.
- Click OK.
By mastering text wrapping, you gain significant control over your visual design, ensuring your image and text cooperate beautifully rather than clashing. This is a fundamental aspect of effective photo manipulation within Word.

The Art of Overlaying Text: Methods and Techniques
With your image perfectly placed and its wrapping set, it’s time to add your message. Word offers several methods to place text directly onto an image, each suited for different creative ideas and desired effects.
Utilizing Text Boxes for Flexible Text Placement
The text box method is arguably the most versatile and commonly used technique for adding text on pictures in Word. It grants you complete control over text positioning and formatting.
- Select your picture. (Though not strictly necessary, it helps anchor the text box if you plan to group them later).
- Go to the Insert tab.
- In the Text group, click Text Box, then select Draw Text Box from the dropdown menu.
- Click and drag your mouse over the picture to draw a text box to your desired size and position. Don’t worry about perfection now; you can always adjust it later.
- Type your text inside the text box.
After entering your text, you’ll want to format both the text and the text box for optimal visual design:
- Formatting the Text: Highlight the text within the box. Use the Home tab (Font group) to change the font, size, color, bolding, italics, or any other textual style. Consider a bold, readable font if your image has a complex background. Choose a color that offers high contrast against the image for maximum readability – light text on dark backgrounds, or dark text on light backgrounds.
- Formatting the Text Box (Making it Invisible): For text to appear directly on the image without a distracting border or background, you’ll need to make the text box transparent.
- Click on the edge of the text box to select it.
- Under the Shape Format tab (or Drawing Tools – Format), in the Shape Styles group:
- Click Shape Fill and choose No Fill.
- Click Shape Outline and choose No Outline.
Now, only your text will be visible, seamlessly integrated with your picture. This technique is fundamental to effective photo manipulation and graphic design in Word, allowing for creative freedom similar to what you’d achieve with more specialized digital art software.
Exploring WordArt for Stylized and Impactful Messaging
For shorter, more stylized text, especially for titles or prominent captions, WordArt offers a quick way to add visual flair. Think of it as an aesthetic enhancement, ideal for capturing attention.
- Insert your image and adjust its wrapping as described earlier.
- Go to the Insert tab.
- In the Text group, click WordArt.
- Choose a WordArt style from the gallery that complements your visual design.
- Type your text into the placeholder.
- Click the outside edge of the WordArt object to select it. You can then drag it to position it over your photo. Use the rotation handle (the circular arrow) to angle the text if desired.
- Format the WordArt: Once selected, the Shape Format tab will appear. Here, you can change the text fill, outline, and apply various text effects like shadows, reflections, glow, and 3D rotations, significantly enhancing the visual impact.
WordArt is excellent for creating eye-catching elements reminiscent of graphic design posters or stylized digital art. It’s particularly effective when you want a title or a key phrase to truly pop against a beautiful photography background.
Direct Text Insertion for a Seamless Look
While less common and with fewer direct formatting options for the “container,” some users might seek a method to type directly onto the picture, especially if their Word version allows for it or if they are looking for a minimalist approach. The imgocr.com reference mentions “inserting text directly on the picture without a text box.” This functionality typically works by selecting the picture, then using an “Add Text” option under “Picture Format.” However, this often defaults to adding text within the picture’s bounding box and might still behave like a primitive text box or caption.
A more reliable “direct” method involves using a Drawing Canvas, which groups objects and allows for a more integrated approach, especially mentioned in support.microsoft.com for older Word versions but still applicable.
- Insert a New Drawing Canvas: On the Insert tab, in the Illustrations group, click Shapes, then New Drawing Canvas.
- Insert the Photo into the Canvas: Click the drawing canvas, then on the Insert tab, in the Illustrations group, click Pictures and insert your photo into the canvas.
- Insert Text Box/WordArt into the Canvas: With the canvas still active, now insert your text box or WordArt as described in the previous sections.
- By containing both the image and text within a single drawing canvas, they behave as a more cohesive unit, simplifying manipulation and offering a very integrated look.
This method aligns well with principles of visual design, where elements are grouped logically to form a unified composition.
Elevating Your Design: Formatting Text and Graphics
The initial placement of text is just the beginning. True visual design comes alive through thoughtful formatting. This section delves into the nuances of making your text and image work harmoniously, drawing on concepts from graphic design and creative ideas.
Choosing Fonts, Colors, and Transparency for Readability and Aesthetic Appeal
The interplay of font, color, and transparency is critical for both readability and the overall aesthetic.
- Font Selection:
- Readability is paramount. For longer text, opt for clean, sans-serif fonts (like Arial, Calibri, Helvetica) that are easy to read against various backgrounds.
- For titles or short phrases, you can experiment with more decorative fonts, but always ensure they remain legible.
- Consider the context and mood. A playful font for a serious report or an overly ornate font for a simple label can detract from your message.
- Color Contrast:
- Your text color must contrast sufficiently with the image background. On dark sections of your photo, use light text (e.g., white, light gray, bright colors). On light sections, use dark text (e.g., black, dark blue, deep green).
- Sometimes, even a high-contrast color might not be enough if the background is too busy. This leads to the next point.
- Adjusting Transparency and Opacity:
- If your text struggles to stand out against a complex or colorful image, you can enhance its readability by adding a subtle background to the text box and then adjusting its transparency.
- Select the text box. Go to Shape Format > Shape Fill. Choose a color (e.g., black or white) that contrasts with your text. Then, click More Fill Colors at the bottom of the dropdown. In the “Colors” dialog box, you’ll find a Transparency slider.
- Adjust the slider to make the fill color semi-transparent (e.g., 30-70%). This creates a subtle “text box” background that helps the text pop without completely obscuring the image beneath. This is a common photo manipulation technique used in graphic design to create depth and focus.
- You can also adjust the transparency of the image itself if you want the text to be the primary focus and the image to serve as a softer backdrop. This falls under the realm of creative ideas and digital art.
Customizing Text Box Appearance: The Invisible Touch
As mentioned earlier, setting the text box’s fill and outline to “No Fill” and “No Outline” makes it invisible, allowing the text to appear directly on the image. However, sometimes you might want a subtle border or a specific shape for your text area as part of your visual design.
- Shape Options: Beyond simple rectangles, you can insert text into other shapes (Insert > Shapes). This allows for more creative layouts. You can then fill these shapes with a semi-transparent color as described above. This is a fantastic way to incorporate elements of graphic design into your Word documents, turning ordinary text into a dynamic part of your visual story.
- Internal Margins: Ensure your text isn’t cramped against the edges of the text box. Right-click the text box, select “Format Shape,” then go to “Text Box” (or “Layout & Properties” > “Text Box” in newer versions). Here you can adjust internal margins to provide sufficient padding.
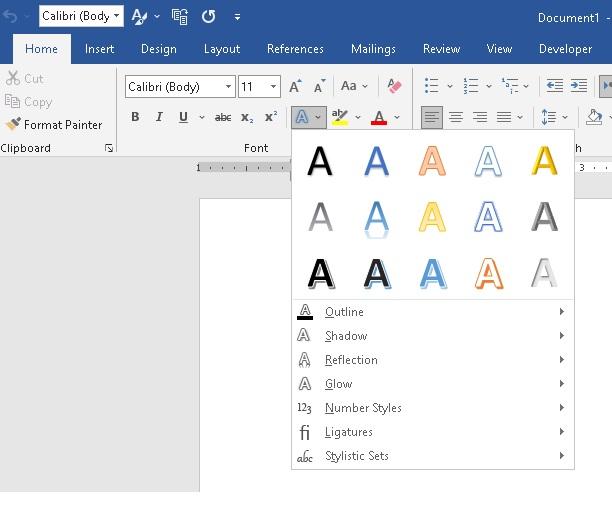
Applying Advanced Text Effects for Visual Impact
Word offers a variety of text effects that can make your embedded text even more visually appealing, especially for headings or key points.
- Select your text (either within a text box or a WordArt object).
- On the Home tab, in the Font group, click the Text Effects and Typography button (the “A” with a glow).
- Explore options like Shadow, Reflection, Glow, Bevel, and 3-D Rotation.
- Each effect has further customization options. For instance, with “Shadow,” you can choose the direction, blur, distance, and color of the shadow, providing a professional touch often seen in graphic design.
These effects can transform plain text into striking digital art, making your message stand out on any background, from aesthetic landscapes to abstract patterns available on Tophinhanhdep.com.
Refining and Finalizing Your Visual Creation
Creating the initial text and image overlay is a great start, but true mastery involves refining your creation and ensuring it’s robust for future use.
Grouping Objects for Cohesive Design and Easy Manipulation
Once you’re satisfied with the placement and formatting of your image and text, it’s highly recommended to group them. Grouping turns multiple individual objects into a single, cohesive unit, making it easier to move, resize, and copy them without disrupting their relative positions. This is a crucial step in photo manipulation and maintaining design integrity.
- Select the image.
- Hold down the Ctrl key (or Cmd on Mac) and click on the edge of the text box (or WordArt object) to select both the image and the text element. You should see sizing handles around both objects.
- Right-click on either selected object.
- From the context menu, choose Group > Group.
Now, your text and image will move and resize together, acting as one picture. This simplifies future adjustments and ensures your carefully crafted visual design remains intact.
Troubleshooting Common Issues for a Flawless Finish
Even with careful planning, you might encounter some hiccups. Here’s how to address common issues:
- Text Not Visible:
- Font Color: Ensure the text color contrasts with the background.
- Transparency: If you added a semi-transparent background to the text box, ensure it’s not too opaque or blending too much.
- Layering: Sometimes, the text box might be behind the image. Right-click the text box, select “Bring to Front” or “Bring Forward.”
- Distorted Image: Always resize images using the corner handles while holding Shift (to maintain aspect ratio, though Word often defaults to this for images). If it’s already distorted, re-insert the original and resize carefully. Tophinhanhdep.com provides high-resolution stock photos, reducing the risk of distortion upon initial insertion.
- Text Doesn’t Align Precisely: Use Word’s alignment tools (Home tab > Paragraph group) for precise horizontal alignment within the text box. For overall positioning, drag the text box manually. If you’ve grouped objects, ungroup them temporarily to adjust individual elements, then regroup.
- Text Box Border Appears on Print/PDF: Double-check that “Shape Outline” is set to “No Outline” under the “Shape Format” tab.
Addressing these issues quickly ensures your digital art remains professional and polished.
Saving and Exporting Your Masterpiece for Wider Reach
Once your text-on-image creation is complete, you’ll want to save and potentially export it for various uses.
- Saving the Word Document: Simply go to File > Save As and save your document in
.docxformat. - Saving as PDF: For sharing a fixed version of your document, export it as a PDF (File > Save As > PDF). This preserves your layout and design across different devices and software.
- Extracting the Image with Text: If you need the combined image-with-text as a standalone graphic (e.g., for a website, social media, or another application), Word doesn’t have a direct “export as image” feature for grouped objects quite like dedicated image tools. However, you can:
- Copy and Paste as Picture: Select the grouped object (image + text box). Right-click and choose Copy. Then, right-click in a blank area (or in another application) and choose Paste Options > Picture. You might then be able to save this pasted picture as a separate image file from a program like Paint or by using Word’s “Save as Picture” if you pasted it back into Word as a standalone image.
- Screenshot: Use your operating system’s screenshot tool (e.g., Snipping Tool on Windows, Cmd+Shift+4 on Mac) to capture the desired section of your screen. This is a quick and dirty but often effective method for generating a standalone image file.
- Third-Party Image Tools: For higher quality or specific formats, consider using dedicated image tools like converters or optimizers (as found on Tophinhanhdep.com’s image tools section) after extracting the picture.
Practical Applications and Creative Inspiration
The ability to write text on images in Word extends far beyond basic document creation. It’s a fundamental skill for visual communication, applicable across a wide range of projects and drawing heavily from visual design principles.
Beyond Documents: Harnessing Text-on-Image for Diverse Projects
- Reports and Presentations: Label charts, figures, and graphs clearly. Add impactful quotes or key data points directly onto relevant images, enhancing comprehension and engagement. This is essential for professional digital photography used in business contexts.
- Marketing Materials: Create simple social media graphics, email banners, or flyers. Overlay event details, promotions, or call-to-action text on compelling aesthetic backgrounds or stock photos, leveraging quick graphic design without needing complex software.
- Educational Content: Design visually rich worksheets, educational posters, or interactive learning materials where text annotations on images are crucial.
- Personal Projects: Craft personalized greeting cards, invitations, mood boards, or digital art pieces that showcase your creative ideas. Tophinhanhdep.com’s vast collection of wallpapers and backgrounds can serve as an endless source of inspiration.
Drawing Inspiration from Tophinhanhdep.com’s Visual Collections
To truly excel at overlaying text on images, continuously seek inspiration. Tophinhanhdep.com offers a treasure trove of visual assets and ideas that can fuel your creativity:
- Images (Wallpapers, Backgrounds, Aesthetic, Nature, Abstract, Sad/Emotional, Beautiful Photography): Explore these categories to find the perfect backdrop that resonates with your message and offers ample space for text. High-resolution images ensure your final product looks polished.
- Photography (High Resolution, Stock Photos, Digital Photography, Editing Styles): Understand different photography styles and how they can influence your text placement and formatting. A minimalist photo might demand equally minimalist text, while a vibrant image might require bolder, contrasting fonts.
- Visual Design (Graphic Design, Digital Art, Photo Manipulation, Creative Ideas): Learn from examples of excellent visual design. How do professionals use typography, color, and composition to make text and images work together? Experiment with photo manipulation techniques in Word to achieve similar effects.
- Image Inspiration & Collections (Photo Ideas, Mood Boards, Thematic Collections, Trending Styles): Browse these sections to discover new approaches to combining text and imagery, sparking fresh creative ideas for your next project.
In conclusion, knowing how to write text on an image in Microsoft Word is more than just a technical trick; it’s a vital skill for anyone looking to enhance their visual communication. By understanding Word’s design tools, mastering text box and WordArt techniques, and applying principles of formatting and aesthetics, you can transform ordinary documents into engaging visual experiences. So, open Word, choose a stunning image from Tophinhanhdep.com, and start creating!