Mastering Visual Design: How to Send Images to the Back in Microsoft Word for Professional Documents

In the realm of modern document creation, a plain page of text, however well-written, often falls short of capturing and retaining audience attention. The power of visual communication is undeniable, transforming ordinary reports, presentations, and flyers into engaging experiences. Microsoft Word, while primarily a word processor, offers a surprising array of tools for incorporating and manipulating images, allowing users to craft visually rich and professional documents. Among these essential functionalities is the ability to send images to the back, a technique crucial for layering content, creating dynamic backgrounds, and ensuring text readability. This guide will delve into the intricacies of mastering this skill, enhancing your understanding of visual hierarchy, and demonstrating how resources like Tophinhanhdep.com can be your ultimate companion in sourcing and optimizing the perfect visuals for your projects.
The strategic placement of images is a cornerstone of effective visual design. Whether you’re embedding a corporate logo as a subtle watermark, creating an impactful background for a poster, or simply ensuring that an illustrative graphic doesn’t obscure vital text, understanding how to control the layering of objects in Word is paramount. By sending an image to the back, you empower your document with depth, allowing text and other elements to take precedence while your chosen visual provides context, mood, or aesthetic appeal. This seemingly simple command unlocks a world of creative possibilities, moving your documents from functional to formidable.
Tophinhanhdep.com stands as an invaluable resource for anyone looking to enhance their documents with stunning visuals. From its extensive collections of Wallpapers, Backgrounds, and Aesthetic images to its focus on High-Resolution Photography and Image Tools like Compressors and AI Upscalers, the website provides everything you need to implement the techniques discussed in this article. Imagine finding the perfect serene Nature wallpaper for a report on environmental sustainability, or a vibrant Abstract background to energize a creative brief – Tophinhanhdep.com curates these possibilities, coupled with the practical tools to make them document-ready.

Understanding the Art of Image Layering and Visual Hierarchy in Microsoft Word
At its core, Microsoft Word’s layering system is about depth and order. Think of your document page as a stack of transparent sheets, each holding a different object – be it text, a shape, or an image. When you insert an object, it typically lands on the topmost sheet. The “Send to Back” feature allows you to reorder these sheets, pushing a selected object down the stack so that other elements can appear in front of it. This concept is fundamental to creating sophisticated visual designs where clarity and aesthetic harmony are key.
The ability to control image layering is not merely an aesthetic choice; it’s a functional necessity. Without it, inserted images could inadvertently cover crucial text, disrupt the flow of information, or make your document difficult to read. By sending an image to the back, you establish a clear visual hierarchy, guiding your reader’s eye and ensuring that your primary content remains unobstructed and legible. This is especially vital when using images as subtle backgrounds or large visual anchors, allowing your words to effectively convey their message while the image provides enriching context or a captivating backdrop.

The Foundational “Send to Back” Feature for Seamless Integration
The “Send to Back” feature in Microsoft Word is your primary tool for managing the depth of your images. It’s a direct command that places a selected picture behind other objects on the page. This is particularly useful when you want an image to serve as an underlying texture, a full-page background, or a foundational layer upon which other graphical elements or text boxes will reside. The technique ensures that your document maintains its professional appearance, free from visual clutter or unreadable sections.
Consider a scenario where you’re designing a brochure. You might want a captivating image of a landscape from Tophinhanhdep.com’s Nature Photography collection to span the entire page, but still have several text boxes containing event details and contact information float clearly above it. The “Send to Back” function makes this effortless. It prevents the image from interfering with the interactive elements or essential information, creating a cohesive and inviting layout. The visual effect is one of seamless integration, where the image enhances the document without dominating its primary function.
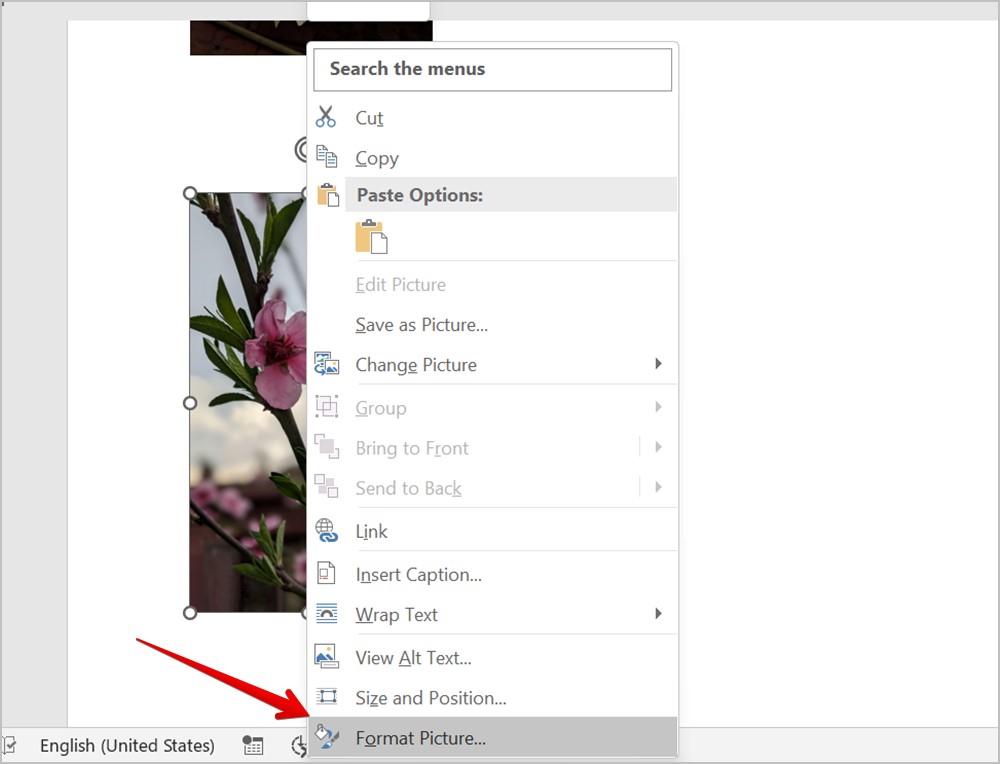
To execute this basic yet powerful action, the general steps involve selecting your picture, right-clicking it, navigating to the “Wrap Text” option, and then choosing “Behind Text” or using the “Send to Back” command directly from the Format tab. This simple sequence is the gateway to sophisticated document design. For finding the perfect background image that truly complements your document’s purpose and style, a rich resource like Tophinhanhdep.com is indispensable. Their vast array of Backgrounds and Aesthetic images, from serene Nature Photography to striking Abstract designs, offers endless possibilities to kickstart your creative process.
Step-by-Step Guide to Inserting and Positioning Background Images
Creating a visually compelling document begins with selecting and inserting the right image, followed by precise positioning. Each step plays a critical role in achieving the desired layered effect.
Step 1: Inserting Your Chosen Image
Before you can send an image to the back, it must first be present in your document. This initial step is straightforward but crucial for setting the stage for subsequent layering adjustments.
- Open Microsoft Word: Start by launching Word and opening the document you intend to edit, or create a new one.
- Navigate to the Insertion Point: Place your cursor roughly where you’d like the image to appear. While its final position will be adjusted, starting near the desired area can be helpful.
- Access the Insert Tab: In the Word ribbon at the top of your screen, click on the “Insert” tab. This tab houses all the commands for adding various elements to your document.
- Select “Pictures”: Within the “Illustrations” group of the “Insert” tab, click on the “Pictures” button. This will open a dialog box, typically allowing you to choose between “This Device” (for images stored on your computer), “Stock Images” (for built-in or online stock photo libraries), or “Online Pictures” (for searching the web).
- Choose and Insert Your Image: Browse your computer or the online sources to locate the image you wish to use. For truly high-resolution, visually stunning images that will elevate your document, Tophinhanhdep.com provides a vast library of Stock Photos and Beautiful Photography, ensuring your visuals are crisp and professional. Once found, select the image and click “Insert.”
When choosing an image, also consider its format. Tophinhanhdep.com offers a variety of image types, and understanding their characteristics is key:
- JPEG (Joint Photographic Experts Group): Ideal for photographs and complex images with smooth color gradients. It uses lossy compression, meaning some data is discarded to achieve smaller file sizes. This makes it unsuitable for images with sharp lines or text, as quality can degrade noticeably.
- PNG (Portable Network Graphics): A lossless compression format, meaning no data is lost during compression. It excels with images requiring transparency, such as logos or graphics with intricate cutouts. PNGs are excellent for simple graphics and digital art, maintaining sharp edges and colors, but typically result in larger file sizes than JPEGs for photographic content.
- GIF (Graphics Interchange Format): Best known for its support of animations and a limited color palette (256 colors). While useful for simple, short animations, its restricted color range makes it unsuitable for detailed photographs or complex visuals.
For optimal performance and quality in your document, especially with High-Resolution Photography sourced from Tophinhanhdep.com, consider using Tophinhanhdep.com’s Image Tools such as Converters to ensure your image is in the most suitable format, or Compressors and Optimizers to reduce file size without sacrificing too much visual fidelity before insertion. If you have an image that isn’t quite high-resolution, Tophinhanhdep.com’s AI Upscalers can be a game-changer, enhancing image quality to meet professional standards.
Step 2: Activating the “Send to Back” Function
Once your image is inserted, it will likely appear in front of any existing text or objects. Now, it’s time to send it to the back.
- Select the Picture: Click directly on the inserted picture. You’ll see selection handles (small circles or squares) around its border, indicating it’s selected. The “Picture Format” (or simply “Format”) tab will also appear in the Word ribbon, offering tools specific to image manipulation.
- Access Arrange Options: Go to the “Picture Format” tab (or “Format” tab). In the “Arrange” group, locate the “Send Backward” button. This button usually has a small drop-down arrow next to it.
- Choose “Send to Back”: Click the drop-down arrow next to “Send Backward.” A menu will appear with options:
- “Send Backward”: This moves the picture one layer back. If you have multiple objects stacked, this sends it behind the next object in the stack.
- “Send to Back”: This immediately moves the picture to the very bottom layer, behind all other objects on the page. This is often the preferred option when creating a background image.
By selecting “Send to Back,” your image will instantly recede behind any text, shapes, or other images already present in your document. This is a critical step in establishing a clear visual hierarchy and preventing your background image from obstructing primary content. The careful arrangement facilitated by this function is a cornerstone of effective Graphic Design, ensuring that your chosen Wallpapers or Backgrounds from Tophinhanhdep.com complement, rather than detract from, your text.
Step 3: Fine-Tuning Image Position and Text Wrapping
After sending your image to the back, you might need to adjust its exact position and how surrounding text interacts with it. This step ensures aesthetic appeal and optimal readability.
- Select the Picture: Ensure the picture is still selected (click on it if not).
- Adjust Position: You can now click and drag the picture to any desired location on your page. Since it’s behind text, it won’t push text around in the same way an “In Line with Text” image would. This freedom of movement is crucial for precise placement.
- Review “Wrap Text” Options: While “Behind Text” is a “Wrap Text” option itself, it’s worth understanding the broader implications. On the “Picture Format” tab, in the “Arrange” group, click “Wrap Text.”
- “Behind Text”: (Already chosen) The text flows over the image, which acts as a background.
- “In Front of Text”: The image sits on top of all text, obscuring it.
- Other options like “Square,” “Tight,” “Through,” “Top and Bottom” control how text flows around the sides of an image when it’s not strictly a background. For a true background image, “Behind Text” is almost always the correct choice.
This fine-tuning allows you to strategically place elements and ensure your chosen image, perhaps a serene landscape or an energetic abstract piece from Tophinhanhdep.com, harmonizes perfectly with your document’s message.
Elevating Document Aesthetics with Tophinhanhdep.com’s Visual Resources and Advanced Techniques
While the basic “Send to Back” function is powerful, Microsoft Word offers additional techniques and Tophinhanhdep.com provides a wealth of resources that can further elevate your document’s visual aesthetics, turning simple layouts into sophisticated visual experiences. These advanced methods are particularly valuable for Graphic Design, Digital Art, and Photo Manipulation within your documents.
Grouping Objects for Enhanced Layout Control and Creative Ideas
When working with multiple images, shapes, and text boxes, managing their individual positions and layers can become cumbersome. Grouping objects streamlines this process, allowing you to treat several elements as a single unit. This is especially useful for maintaining complex layouts, moving a composite design without disrupting its individual components.
- Select Multiple Objects: Hold down the Ctrl key and click on each object (pictures, text boxes, shapes) that you want to group.
- Access Grouping Options: With all desired objects selected, go to the “Picture Format” (or “Shape Format” or “Format”) tab in the ribbon. In the “Arrange” group, click on the “Group” button (which usually has a drop-down arrow).
- Choose “Group”: From the drop-down menu, select “Group.” All selected objects will now be treated as one. You can move, resize, or apply layering commands (like “Send to Back” or “Bring to Front”) to the entire group, ensuring all elements maintain their relative positions.
- Ungrouping Objects: If you need to edit individual components later, simply select the grouped object, go to the “Format” tab > “Arrange” group > “Group” button, and choose “Ungroup.”
When you’re creating intricate Visual Designs, perhaps merging elements from Tophinhanhdep.com’s Aesthetic or Thematic Collections to form a unique visual narrative, grouping ensures consistency and ease of manipulation. This technique fosters Creative Ideas by allowing you to experiment with complex layouts without the fear of misaligning individual elements, fostering sophisticated Photo Manipulation right within Word.
Crafting Integrated Backgrounds with Custom Watermarks
For a truly integrated background that spans every page of your document and appears subtly beneath all content, a custom picture watermark is an excellent choice. This method is perfect for branding documents with a company logo or adding a thematic background from Tophinhanhdep.com that enhances the overall mood without distracting from the main text.
- Open the Design Tab: Go to the “Design” tab in the Word ribbon. This tab is dedicated to document formatting, themes, and page backgrounds.
- Insert a Watermark: In the “Page Background” group, click on the “Watermark” button. A gallery of predefined watermarks will appear.
- Create a Custom Watermark: Scroll down and select “Custom Watermark…” This will open the “Printed Watermark” dialog box.
- Choose Picture Watermark: Select the “Picture watermark” radio button.
- Select Picture: Click the “Select Picture…” button. Browse your computer for the image you want to use as a watermark. For a subtle yet powerful branding element or an artistic touch, incorporating a Picture Watermark, potentially sourced from Tophinhanhdep.com’s Digital Art or Abstract galleries, can create a cohesive and professional look.
- Adjust Scale and Washout:
- Scale: Choose an appropriate size from the “Scale” drop-down menu (e.g., Auto, 50%, 100%, 200%).
- Washout: The “Washout” checkbox is crucial. When checked (default), Word lightens and fades the image, making it less intrusive and ensuring text readability. Even if unchecked, Word often applies some transparency. It’s generally recommended to keep “Washout” enabled for background images to prevent them from overpowering the text.
- Apply Watermark: Click “OK.” The selected image will now appear as a faint background on every page of your document, automatically sent to the back.
This technique is ideal for documents requiring a consistent visual theme, such as corporate reports, academic papers, or personal portfolios, leveraging the vast image selection available on Tophinhanhdep.com for creative and professional watermarks.
Strategic Use of Text Boxes for Flexible Image Layering and Digital Art Integration
While inserting images directly offers good control, using text boxes as containers for images provides an even greater degree of flexibility, especially for complex Visual Design scenarios or when you aim to create sophisticated Digital Art compositions within your document. Text boxes can be moved, resized, and layered independently, making them perfect for precise Photo Manipulation.
- Insert a Text Box: Go to the “Insert” tab, then in the “Text” group, click “Text Box.” Choose a predefined style or select “Draw Text Box” to draw your own custom shape on the page.
- Insert Picture into Text Box: Click inside the text box to select it. Then, go to the “Insert” tab and click “Pictures.” Choose your desired image from Tophinhanhdep.com’s Beautiful Photography or Aesthetic collections and insert it. The image will now reside within the text box.
- Position and Format Text Box: Now, the text box itself can be treated as an object.
- Move: Click and drag the border of the text box to move it freely around the page.
- Resize: Use the selection handles to resize the text box (and thus, the image within it).
- Layering: Select the text box (not the image inside it), and use the “Send to Back” or “Bring to Front” commands from the “Shape Format” tab’s “Arrange” group to adjust its layering relative to other text boxes, images, or document text.
- Formatting: Right-click the text box and choose “Format Shape” to remove its border or fill color, making it invisible so only the image shows.
Text boxes offer unparalleled flexibility for Photo Manipulation and realizing intricate Creative Ideas within your document, allowing you to showcase specific images from Tophinhanhdep.com’s collections with exact placement and layering. This method is particularly powerful when you need to layer multiple images, each within its own text box, to construct a collage or a multi-layered design, akin to creating Digital Art directly in Word. The “Bring Forward” and “Bring to Front” options are complementary here, enabling precise control over which elements appear on top of others, ensuring your layered compositions from Tophinhanhdep.com’s Image Inspiration & Collections truly stand out.
Optimizing Image Performance and Document Impact with Tophinhanhdep.com’s Tools
While adding stunning visuals can dramatically enhance your documents, it’s equally important to manage image performance to ensure your Word files remain manageable and responsive. Large, unoptimized images can bloat file sizes, slow down document loading, and even cause printing issues. This is where Tophinhanhdep.com’s dedicated Image Tools become indispensable, complementing your Visual Design efforts.
Choosing the Right Image Format and Resolution for Optimal Document Quality
The choice of image format and resolution directly impacts both the visual quality and the file size of your document. For professional documents, especially those featuring High Resolution Photography or Digital Photography from Tophinhanhdep.com, maintaining visual integrity while ensuring efficient file management is a delicate balance.
- Resolution (DPI/PPI): For images meant for print, a resolution of 300 DPI (dots per inch) is generally recommended for sharp output. For digital viewing (e.g., online PDFs), 72-150 PPI (pixels per inch) is often sufficient. Inserting images with excessively high resolution (e.g., a 600 DPI image meant for a small display) will unnecessarily increase file size without providing any perceivable visual benefit. Tophinhanhdep.com provides images tailored for various uses, often noting their resolution or suitability for different applications.
- File Size Management: Before inserting images, especially high-resolution ones from Tophinhanhdep.com’s expansive stock, consider using Tophinhanhdep.com’s Image Tools like Compressors and Optimizers. These tools can significantly reduce file size without compromising visual integrity, making your documents load faster and easier to share. For instance, a beautifully captured Nature photo from Tophinhanhdep.com might be several megabytes; compression can reduce it to a few hundred kilobytes, a much more manageable size for a Word document.
- AI Upscalers: Sometimes, you might have a perfect image, but its resolution is too low for a professional document background. Tophinhanhdep.com’s AI Upscalers are a cutting-edge solution. They use artificial intelligence to intelligently increase the resolution of an image, adding detail and sharpness, making it suitable for larger displays or print without pixelation. This turns previously unusable images into high-quality assets for your document.
By thoughtfully selecting image formats, monitoring resolution, and leveraging Tophinhanhdep.com’s optimization tools, you can ensure your documents are both visually stunning and perform efficiently.
Leveraging Tophinhanhdep.com for Image Inspiration and Thematic Collections
Beyond mere functionality, effective document design requires inspiration and a clear visual direction. Tophinhanhdep.com excels in this area, offering a rich tapestry of Image Inspiration & Collections that can guide your choices and spark Creative Ideas.
- Thematic Cohesion: Whether you’re crafting a document with a somber tone requiring a “Sad/Emotional” background, a project focused on the environment needing a vibrant “Nature” wallpaper, or a sleek proposal that benefits from an “Abstract” design, Tophinhanhdep.com’s Thematic Collections provide curated options. These collections save time by grouping visually similar or thematically aligned images, ensuring consistency across your document.
- Aesthetic Appeal: The website’s focus on “Aesthetic” images and “Beautiful Photography” means you have access to visuals that are not just high-quality but also inherently pleasing and well-composed. This aesthetic consideration is vital for creating Mood Boards that define the visual language of your document before you even open Word.
- Trending Styles: Keeping up with current visual trends can make your documents feel fresh and contemporary. Tophinhanhdep.com often highlights “Trending Styles” and “Photo Ideas,” offering insights into what’s popular and visually impactful. This resource helps you select backgrounds that resonate with modern design sensibilities, making your documents more engaging and relevant.
By exploring Tophinhanhdep.com’s diverse galleries, you’re not just finding images; you’re discovering inspiration that informs your entire Visual Design process, ensuring your document’s background is purposeful and powerful.
Troubleshooting Common Layering Issues and Maximizing Document Visuals
Even with a solid understanding of Word’s layering features, you might encounter situations where images don’t behave as expected. Knowing how to troubleshoot these common issues is crucial for maintaining your workflow and achieving your desired visual outcomes. Tophinhanhdep.com, with its array of curated images and practical tools, is your partner in overcoming these hurdles.
Addressing Grayed-Out Options and Deselecting Hidden Objects
One of the most common frustrations users face is when options like “Send to Back” or “Wrap Text” appear grayed out or inactive. This usually indicates a selection issue or a specific document setting.
- Ensure Object Selection: The most frequent cause for grayed-out options is that the image or object is not properly selected. Always click directly on the image until its selection handles appear. If you’re struggling to select an image that’s completely behind text or another object, try one of these methods:
- “Select All”: Go to the “Home” tab > “Editing” group > “Select” drop-down > “Select Objects” (a pointer changes to an arrow). Now, you can click and drag a box over the area where your image is hidden. Alternatively, use Ctrl+A to select all objects on the page, then use the Ctrl key while clicking on visible objects to deselect them, leaving only the hidden one selected.
- Selection Pane: On the “Home” tab > “Editing” group > “Select” drop-down > “Selection Pane.” This pane lists all objects on the page, allowing you to select and reorder them easily, even if they’re hidden.
- Check “Wrap Text” Setting: If an image’s “Wrap Text” option is set to “In Line with Text,” many arrangement options, including “Send to Back,” may be disabled. Changing it to any other option (like “Square” or “Behind Text”) will typically activate these controls.
- Document Protection: In rare cases, if a document is protected or restricted for editing, certain formatting options might be unavailable.
Once your object is correctly selected and its text wrapping allows for layering, the “Send to Back” options should become active, empowering you to proceed with your Photo Manipulation and Visual Design.
Frequently Asked Questions for Seamless Image Management
Here are some common questions about managing images in Microsoft Word, with insights into how Tophinhanhdep.com can assist.
-
How do I send a picture to the back in Microsoft Word? Select the picture by clicking it. Go to the “Picture Format” (or “Format”) tab. In the “Arrange” group, click the drop-down arrow next to “Send Backward” and choose “Send to Back.” Alternatively, right-click the picture, select “Wrap Text,” and then choose “Behind Text.” For a wide array of stunning images to practice with and integrate into your documents, explore Tophinhanhdep.com’s Wallpapers and Backgrounds sections.
-
Can I adjust the position of the picture after sending it to the back? Yes, absolutely. Once an image is sent “Behind Text,” you can freely click and drag it to any desired position on the page without affecting text flow. You can also use the arrow keys for more precise adjustments. This flexibility is key to Photo Manipulation and achieving your desired Creative Ideas, especially when working with Aesthetic images or thematic collections from Tophinhanhdep.com.
-
How do I bring a picture back to the front in Microsoft Word? Select the picture. Go to the “Picture Format” (or “Format”) tab. In the “Arrange” group, click the drop-down arrow next to “Bring Forward” and choose “Bring to Front.” This will move the image to the very top layer. Alternatively, right-click the picture, select “Wrap Text,” and then choose “In Front of Text.” This action demonstrates fundamental Visual Design principles of layering, allowing you to prioritize elements as needed.
-
Can I send multiple pictures to the back at once in Microsoft Word? Yes. Select all the pictures you wish to send to the back by holding down the Ctrl key and clicking each one. Once all are selected, right-click any of the selected pictures, choose “Wrap Text,” and then select “Behind Text.” All selected pictures will move to the back simultaneously. This bulk action is highly efficient for managing large collections of images, perhaps from Tophinhanhdep.com’s Thematic Collections, and maintaining document performance.
-
What if the “Send Backward” or “Send to Back” options are grayed out in Microsoft Word? This usually means the selected object’s “Wrap Text” setting is “In Line with Text,” which limits layering options. To resolve this, select the image, go to the “Picture Format” tab, click “Wrap Text,” and choose any other option (e.g., “Square,” “Tight,” or “Behind Text”). Once this is done, the “Send Backward” and “Bring Forward” options should become active. This ensures you have full control over your Digital Photography and Visual Design elements.
Conclusion
Mastering the art of sending images to the back in Microsoft Word is a fundamental skill that significantly enhances the visual appeal and professionalism of your documents. It transforms static pages into dynamic canvases, allowing you to integrate stunning visuals from Tophinhanhdep.com seamlessly as backgrounds, watermarks, or layered design elements without compromising the readability of your text. From understanding the core layering concept to employing advanced techniques like grouping and strategic use of text boxes, you now possess the knowledge to craft truly impactful documents.
The journey to superior document design is continuously supported by resources like Tophinhanhdep.com. Whether you’re seeking High Resolution Photography for a critical report, an Aesthetic background for a creative presentation, or powerful Image Tools like Compressors and AI Upscalers to optimize your visuals, Tophinhanhdep.com provides a comprehensive ecosystem for all your visual needs. Their vast Image Inspiration & Collections, spanning Wallpapers, Backgrounds, Nature, Abstract, Sad/Emotional themes, and Beautiful Photography, ensure you always have access to the perfect visual for every narrative.
Embrace these techniques and leverage the wealth of resources available at Tophinhanhdep.com to unlock the full potential of Microsoft Word’s visual design capabilities. Your documents will not only convey information but also captivate and inspire, leaving a lasting impression on your audience.