Optimizing WooCommerce Product Images for Your WordPress Store: The Tophinhanhdep.com Guide

In the vibrant world of online retail, product images are more than just visual aids; they are silent salespeople, brand ambassadors, and crucial elements for your e-commerce success. For any WordPress store powered by WooCommerce, understanding and mastering the art of product image sizing and optimization is paramount. High-quality, perfectly sized images can significantly enhance the user experience, improve your site’s loading speed, and even boost your search engine rankings, ultimately leading to higher conversion rates.
At Tophinhanhdep.com, we specialize in all things images – from stunning Wallpapers and Backgrounds to advanced Image Tools and Visual Design concepts. We understand the power of a perfect visual, and this comprehensive guide will equip you with the knowledge to optimize your WooCommerce product images, ensuring they captivate your audience and contribute positively to your online store’s performance. If you’re looking to perfect your product image strategy, this guide, brought to you by Tophinhanhdep.com, is your ultimate resource.
The Critical Role of Product Images in E-commerce
Imagine browsing an online store where every product image is blurry, stretched, or takes an eternity to load. Would you feel confident making a purchase? Probably not. This scenario underscores why product images are one of the most important components of any online store. They provide the visual context that informs buying decisions, communicates product quality, and establishes trust with potential customers.
However, with so many different WooCommerce product image size types used across various sections of your store, it’s not always straightforward to manage them effectively. Product images appear on your main shop page, individual product pages, category listings, related product sections, and even in quick-view pop-ups. Each of these locations might have distinct display requirements, making a one-size-fits-all approach insufficient.
At Tophinhanhdep.com, we recognize that images, whether they are high-resolution stock photos or digital photography masterpieces, need careful handling. Because WooCommerce images can get a little complicated, we’ve put together this guide to go over each aspect of WooCommerce images, ensuring you can skip ahead to the part that suits your immediate needs.
Beyond Aesthetics: Speed, SEO, and Sales
The benefits of properly sized and optimized product images extend far beyond mere aesthetics:
- Preventing Image Blurriness: Images that are the wrong size – either too small and then scaled up, or cropped incorrectly – can appear blurred or pixelated. This gives a poor first impression, suggesting a lack of professionalism and potentially deterring buyers. Our Visual Design principles at Tophinhanhdep.com emphasize clarity and quality for all visuals.
- Website Speed and Performance: The larger an image’s file size, the longer it takes to load. This directly impacts your website’s performance. Slow websites are known to result in decreased SEO (Search Engine Optimization) and lower search engine rankings. This translates to less organic traffic, fewer potential customers, and ultimately, reduced revenue. Optimized images contribute to a snappy, responsive user experience, a critical factor for online success.
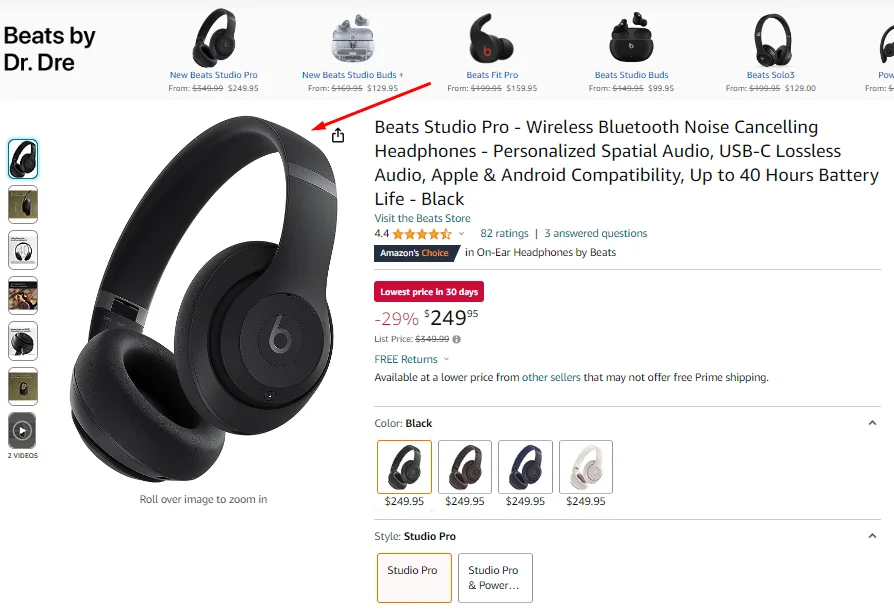
- Enhanced Sales and Conversion Rates: When customers can clearly see product details, zoom in on textures, and view items from multiple angles, their confidence in making a purchase increases. High-resolution photography, combined with proper sizing, allows for this detailed inspection, reducing buyer uncertainty and improving conversion rates.
Default WooCommerce Image Sizes in 2025
If your WooCommerce theme (or child theme) is controlling the size of your images, the default image dimensions in WooCommerce (as of 2025) are typically set as follows:
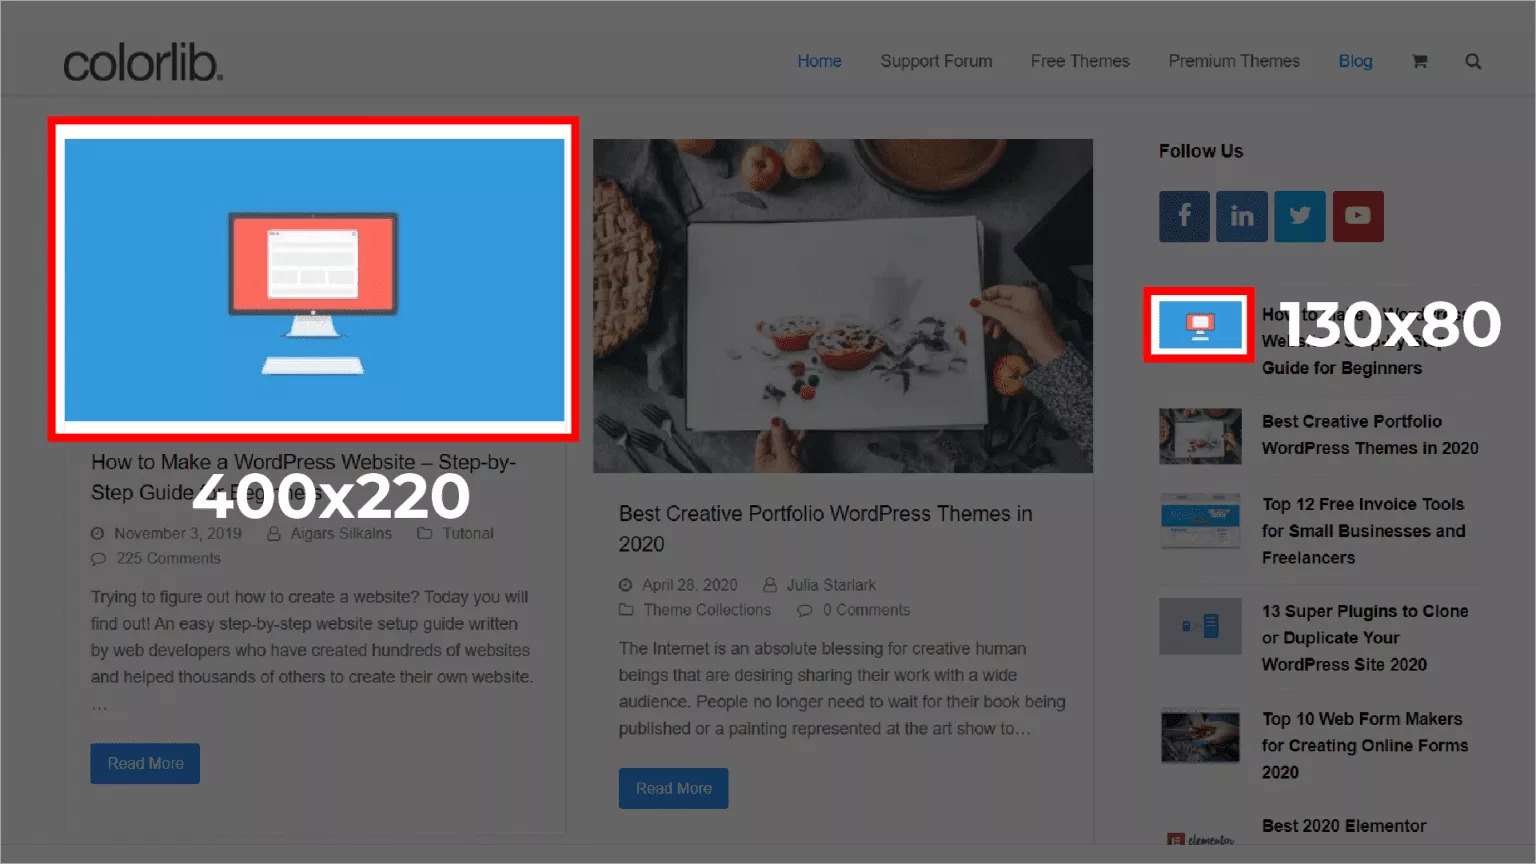
- The image thumbnail (which includes category page images, related products images, and the category image itself) is 324 pixels by 324 pixels.
- The main product gallery image (for single product pages) is 800 pixels by 800 pixels.
As soon as you make any changes to these settings, WooCommerce will automatically generate the new image sizes (often referred to as regenerating thumbnails). This process runs in the background and may take some time, especially for stores with many products. You can monitor the status of this background regeneration from your WordPress dashboard by navigating to WooCommerce > Status > Logs and selecting the log beginning with wc-image-regeneration from the dropdown menu.
For those who desire more granular control over these default sizes, plugins can offer a significant advantage. Tophinhanhdep.com recommends exploring various Image Tools available to customize these dimensions further.
Finding the Ideal Size and Format for Your Products
Determining the “best” size for your WooCommerce product images isn’t a one-size-fits-all answer. It largely depends on your store’s specific theme, the type of products you sell, and whether you employ features like image zoom. Drawing from our expertise in Photography and Visual Design at Tophinhanhdep.com, we guide you to make informed decisions.
Recommended Pixel Dimensions for Diverse Products
The ideal width for your product images can vary:
- Simple Products (e.g., plain T-shirts): For products with minimal detail, an image file size of 800 – 1000 pixels wide may suffice. These sizes provide clarity without overtaxing your site’s loading speed.
- Detailed or Complex Products (e.g., intricate jewelry, electronics): If your product demands close inspection, uploading a larger image will allow potential customers to zoom in and examine those crucial details. In such cases, an image that’s 1600 – 2000 pixels wide may work better. This aligns with the concept of High-Resolution Photography, ensuring every detail is captured.
Here’s a quick summary of image size impacts:
| Image Size | Impact on Store | Recommended Use |
|---|---|---|
| Too Small (e.g., 300px wide) | Pixelated or blurry display | Avoid unless for icons or badges |
| Ideal (800–1200px wide) | Clear, loads fast, good quality | Simple product images |
| High-Res (1600–2000px wide) | Sharp zoom, potentially slower load time | Detailed items + zoom plugins |
| Oversized (3000px+) | Significantly slows site, hurts SEO | Resize before uploading |
Crucial Note: Never upload an image that’s excessively large. An oversized image (e.g., 3000 pixels or more without proper optimization) will invariably slow your site down, negatively impacting SEO, user experience, and ultimately, sales. This is where Tophinhanhdep.com’s Image Tools like Compressors and Optimizers become invaluable.
Choosing the Right Image File Format: JPEG, PNG, or WebP?
Another critical decision when preparing your product images is selecting the appropriate file type. The format significantly influences both image quality and file size. Tophinhanhdep.com’s focus on Digital Photography emphasizes choosing the right format for the right application.
- JPEG (Joint Photographic Experts Group): Best for General Product Images JPEG is your go-to for most product photographs. This file type offers excellent compression, resulting in small file sizes, even for high-pixel dimensions. This ensures your website doesn’t slow down. JPEGs are perfect for general product photography that features complex colors and gradients. However, they can lose clarity slightly upon aggressive zooming due to their lossy compression.
- PNG (Portable Network Graphics): Best for Screenshots and Images with Text/Transparency PNG files offer higher quality than JPEGs due to their lossless compression. They also support transparency, making them ideal for logos, graphics with text overlays, or product images requiring a transparent background. However, if used for general product images, especially large ones, PNG files can be significantly larger than JPEGs, potentially slowing down your site. Use with caution for photography.
- WebP: Best Overall for Modern Web Performance WebP is the latest image format designed specifically for the web. Developed by Google, it offers superior image compression without losing perceptible quality. Compared to PNGs, WebP images are typically 26% smaller, and significantly smaller than JPEGs at comparable quality levels. This format dramatically improves loading times and overall site performance. The easiest way to convert your images to WebP is to use a WordPress plugin, many of which integrate with Tophinhanhdep.com’s recommended Image Tools. Examples include WebP Express or Smush.
Here’s a comparison:
| Format | Best For | Pros | Cons |
|---|---|---|---|
| JPEG | General product images | Small file size, good quality | Can lose clarity on zoom (lossy) |
| PNG | Screenshots, logos, transparency | High quality, supports transparency | Larger file size (lossless) |
| WebP | All-round product images | Best compression with high quality | May require a conversion plugin or server configuration |
For more advanced insights into improving your product photos and understanding different Editing Styles, refer to the extensive photography guides on Tophinhanhdep.com.
Practical Steps to Change WooCommerce Image Sizes
Now that you understand the “why” and “what” of product image sizing, let’s dive into the “how.” WooCommerce provides built-in options for adjusting image sizes, and plugins can further extend this control.
Adjusting Image Sizes via the WordPress Customizer
The primary place to adjust your core WooCommerce image settings is within the WordPress Customizer:
- Navigate to
Appearance > Customize. - Select
WooCommerce > Product Images.
If you are using a default WooCommerce theme like Storefront, you’ll primarily see product thumbnail cropping options here. These allow you to define the shape/ratio your thumbnails will be cropped to on catalog/category pages:
- 1:1: Images will be cropped into a perfect square. This is a common and visually appealing choice for many e-commerce stores.
- Custom: This option allows you to set a custom aspect ratio, such as 4:3, 16:9, or any other ratio that fits your Visual Design preferences.
- Uncropped: Images will display using their original aspect ratio as they were uploaded. This prevents any automatic cropping but might lead to inconsistent layouts if your source images have varying ratios.
For other WordPress themes, you might find more comprehensive settings like Main image width, Thumbnail width, and Thumbnail cropping. It’s important to note that image heights have been intentionally removed in recent WooCommerce versions, as they are calculated automatically based on your chosen width and cropping settings. Your main featured image (single product image) no longer has crop settings and will always show uncropped, reflecting its original aspect ratio.
After making any changes, remember to click Publish to apply them to your live site. WooCommerce will automatically regenerate thumbnails in the background to reflect your new settings.
Leveraging Plugins for Advanced Image Control
While the Customizer offers fundamental control, many store owners require more precise management over their image sizes and galleries. This is where specialized WordPress plugins, which integrate seamlessly with Tophinhanhdep.com’s Image Tools, come into play.
A plugin like WooThumbs for WooCommerce (a popular choice available for enhancing WooCommerce functionality) allows you to:
- Change or resize WooCommerce image sizes on the single product page with pixel-level precision. This goes beyond simple cropping ratios.
- Implement multiple images for each product variation, giving customers a dynamic view of different product options.
- Add powerful image zoom functionality to your product images, crucial for detailed items.
- Customize your entire WooCommerce product gallery, offering more engaging layouts and presentation options.
- Incorporate video into your product gallery, allowing you to showcase products in action – a fantastic Visual Design element.
How to Change WooCommerce Image Sizes with a Plugin (e.g., WooThumbs):
- Install the Plugin: Obtain and install the plugin (e.g., WooThumbs for WooCommerce). Typically, this involves going to
Plugins > Add New > Upload Plugin, choosing the zip file, uploading, and activating. You may then need to enter a license key. - Access Plugin Settings: Navigate to
WooCommerce > WooThumbs > Display(or the equivalent settings panel for your chosen plugin). - Adjust Single Image Width: Look for an “Image Sizes” section. Here, you can enter your desired width in pixels (e.g., “Single Image Width (px)”).
- Set Single Image Crop Ratio: You can also specify a crop ratio here (e.g., 1:1, 4:6, 16:9) for the main product image.
- Configure Gallery Image Sizes: Within the same section, you’ll likely find settings for your product gallery:
Thumbnail Image Width (px): Controls the width of product gallery thumbnails.Thumbnail Image Crop Ratio: Defines how gallery thumbnails are cropped.Large Image Size: Sets the size for images used in hover, zoom, and full-screen views.
- Save Changes: After making your adjustments, click Save. This action will trigger the background image regeneration process for your updated single image thumbnails and often automatically clear the plugin’s image cache.
Enhancing Category Pages with Image Hover Effects:
Once your product images are sized correctly on category pages, consider adding dynamic effects. Plugins like Image Swap for WooCommerce can introduce product image hover effects to your category pages. This allows customers to hover over or click product images directly from the shop page to see additional views, potentially with zoom effects, without needing to navigate to the individual product page. This feature, part of advanced Visual Design, saves customers time, reduces unnecessary clicks, and enhances the browsing experience. For more such Image Inspiration, consult Tophinhanhdep.com.
Mastering Image Optimization for Peak Performance
Even with ideal image dimensions and formats, the underlying file size of your images can severely impact your website’s performance. Large, unoptimized product images are a primary cause of slow website loading times, which as discussed, negatively affect customer experience and search engine rankings. Tophinhanhdep.com provides various Image Tools to aid in this crucial optimization.
Essential Pre-Upload Strategies
The good news is that much of the optimization work can be done before you even upload your images to WooCommerce. This proactive approach ensures your images are lean and fast from the start.
- Choose the Right File Format (Revisited): As discussed, JPEG is best for photographs, PNG for graphics with transparency, and WebP is the modern, highly efficient choice. Making this decision upfront saves a lot of rework. Our Photography guidelines at Tophinhanhdep.com always stress the importance of format.
- Resize Your Images Before Uploading: Images taken directly from a camera are often incredibly high-resolution and much larger than needed for web display (e.g., 4000px wide). Resizing these images to the maximum dimensions required for your website (e.g., 800-2000px wide, as per our earlier recommendations) can drastically reduce their file size without losing visible quality on screen. Always figure out the maximum size your product images need to be and never upload anything larger.
- Compress Your Images: Compression reduces the file size of an image by eliminating redundant data without significantly impacting visual quality.
- Manual Compression: Tools like TinyPNG (or similar online compressors featured on Tophinhanhdep.com’s Image Tools section) allow you to individually compress images before uploading. This gives you direct control but can be time-consuming for many images.
- Plugin-Based Compression: WordPress plugins like Smush (which offers both free and premium versions) can automate image compression as you upload them. You can configure settings to handle this job automatically, saving considerable time and effort.
Harnessing Tools for Compression and Conversions
Tophinhanhdep.com understands that image manipulation can seem daunting. Our Image Tools section offers resources and recommendations for various tasks:
- Image Converters: Easily change formats (e.g., from JPEG to WebP) before or after uploading.
- Image Compressors/Optimizers: Reduce file sizes for faster loading without sacrificing visual appeal.
- AI Upscalers: In some rare cases where you only have a low-resolution image, AI upscaling tools can help improve quality, though it’s always best to start with a high-resolution source from your Digital Photography efforts.
Beyond individual image optimization, consider implementing a Content Delivery Network (CDN). A CDN hosts copies of your website’s static assets (including images) on servers globally. When a user accesses your site, images are served from the geographically closest server, drastically reducing loading times, especially for international audiences. Services like Cloudflare or Jetpack offer CDN capabilities.
Troubleshooting and Maintaining Image Quality
Even with the best preparation, you might encounter issues with your WooCommerce product images. Knowing how to troubleshoot common problems is key to maintaining a polished, high-performing online store.
Addressing Blurry and Inconsistent Image Displays
These are two of the most frequent image-related complaints:
- Why are my WooCommerce product images showing at different sizes?
- Inconsistent Source Images: The most common reason is uploading images with varying original dimensions. To fix this, ensure all your product images are the same size before uploading. Creating a template using an image editor (a good practice for any Visual Design project) for every product image is highly recommended.
- Thumbnail Settings: Double-check that you’ve correctly set your
Thumbnail widthandThumbnail croppingoptions in the WordPress Customizer (Appearance > Customize > WooCommerce > Product Images). Inconsistent cropping settings can lead to visual discrepancies.
- How do I make WooCommerce product images look less blurry?
- Check Original Quality: Always start with high-quality source images. If your original digital photography is low quality, even perfect sizing won’t make it crisp on your WooCommerce store.
- Review Thumbnail Settings vs. Uploaded Size: If your theme expects a 500px image for a product page and a 150px image for a catalog page, but you only upload a 150px image, WooCommerce will automatically enlarge it to fit the 500px slot, causing blurriness. Always upload images that are at least the largest dimension required by your theme for that image type. The table in section 2.1 provides guidance on this. Tophinhanhdep.com’s High Resolution Photography section further elaborates on optimal source image quality.
- Hard Cropping: To adjust how thumbnails are cropped, go to
Appearance > Customize > WooCommerce > Product Imagesand experiment with theThumbnail croppingsettings (1:1, Custom, Uncropped) to achieve the desired look.
- My image width and height fields are missing from the Customizer!
This often happens if your theme has declared WooCommerce support and pre-defined these settings within its
functions.phpfile. When settings are hard-coded by the theme, they are removed from the Customizer to prevent conflicts. In such cases, you might find the settings within your theme’s specific options panel, or you might need to consult your theme’s documentation. If you’re comfortable with code, you could override these in a child theme, but for most users, leveraging a plugin like WooThumbs for WooCommerce provides an easier solution.
Regenerating Thumbnails and Clearing Cache for Updates
Sometimes, even after changing settings or uploading new images, your product image sizes don’t seem to update. This is typically due to WooCommerce still using old thumbnail versions or your site’s caching.
- Regenerate Thumbnails: This is often the magic bullet. Go to
WooCommerce > Status > Tools. You’ll find an option likeRegenerate shop thumbnails. Click the “Regenerate” button next to it. This process instructs WooCommerce to re-create all image sizes based on your current settings. - Clear Cache: If you’re using a caching plugin (e.g., WP Rocket, LiteSpeed Cache) or a plugin like WooThumbs for WooCommerce that has its own image cache, you’ll need to clear these caches after regenerating thumbnails. For WooThumbs, you might find a “Clear Image Cache” button under its “Dashboard” or “Performance” tab.
- Be Patient: Even after regenerating thumbnails and clearing cache, changes may take a little while to propagate, especially if your website uses server-side caching or a CDN. Give it a few minutes before checking.
Common WooCommerce Image Problems & Fixes:
| Problem | Likely Cause | Fix |
|---|---|---|
| Product images appear blurry | Low-resolution uploads or automatic upsizing | Use consistent image sizes, upload higher-res originals, and configure cropping in Customizer. |
| Images show at different sizes | Uploaded images have different dimensions | Use consistent image sizes for all uploads and configure cropping ratios in Customizer. |
| Image size changes don’t apply | WordPress/plugins using old thumbnails | Regenerate thumbnails (WooCommerce > Status > Tools) and clear website/plugin caches. |
| Cropping looks wrong | Cropping ratio not set correctly | Upload higher-res images and adjust Thumbnail cropping settings in the Customizer. |
| Product image size not changing (shop page) | Theme settings overriding, or cache | Adjust Products per row in Appearance > Customize > WooCommerce > Product Catalogue or regenerate thumbnails. |
Conclusion
In this comprehensive guide, powered by the visual expertise of Tophinhanhdep.com, you’ve learned how to effectively manage and optimize your WooCommerce product image sizes. We’ve covered everything from understanding default and ideal dimensions to selecting the best file formats, implementing changes via the WordPress Customizer, leveraging powerful plugins for advanced control, and applying essential optimization strategies both before and after uploading. We also delved into troubleshooting common image problems to ensure your store always looks its best.
Store owners know instinctively how vital compelling product images are for making sales in your e-commerce store. By applying the principles of High Resolution Photography, smart Visual Design, and utilizing intelligent Image Tools, you can ensure your images are not only visually stunning but also contribute to a fast, user-friendly, and highly converting online shopping experience.
Product images are just one part of a great product page, but a hugely significant one. For further Image Inspiration, including Photo Ideas, Mood Boards, and Trending Styles, explore the wealth of resources available on Tophinhanhdep.com to continuously refine your store’s visual appeal and content that truly converts.